Browsing Tag

jasmine bra

How to use Boning for Added Support in Bras

Sewing Patterns, Tutorial, Uncategorized

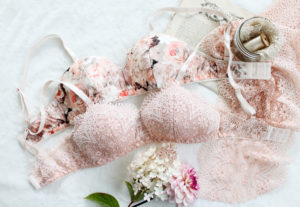
One of the reasons I started making wire-free bras is because underwires, no matter what size I wear, end up giving me terrible chest and back pain by the end of the day. I just love the relaxed comfort of a soft bra.

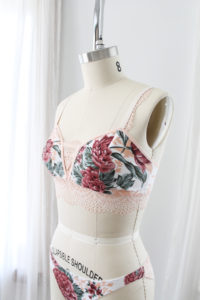
That being said, sometimes you want to find ways to give your wire-free bras a little more structure. There are lots of different ways you can do this, from sewing them with wider band and strap elastic, to adding some light sew-in foam. Over the summer, I finally got around to experimenting with something I’ve been wanting to do for a while: adding boning to the sides of my Jasmine Bras.  Personally, I’m not a big fan of foam bras for myself. For me, a lightweight lace bra is my go-to, but I wanted to add a little more vertical structure.

What is boning?

Boning is best known for it’s use in corsetry, but it’s used in everything from longline bras to wedding dresses to swimwear! Basically, any garment where you need some vertical structure to prevent a garment from folding in on itself, OR when you want to create a garment that shapes the body, you’ll want to use boning.

There are a few different types of boning:

Rigelene / Sew-in boning – very lightweight plastic boning that can be sewn through and does not have a casing.

Plastic Boning – heavier than rigilene boning and often comes with a casing. Easy to cut and sew, but can form permanent bends when used in corsets or shaping garments.

Flat Spring Steel Boning – this boning is very rigid and great for use where a lot of vertical structure is needed, like on either side of corset laces.

Steel Spiral Boning – very flexible but strong steel boning made out of flattened coiled steel. This boning is great for use down side seams of corsets or structured evening dresses as it will bend around the curves of the waist and hips.

Although there are many ways to “install” boning, I usually like to use a casing. You can buy a tightly woven casing meant specifically for boning which I highly recommend using as it will prevent the bones from working their way through, but if you’re experimenting and are not ready to commit to purchasing supplies, bias or twill tape are good alternatives.

Most fabric stores will stock plastic and/or rigilene boning. You can find metal boning at larger bra and corset making supply shops, like Bra-Maker’s Supply.

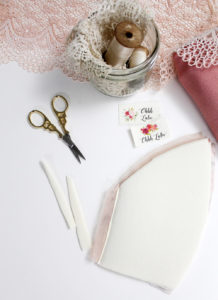
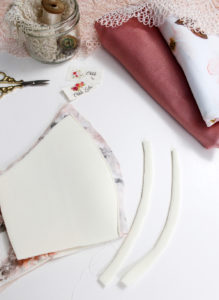
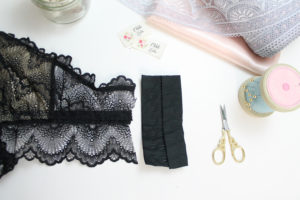
For this particular bra, I used small pieces of Flat Spring Steel Boning and cotton bone casing, however I’ve made myself a couple of other bras using Plastic Boning that I like just as well. Truthfully, the bones are so small in this variation that either works well.

Installing the bones.

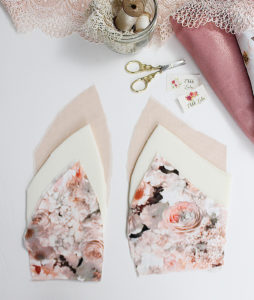
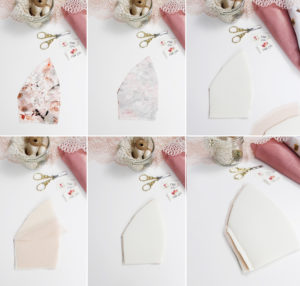
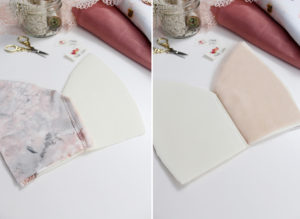
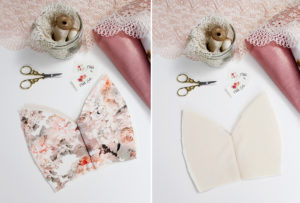
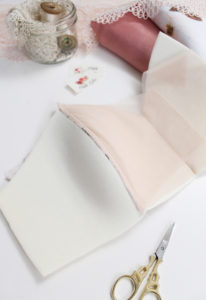
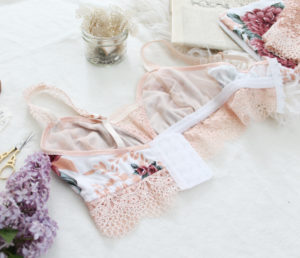
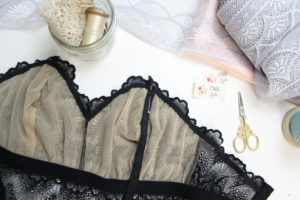
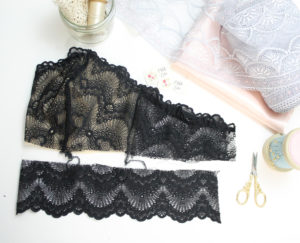
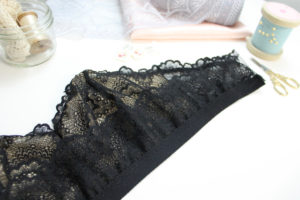
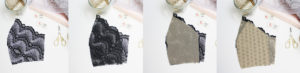
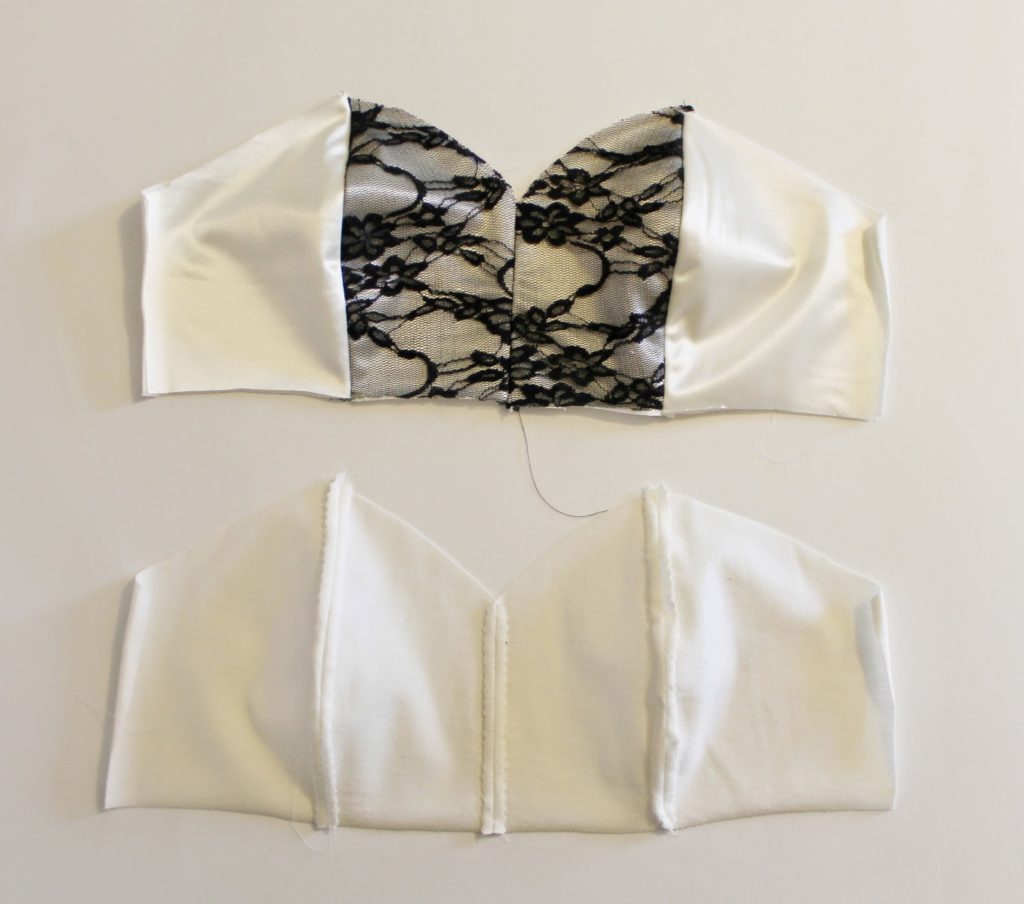
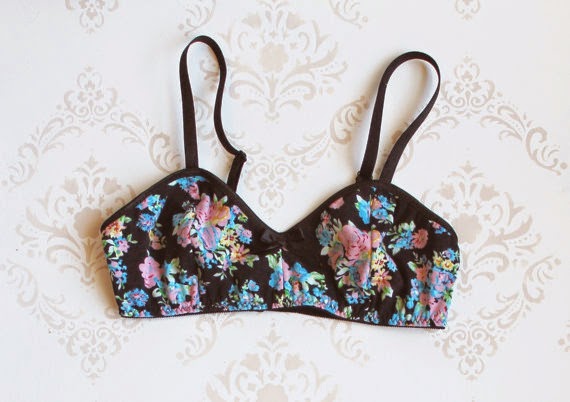
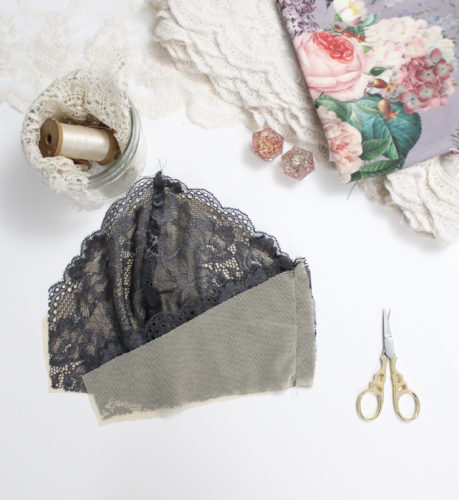
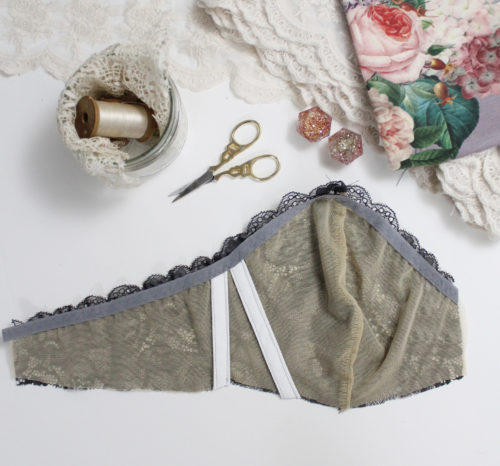
I assembled my Jasmine Bra in lace according to the pattern instructions.

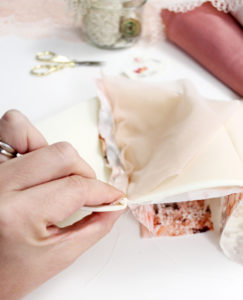
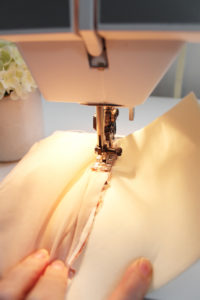
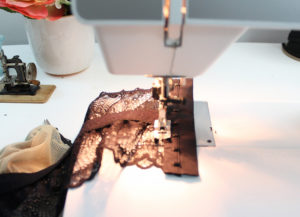
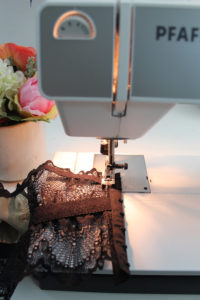
Before finishing the seam allowance on the side seam and applying the upper elastic, stitch a length of bone casing to the seam allowance, along the side seam stitching line.

Trim back the seam allowance to approximately 1/4″.

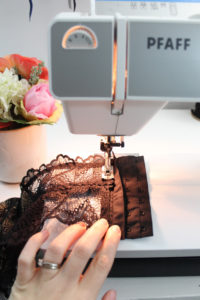
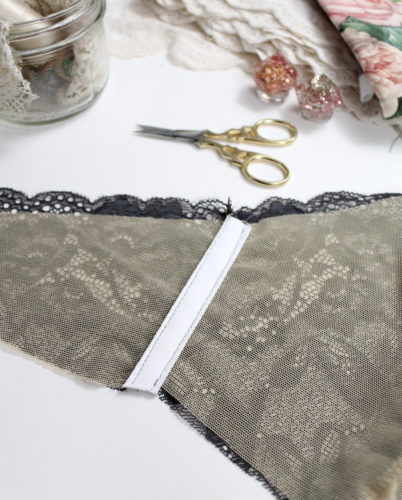
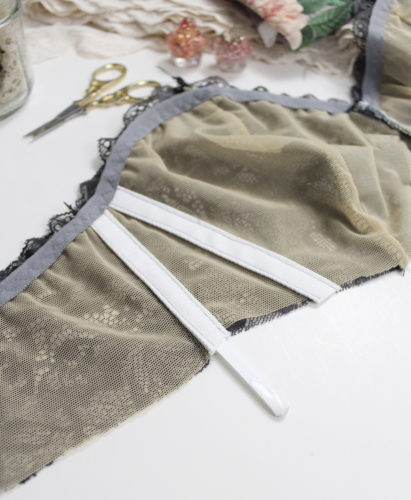
Fold the casing down and top stitch in place along the opposite edge.

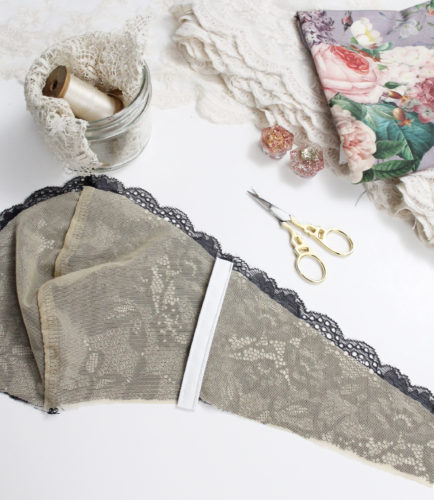
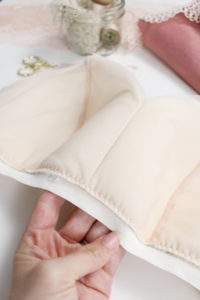
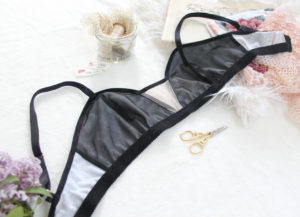
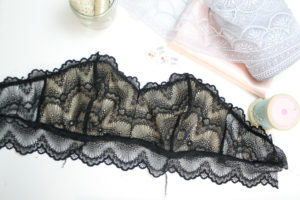
You now have a casing stitched to the bra side seam that will soon house your boning!

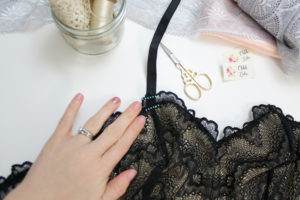
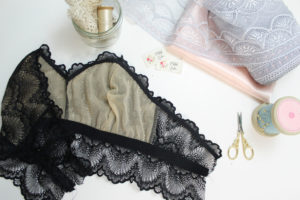
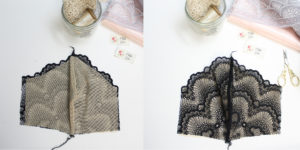
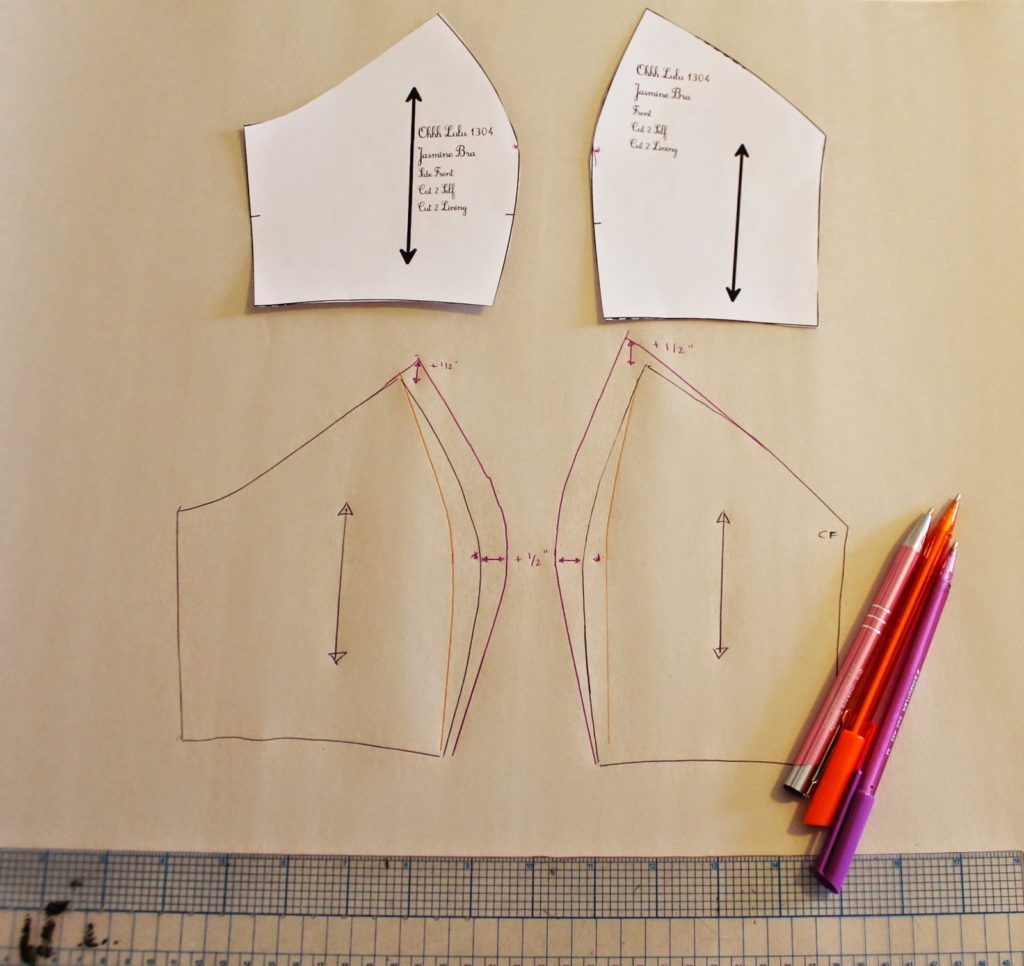
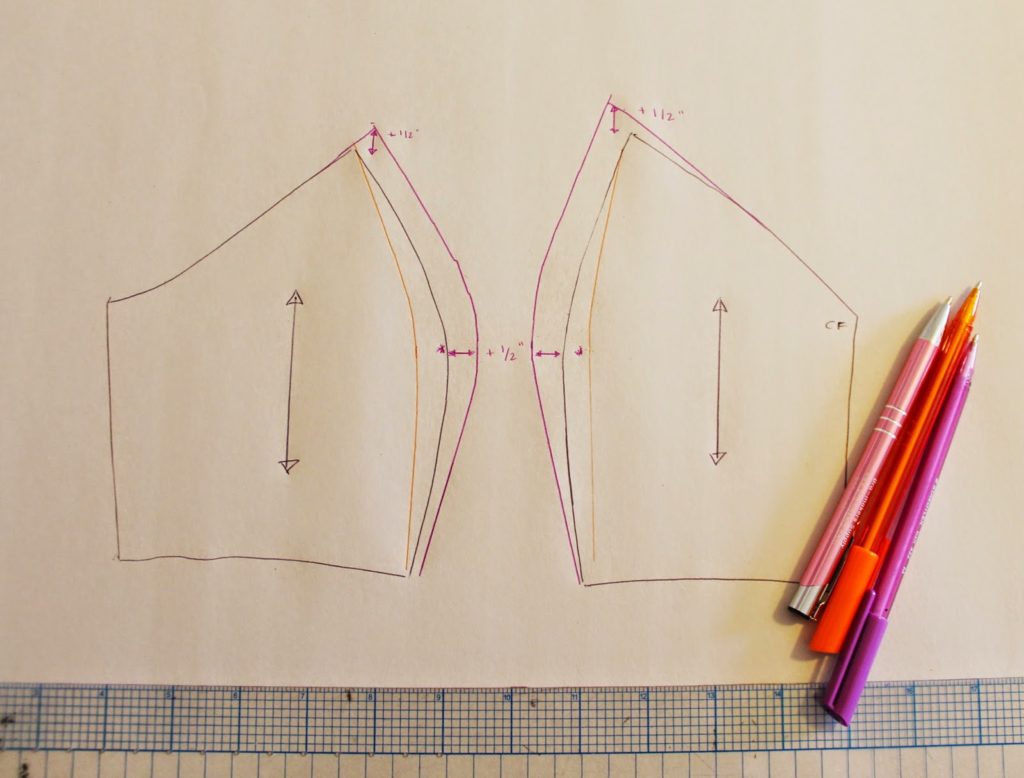
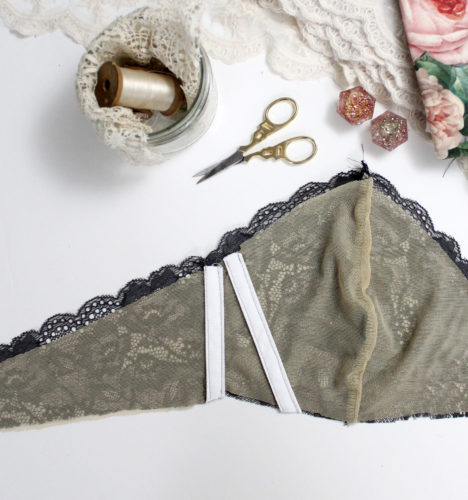
I decided to sew a second length of casing beside the side seam, running slightly on the diagonal. My goal  was to have it slightly follow the side of my breast.

Finish your upper edge according to the pattern instructions.

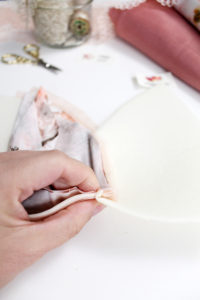
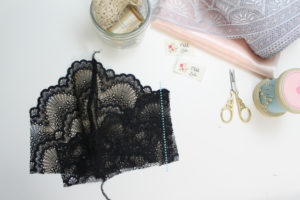
Measure out your boning so that it is at least 1″ shorter than the length of the casing. Remember, you need to leave enough room to stitch on the band elastic.

If you are using plastic boning, round off the ends of the boning and file down any rough or sharp bits. If you are using metal boning, finish the ends with metal boning tips. This will smooth out the ends of the boning so they won’t poke through.

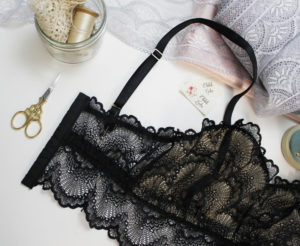
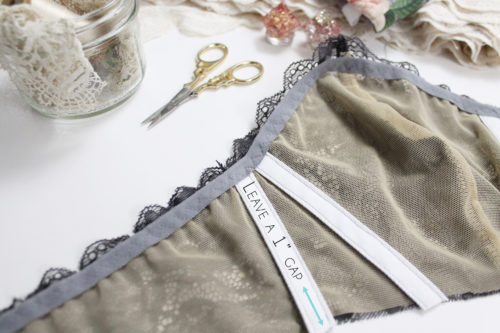
Insert the bones into the casing, making sure you have left at least a 1″ gap at the bottom. From here, you can complete the assembly of the bra.

A very important note.

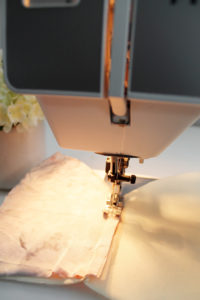
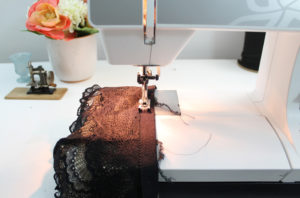
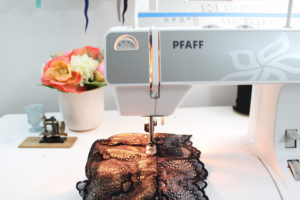
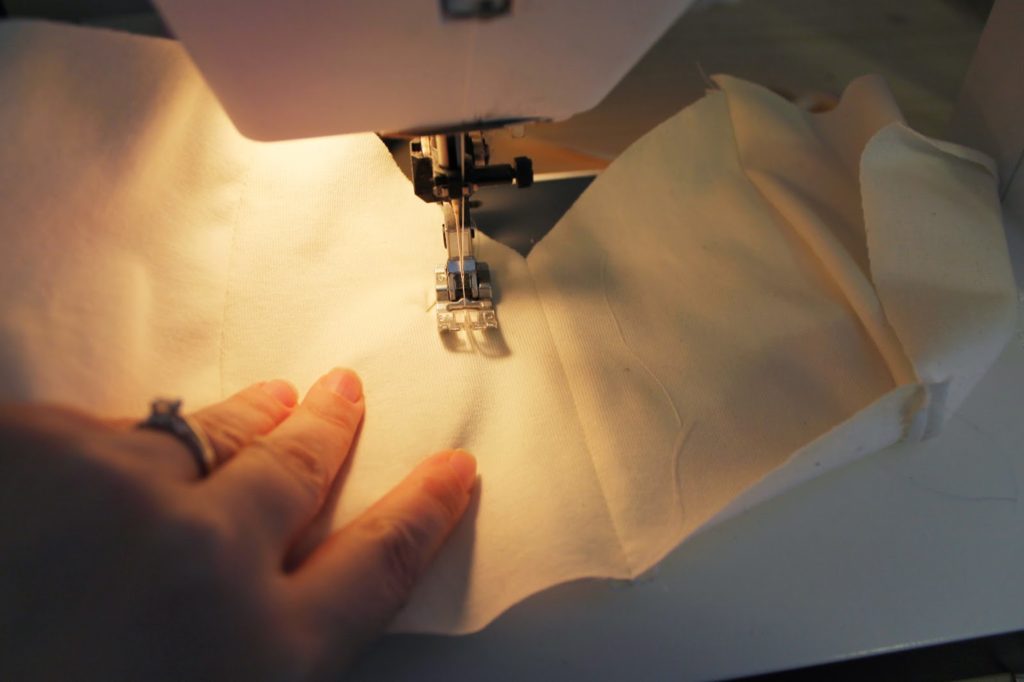
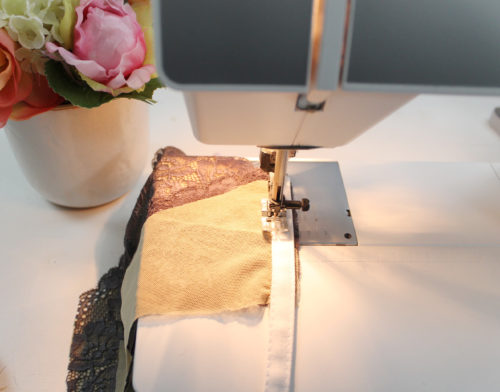
When you are ready to sew on your band elastic, please stitch very carefully past where your boning is. If you are using plastic boning, you may find that your sewing machine will just stitch through the boning, but if you have chosen metal, your sewing machine will spit needle shards at you.

Finishing Up.

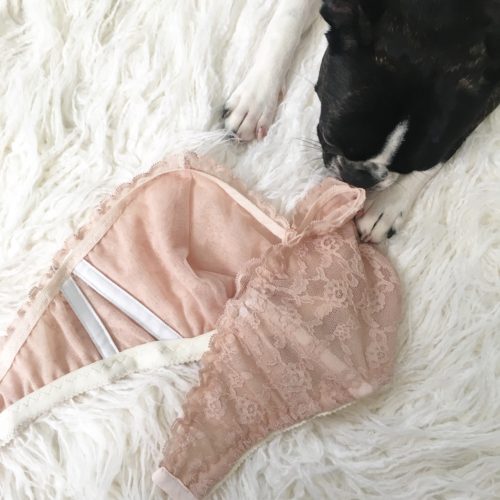
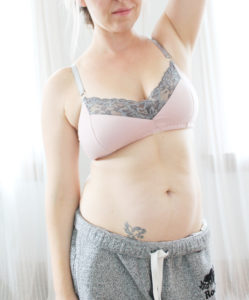
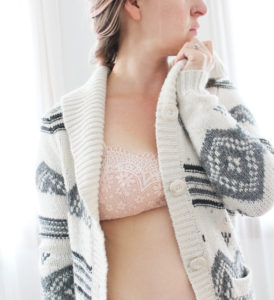
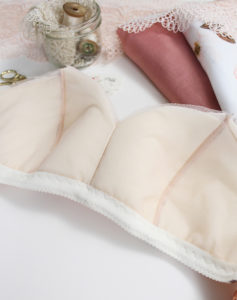
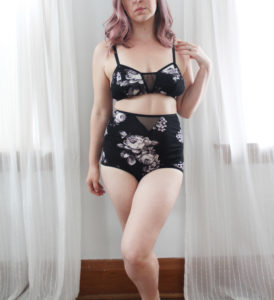
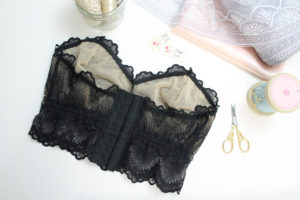
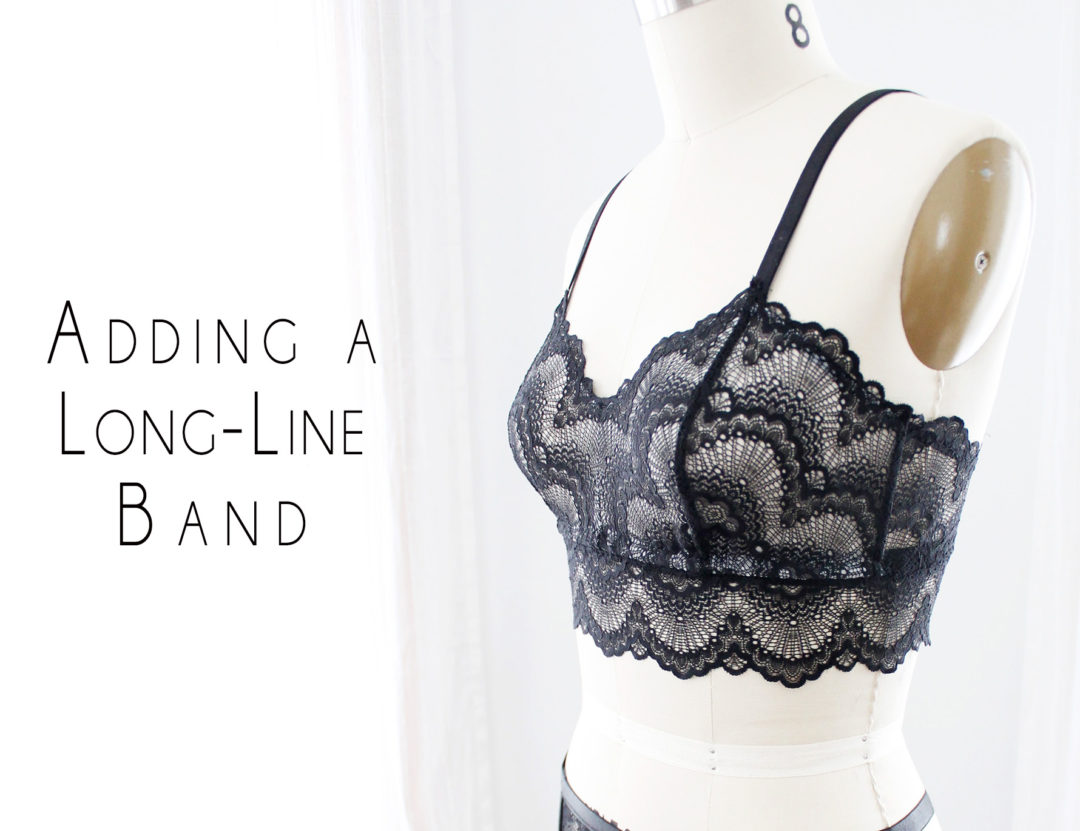
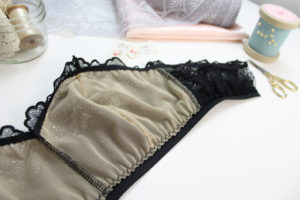
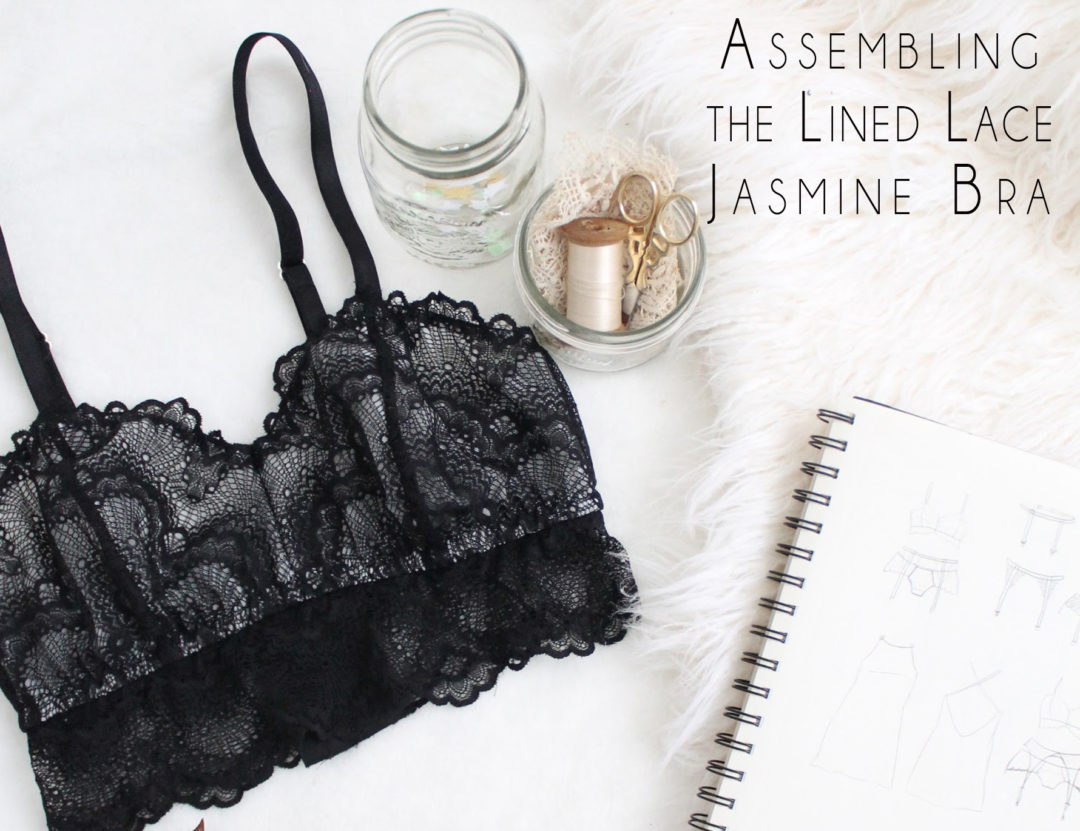
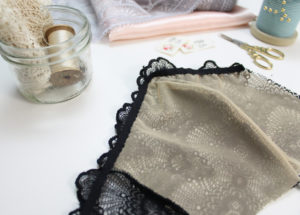
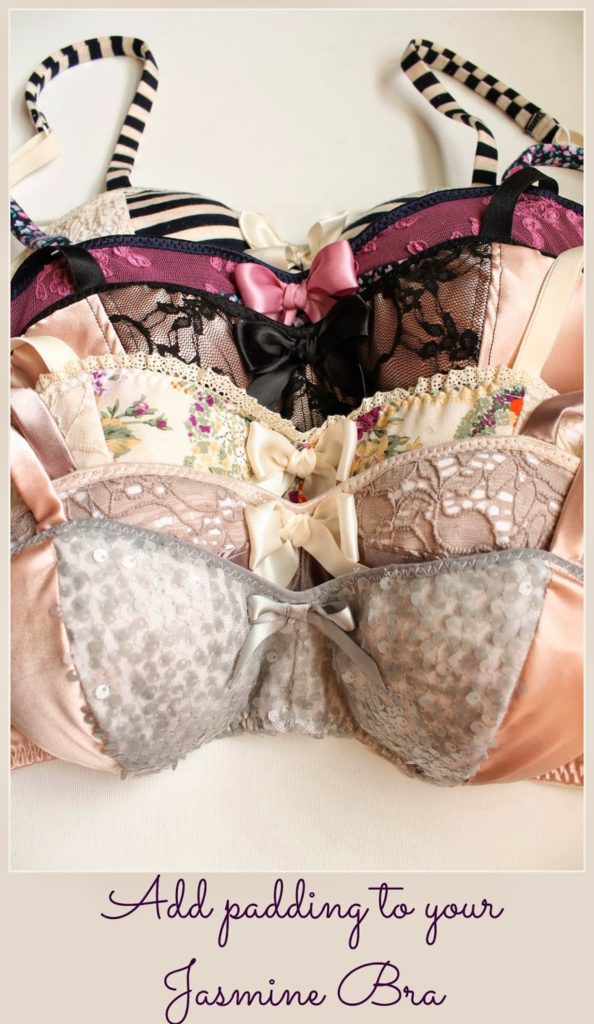
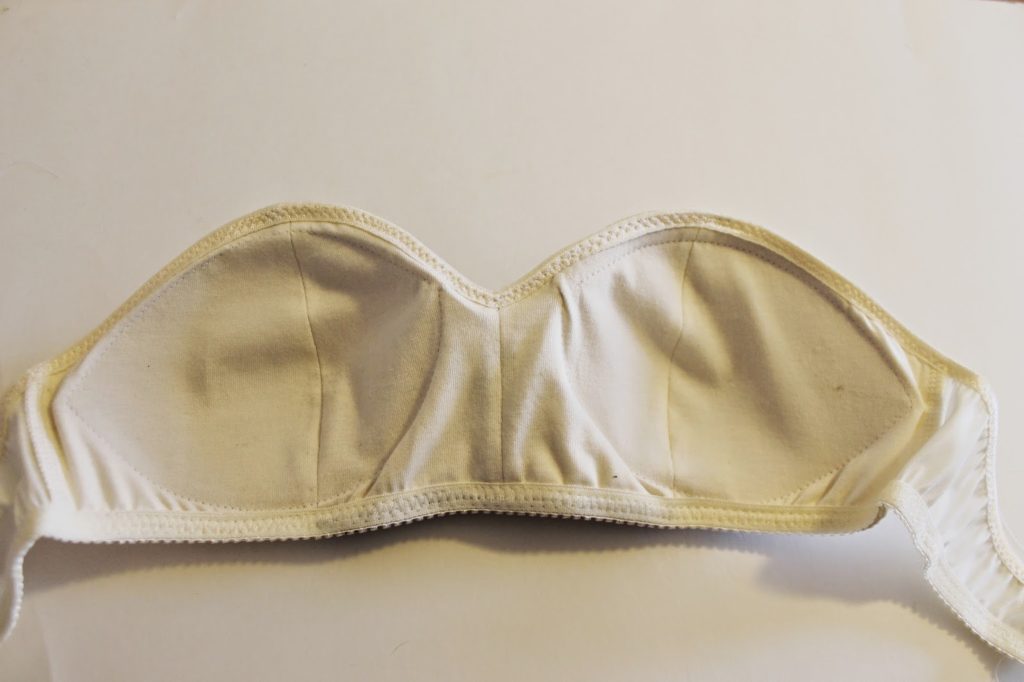
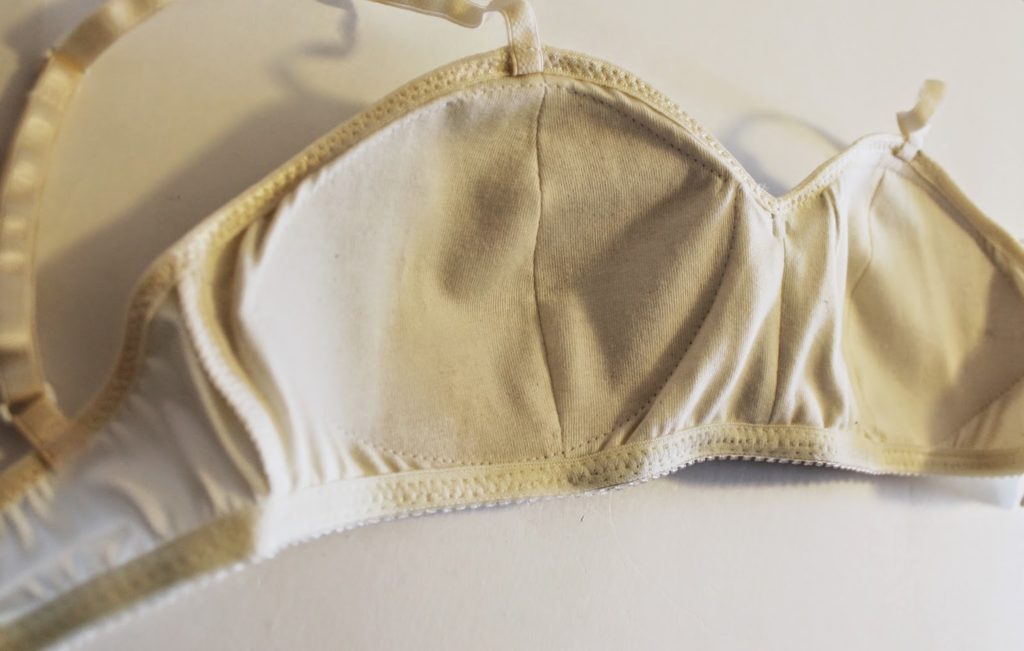
Adding boning this way doesn’t change the overall look of the bra, but it does add some vertical structure which can help your bra stay more up-right while still being comfortable. Here’s another one I made, this time in a neutral beige lace (which had yet to have it’s straps sewn on). Leah thought it looked great! And honestly, it’s my current favourite bra.


How to add Cut & Sew Foam Padding to the Jasmine Bra (and more!)

Sewing Patterns, Tutorial, Videos

Way back when, I wrote up a tutorial on padding the Jasmine Bra with balconette style pre-formed cups. Over the last few months, I’ve been experimenting with a new method, using cut and sew foam.

Cut and sew foam is available through most bra making suppliers. There are lots of options, but I recommend Bra Makers Supply in Canada or Arte Crafts in the US. Cut and sew foam is quite thin, maybe 1/8″ or so thick. It has some 2-way stretch. Adding foam to your soft bras will add a little bit of body and structure, as well as a little extra coverage if you are concerned about visible nipples. My personal preference is still for non-padded bras, but this is a nice option if the things above are of concern to you! Or, if you just want to try something new. I will say, I’ll be adding this to my bikini top sewing repertoire, but I’m still not sure padded bras are for me.

Aside from the foam, you won’t need any other special supplies – just what it outlines in the pattern for a lined bra.

Feeling cozy!

The method for assembling the bra with foam padding is essentially the same as a lined Jasmine. The main difference comes with how we will finish the interior seams.

Instructions:

Begin by cutting out your pieces. Cut the bra exactly as you normally would, but also cut out the cup pieces in cut and sew foam.

Place the Centre Front Self/Exterior pieces right side together, aligning the CF seam. Place a piece of foam over top of that, then the lining pieces with the right sides facing each other. Finish with the final piece of foam. Stitch together down the centre front seam.

Trim back both pieces of foam as close to the stitching line as possible.

Open the Front up, separating one half of the foam. With your fingers, press the seam allowance towards the foam.

Using a zig-zag stitch, top stitch the seam allowance to the foam. When your needle “zigs” to the left, it should just catch that little bit of foam left in your seam allowance. The idea here is to flatten the seam, and in addition, the zig-zag stitching almost acts as an understitch, helping the lining and exterior fabrics fall into place.

Trim back the seam allowance as close to the stitching line as possible and open the Centre Front pieces.

To assemble the rest of the cup, place the Side Front Self/Exterior against the Centre Front curved cup seam so that the right sides are facing. Place the Side Front foam against the wrong side of the Side Front Self. Flip the garment over, and then place the lining down the curved seam, sandwiching the Centre Front between the Side Front Self/Foam and Lining. Stitch together.

Once again, trim back both pieces of foam seam allowance as close to the stitching line as possible.

Fold the seam allowance towards the Side Front Foam, pushing the Side Front self and lining towards the centre front.

Just like you did with the centre front seam. Zig zag stitch the seam allowance to the Side Front foam.

Trim back the remaining seam allowance as close to the stitching line as possible and flip the Side Front self and lining over the foam.

Attach your Back Band pieces as indicated in the pattern instructions and sew on the band elastic.  It is very important that you trim any excess fabric beyond your  band stitching line back to allow the bra to fold under properly.

Top stitch the band elastic in place. Be careful here, it gets quite thick. Go slowly and take your time! Finish the upper edge with Fold Over Elastic as outlined in the instructions, and complete the bra with a back closure and straps.

I would say this is more of an “advanced” tutorial. It can be quite tricky to get all of the layers to line up properly. That is definitely the most challenging part.  Getting the fit just right is also a little more of a challenge because the foam will limit the vertical stretch of the bra, which tends to be more of an issue for the DD+ crowd.

If you prefer video format, I’ve uploaded a quick tutorial on how to add foam padding to the Romy Bra:


… And how to add padding the the Lace Jasmine Variation!

Jasmine PRISM Add-On

Design Diary, Lingerie, New Items, Sewing Patterns

A few weeks ago I added a new style to my Lingerie Shop. I talked a bit about why I designed this Jasmine adaptation earlier, but I’ll recap. I had been experimenting with sewing the Jasmine Bra with a cut-out at the front but was experiencing some unsightly gaping and pulling no matter what I did. So I had the idea of adding  a sheer mesh insert to fake it and it worked out amazingly.

So, from there I experimented with adding a scalloped lace insert, which also was a nice detail, and a little different, design-wise. So I decided to release this as an Add-On to the Jasmine Pattern.

Let’s take a peek inside…

With the Jasmine PRISM Add-On, you get two additional pattern pieces which you use instead of using the original Front Cup Piece. I’ve written up a 29 page instructional manual that will show you how to sew the bra with the alternate pattern pieces, as well walk you through how to add a lace longline band, how to use hook and eye tape, and how to add some lace detail to the straps.  Some of these are techniques I have already gone over in my Valentine’s Day Sew Along, but here you will have them all in one place.

The PRISM Add-On is only $2, but it only works in conjunction with the Original Jasmine Pattern – so you need to have both. I hope this helps you get even more wear out of my Jasmine Pattern!

Valentine’s Sew Along: Bra Straps & Closure

Tutorial, Valentine's Day Sew Along, Videos

Now that the bra is basically assembled, it’s a great opportunity to “try it on”. Pull it on around you, like you normally would. It should fit snug with a small gap at the centre back where the closure will get applied. If you find you have some overlapping fabric, trim it back a bit.

Make sure that both sides of your Centre Back are the same length. Cut a strip of hook and eye tape about the same length as your Centre Back edge. Cut it so that you have some space between the cut edge and the first and last hook/eye.

With the tape left open, baste the hook side of the tape onto the inside of the righthand side of the bra. The hooks should be facing towards the inside of the garment. You might want to use a zipper foot here. I find that my regular foot is sufficient. I just move my needle into the right-most position.

Once that is basted on, fold the tape so that it is encasing the raw Center Back Edge, and top stitch down.

You do a very similar process on the other side with the “eye” side of the tape. Baste it on to the lefthand side of the bra so that the “eyes” are facing up. Then, fold the tape back down to bind that Centre Back Edge and top stitch in place. I use a tight, narrow zig-zag stitch to “seal” the upper and lower edge of the tape.

There are instructions in the pattern on how to assemble bra straps, but if you’re having any trouble, here is a step by step video:

Here is how I attach my bra straps:

I pin the strap so that the plush side of the strap is facing the inside of the bra. The strap is facing down. I do a row of stitching to anchor the strap in place.

I then fold the strap up, and to another row of stitching, with lots of back tacking to anchor it securely in place. This method hides the raw edge nicely so the strap area is not scratchy. I have sensitive skin, so if there is any slightly scratchy bit, I end up with a nasty rash. I’ve found this is the best way for me to finish the front strap.

On the back, I do a tight row of zig-zag stitching PLUS a row of straight stitching as close to the upper edge of the lace as possible, then trim back any excess strap elastic. I make sure to stitch the strap onto the elastic edging as that is the most stable part.

That’s it! That’s the Jasmine Bra, sewn in lace with a sheer lining and long-line band. Was there any step that you had trouble with that you need any more clarification on?

The next steps are going to be the Garter Belt portion. Just a reminder that I’ll be showing you two different garter belts. There’s the FREE Cora garter belt pattern, or the Mina Pattern (my personal fav!).

Valentine’s Sew Along: Adding a Longline Band to the Jasmine Bra

Tutorial, Valentine's Day Sew Along, Videos

Now that we have assembled the body of our Jasmine Bra, we can add the longline lace band, and band elastic.

To do this, simply cut a length of lace just slightly less long than your bra. I then cut my lace so that it was only about 2-3″ high.

With the right sides together, sew the new lace band to the lower edge of the bra. I use a zig-zag stitch so the garment retains it’s stretch.

I’m using a 3/4″ band elastic here, but you can use any width you prefer.

Place the band elastic so the plush side is facing up and the decorative edge is running along side your stitching line. Use a zig-zag stitch to apply the elastic along the seam allowance of the bra band. Gently pull on the elastic as you stitch it in place. This creates a snug fit under the bust.

Trim back any excess fabric that extends beyond your stitching line.

Fold your band elastic up so that it is covering the seam allowance. Use a multi-step zig-zag stitch to top stitch in place. You’ll be stitching through your elastic, as well as the lined portion of the bra.

For those of you who prefer to follow along with a video, this one is for you!

Valentine’s Sew Along: Assembling the Jasmine Bra

Tutorial, Valentine's Day Sew Along, Videos

Once again, I planned on posting this yesterday then yesterday went by in a flash! But, this part of the sew along goes by fast, I promise!

I line my bras in one step so that the lining is anchored to the exterior fabric. I do it this way because it prevents slipping between the two layers, and once you get a hang of the technique, it makes lining a bra so fast!

In one of the first steps, I went over how to cut scalloped lace. Just a reminder that you need to trim your lining back by about 1/4″ along the neckline edge.

Begin by taking your Side Front Lace piece and place it so that the right side is facing up. Lay your Centre Front Lace piece on top so that the right sides are facing. You may want to baste these together along the curved cup seam at this point.

On top of that, place the Centre Front Lining on top of the Centre Front Lace piece (wrong sides are facing). Then, with the right sides of the lining facing each other, lay the Side Front Lining on top of that. Stitch together down the curved seam.

When you open up your layers, the cup is nicely lined in one action.

Pin the Band to the Side Front, and stitch in place.

If you are finding this  a bit confusing, this video will likely clear things up for you.

At this point, I take a length of plain old 3/8″ elastic, and use a multi-step zig-zag stitch to sew it to the wrong side each half of the bra along the upper edge. The elastic should run on top of the lining to anchor it to the bra. Make sure the elastic does not extend beyond the scalloped edge of the elastic. Gently pull on the elastic as you stitch it on to contour the upper edge.

Once the neckline elastic is applied to both halves of the bra, pin it together down the centre front and stitch in place.

If you’d like more insight on how to add elastic along the upper edge, this video will walk you through in even more detail.

Ohhh Lulu Pattern Hacks: Adding Padding to your Jasmine Bra

Tutorial

The Jasmine bra is a light support bra.  Adding pre-formed foam cups can help give your bra  a little extra shape and structure.  Foam pads come in a variety of styles – balconette, push-up, triangle, etc, and can be found at most sewing supply stores.  My local Fabricland (for Canadians) carries foam cups, but you can also find them for sale on Etsy and other sewing supply stores – just search for foam bra cups. This tutorial is excellent to use if you want to sew your Jasmine as a Bikini Top. You can also use this basic concept to add padding to any of my bra patterns.

What you will need:
1. The Jasmine Bra Pattern (available on Ohhh Lulu Sews)
2. Supplies for the Jasmine bra PLUS fabric for lining (Lining is a MUST) – I recommend a plain cotton jersey, or swimsuit lining if you are making the top into a swimsuit.
3. Foam Cups

Style Lines for the Jasmine Bra Pattern

A bit about cups:
Bra cups come in different shapes and sizes.  If you were to browse through any large sewing supply store, you may find Balconette, Swimsuit, Triangle, and Push-Up Pads.  I generally use Balconette Cups in the Jasmine Bra – they are the most versatile.  Swimsuit cups, which have a less oval shape and generally tend to be lighter weight, work great as well.  You can also find specially shaped triangle cups which will fit into my triangle shaped bras.

If you are putting in a cup larger than a DD, you will need to adjust the height of the pattern and I highly recommend sewing a mock-up first.

 Instructions:
1. Sew your front exterior and lining according to Pattern Instructions.

2. Place a foam cup over the wrong side of the fabric. Below, you can see where I’ve placed the balconette cup, the centre front point sits about 1/2″ away from the centre front seam line and is centred vertically along the front princess seam.  When I make these for myself, I do a lot of “trying on” as I go. I’ll actually hold the lining over my body, and place the cup where it sits best on my bust.  The most important part here is that the the wrong-side of the lining fall into the inward curve of the cup.  You don’t want to put your cup on backwards/inside out!

3. Once you’ve gotten your cup in place, put in a few pins to keep it secure.  With the right side of the lining facing up, so that you can make sure that the lining is curving into the cup, and not getting pulled taught, stitch around the exterior edge of the cup. This part takes a bit of practice. You can use your fingers to feel where the edge of the cup is as you slowly stitch around the perimeter. Do the same to both sides.

Using my fingers to feel the edge of the foam cup as I stitch the cup directly onto the interior of the lining
Cups stitched onto both sides of the lining.
4. Place your outer shell over top of the lining so that the padding is sandwiched between the layers.  Line up your lining and exterior seam-lines, and baste along the lower edge of the bra.  When you are done, you will notice that the outer layer appears shorter.  That’s because it now has to curve over the cup. You can now baste the upper edge in a similar fashion as you did the lower, but just be aware that it is A-OK that the the lining peak out about 1/8″-1/4″ above your exterior – this can be trimmed back when you are done basting.
Baste Lower Edge First
5. Sew on the bra band at the side seams, and complete the bra using the instructions provided in the pattern.  You can use many different types of elastic edging for the neckline of the Jasmine Bra, but when padding the bra, I find that Foldover Elastic is the easiest to manage.
Finished Interior – just needs straps!

Padded Jasmine Exterior

 That’s it! Just a few extra steps and you can make yourself a super-comfortable padded bralette or swimsuit top.

Mini Pattern Hack: Adjusting the Cup Size of the Jasmine Bra

Tutorial


The Jasmine Bra (available in my sewing pattern shop, Ohhh Lulu Sews) is a great bra pattern for a first-time lingerie sewist! It is simple to assemble, and will give you experience applying lingerie elastic.  It’s a comfortable bralette that can accommodate a number of sizes with some simple pattern adjustments. I use this pattern a lot myself.  You may remember I made a boned bikini top with it last summer.  I’ll also show you how to add padding in another Pattern Hack Post. 
First we need to know a little something about how cup size works. Cup size is basically the difference between your Bust & Band measurements.  For the novice seamstress, your bust measurement is measured around the fullest part of your bust, and your band measurement is measured around your ribcage, just below your breasts where your bra band sits.  In general, each Cup Letter represents 1″ difference in Bust and Band measurements.  So, as an example, if you have a 30″ band measruement and a 34″ bust measruement, you should fit a 30D bra.  This is not a fool proof method, but a guideline for finding a size that fits you best.  The person with a 30 band and 34 Bust may well find that a C cup is more comfortable or that they prefer a looser band.  Regardless, this is often a good starting point. 
 I have drafted the Jasmine Bra for about a B/C cup size, which is a very common cup size.  If you are below or above that cup size, you will likely want to make some pattern adjustments.
If you are an A or AA cup, you may generally have a 0-2″ difference in bust to band measurement. As a result, you will want to straighten out the curve of the cup (See the illustration below in the orange ink).  The front princess seam gets taken in at the bust apex, which is approximately 3.5″ up from the lower edge of the pattern piece.  When reducing the cup, I haven’t adjusted the height of the pattern pieces, just straightened out the curve of that front seam.  

If you are a D-DD Cup (or larger!), you will want to exaggerate the curve of the cup as well as increase the height to provide better coverage.  Here, in purple ink, I’ve increased the bust curve by 1/2″ on each pattern piece at the apex. I’ve also extended the top of the cup by 1/2″.

Because this pattern is to be sewn in stretch knits, the fit is really quite flexible.  If you are above a DD (this includes myself!), you may find that this simple adjustment, adding 1″ to the bust apex + a bit of height, will be all you need to get a better fit.  Remember, it is really important when sewing any garment, but especially lingerie, that you sew a mock up first in a fabric of a similar weight and stretch.  This way, you can make any pattern adjustments to get a truly custom fit!