One of the things I love about the sewing & indie lingerie community specifically is just how supportive they are. I remember when I first started selling on Etsy, makers like Hopeless and Knickerocker were so supportive and welcoming towards me. And that really had an impact.
So, while I spent month after month home with my two kiddos with no where to go, I had the idea of the Bra Maker’s Support Club merch line to help support my YouTube channel.
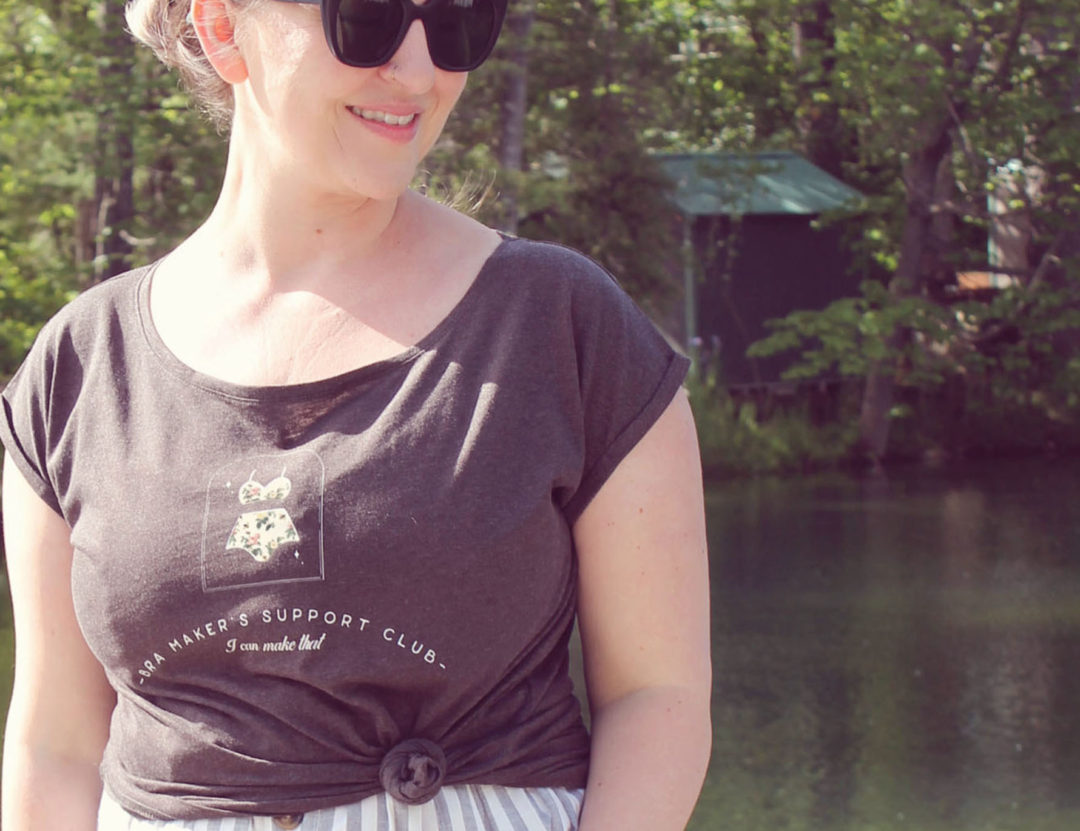
I wanted to create something that would allow people to show off their love of lingerie… but not in an over the top, lingerie-y way.
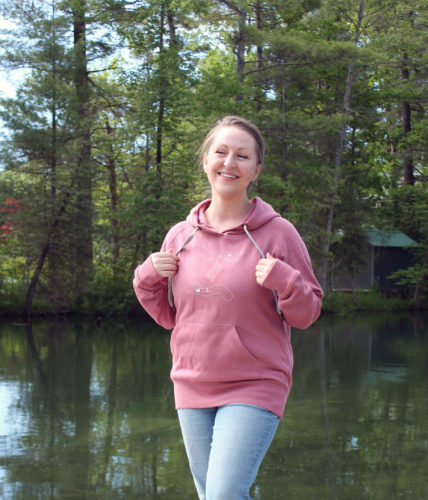
I’m really happy with how these turned out. The hoodie especially is so soft. I got together with my bestie this morning and had a little photoshoot down at the river.
I love this little charcoal t-shirt that says “I can make that.” I think any sewist can relate to passing up so much ready to wear clothing because…. you could so easily make that!
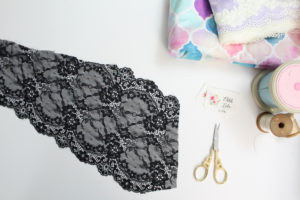
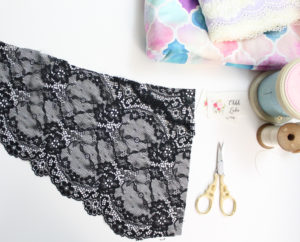
Lately I’ve become obsessed with scalloped lace. I’ve used a lot of it in my latest collection, and have a ton more lace on the way! I just love how pretty and delicate it is, while still being comfortable.
It can be tricky to find wide enough lace for panties or larger size bras. Here I’m going to outline a couple of tricks that I’ve learned along the way to make the most of what you’ve got on hand!
The first thing to be aware of is when you cut your scalloped lace, make sure you lay your lace out so that the scallops are evenly matched up. You want both sides of your panties or bra to be an exact mirror image of one another. When you sew your seams, the most important thing is to make sure that your scallops match up evenly. This may sometimes mean that your waist edge might be off a bit. Don’t worry – just focus on lining up the scalloped edge of your seam.
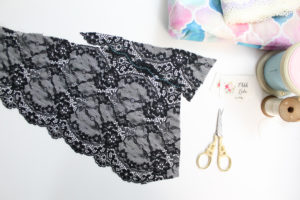
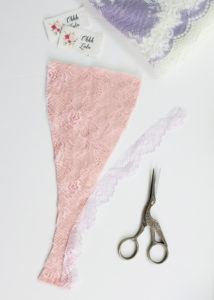
If your lace is a little too narrow for your panties pattern, you can easily piece the lace together to make up for the lack of width. Start by cutting out your pattern piece.
Grab a scrap piece of lace with a bit of scalloped edge. Layer it overtop of the too-short part so that the scallops overlap, kind of like a puzzle piece.
Use a zig-zag stitch to top stitch in place, then straighten out your edges.
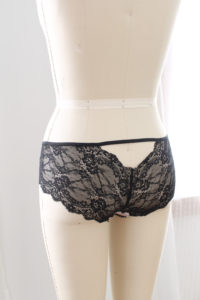
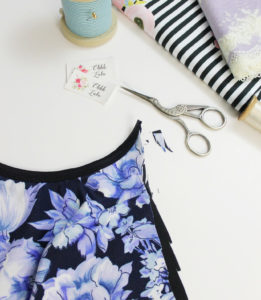
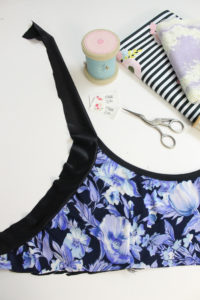
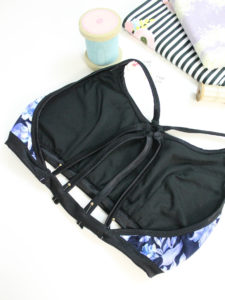
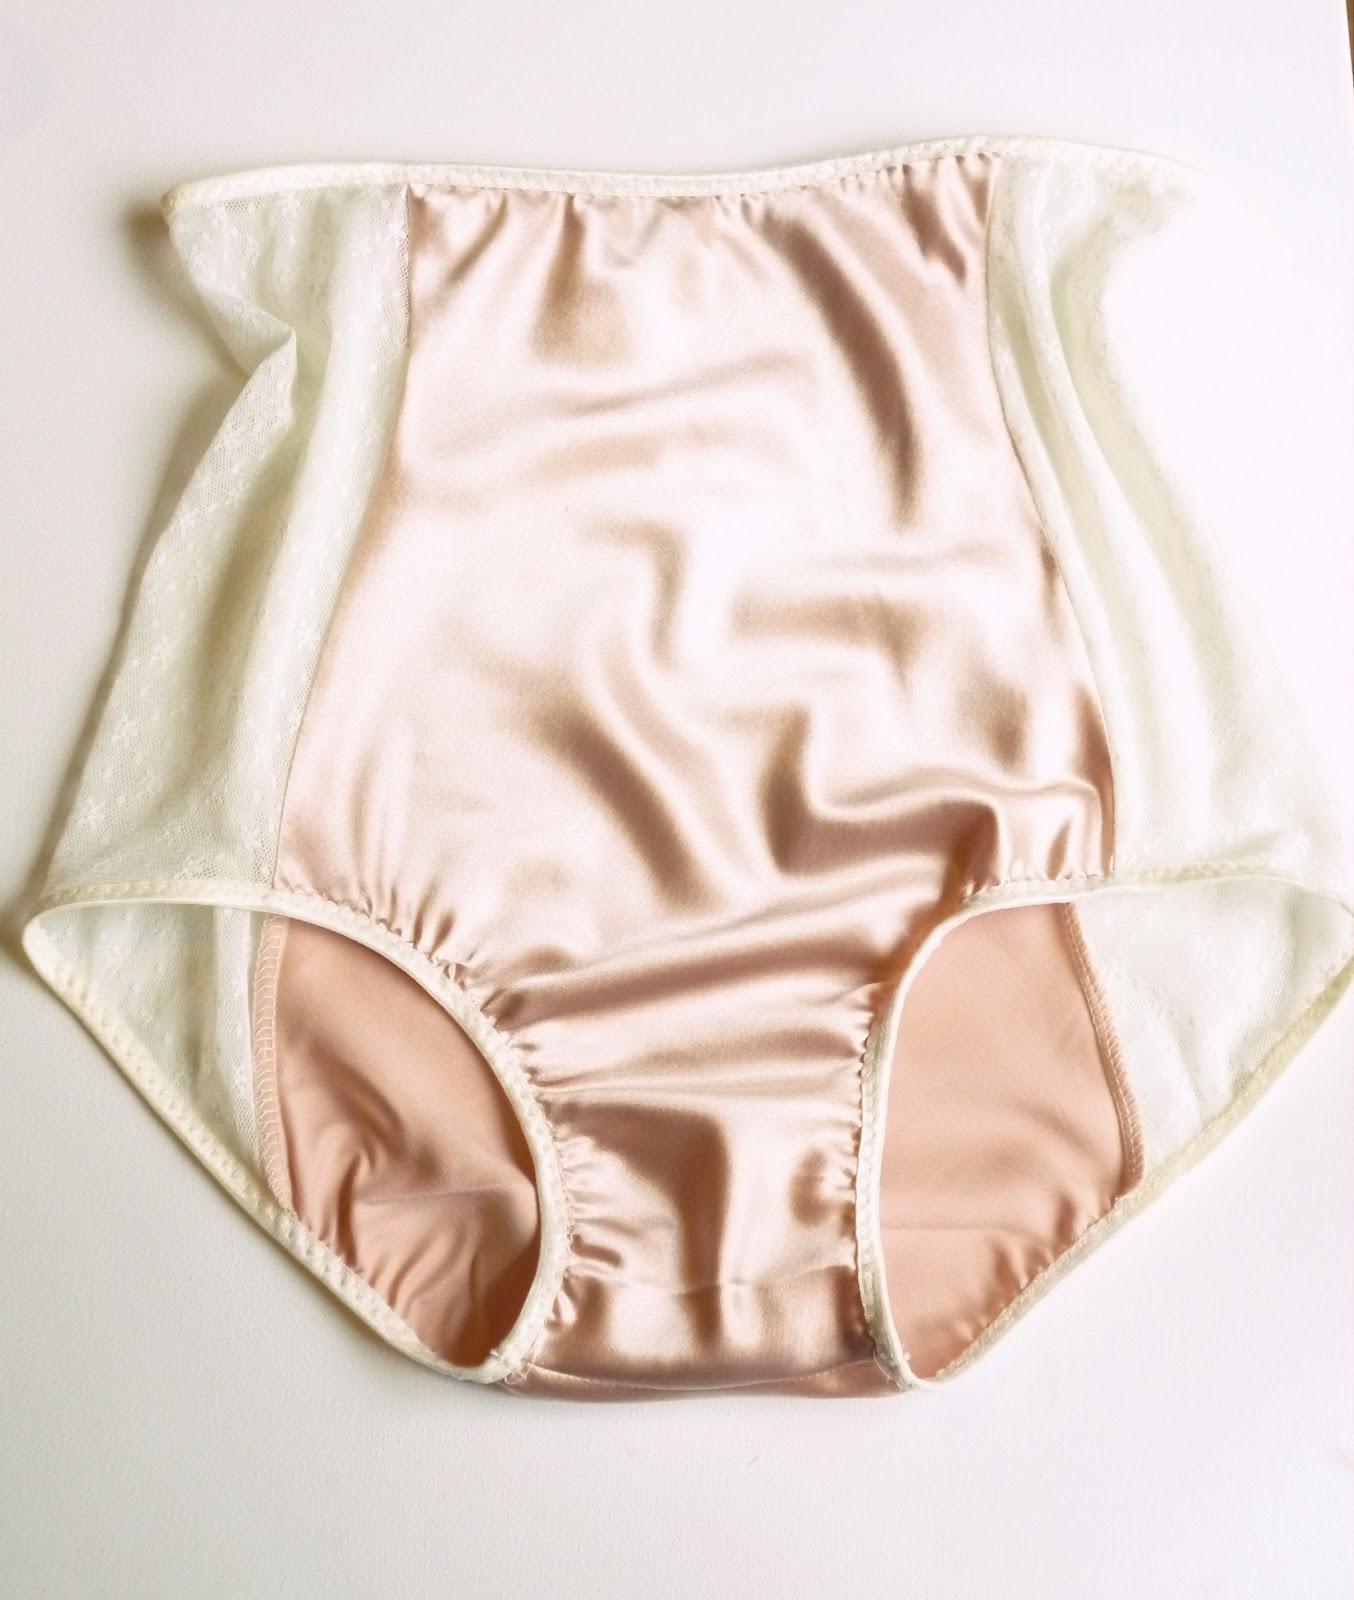
Alternatively, you can use too-narrow lace as a design feature! You can create interesting “cut outs” by just working with the width of lace you have. Here, I’ve just left the scalloped edge of the lace in place, then extended my waist elastic overtop to create a “peekaboo” back.
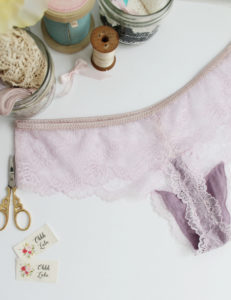
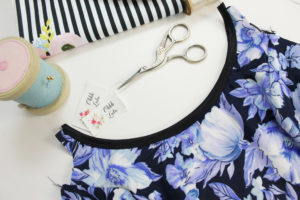
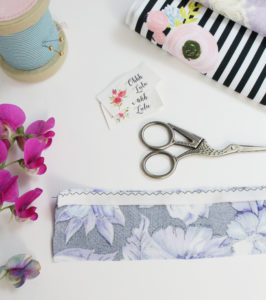
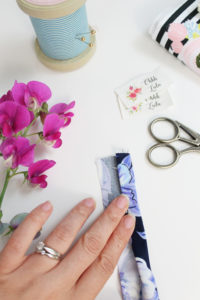
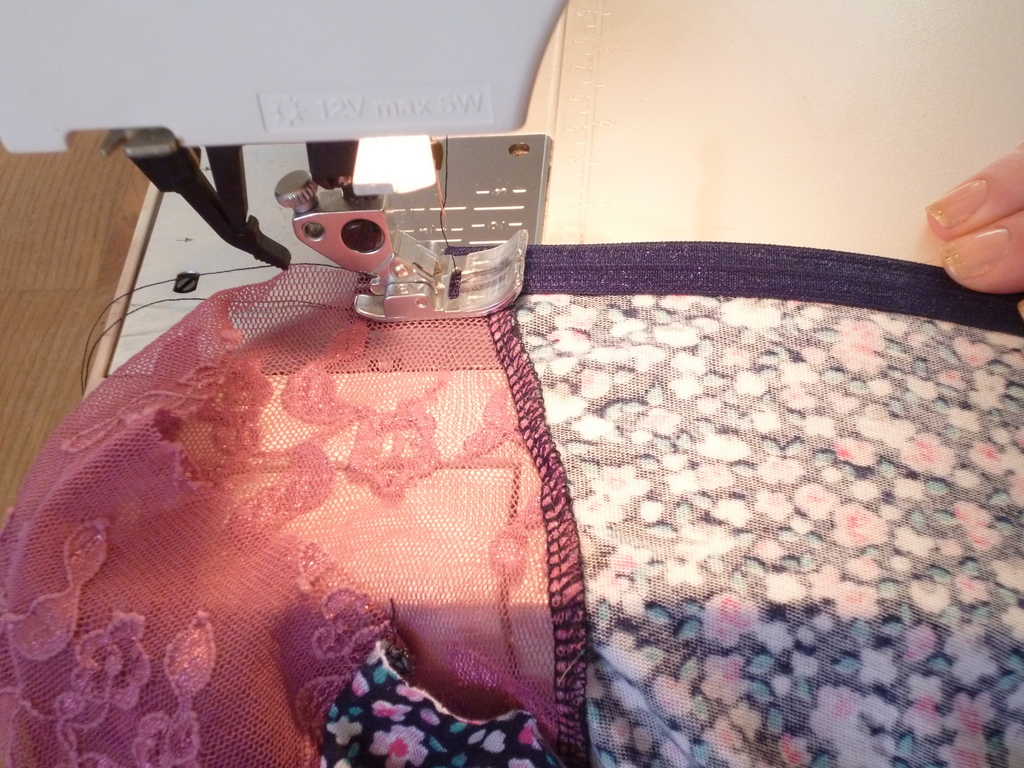
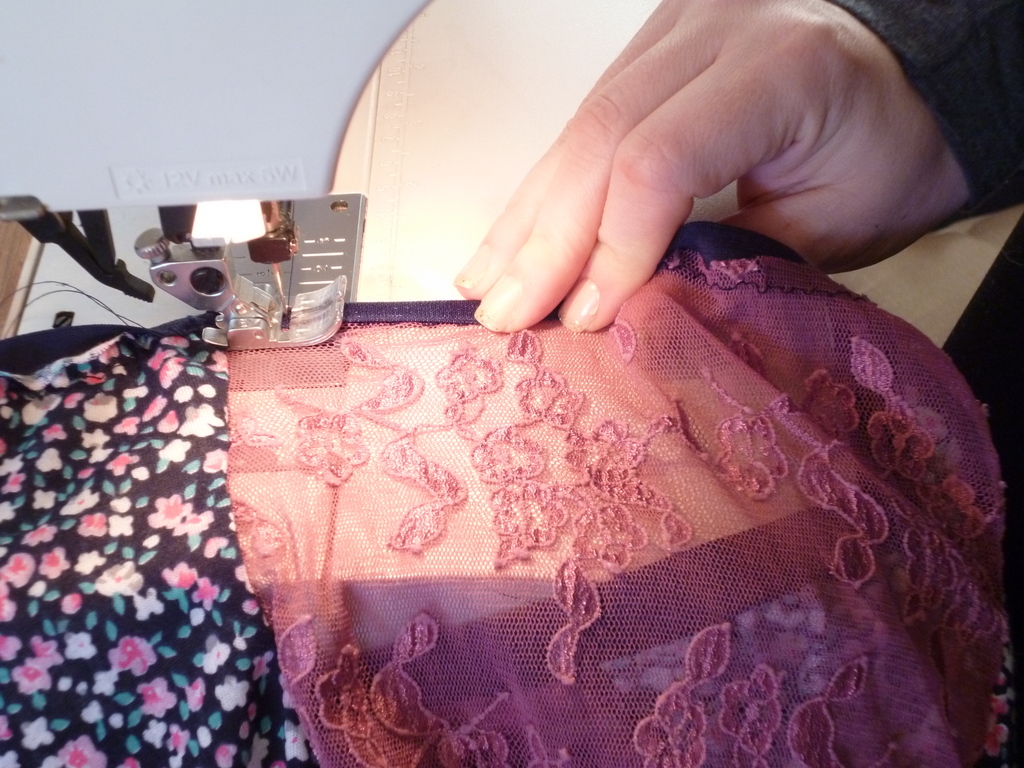
Finding trimming lace to match can sometimes be a challenge, even for myself who has access to wholesale lace suppliers. If you need some trimming lace in the same colour as the lace for the body of your panties, just cut off some of the scalloped edge of your lace, and use it exactly as you would use a trim. Just zig-zag it on, and cut off any excess that extends beyond your zig-zag stitching. I’ve done that with this pretty purple thong.
If you are having trouble finding stretch lace at your local fabric stores, I highly recommend looking online. Below are a few of my favourite resources:
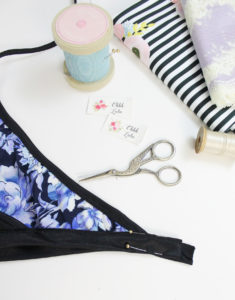
Since moving to Washago, I’ve been spending a lot of time at the beach with Isabel, which means I need a few new bathing suits. I’ve always found it difficult finding RTW bathing suits, since I have a full bust and like a fit with a little more coverage so that I can, you know, actually swim. At the same time, I want something that looks awesome.
So, I made this suit a couple weeks ago and it has had a lot of wear already! I used the Amber Bra for the top and the Panties from my Cindy Pattern for the bottom – I like them because they have high cut leg, which I find more flattering for my petite stature.
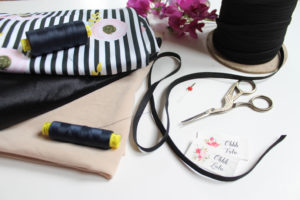
Aside from the patterns, you’ll need the following supplies:
Swimwear Fabric -I used a print and a solid for binding
Nylon swim lining
1/4″ elastic (you can use clear elastic)
Twin Needle
Two spools of thread
5/8″ (or larger) metal ring
Directions:
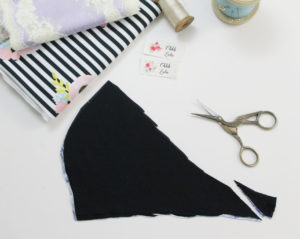
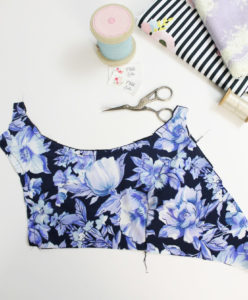
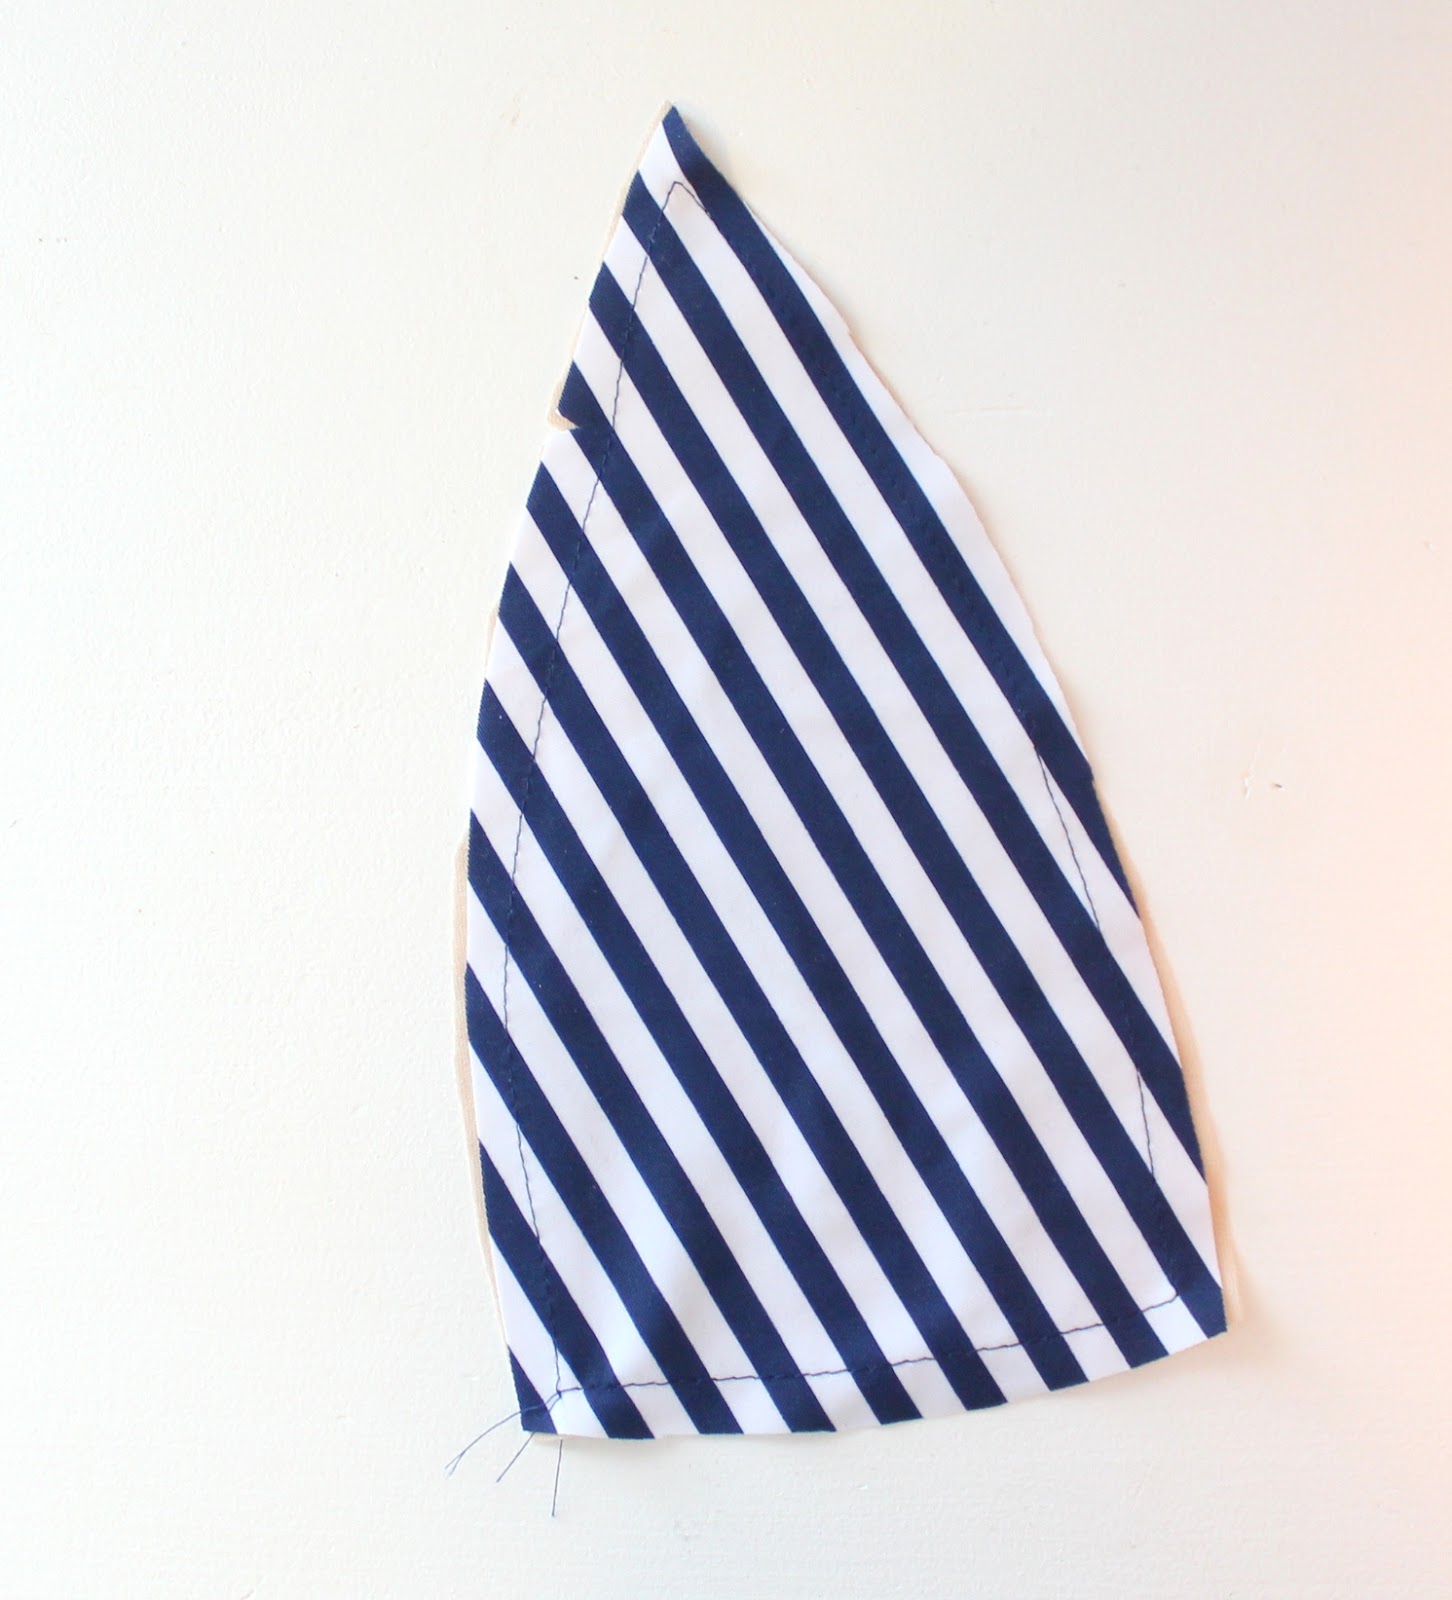
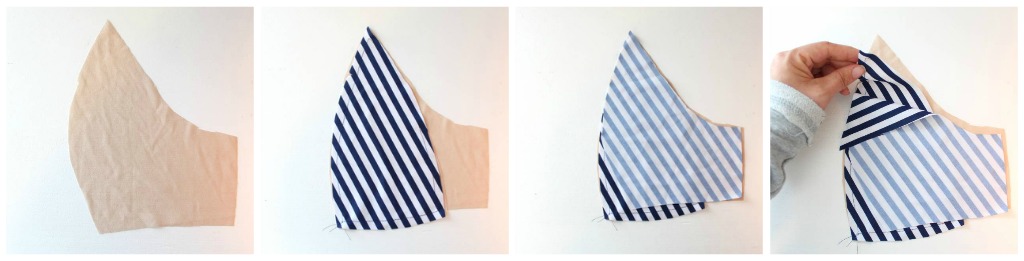
Cut the pattern out of your swim fabric & lining. Taper the Side Back down to a point.
2. Baste the lining to the swimsuit front.
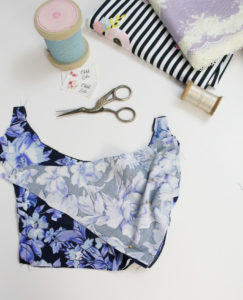
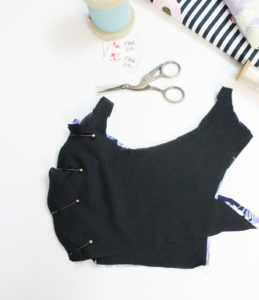
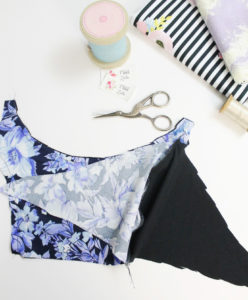
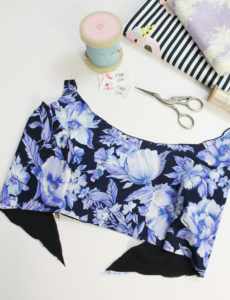
3. Pin the side front swimsuit fabric to the front swimsuit along the curved seam and baste together (right sides facing). Flip over and pin the swimsuit lining along the curved seam of the front swimsuit, so that right sides of the lining are facing and stitch together. This creates a totally encased seam and anchors your lining so you don’t get slipping between the two layers. Repeat on opposite side. If you are feeling confident, this can all be done in one step.
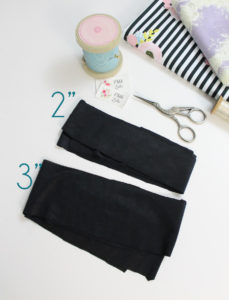
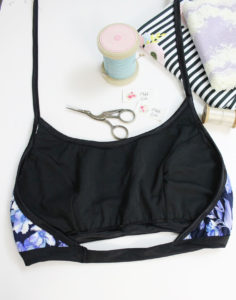
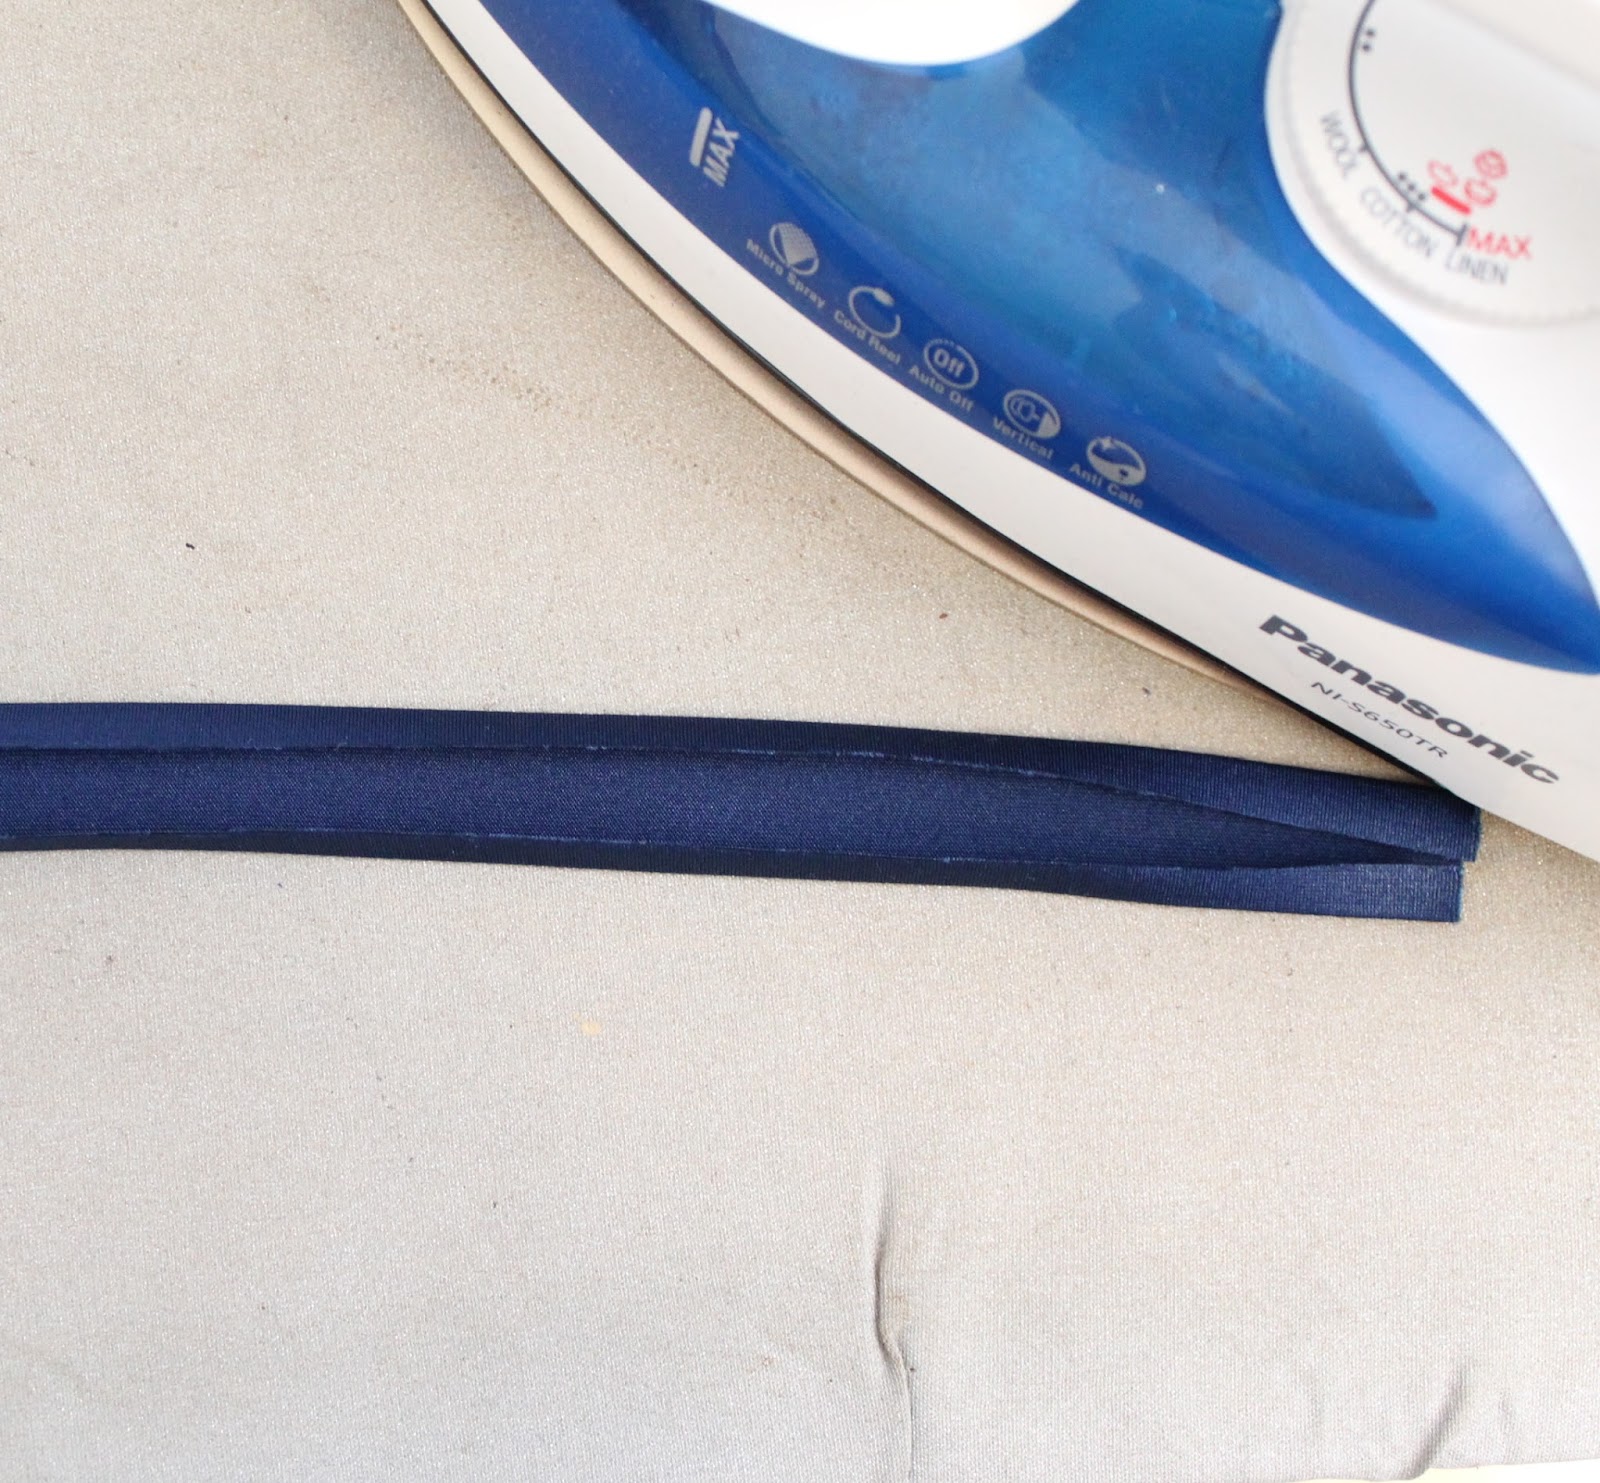
4. Cut a couple long lengths of your contrast fabric to create a binding. I cut two 2″ wide lengths (2″ by approximately 54″) and one 3″ wide length (3″ by approximately 30″) for my size small top.
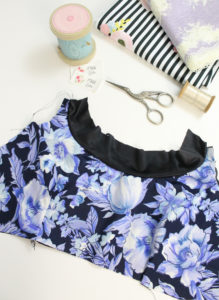
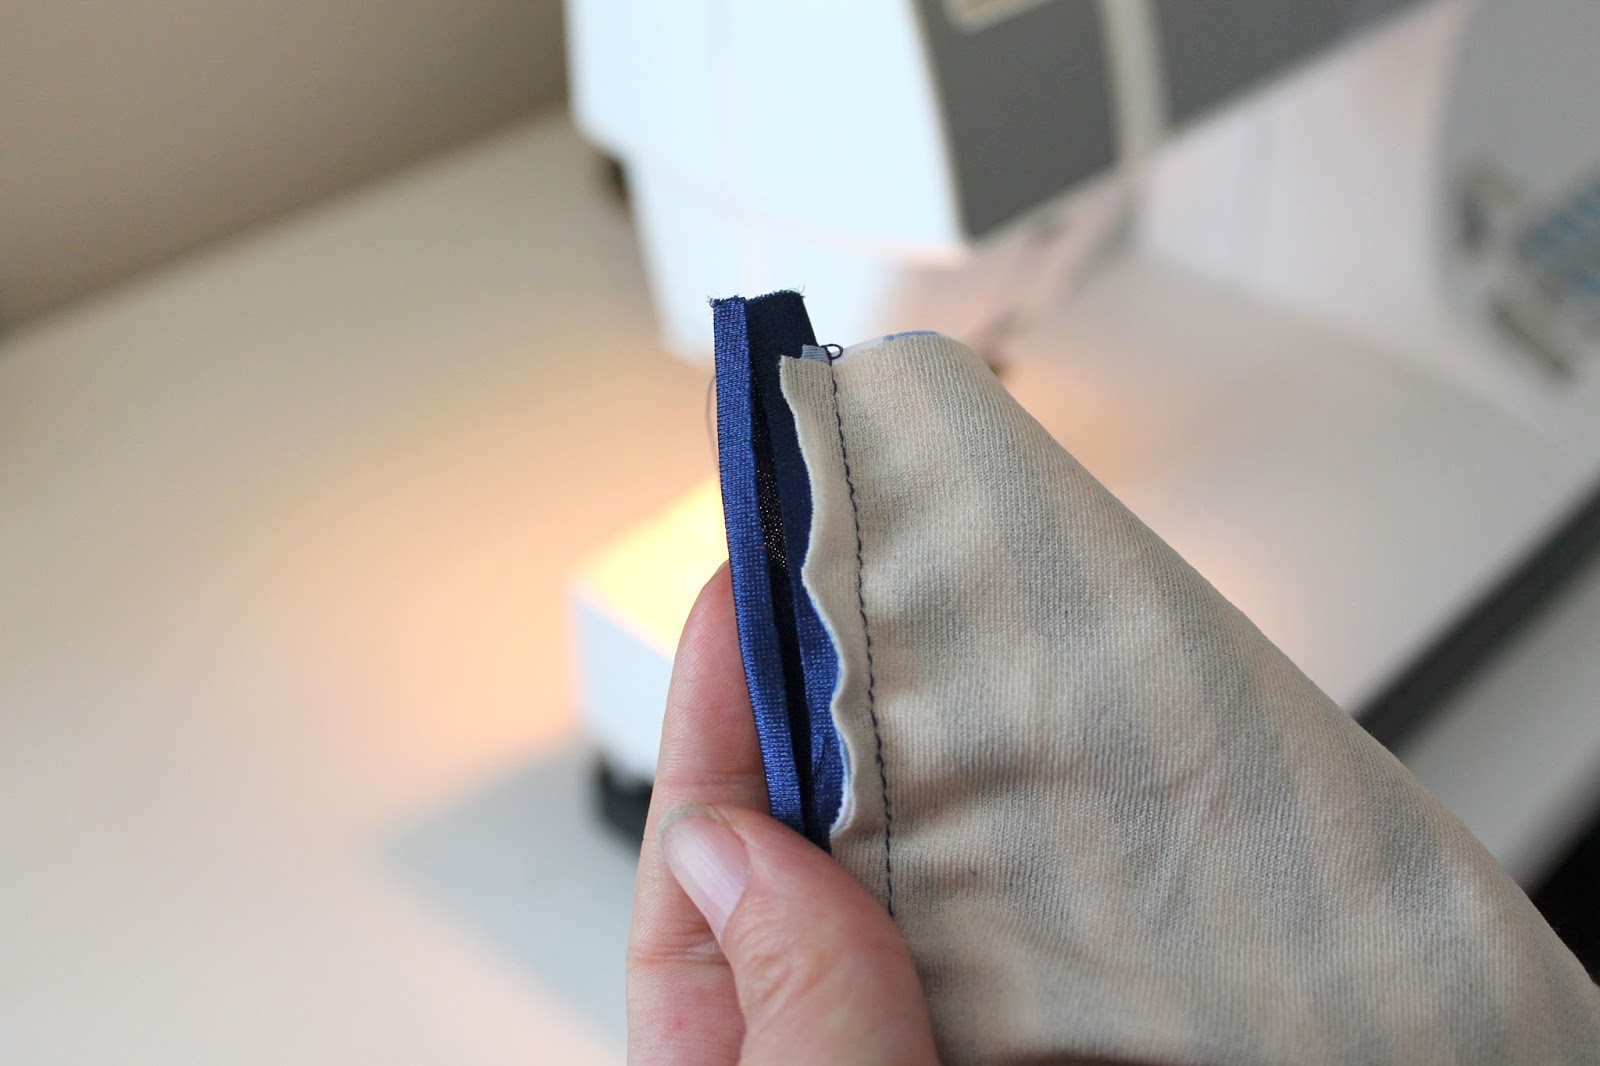
5. With the right side of the binding facing the right side of the swimsuit top, baste binding along neckline using about a 1/2″ Seam Allowance. Gently pull on the binding to create a bit of tension to carefully contour the edge of the top.
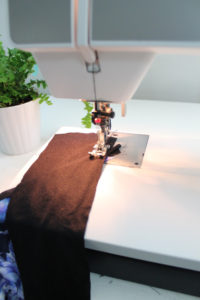
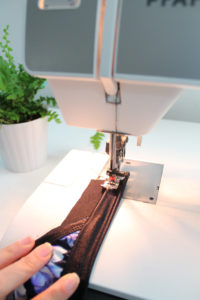
6. Load your sewing machine up with your twin needle and two spools of thread. Fold the binding towards the wrong side and top stitch in place using your twin needle. I do not double fold my swim biding. I just fold it back once and trim back the excess along the wrong side. This way is quick, easy, and less bulky.
7. Trim the small strap tab back to a point. Apply the binding along the side in a the same manner as steps 5&6, but leave a 6″ long tail extending past the neckline. As in the previous step, fold the binding in half and use a twin needle to stop stitch. I do a single fold, then trim away the excess fabric.
Extra Credit: add some stability and strength to your straps by wrapping the binding that forms your neck strap around a piece of elastic. I am heavy chested and always find stitches in my swimsuit straps pop! Adding clear swimwear elastic (or something heavier) will help. (I’m really sorry I didn’t take pictures of this part! the next step will give you some idea of what I mean)
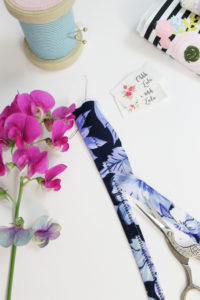
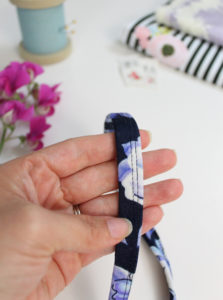
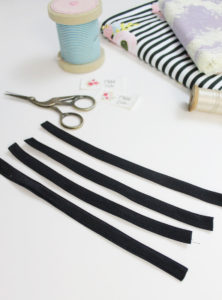
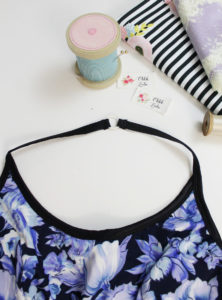
8. Now we are going to create the strap details for the back. I’m adding elastic to mine for some strength and stability. This is optional – you may opt to just sew a traditional spaghetti style strap/tube. I created by straps by basting a length of elastic to the wrong side of a strip of my binding. I folded the binding 3 times to fully encase the elastic. Using a twin needle, I stitched down one edge, then simply trimmed back the excess. This is a quick and easy way. You may opt to double fold your binding, but I find it gets a little bulky. I then cut the strap into 4 lengths of 8″.
9. I used the wider piece of biding to for my band. In the exact same method as in previous steps, baste the binding onto the lower edge of the top, pulling on the binding as you go to contour the bottom of the top. Fold to desired width, and top stitch in place, trimming back the excess fabric once you are done. Leave approximately a 1″ tail on one end and a 4-5″ tail on the other.
10. With the right sides together, pin and stitch band together. Fold seam allowance to one side and top stitch down.
11. Wrap ends of strap around your metal ring and stitch in place using a tight zig-zag stitch.
12. Wrap one end of each of the 4 straps you made previously around the ring and stitch using a tight zig zag stitch. Pin the opposite end of each of the 4 straps evenly along the band. I used a tight zig-zag again to anchor them along the band.
Last year I posted a video demonstrating how to apply swimsuit binding. You can view it HERE. To add more stability to the edges of your suit, you can add clear swimsuit elastic. I didn’t have any on hand, so I omitted it, and so far have found it to be just fine!
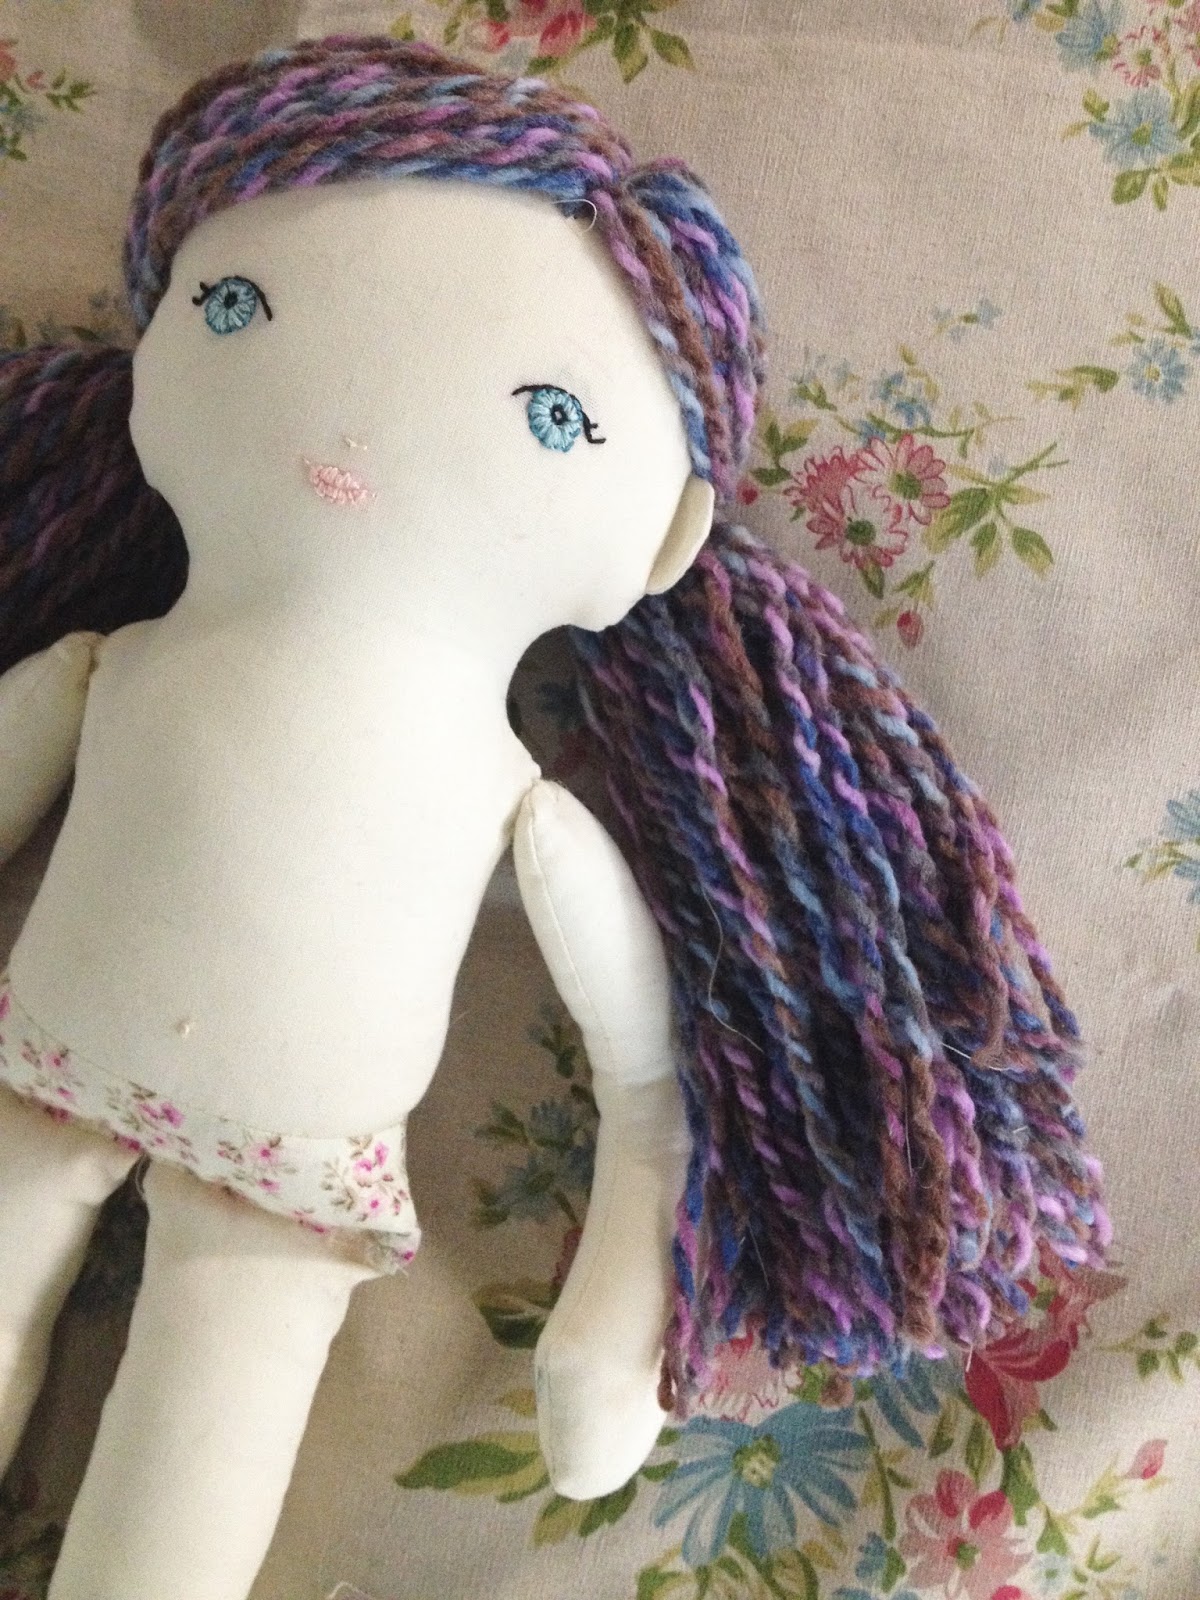
Have you ever tried doll-making? I had never really made stuffed toys, besides some witch legs last halloween, but I wanted to try to make Isabel a rag doll.
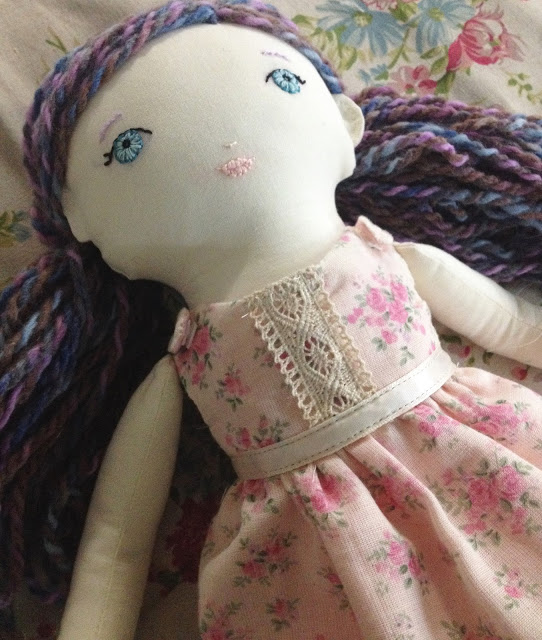
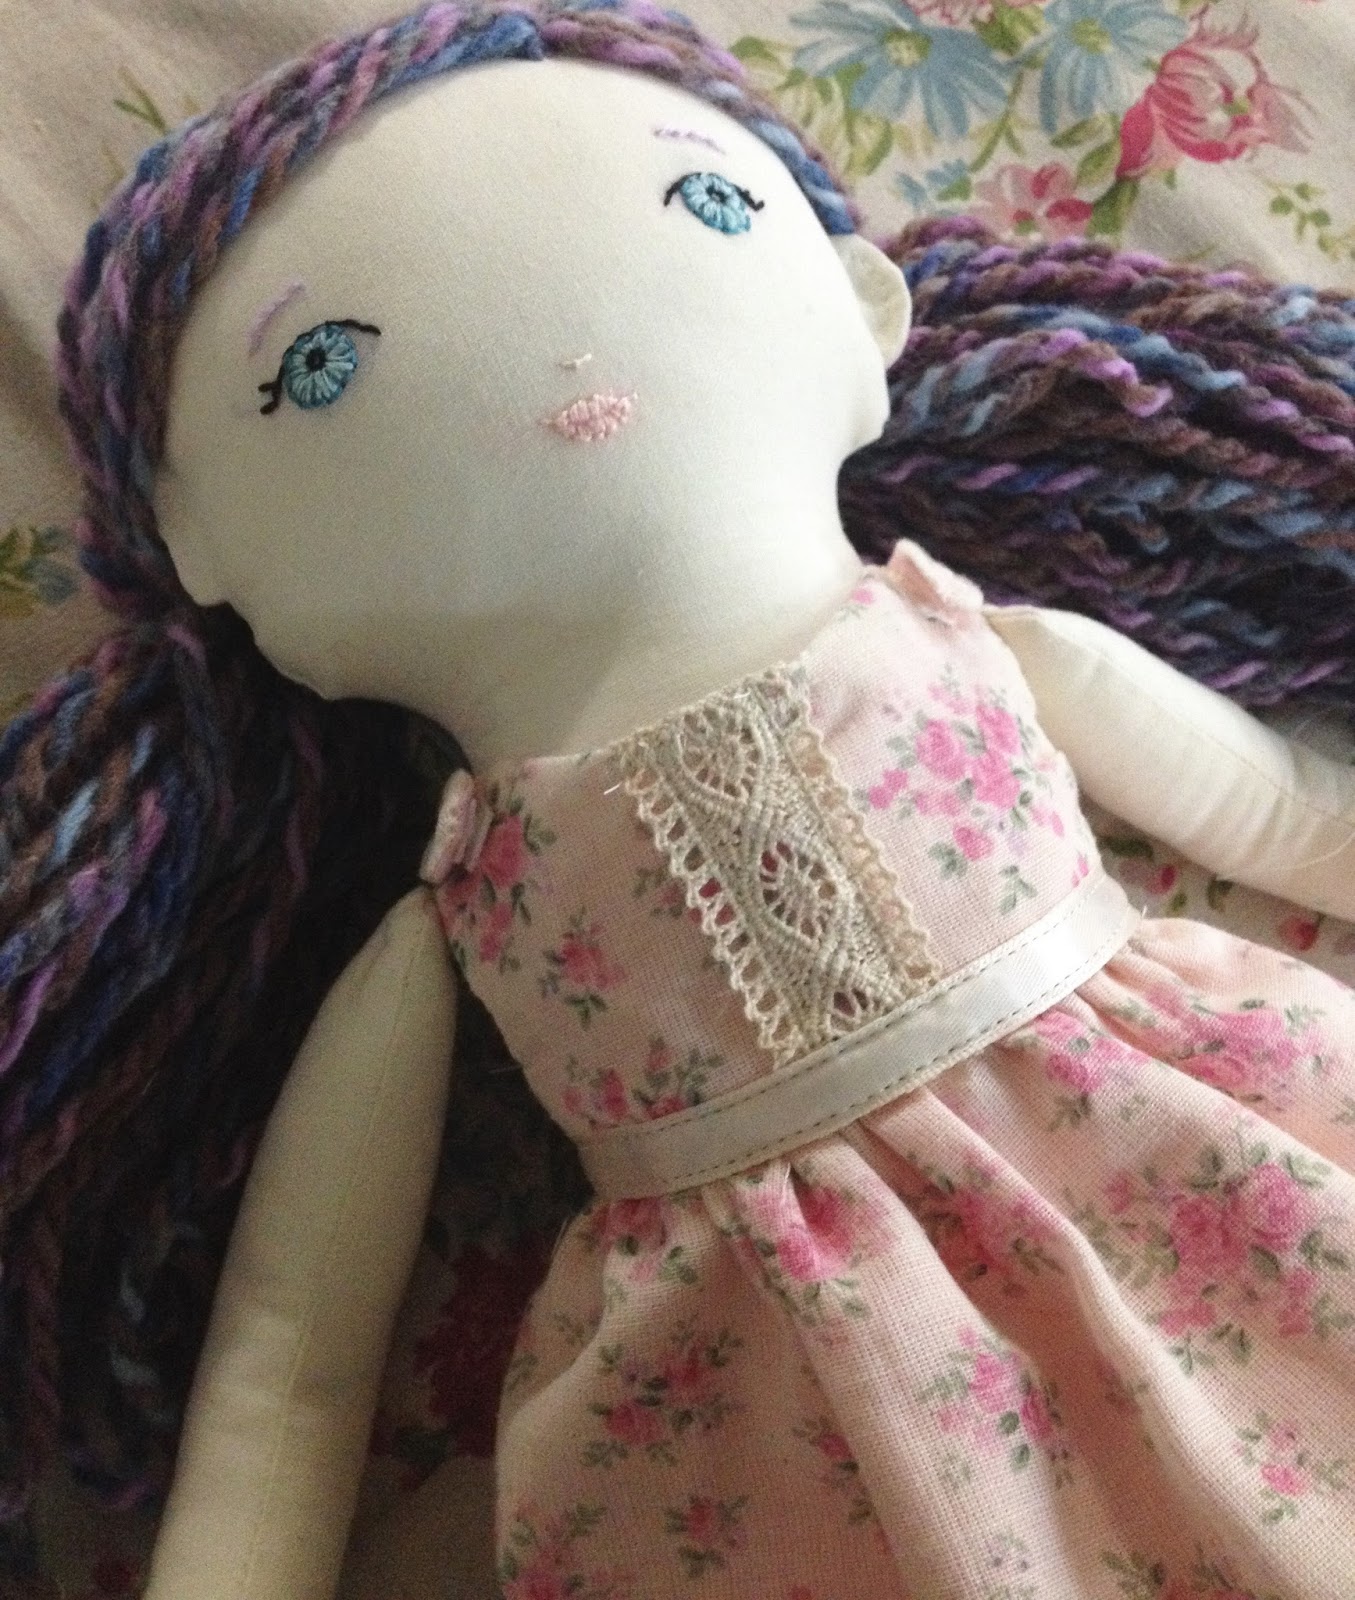
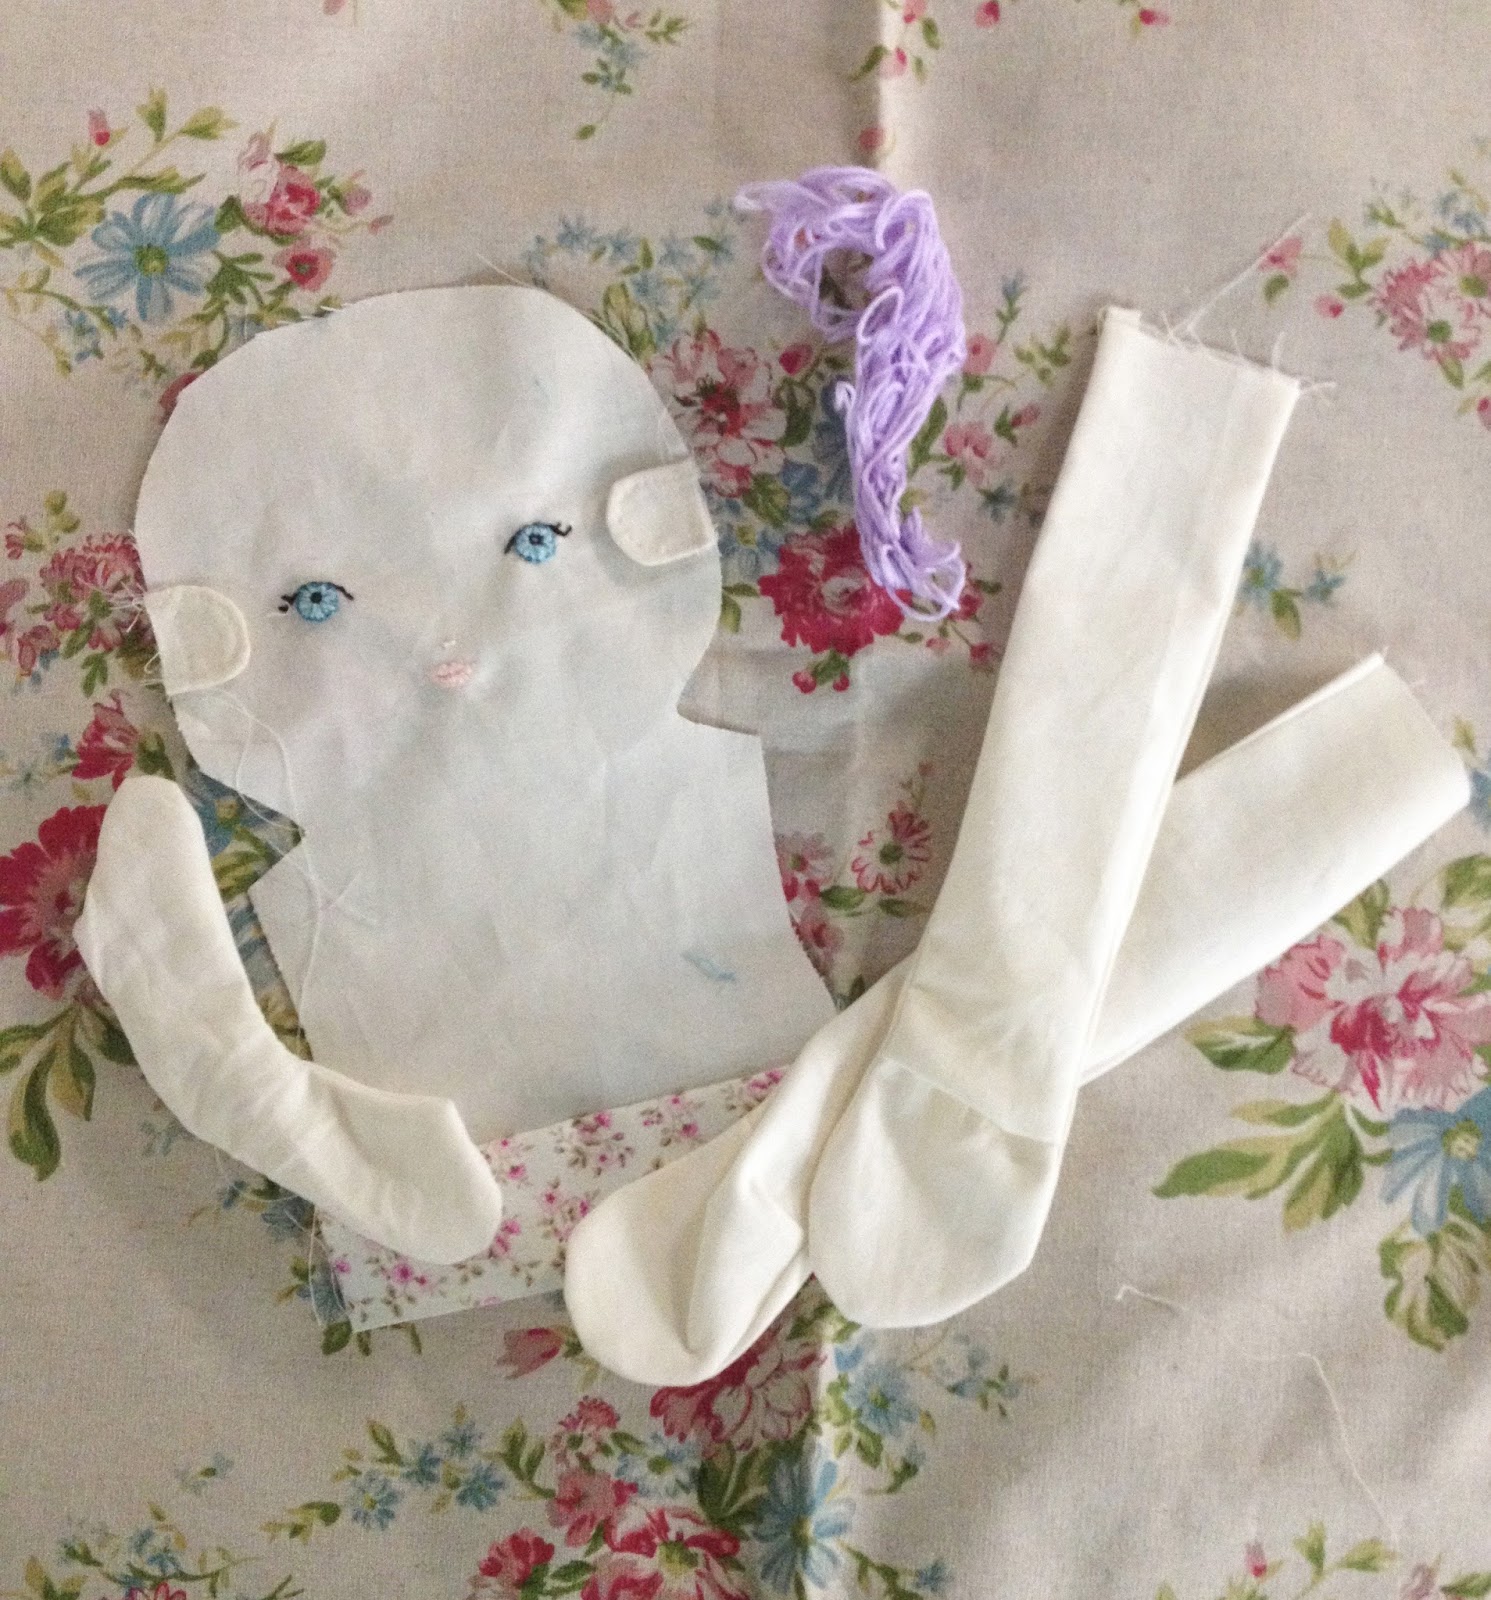
I wasn’t entirely sure where to start, so I bought a pattern on Etsy from Create Joy Make Stuff. I followed the directions exactly for the body, but decided to do yarn hair instead of felt. I also embroidered on the face, which was a real challenge for me, but I am happy how it turned out! I don’t have a lot of experience with embroidery so I did a lot of stitch ripping. I found this blog post from Big Little to be really helpful.
I embroidered a little french knot for a belly button. Isabel is obsessed with belly buttons. She always wants me to show my belly button to everyone in the grocery store…
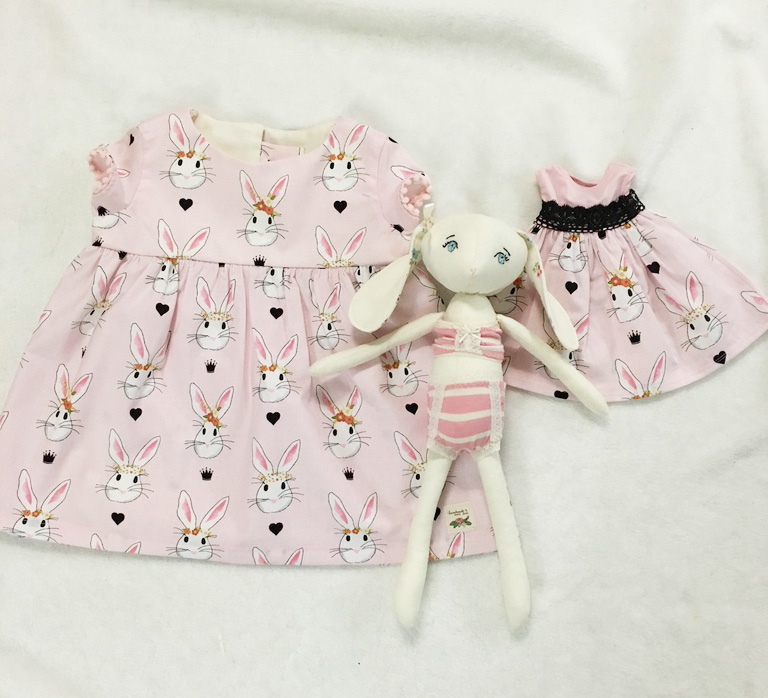
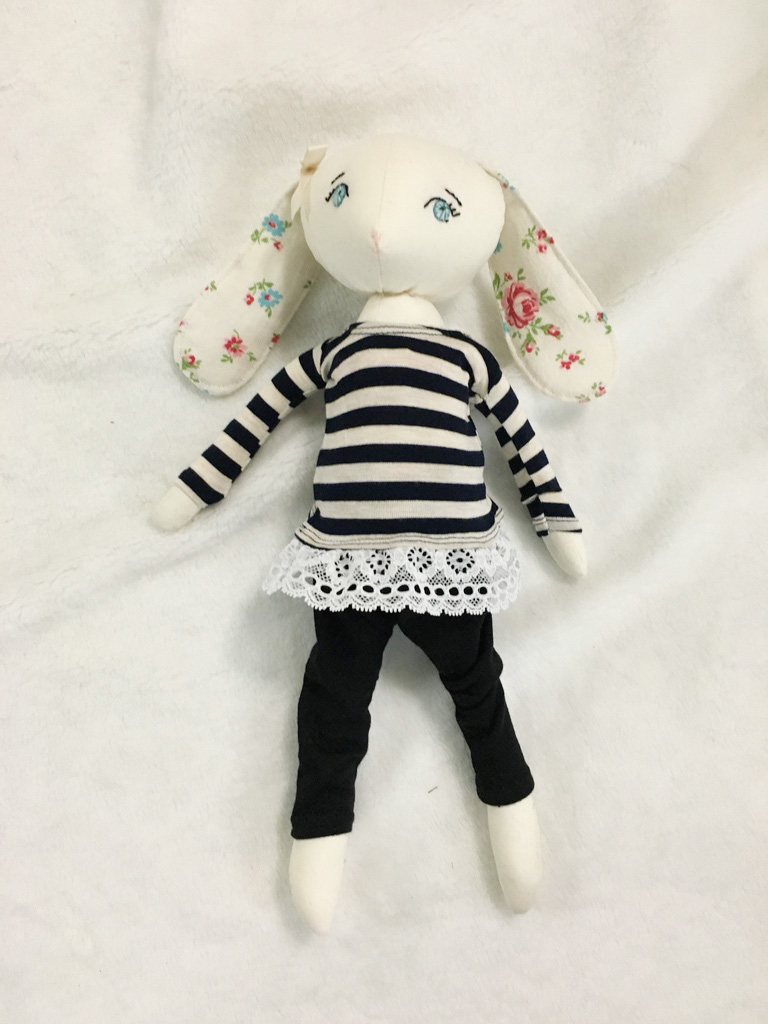
Anyway, I was SO happy with how the doll turned out that I decided I’d try another toy. This time I kind of made up my own pattern, using the doll pattern as a bit of a jumping point. Since it was Easter, I throught I’d make a bunny doll.
I made the tiniest little underwear set for her to wear, as well as a matching easter dress using a Riley Blake Bunny Print. I used Heidi & Finn’s Pumpkin Spice pattern for Isabel’s dress. I really love this pattern! I want to make Isabel a ton of these. It has a comfortable loose fit, is easy to sew with three sleeve variations, and looks super adorable!
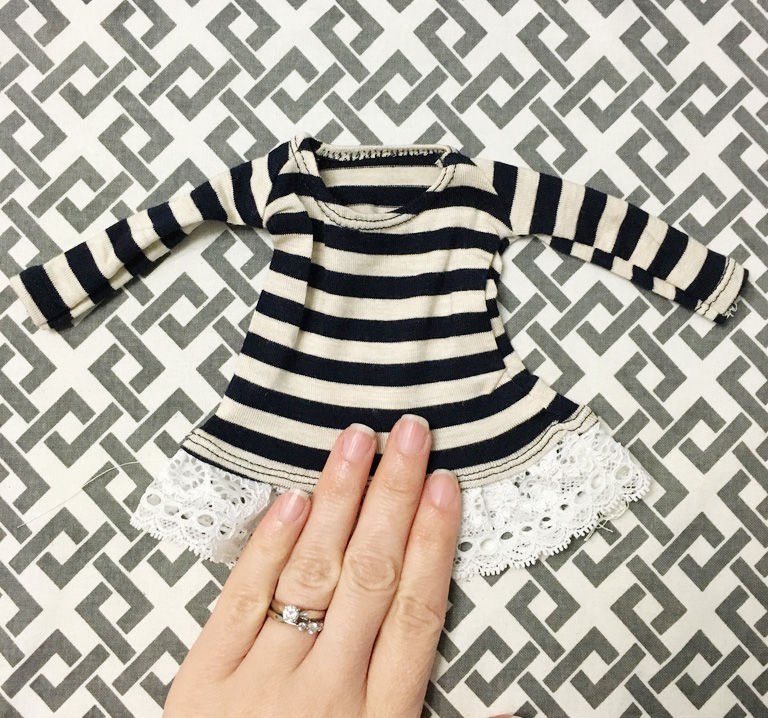
Bunny’s Top
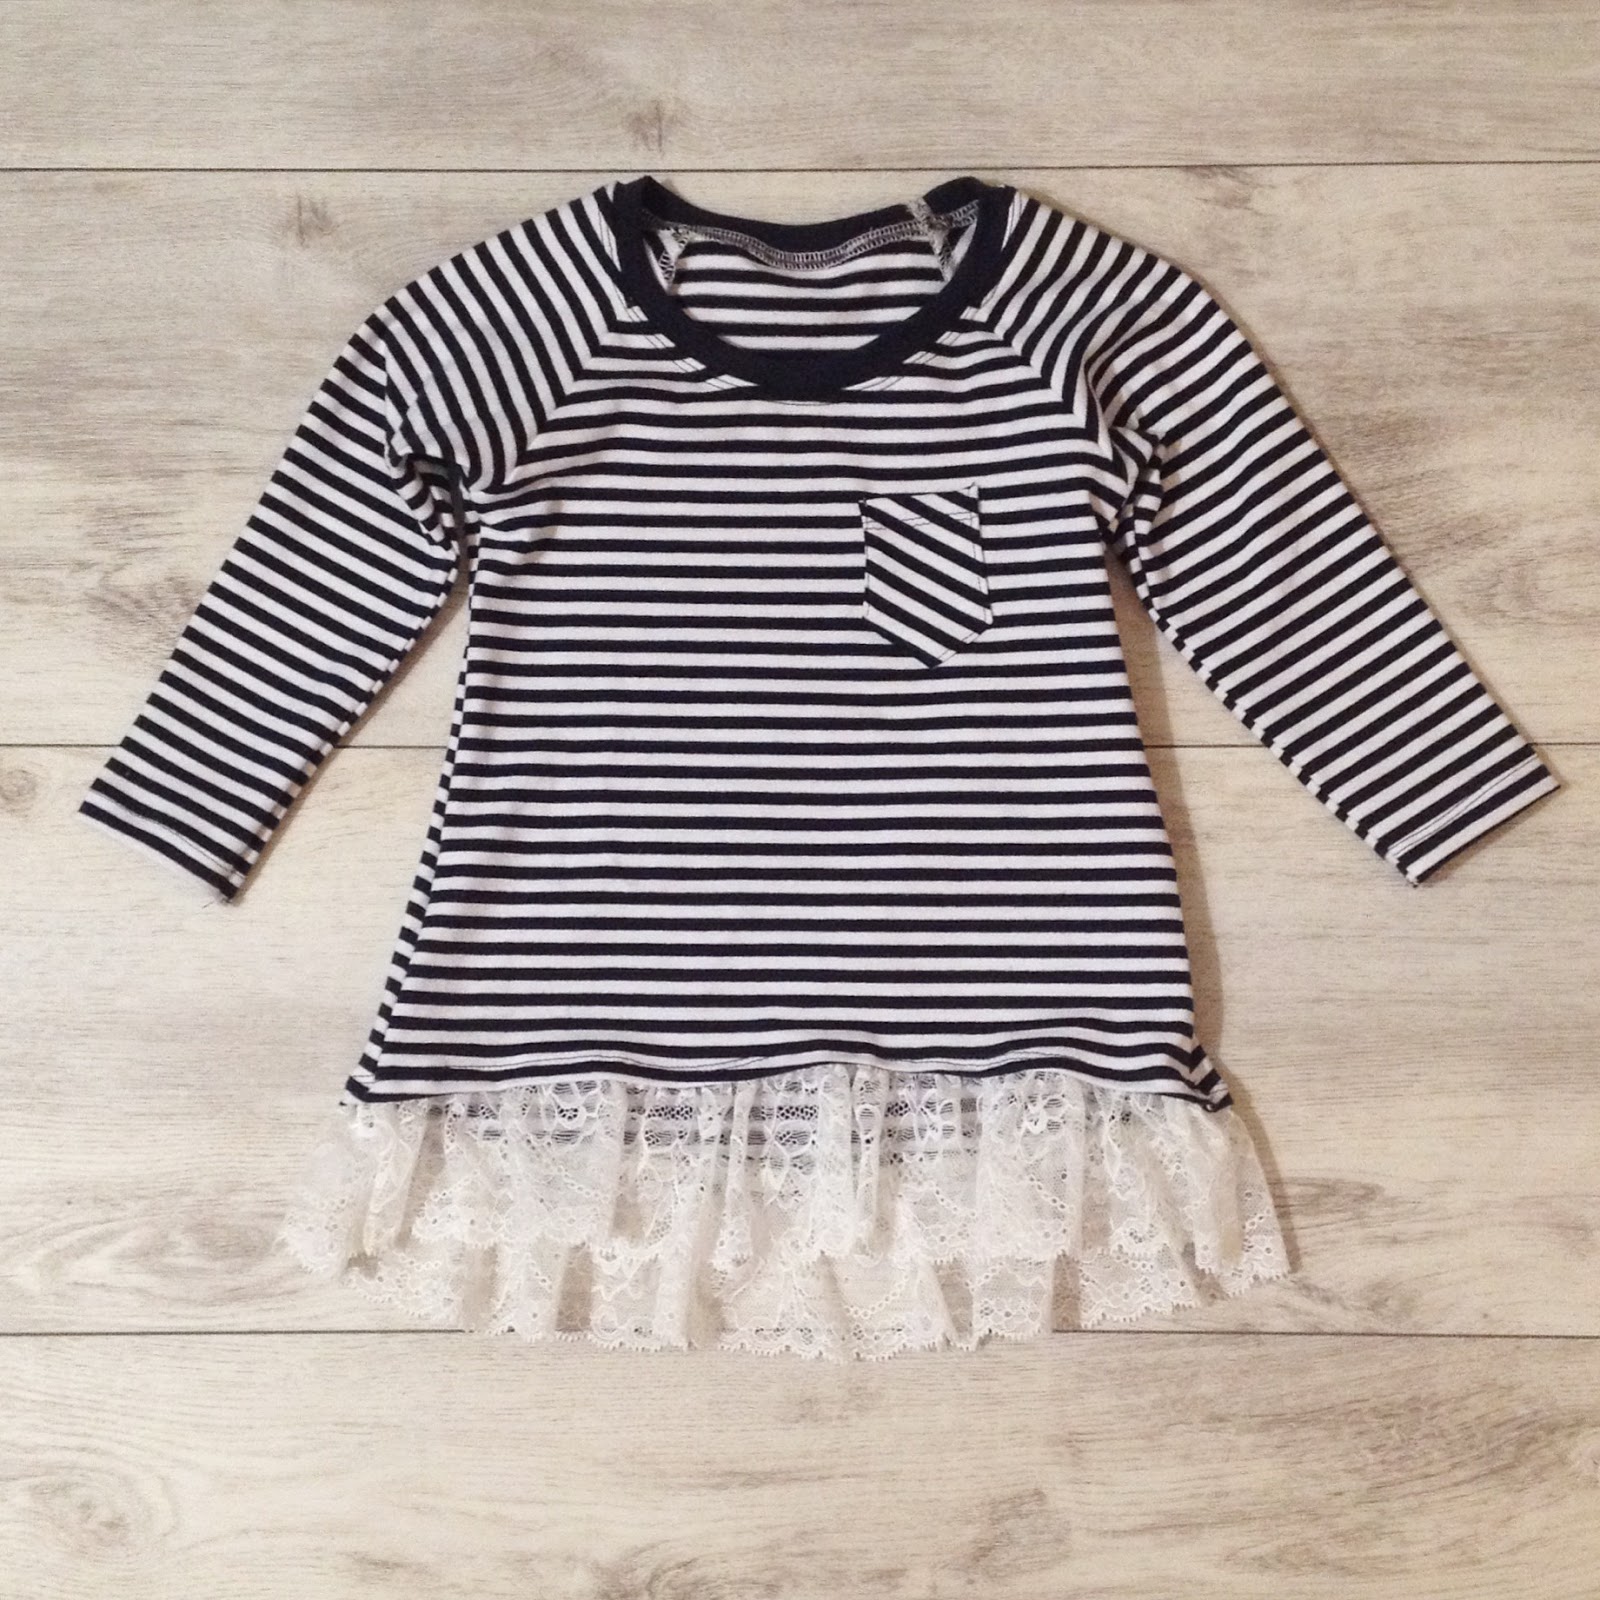
Isabel’s top
So I’m kind of obsessed with making them matching outfits now. I made a striped replica of a Brindille and Twig Ragland Sleeve Top I made for her earlier in the winter.
Doll making is almost as addicting as lingerie making!
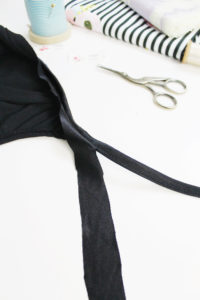
It’s time for Part Two of my Retro Bikini Tutorial. I’ve done a tutorial on how to sew the Ava Panties as Bikini Bottoms before. I did this version just a little differently. I wanted to add a contrasting band around the waist and omit the elastic around the legs. I have full hips and thighs, so these bottoms fit snug as they are. If you’re on the thinner side, you might want to add elastic or bind your leg openings like we did on the Bikini Top.
Instructions:
1. To make the waistband, I roughly measured the waist of the panties front and back. I cut a size medium, which had the same measurement for front and back. I then drew a straight waistband, which was 2″ wide with 1/2″ seam allowance on either side. I indicated cut 2 on my new pattern piece, as my front and back measurement was the same.
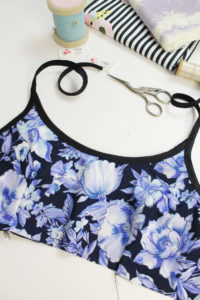
2. Cut your fabric – I’m lining the entire thing.
3. Baste your front lining to the swimsuit front.
4. Like we did with the swimsuit, we’re going to sew the lining and swim fabric all in one motion. Begin by layering: Back Self (rightside up), Front Basted Self (rightside down), then Lining. Pin together if needed and sew your seam. Now your crotch seam allowance in encased between your layers.
5. Sew your side Seams and try them on. They should fit snug all over.
6. Sew the waistband into a continuous loop. Fold in half and press with a light iron. Attach to the waist of the panties, lining up your side seams.
7. I top stitched down my waistband seam allowance using a twin needle.
8. To finish the legs I simply finished the raw edges with my serger, then turned the edges and top stitched them with a twin needle. You can also finish with a zig-zag stitched hem, bind the legs, or use elastic.
That’s it! I’ve found it takes some getting used to sewing swim fabrics. They are slippery and can be hard to manage. But, the more bathingsuits I make, the better they get!
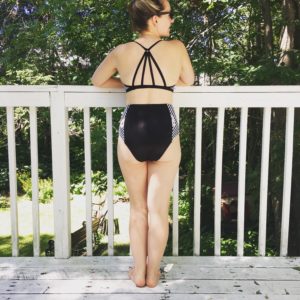
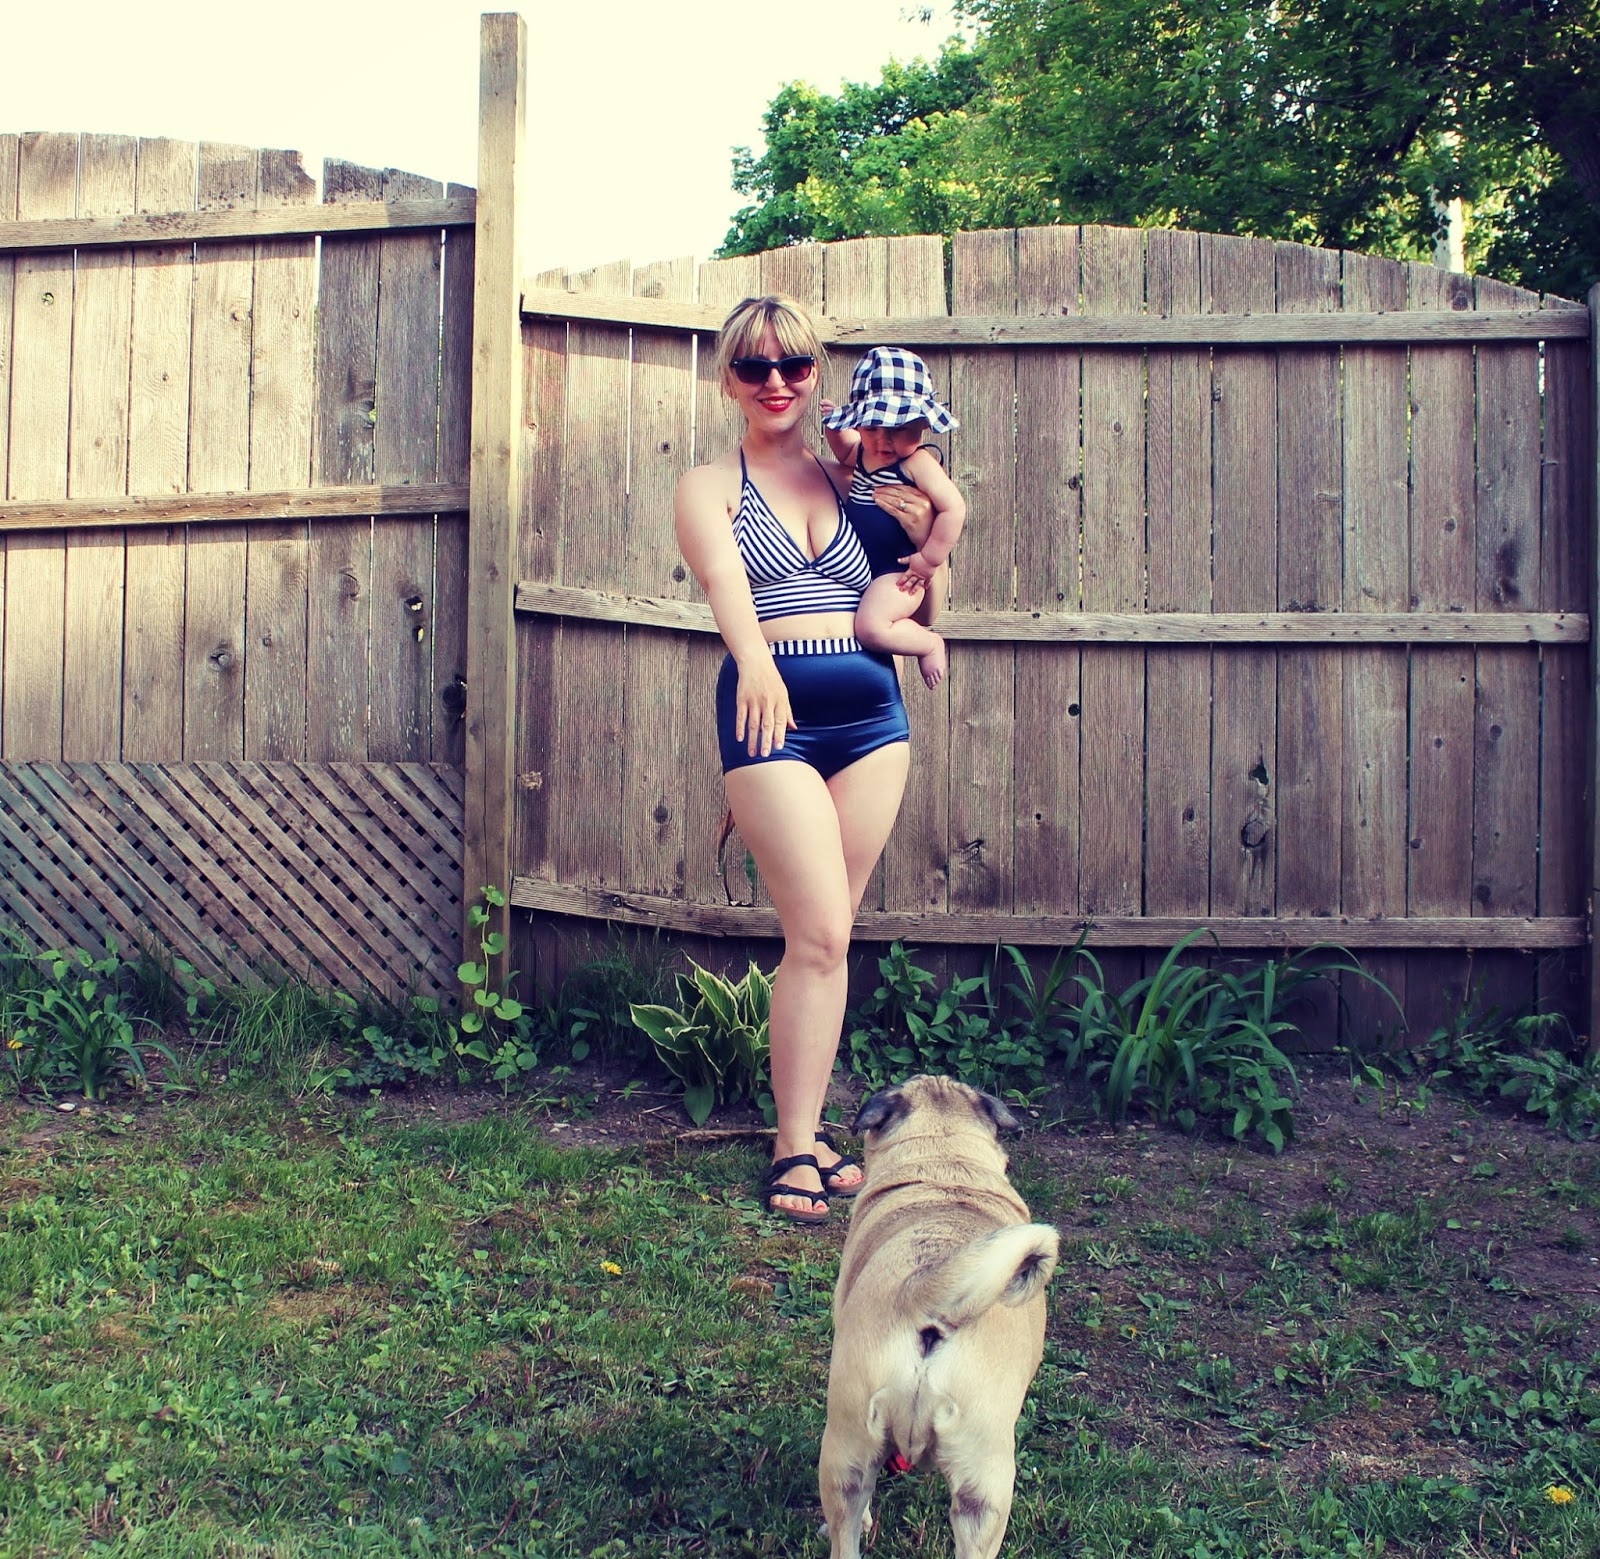
Here I am in mine. Neverind the pug butt and falling down fence. I made Izzy a matching suit too! Now hopefully the weather gets a little warmer so I can test mine out at the beach.
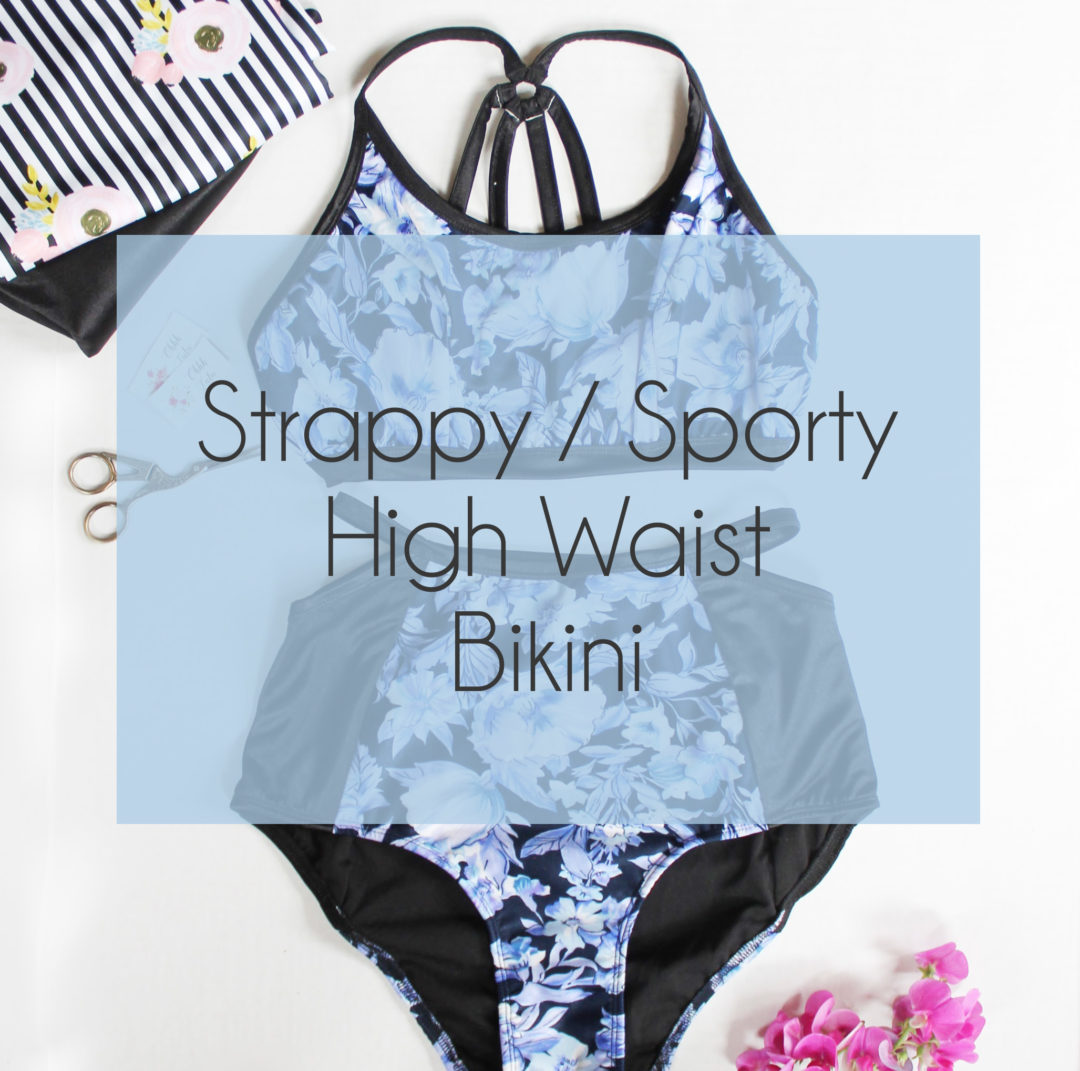
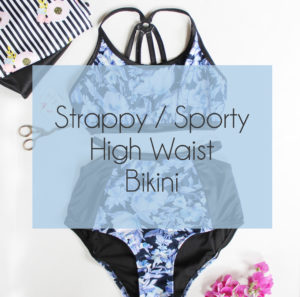
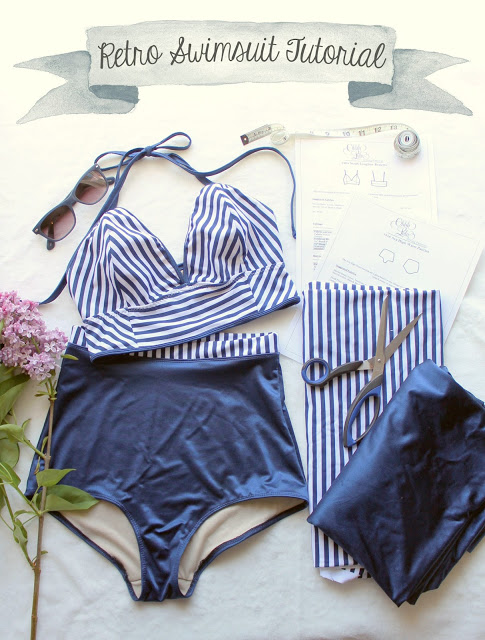
BUT! I’m not going to let that get me down! Last weekend I made this swimsuit. I was inspired by Alexia (from Whimsy Tails ) who made an amazing 2-piece version of my Abigail Swimsuit. You can see it on her Instagram. I really loved the way she place the stripes on the top. I decided I’d give it a go using my Sarah & Ava Pattern to do something kind of similar. I really loved how it turned out and I get lots of emails about using my patterns for swimwear so I thought I’d offer an indepth tutorial.
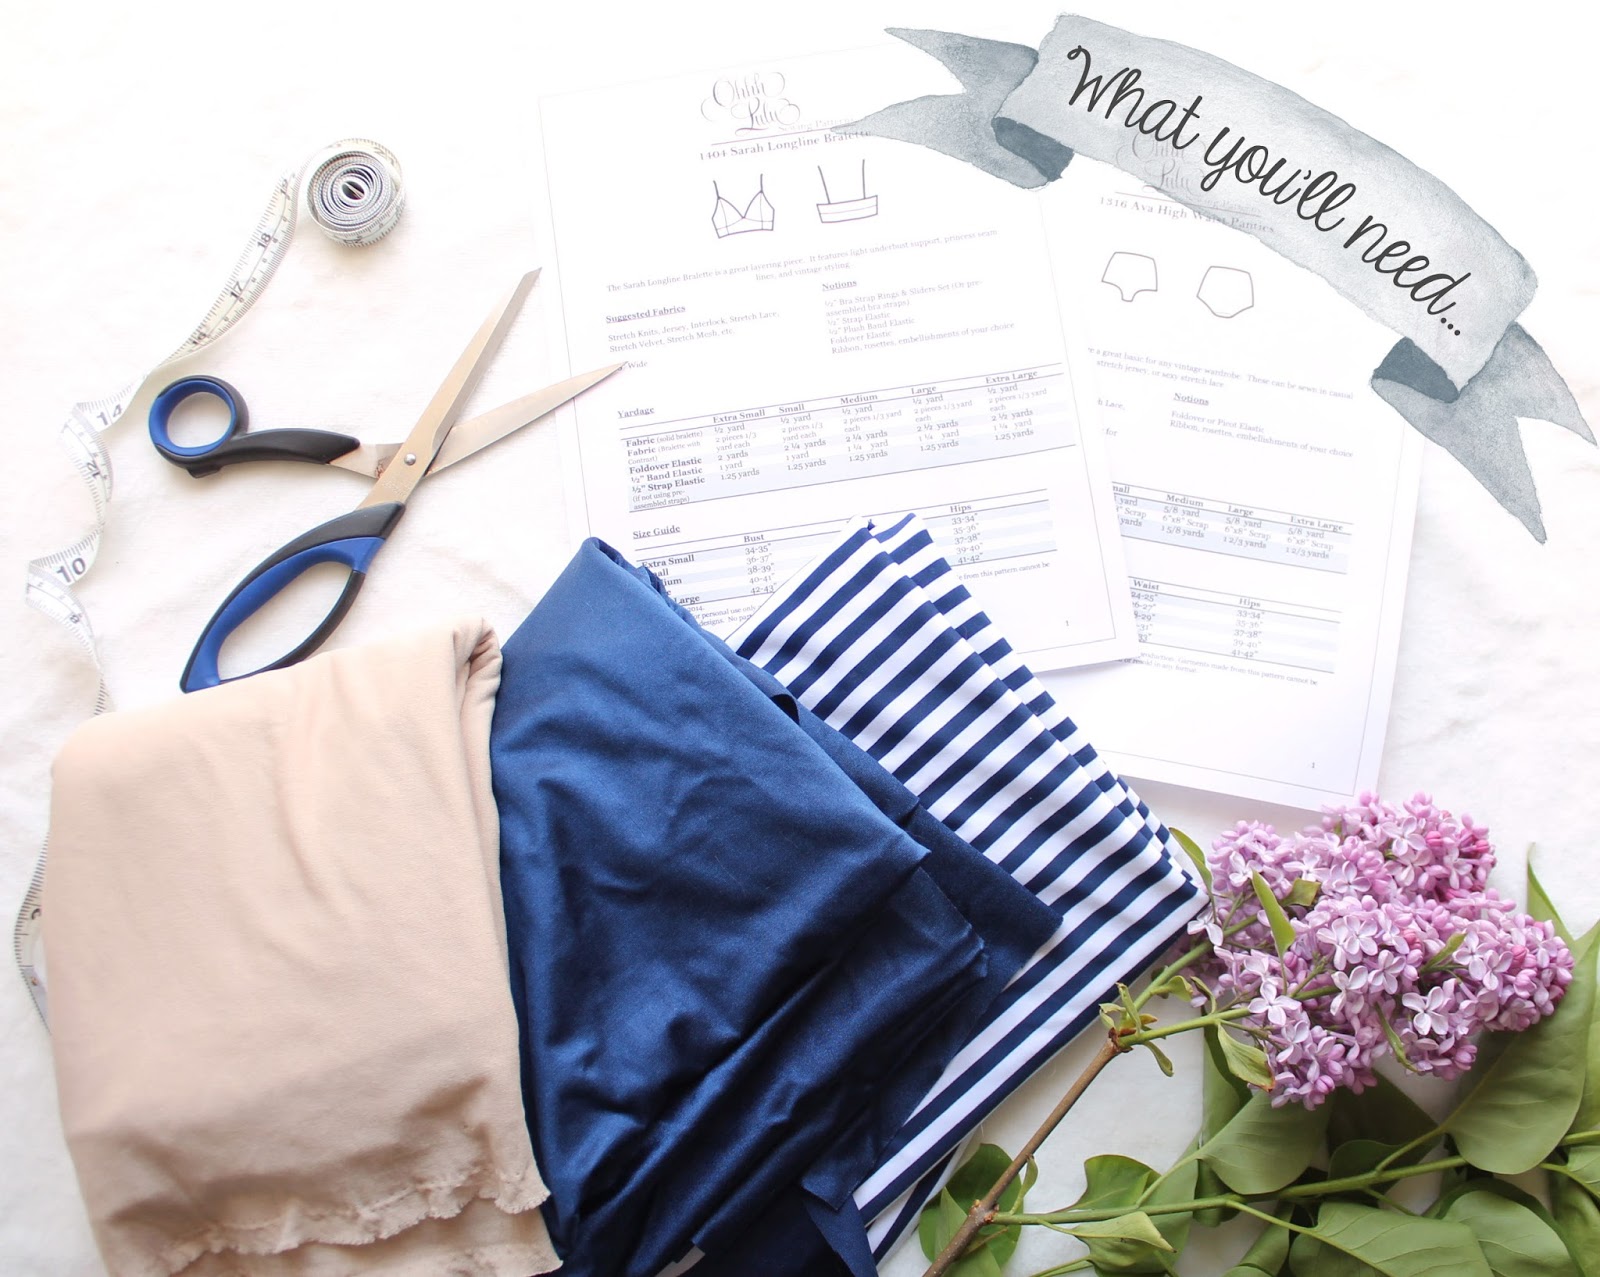
What you’ll need:
1. The Sarah Bralette Pattern and Ava Panties Pattern
2. Coordinating Swimsuit (Spandex) fabric.
3. Swimsuit Lining
4. Thread
5. Twin Needle
6. Rotary Cutter (optional, but handy)
Instructions:
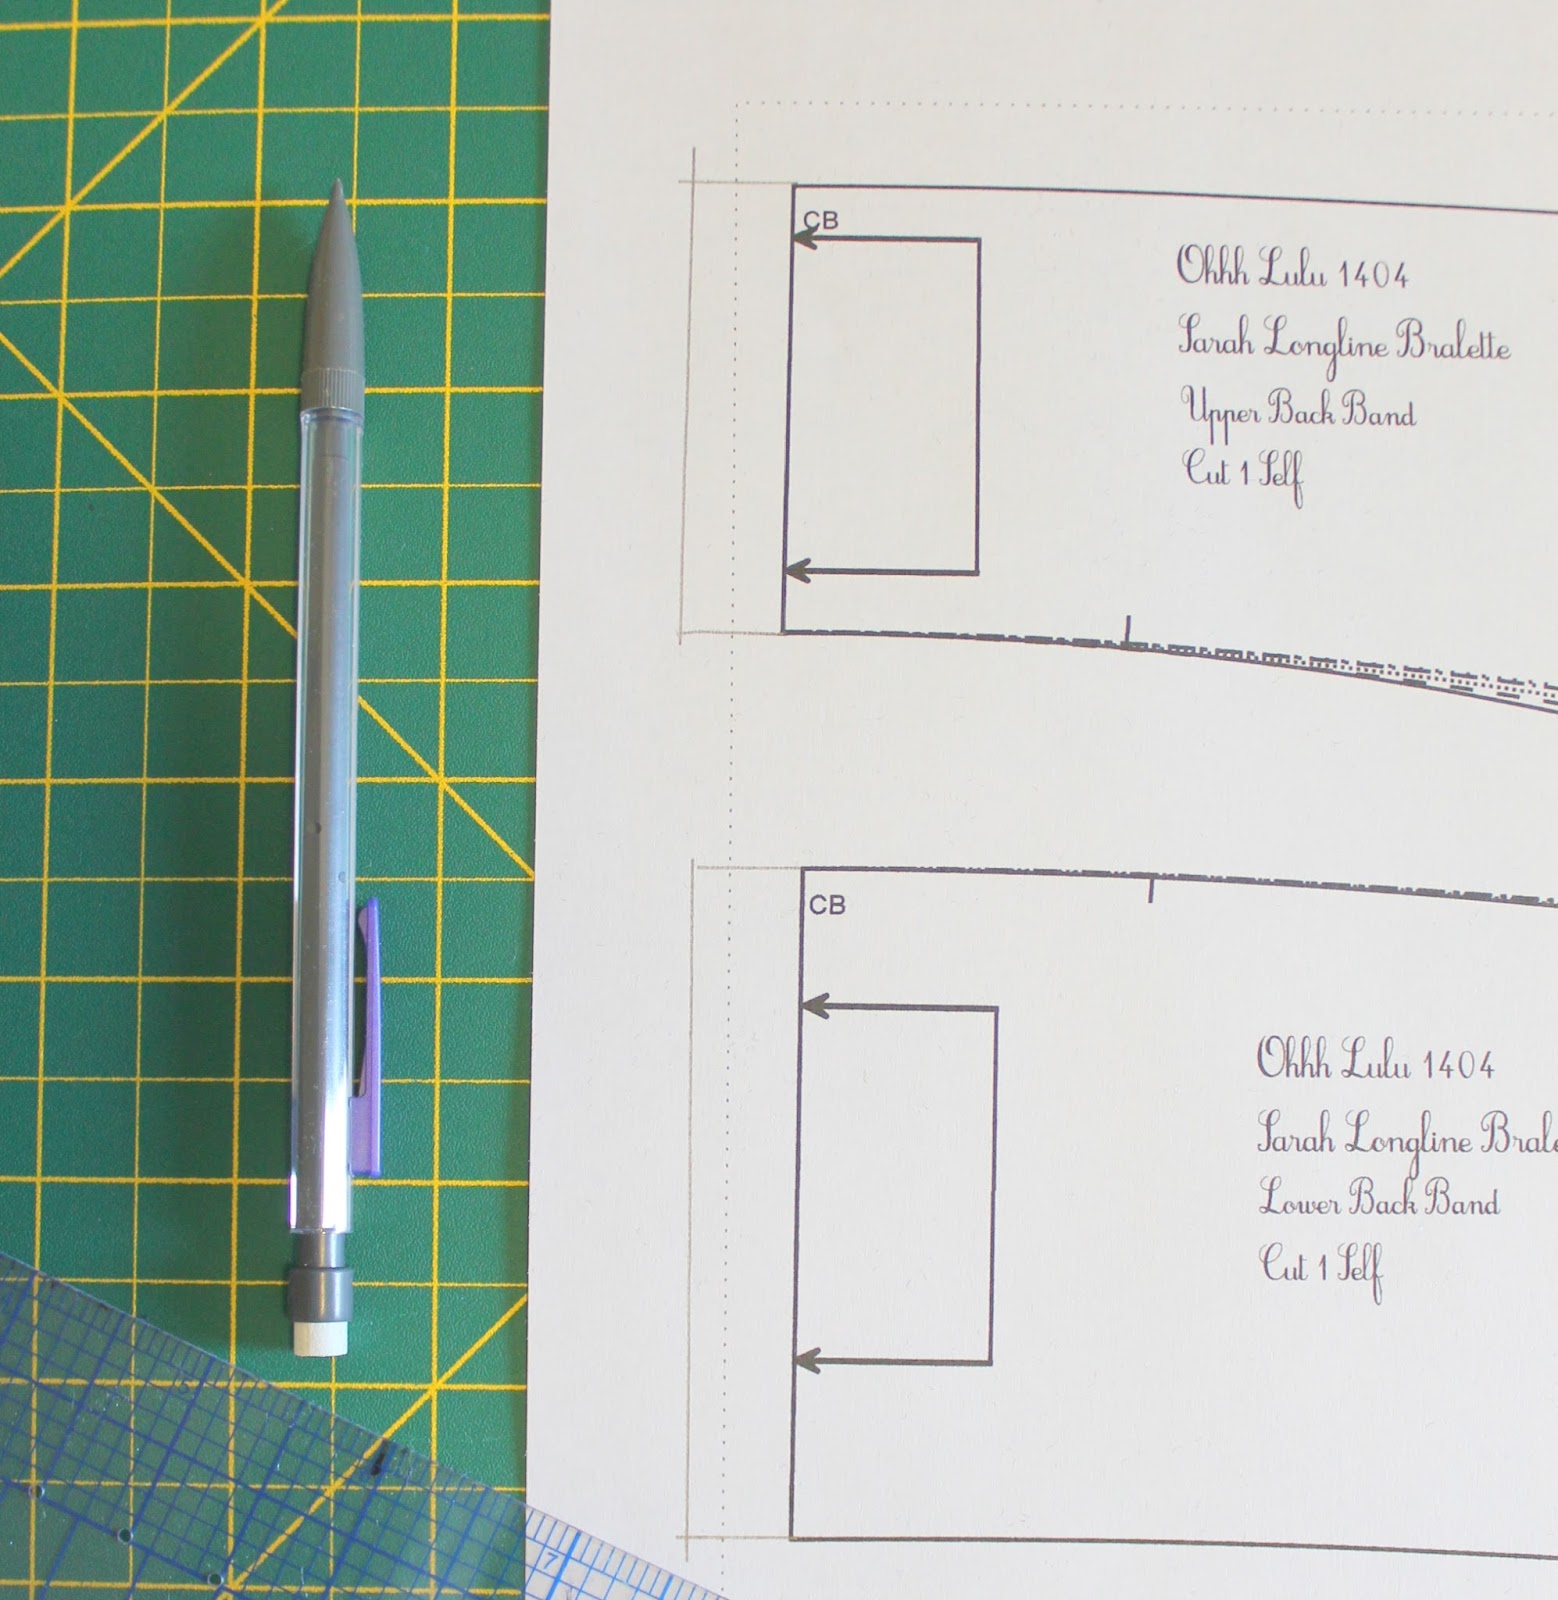
1. Print out your patterns.
2. Trim away margins where indicated.
3. Tape pattern together.
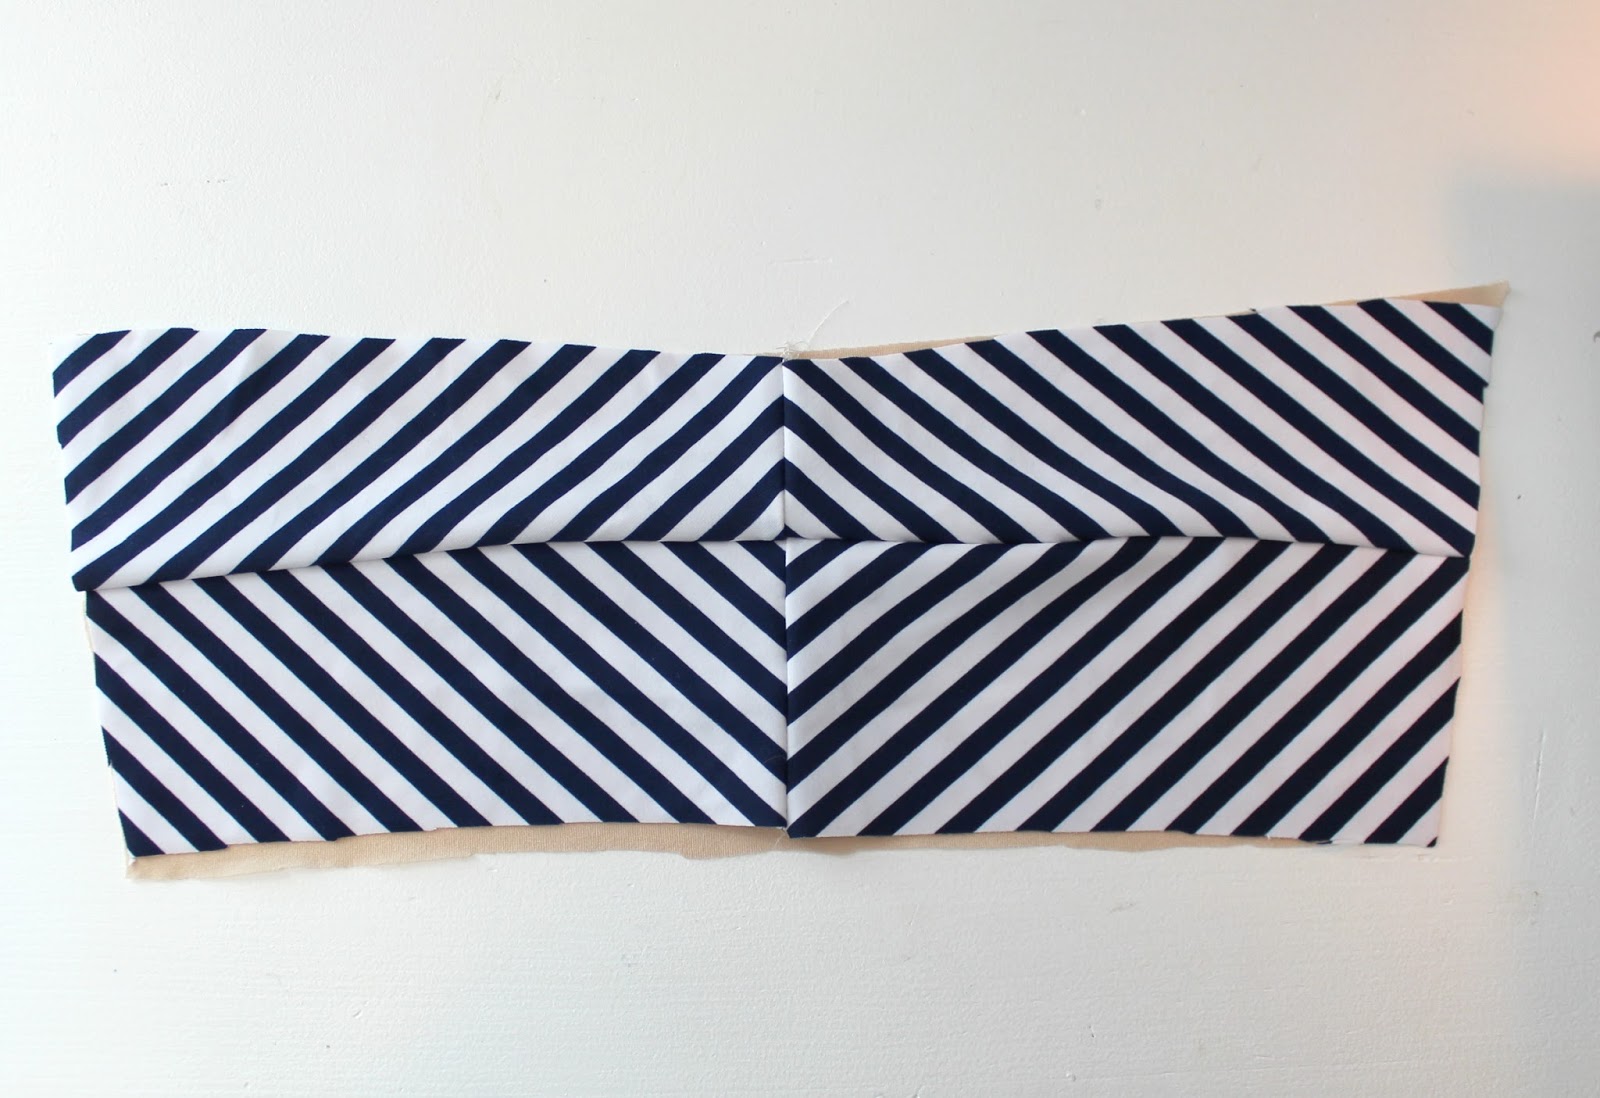
4. Optional: I wanted to have a diamond motif pattern layout on the back, so I added seam allowance to both my back pieces, instead of cutting them on the fold.
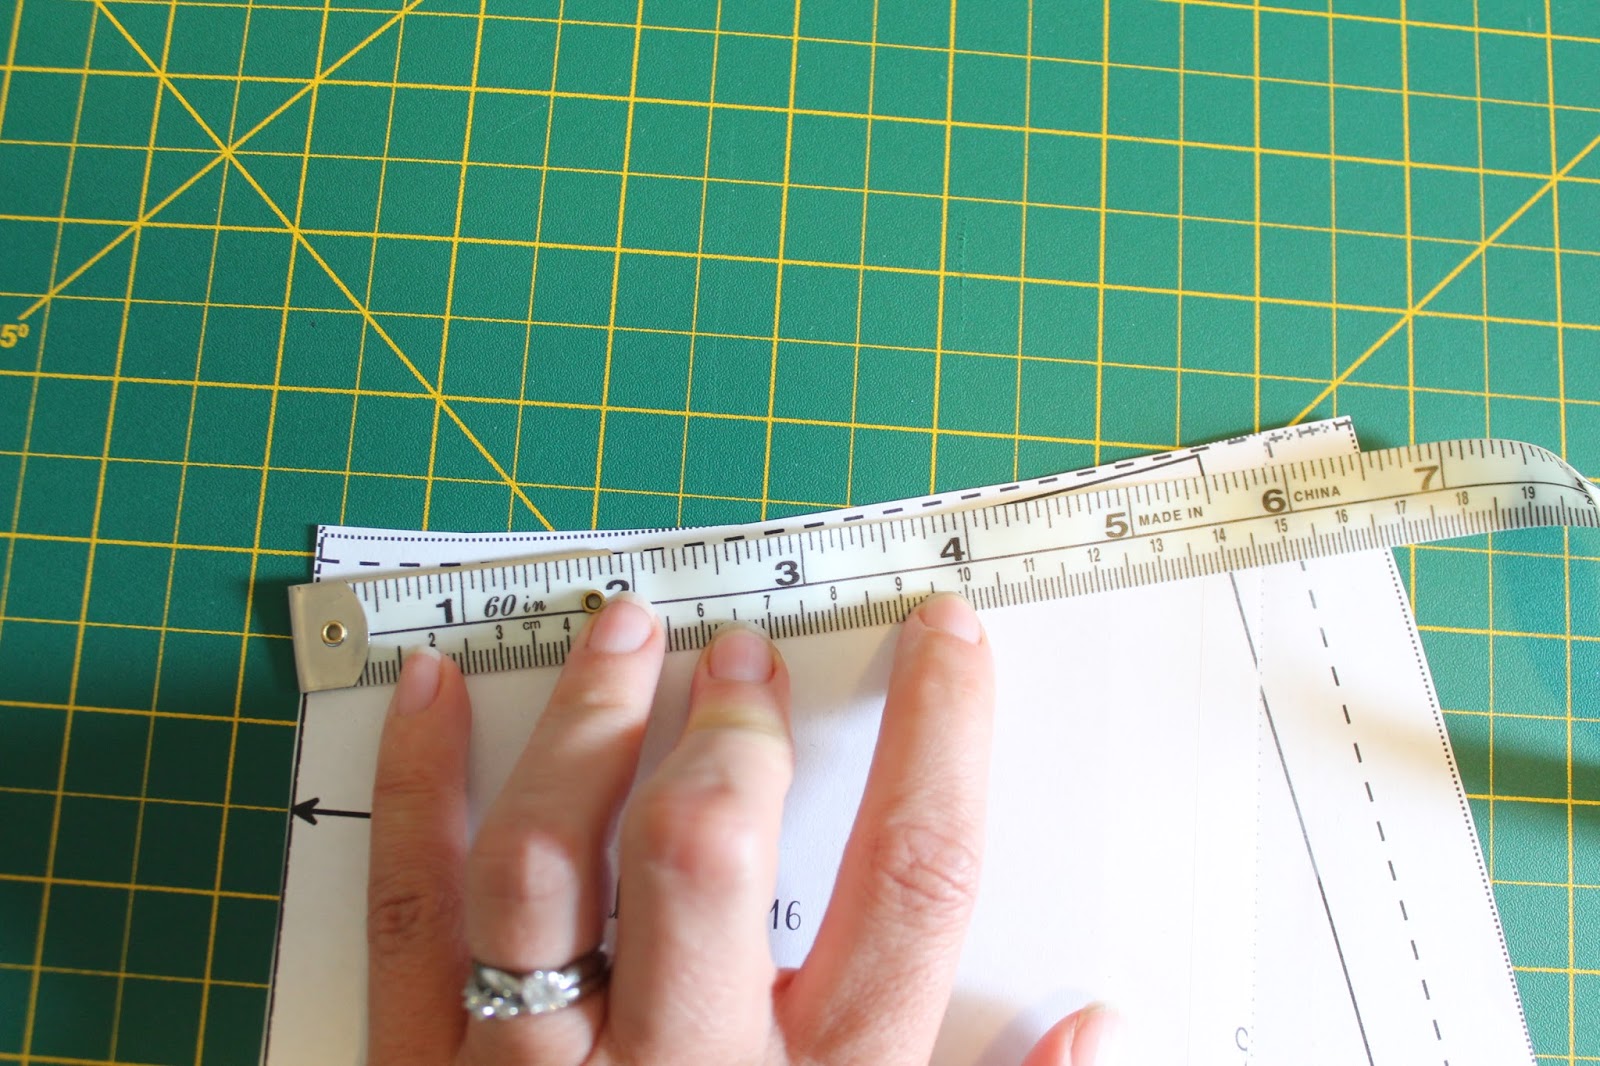
5. Make adjustments. I have a slightly larger cup size than what I’ve drafted this pattern for. All I have done is cut between a size small and medium. If you need a significant change to the bust area, you can slash and spread the cups to increase the size. You can also wing it, like I sometimes do, by just exaggerating the curve of the cup and adding some height. If you are more petite, just straighten that sucker out. Check out my tutorial on adjusting the cup size of my Jasmine Bra for some further instruction.
Cutting between a small and medium
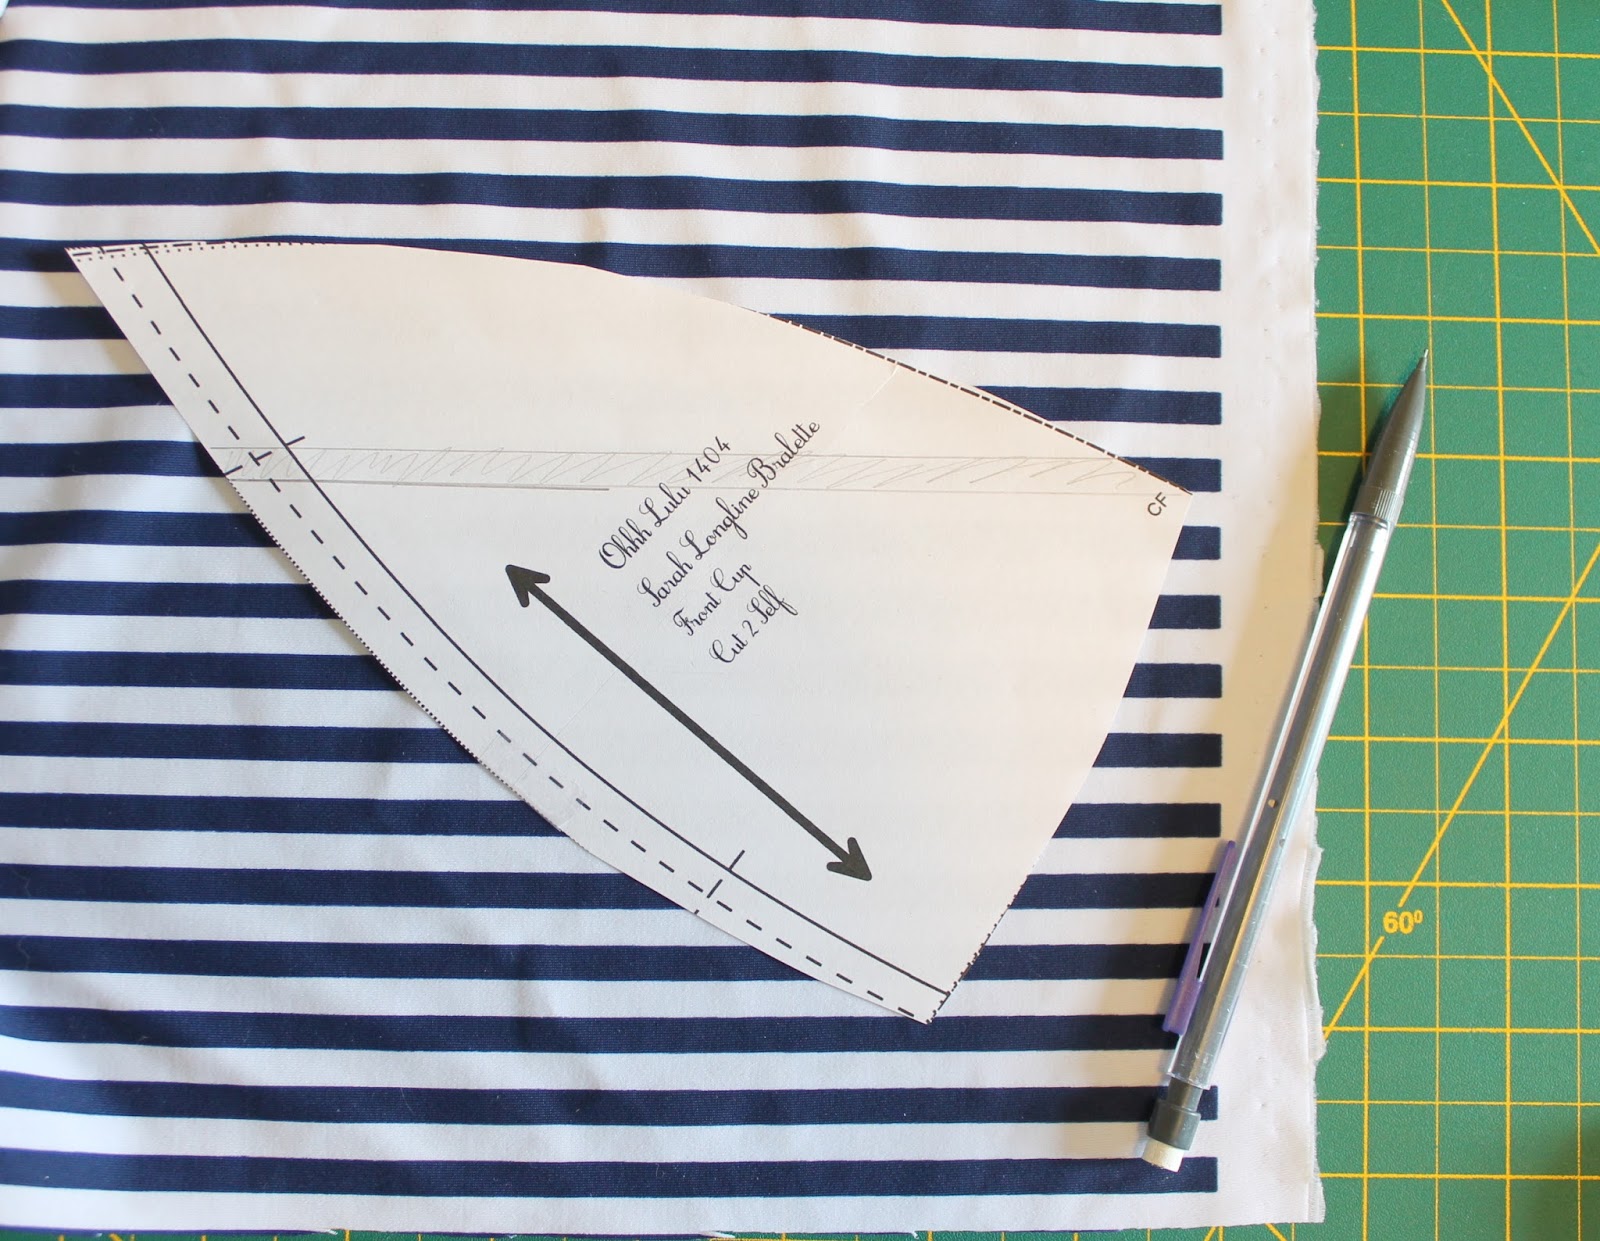
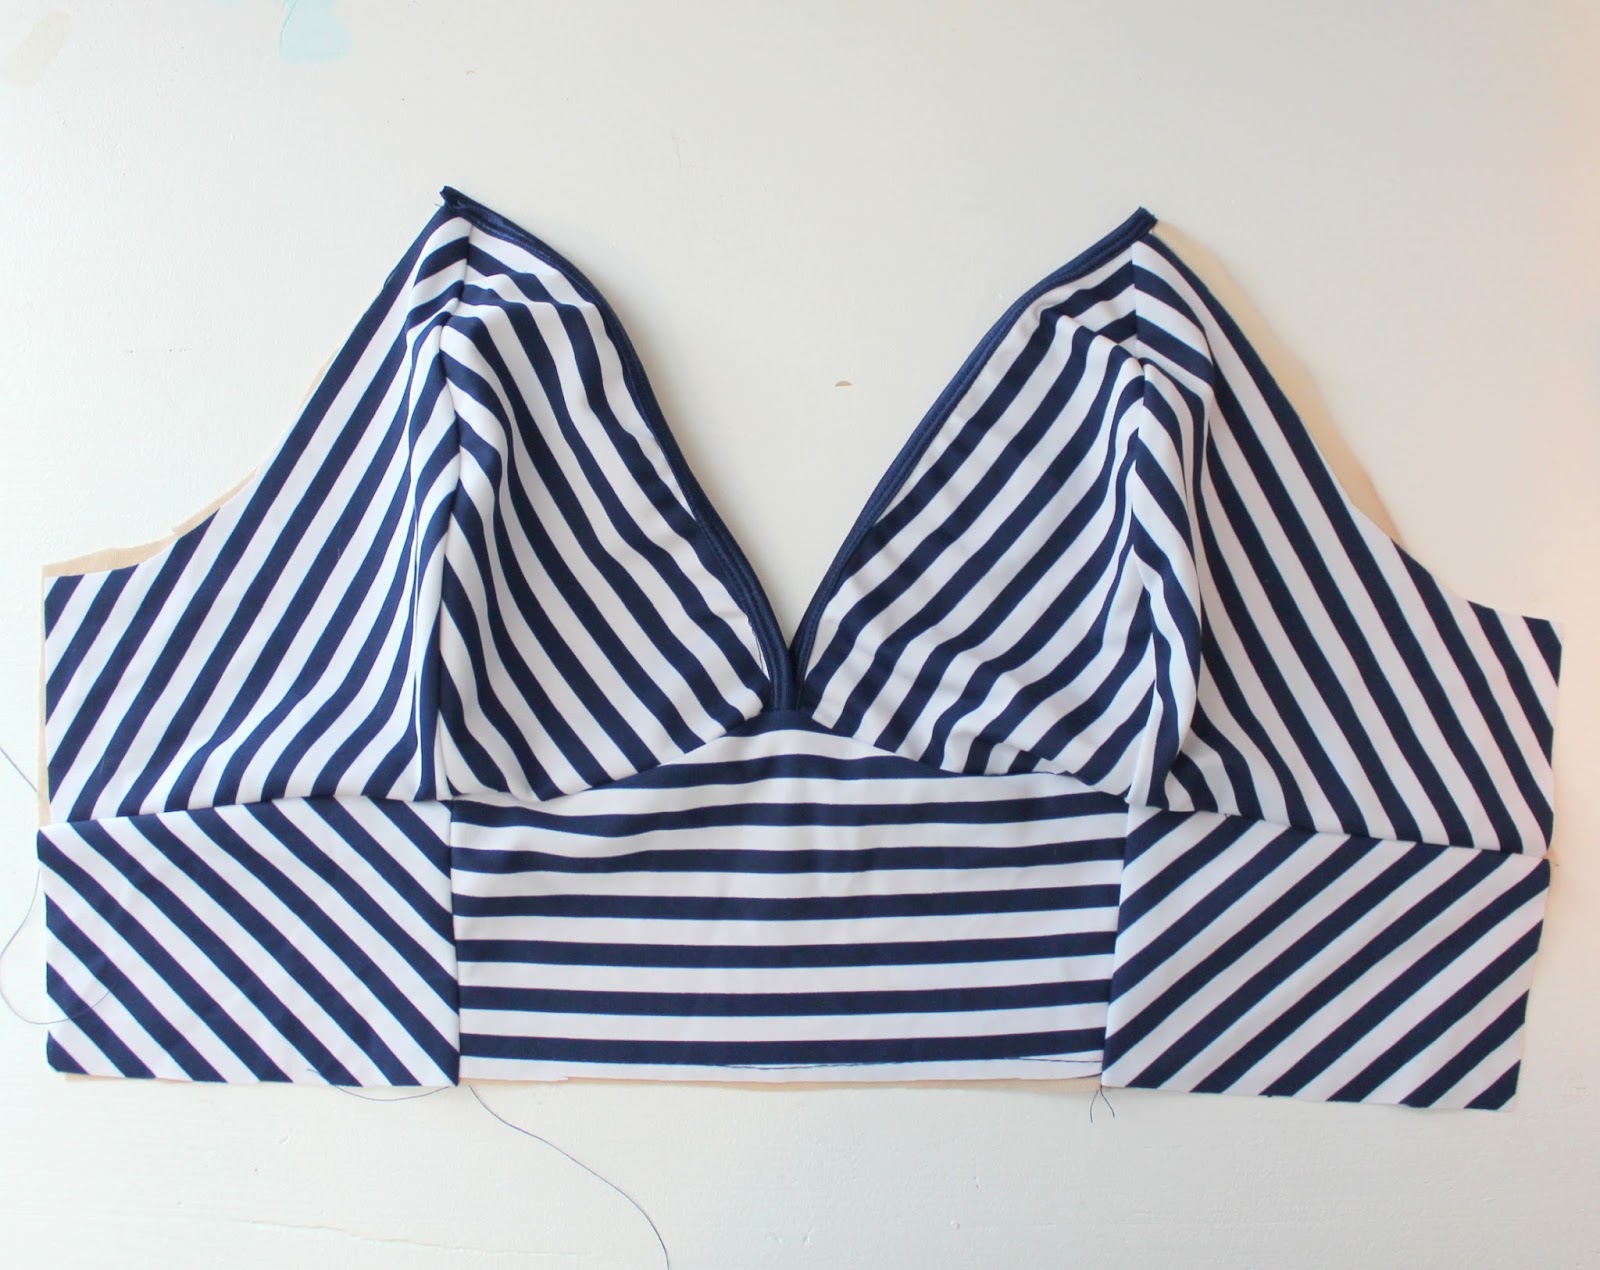
5. Optional Pattern Placement: I have drawn a line on my pattern pieces so I know where to place my stripes. I wanted to create a chevron motif over the bust so I took a little bit of time before cutting my fabric to make pattern placement indicators on my pattern pieces.
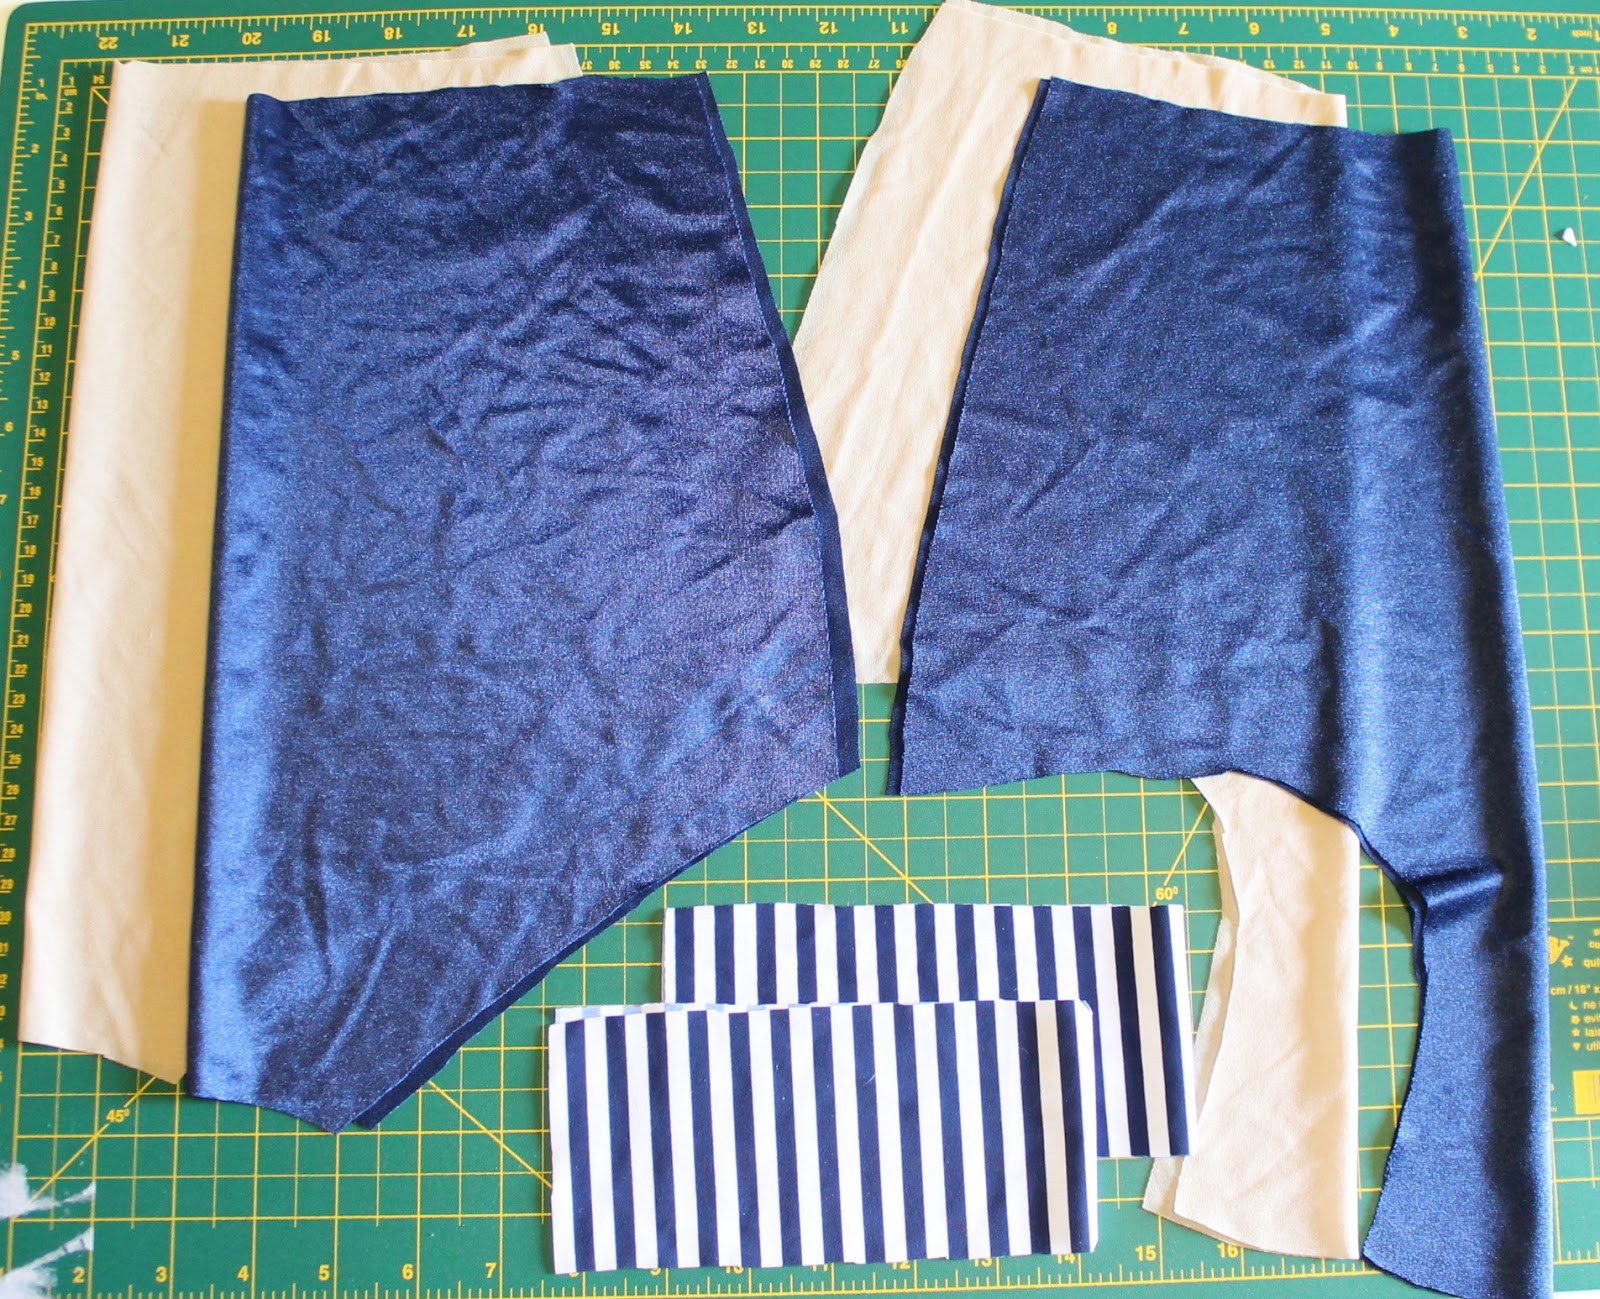
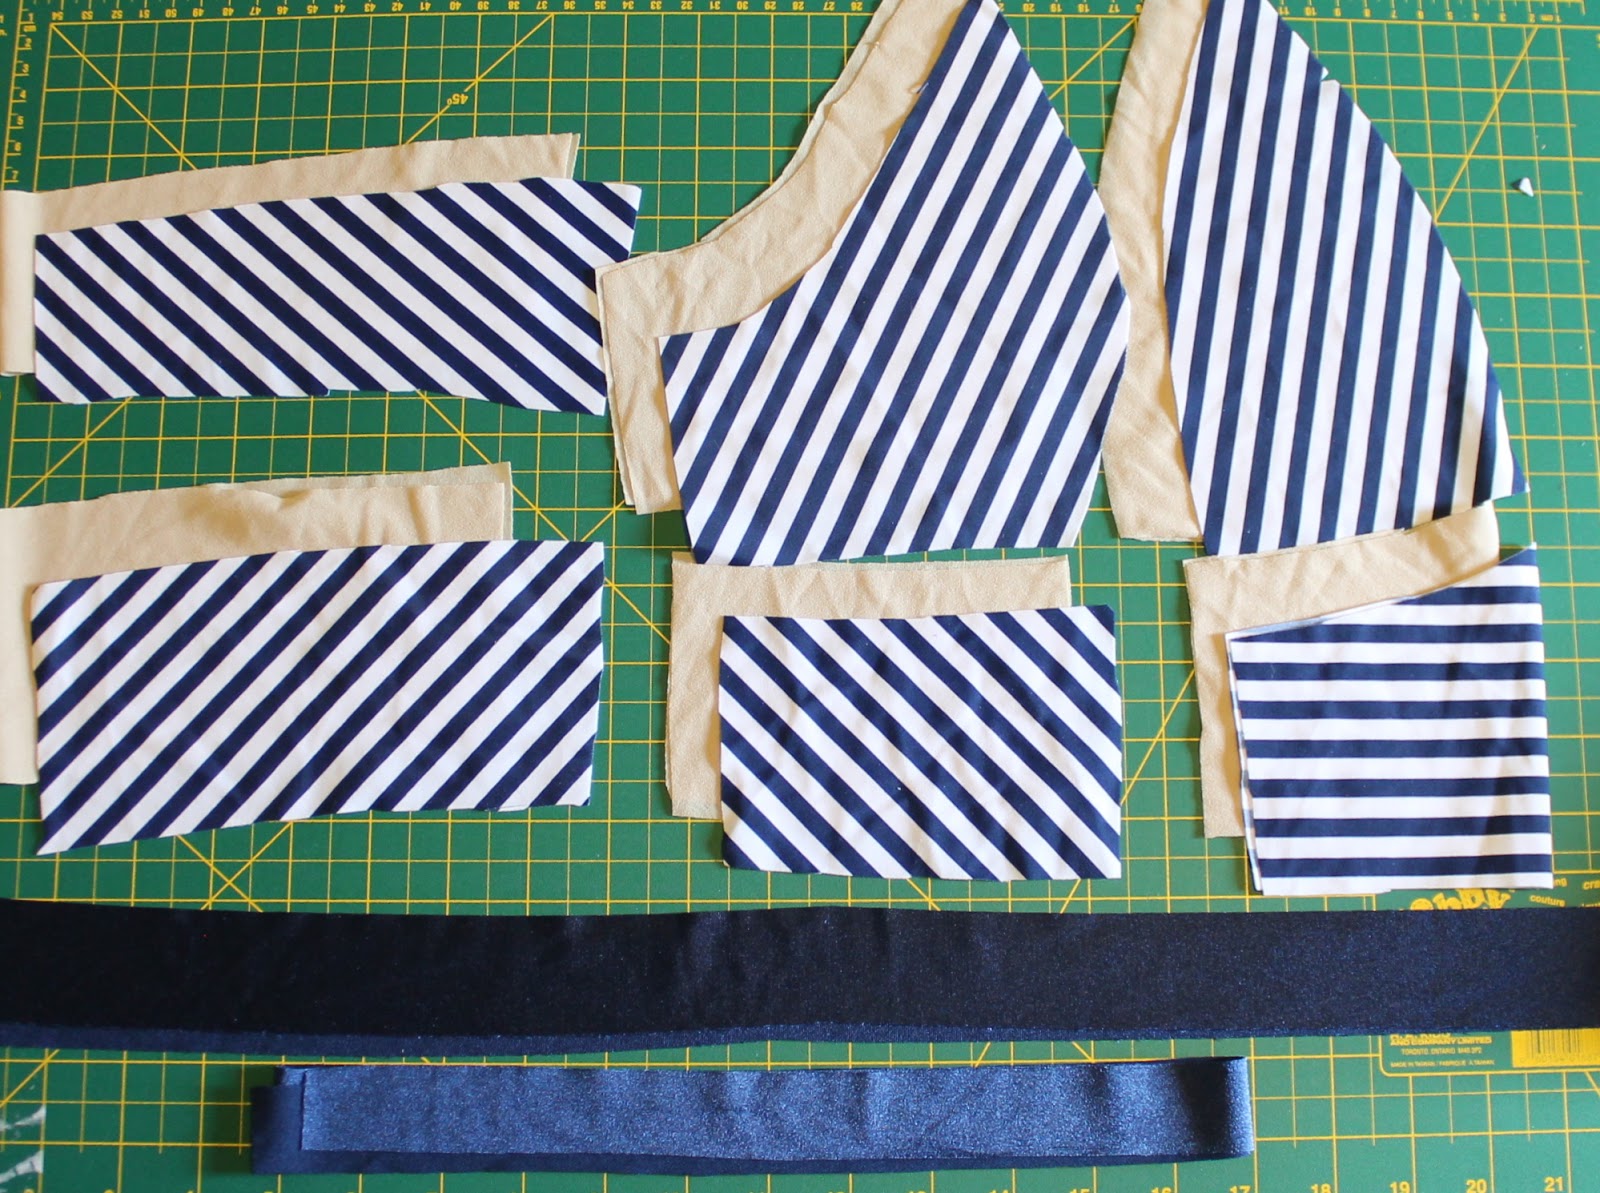
7. Cut your fabric! For a swimsuit, you’ll need to cut Lining & Swim Fabric. You don’t have to line the back, but I think it makes for a nicer suit.
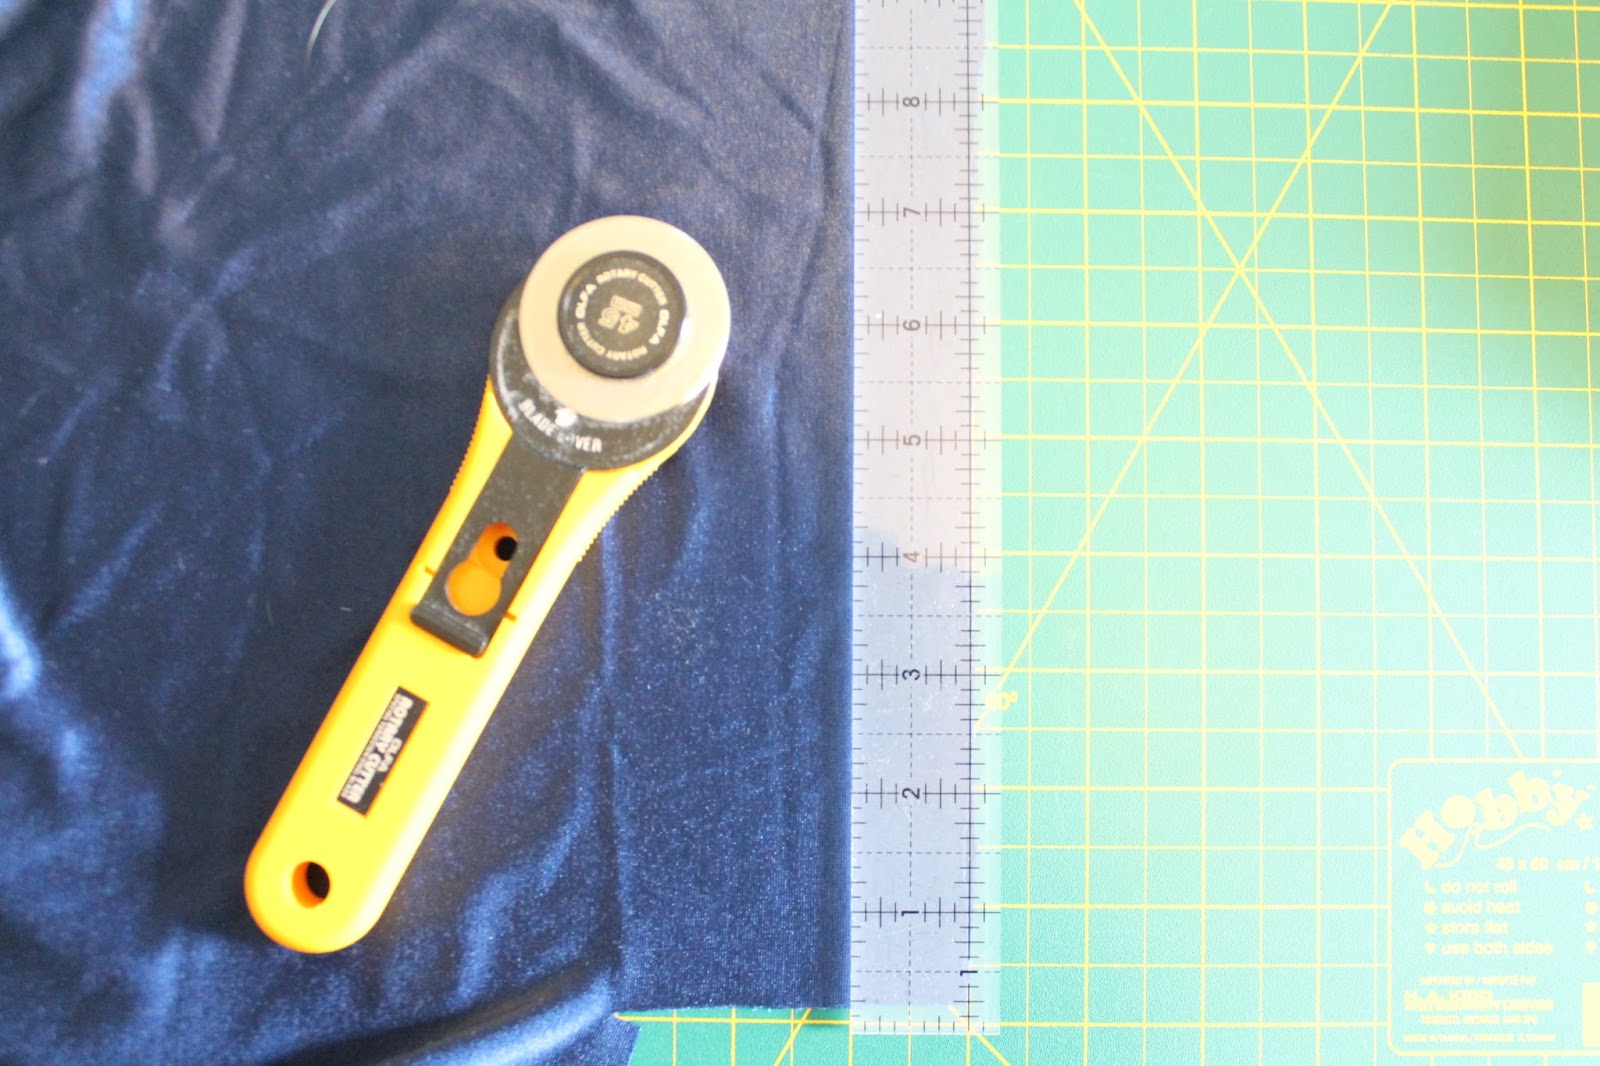
8. Cut your binding. Using a contrasting fabric, cut several long strips of binding (stretch should be going lengthwise). I cut mine in 1 inch strips, as I wanted narrow, quarter inch straps and binding. Cut accordingly! Using a rotary cutter makes life a lot easier.
9. Baste lining to Front Cup.
10. We’re going to line and sew our cup seams in one motion so that our seam is encased between the lining and swim fabric. Layer your pieces like so: Side Cup Lining, Basted together Front Cup (lining side down), finished with Side Cup (right side down). Sew your seam (1/2″ Seam Allowance). Why do it like this? This way your lining and exterior fabric won’t shift and you’ll have less seam allowance to worry about between your layers. I’m serging my seams, but you can also just use a zig-zag stitch.
11. Prepare your binding by turning under the raw edges by 1/4″ and pressing with a warm iron. Careful not to melt your farbric!
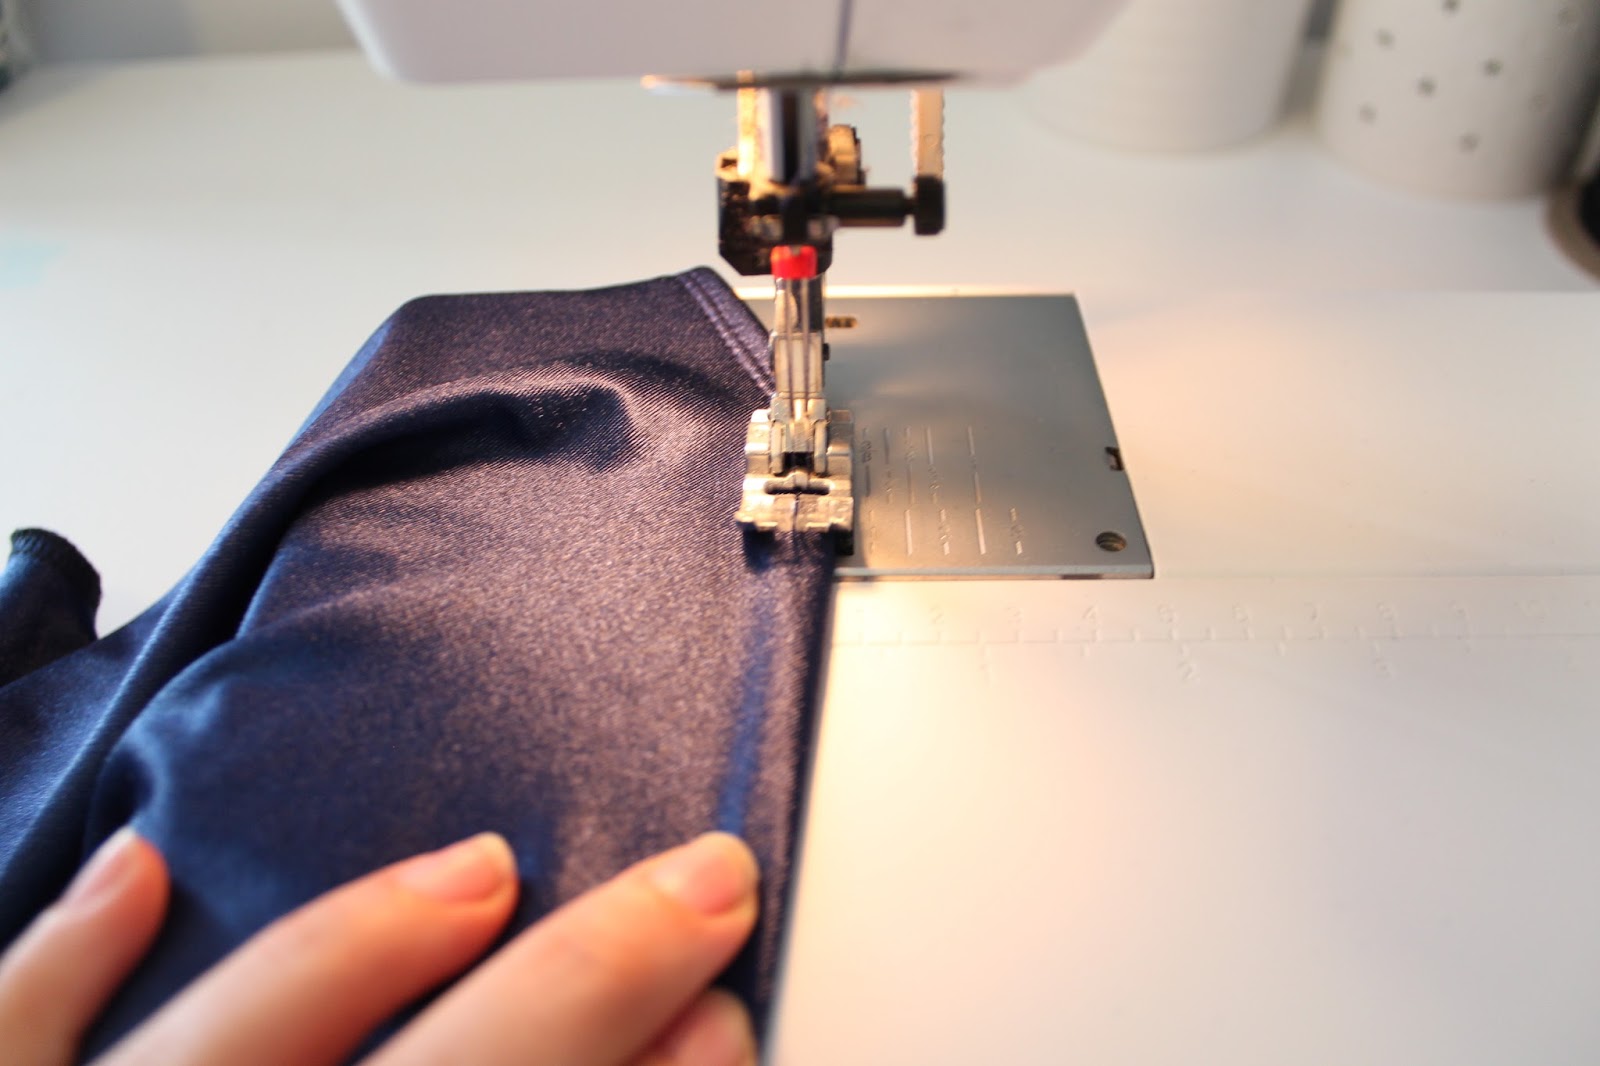
12. Baste Binding along front edge of cup using a narrow zig-zag stitch. Gently pull on the binding as you stitch. You wan the suit to contour along your bustline. When you’re done, turn the binding under and top stitch with a twin needle. If you don’t have a twin needle, you can also zig-zag stitch. The binding gets applied exactly the way you’d apply any binding (though I apply mine to the right-side first). I made a Video! Watch!
Raw edge trimmed back, binding is ready to be turned under and top stitched.
Twin-stitched binding.
13. Baste Lining to Center Front Band.
14. Just like we did with the cups, we’re going to sew our lining and exterior fabric in one motion. Layer your fabric like so: Side Front Band Swim fabric, Center Front Band Basted Piece (Swim Fabric Down), finished with the Side Front Lining. Sew your seam, and now your seam allowance is encased.
15. Stitch cups to Front Band
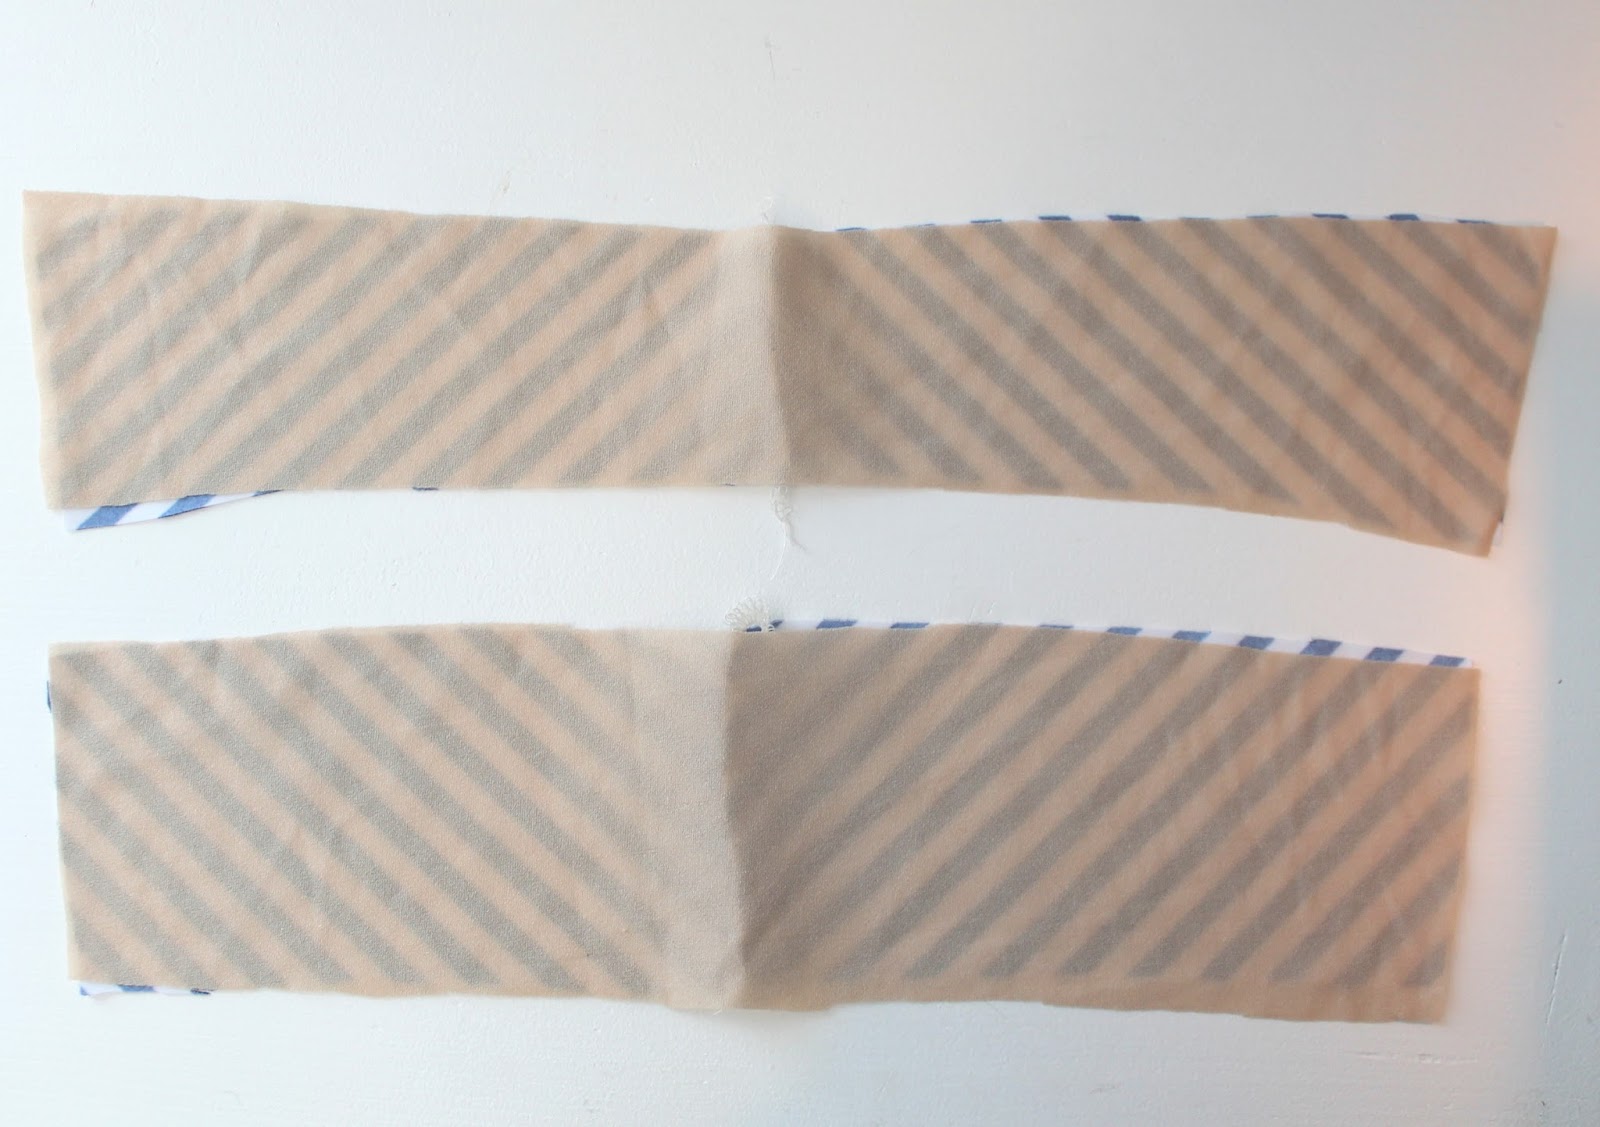
16. Prepare your back pieces. If you’re doing it like me, you’ll have to sew your Center Back Seams. Then, go ahead and baste your lining to your swim pieces. Stitch your Upper Back to your Lower Back.
17. Sew your side seams then try this baby on! If you’re happy with the fit, finish your seams by serging or zig-zag.
18. Apply Band Elastic on the inside of the garment using a wide Zig Zag stitch, as indicated in the pattern instructions. I have also made a video to show you exactly how to do it.
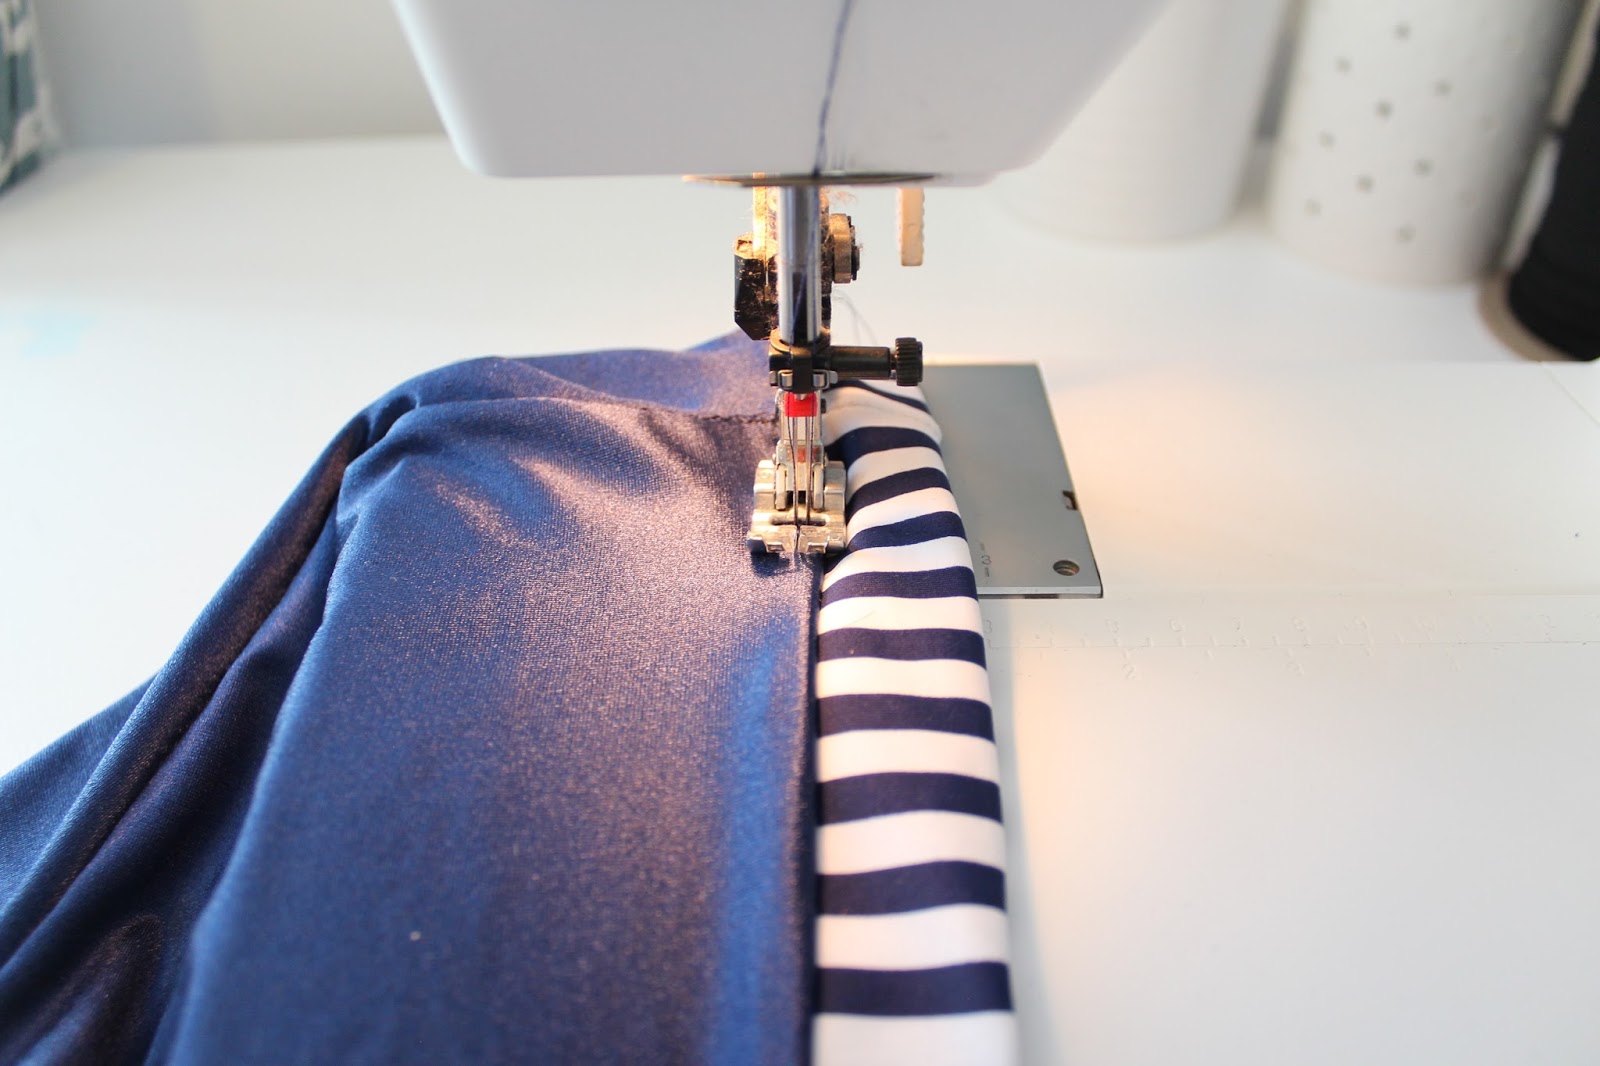
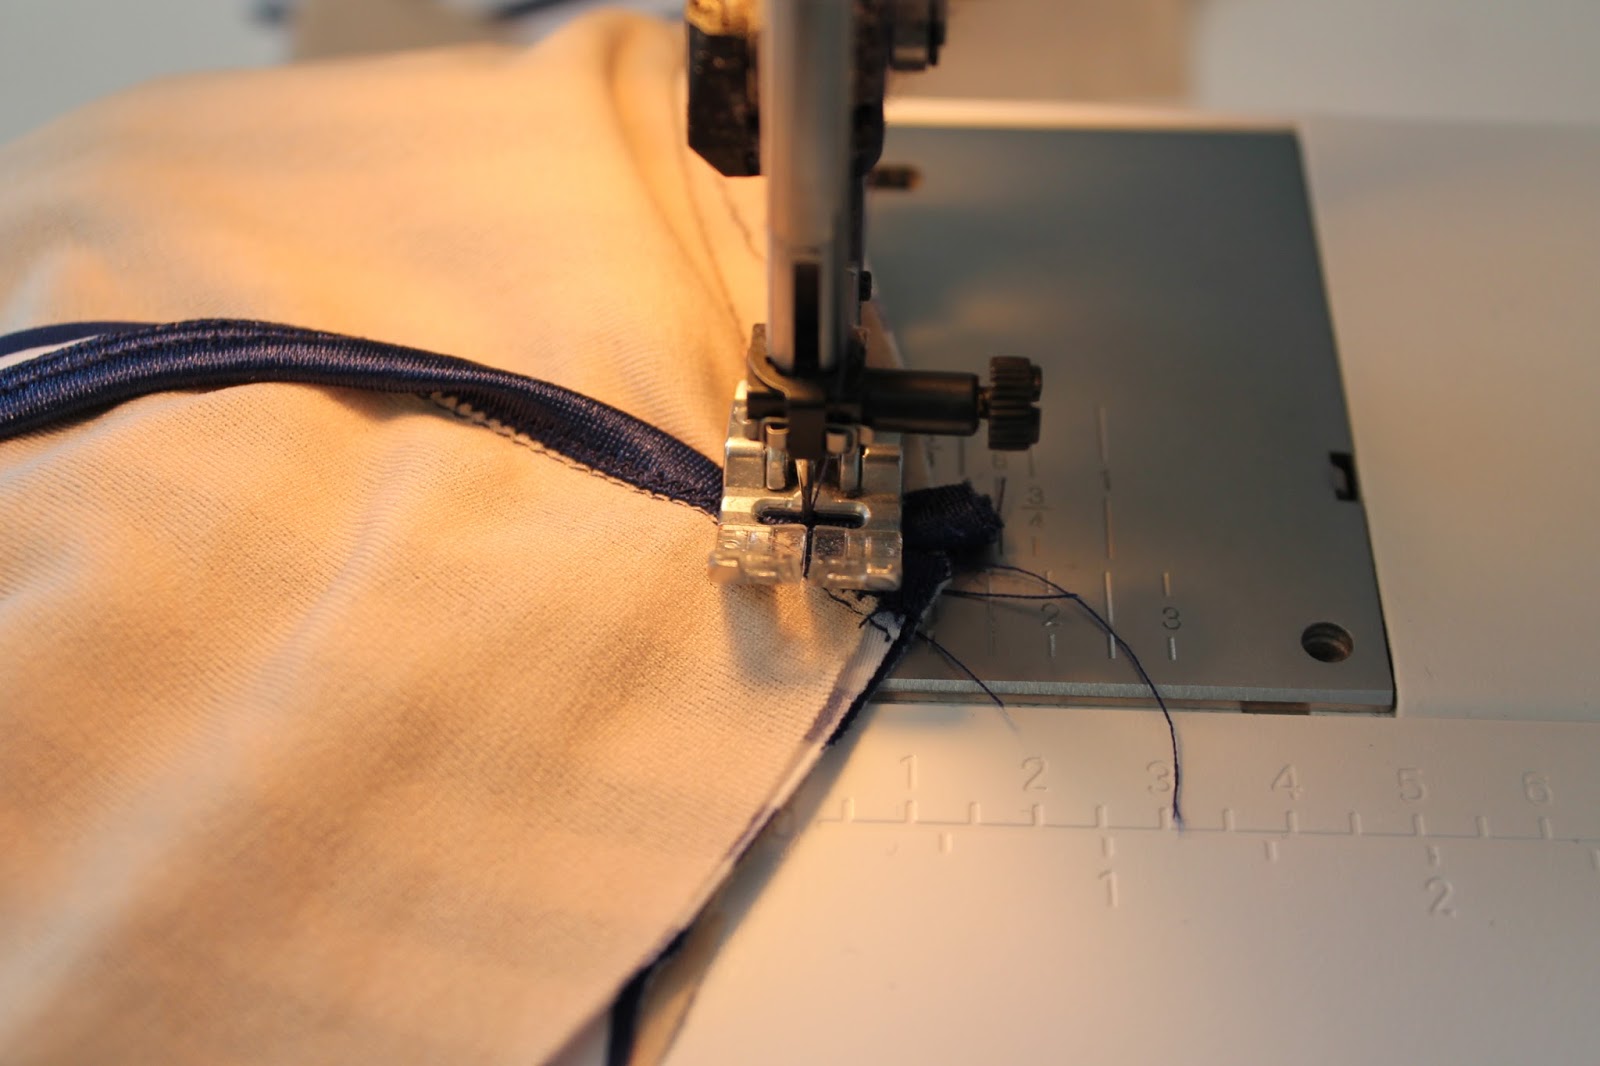
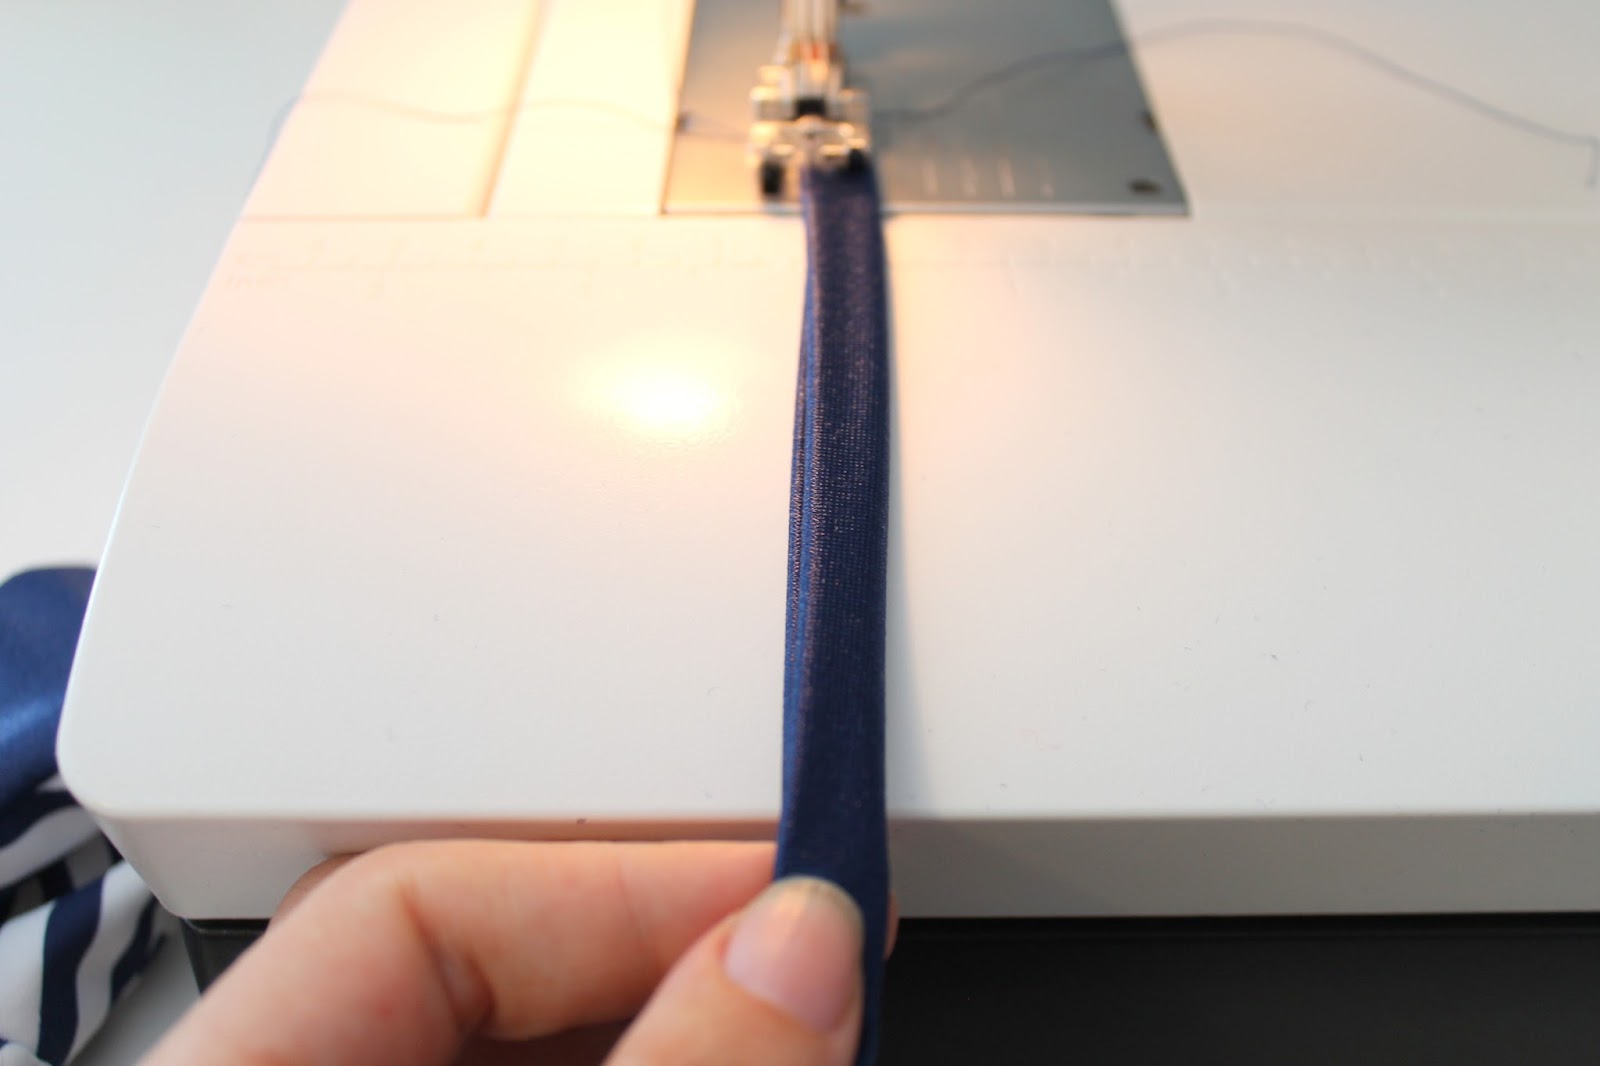
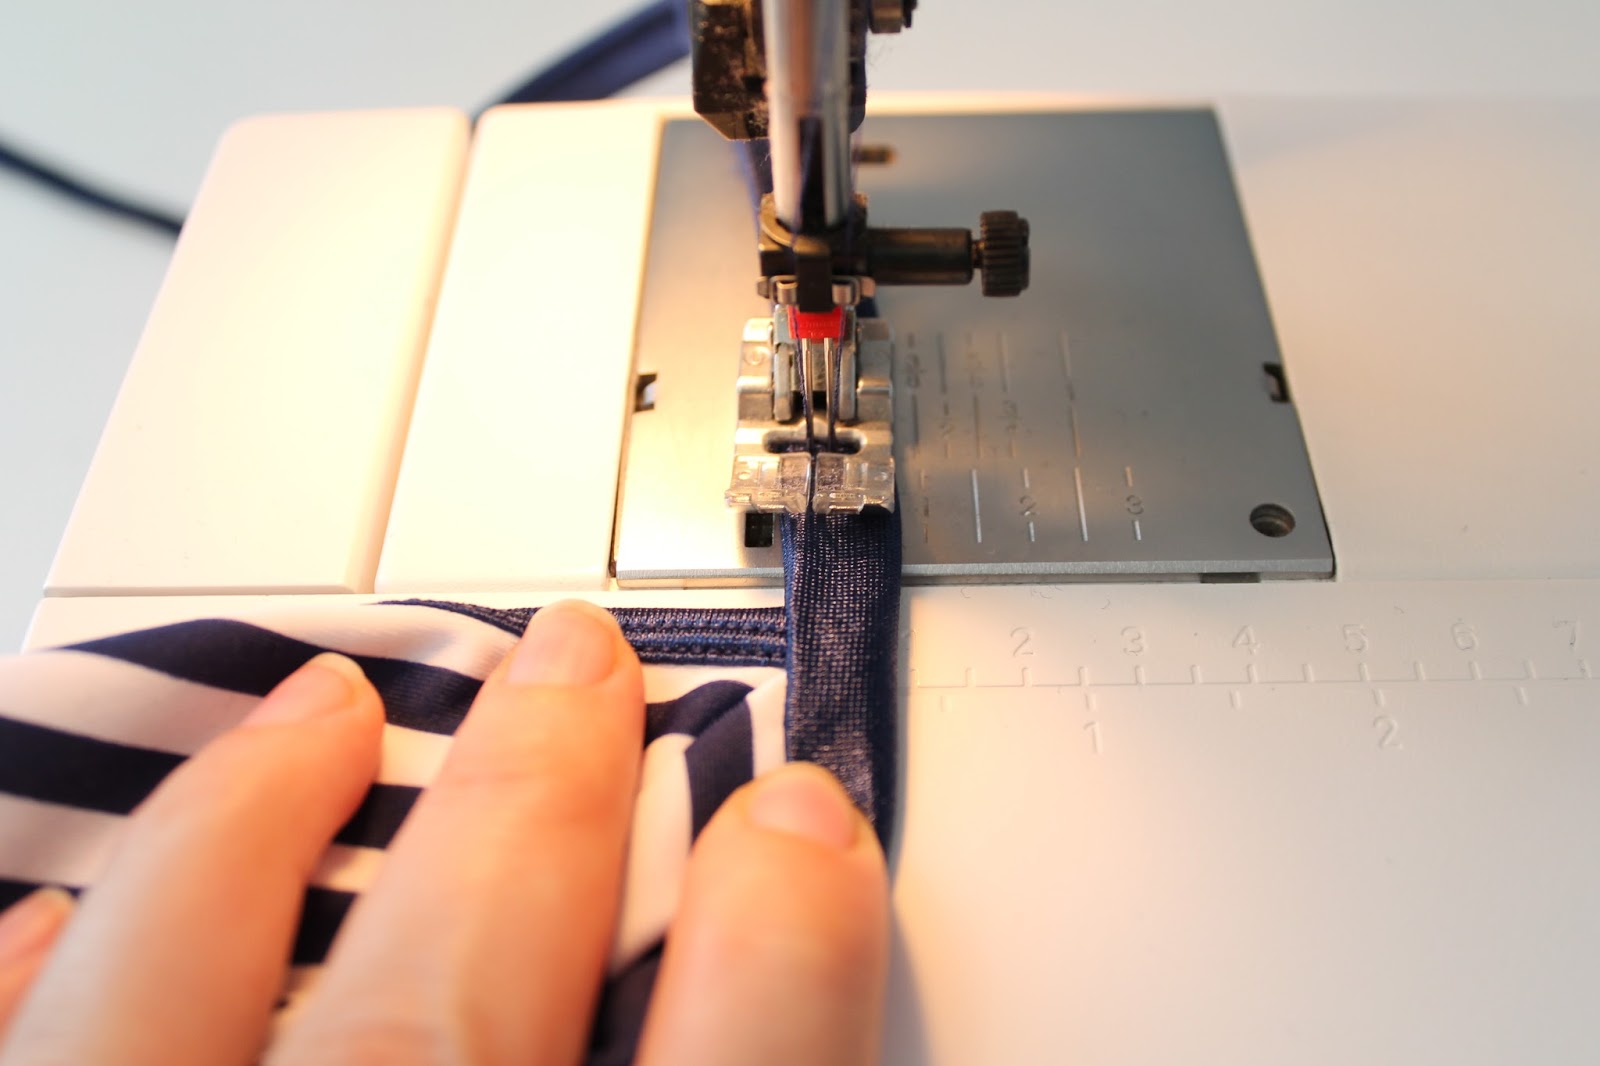
19. Now it’s time to bind the upper edge of our tops. I used a length of binding approximately 80″ long (I had to attach two pieces in order to get this length). I started basting on my binding approximately 31″ down the length of the binding – this extension forms your strap. You will be left with a long extension on the opposite end as well.
20. Folding your binding in half, and making sure all of the raw edges are turned towards the inside, top stitch with a twin needle.
21. Cut your straps so that they are both an even length and tie the ends into knots.
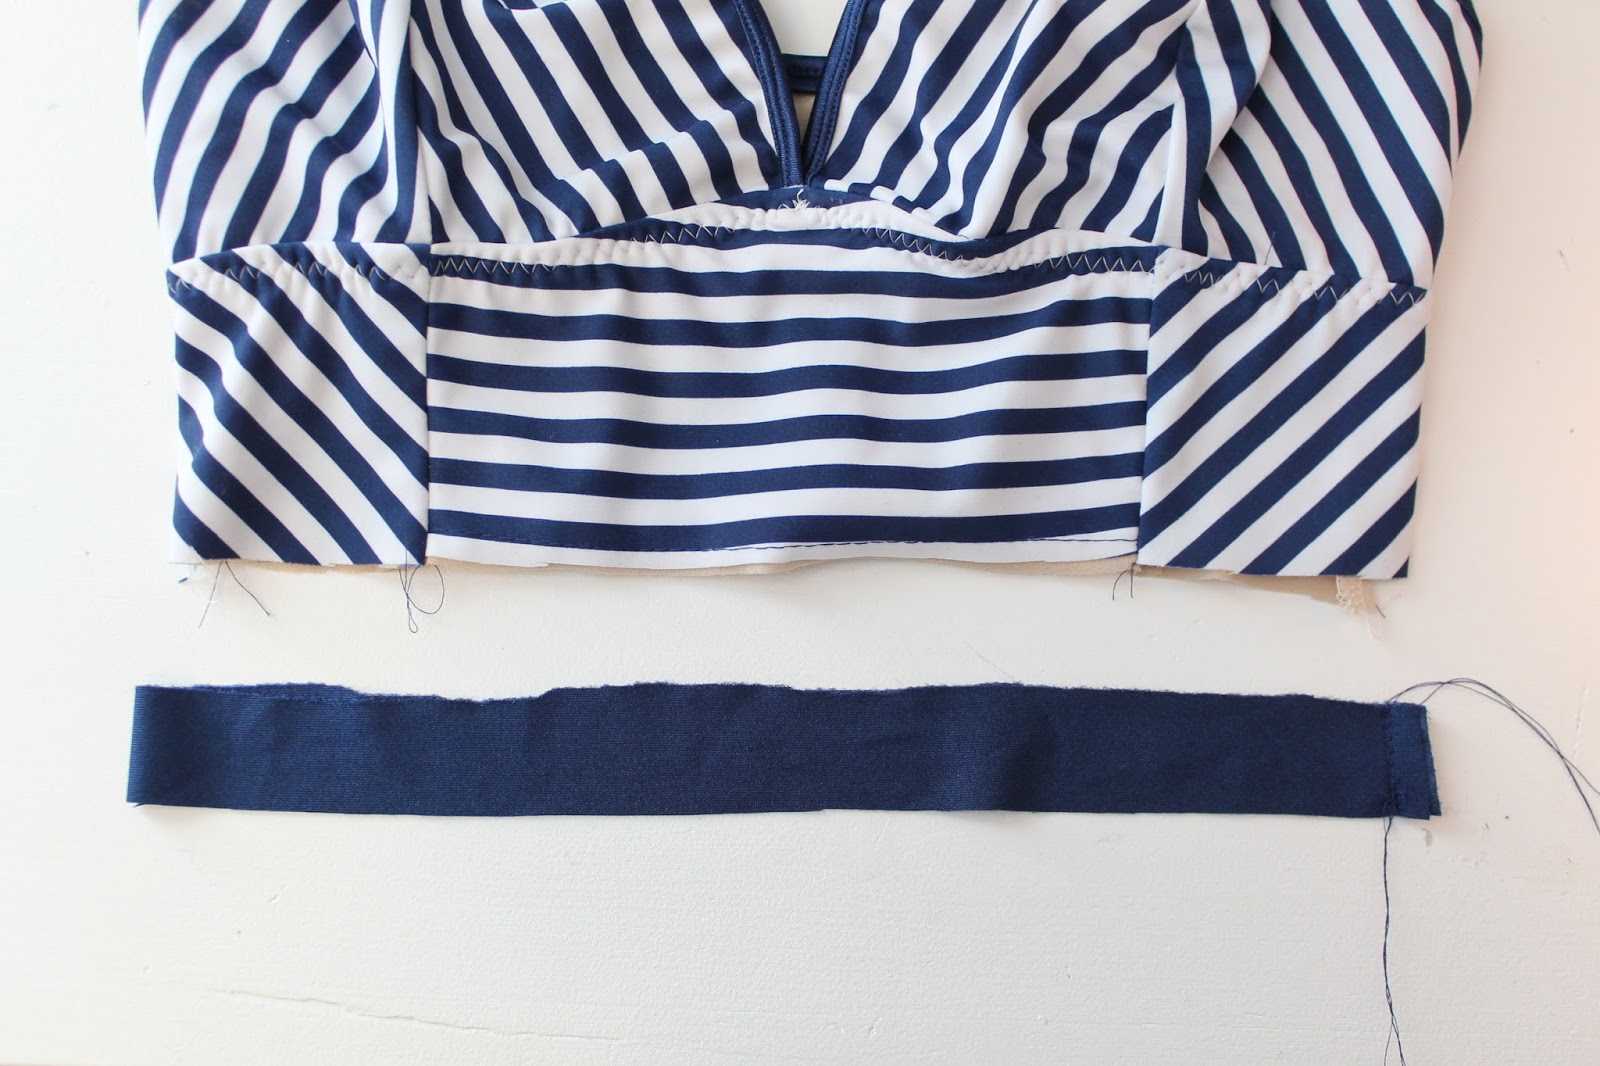
22. Cut a strip of elastic approximately the same lenth as the bottom of your top. Stitch it into a loop.
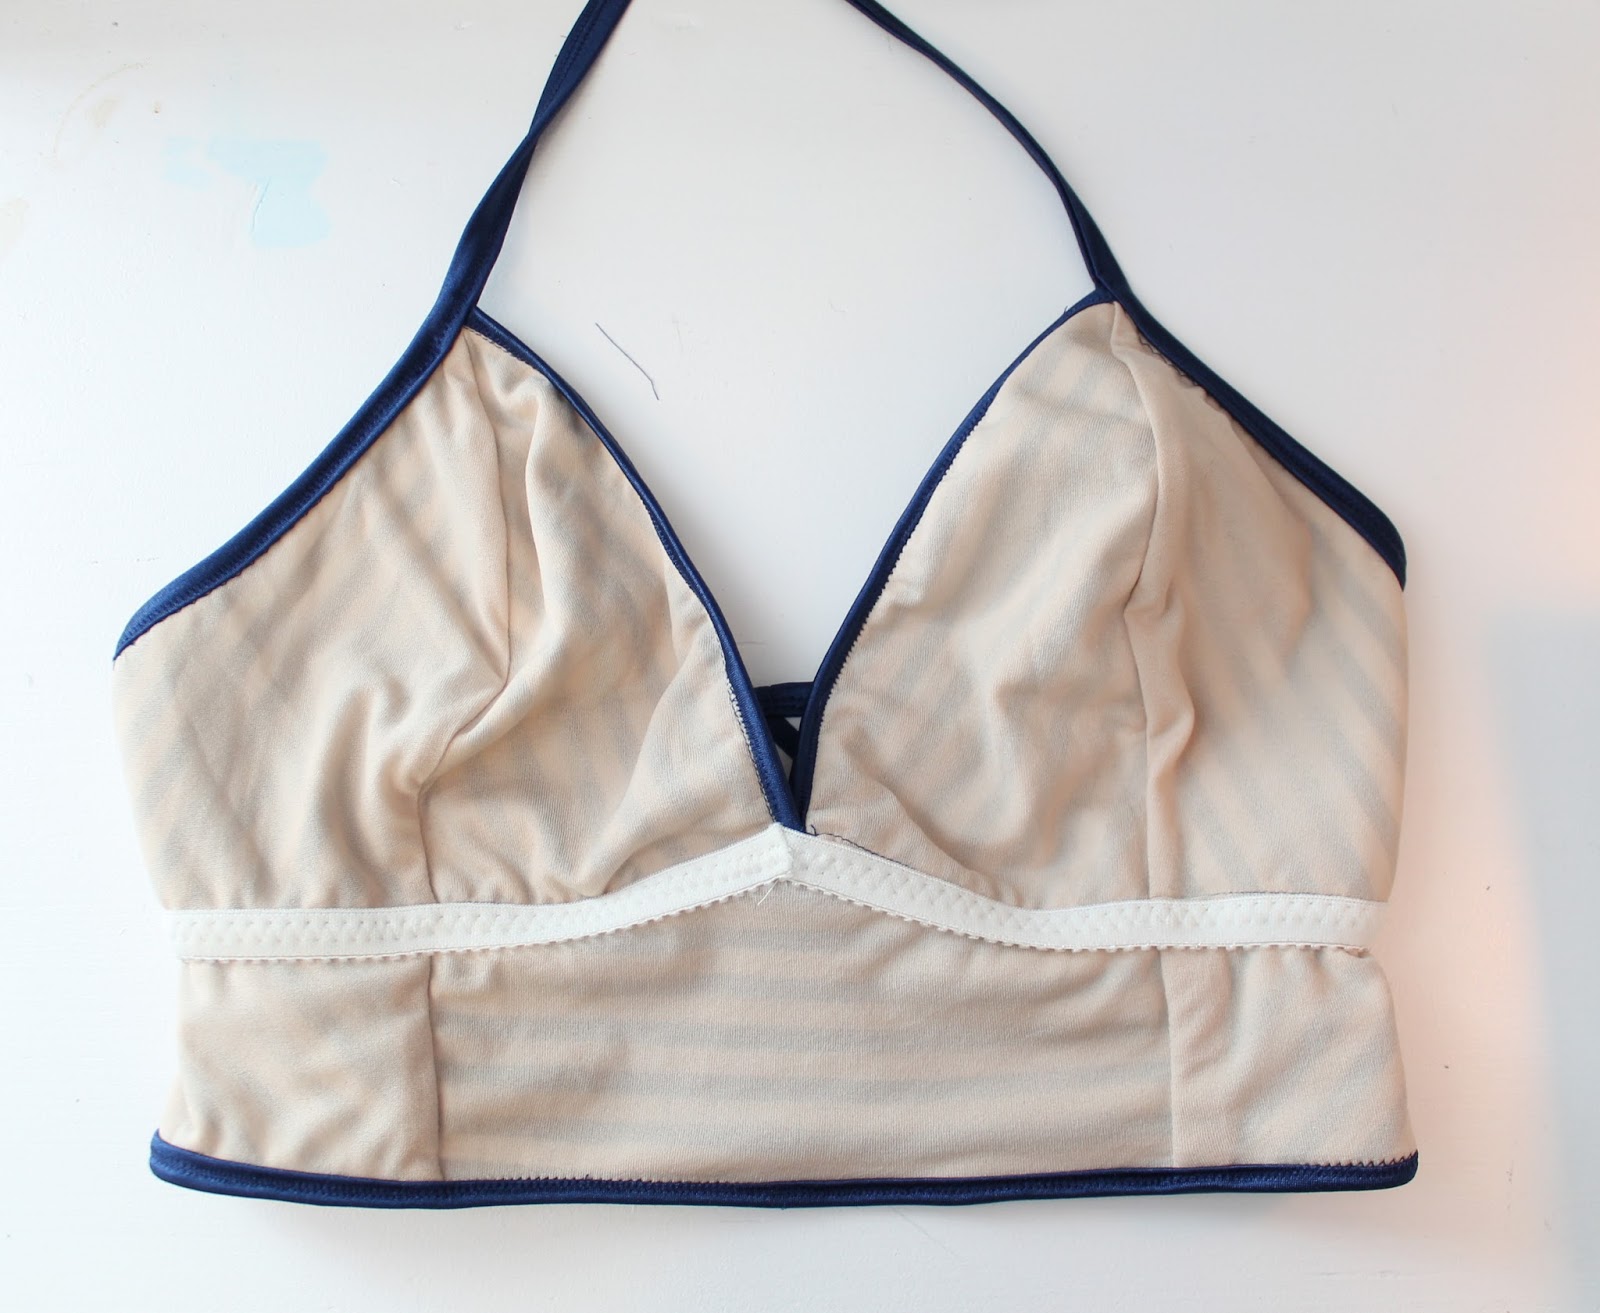
23. Pin the binding evenly around the bottom of your swimsuit top and baste on. Finish just like we did all of the other bindings by top stitching with a twin needle.
I’ll post the tutorial for the coordinating bottoms in a separate post!
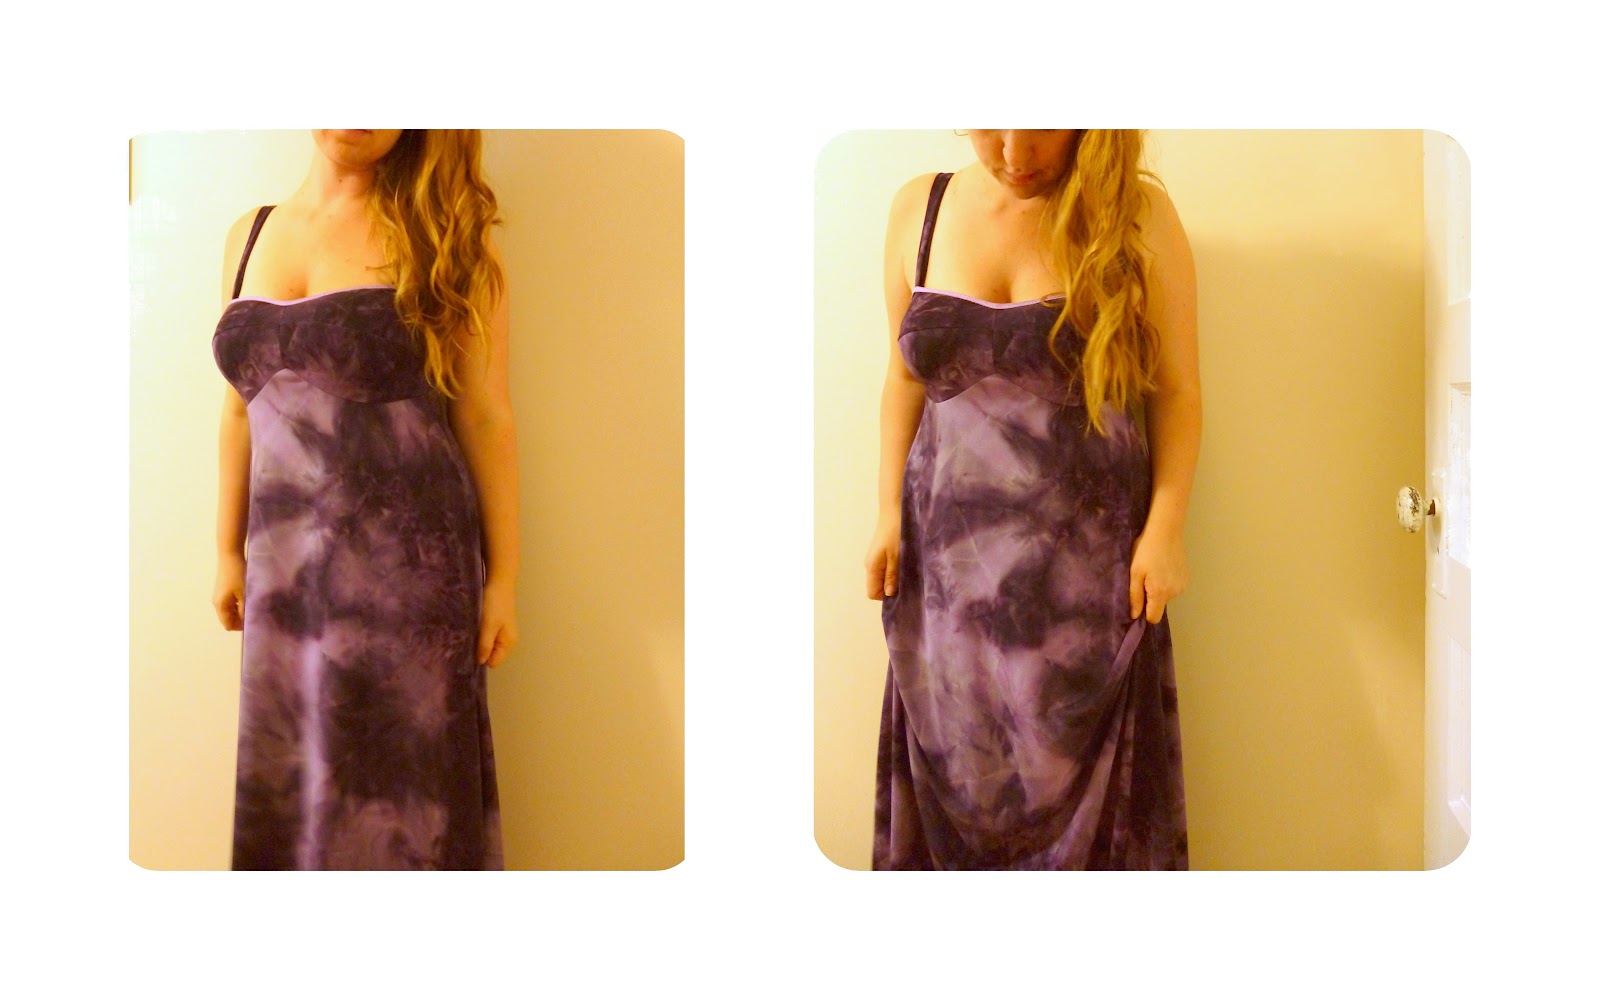
So I got this awesome tie-dyed knit in the clearance section last weekend. It’s been so hot here lately, maxi dresses have been the only thing I’ve wanted to wear. They are light and airy, cool, comfy, and look more put together than shorts and tank tops. I used the Ginger Pattern to cut this dress, with a very simple pattern manipulation.
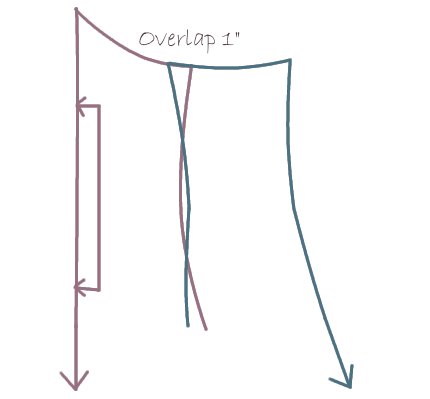
Cut the bust cups as you normally would – I did not line mine. I overlapped the Centre front and Side Front 1″ (because each piece has 1/2″ S.A.), and eyeballed how I wanted the side seams to lay. You could just as easily make this a princess seam dress. I extended my side seam down as long as I wanted the dress, gently curved the hem, then did the same to the back.
As I mentioned, I did not line the cups of this dress, I finished the edges with fold over elastic. You could just as easily line the cups alone, or simply fold under.
Depending on the type of elastic you are using, you will use different methods to apply the elastic. However, the basic idea is the same. Baste your elastic on, pulling gently to ensure a secure fit. Fold your elastic under, or over, and zig-zag stitch down, pulling flat as you go. When you finish, you want your elastic to pull your leg and waist opening slightly smaller – about 2″ depending on the resiliency of your elastic.
For foldover elastic -baste the elastic to the wrong side, as you would bias tape. Use a long zig-zag stitch.
Trim back any excess, fold over towards the right side, and zig-zag stitch down, pulling as you go.
If using a flat lingerie elastic, with or without a picot edge, baste onto the right side of your garment, pulling gently as you go. Stitch about 1/16″ away from the edge of the elastic, furthest from the edge of your garment. For instance, if you are applying a 1/2″ elastic to the waist band of your panties, baste on 7/16″ away from the seam allowance. Make sense?
Trim back any excess, fold your elastic under, and top stitch down.
Voila! Two easy ways to finish off your garments… And you’re done!
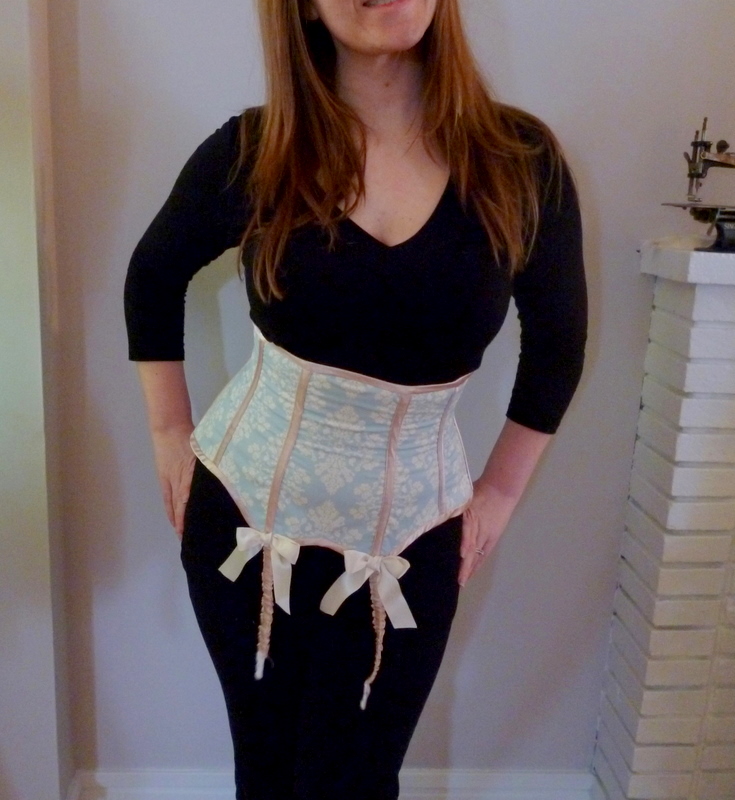
We have a saying around my house… “Bows make everything better.” Whenever I finish something that I’m not 100% thrilled with, my husband suggests I “slap some bows on it,” and you know what? It usually works!
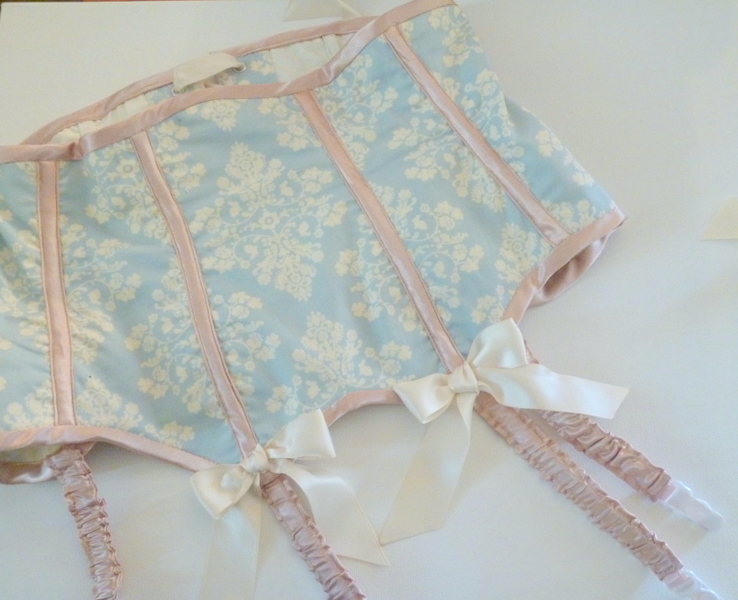
I am adding bows to the “points” on my corset above my garter straps. I’ll show you how to make 2 kinds of bows.
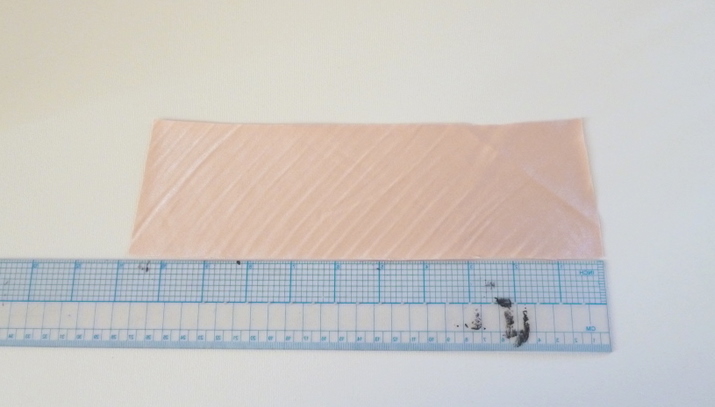
The first kind of bow is a sewn bow. Cut a large rectangular piece – I cut mine on the bias.
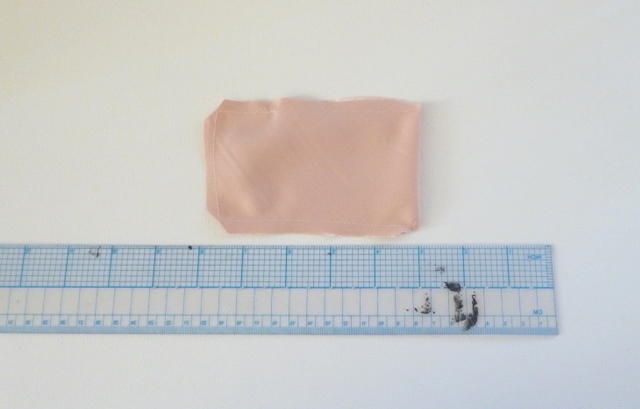
Fold in half length-wise and stitch around the edges, about 1/4″ Seam allowance, leaving a small gap where you will turn the rectangle inside out. Clip your corners, flip right side out, and pull your corners out with a pin.
Grab a piece of left over bias trim, or make a small strop of fold over bias tape.
Add a row of basting stitches down the center of your rectangle and gather, tying off both ends.
Sew your bias strip around it, forming a loop. I left a raw edge on the back of mine. This can then be hand sewn onto your corset.
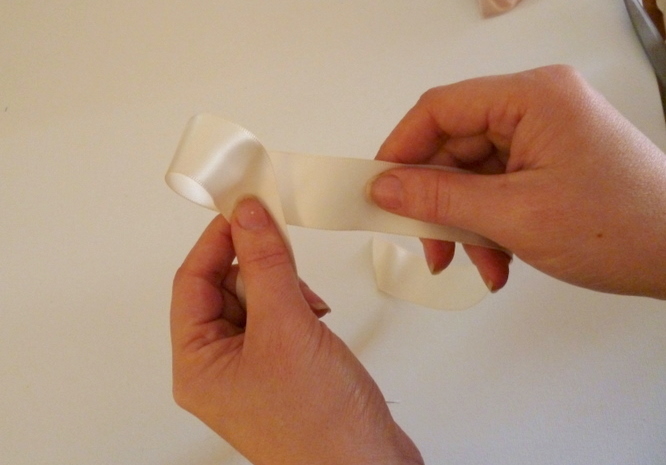
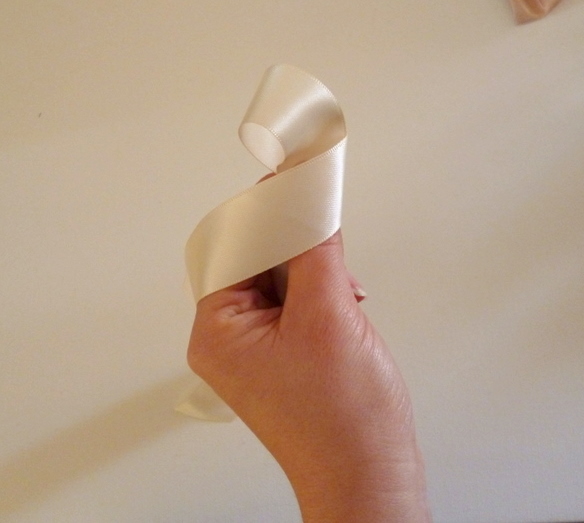
My favourite bow, the the bow I am using on my corset, is a hand tied ribbon bow. I took a piece of 1 1/2″ satin ribbon.
And tied a bow. Cut the ends on an angle, at equal length, and singe with a lighter. Give your bow a press with a hot iron (but not so hot as to melt the ribbon – always test on a scrap first).
I machine stitched my bows on, but you can also hand stitch.
Here’s my best pin up pose!
Voila! What kind of embellishments will you use on your corset?
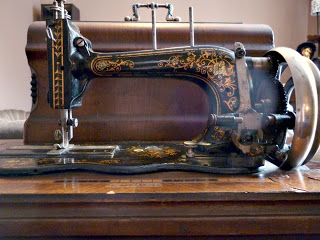
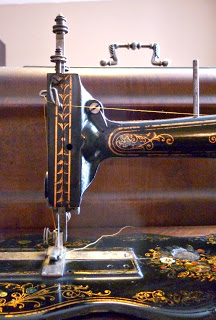
Ooohhh… Look at my Valentines Day Present! Isn’t it pretty? I got this today at an auction sale, along with some other goodies (a lamp and a table). I’ve been trying to research this well-loved sewing machine all afternoon.
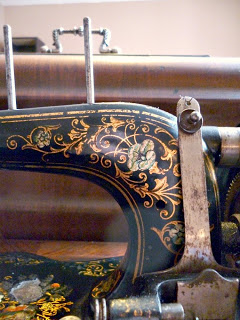
This sewing machine has no obvious identifying marks. I can see where there once was a name plate of some soft, but it has long fallen off… There is a number, “131693” stamped into a metal piece on the front of the machine. I can tell this sewing machine got a lot of use, as the gold detail is worn off where fabric would have passed over it, over & over again. An inlaid mother-of-pearl flower has also “Disappeared.”
It seems to be in working order, and came with one wound bobbin, in the shuttle already in the machine. I haven’t threaded it yet, but have oiled it up and all of the parts move as they should.
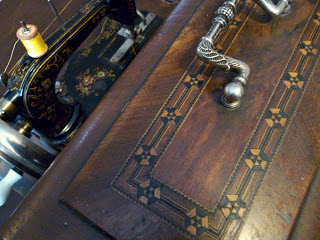
The case it came in is beautiful on it’s own – inlaid along the top, and with a beautiful silver handle.
I’ve scoured the bottom of the machine, underneath the machine, inside the case, everywhere – to see who made this machine so I could try to date it, but nothing! I am told it is a German make, and it does resemble the Frister and Rossmann or Herman Kohler machines. I think it looks to be anywhere from 1880 to 1910. What do you think?
I just love old sewing machines… I can’t help but daydream about the woman who had used it before me… what she might have sewed, and for who… what her life was like. I am so excited to get this machine threaded up, and bring it back to life again!
We also picked up this rather unusual lamp… It’s only about 5′ high and has a long tassel pull on it. I think we are going to paint it white. It has made it’s home (for now) next to a lovely old wing-back we got from Dan’s Grandma, which she had upholstered in beautiful grey cut velvet damask.
We use cookies on our website to give you the most relevant experience by remembering your preferences and repeat visits. By clicking “Accept All”, you consent to the use of ALL the cookies. However, you may visit "Cookie Settings" to provide a controlled consent.
This website uses cookies to improve your experience while you navigate through the website. Out of these, the cookies that are categorized as necessary are stored on your browser as they are essential for the working of basic functionalities of the website. We also use third-party cookies that help us analyze and understand how you use this website. These cookies will be stored in your browser only with your consent. You also have the option to opt-out of these cookies. But opting out of some of these cookies may affect your browsing experience.
Necessary cookies are absolutely essential for the website to function properly. These cookies ensure basic functionalities and security features of the website, anonymously.
Cookie
Duration
Description
cookielawinfo-checkbox-analytics
11 months
This cookie is set by GDPR Cookie Consent plugin. The cookie is used to store the user consent for the cookies in the category "Analytics".
cookielawinfo-checkbox-functional
11 months
The cookie is set by GDPR cookie consent to record the user consent for the cookies in the category "Functional".
cookielawinfo-checkbox-necessary
11 months
This cookie is set by GDPR Cookie Consent plugin. The cookies is used to store the user consent for the cookies in the category "Necessary".
cookielawinfo-checkbox-others
11 months
This cookie is set by GDPR Cookie Consent plugin. The cookie is used to store the user consent for the cookies in the category "Other.
cookielawinfo-checkbox-performance
11 months
This cookie is set by GDPR Cookie Consent plugin. The cookie is used to store the user consent for the cookies in the category "Performance".
viewed_cookie_policy
11 months
The cookie is set by the GDPR Cookie Consent plugin and is used to store whether or not user has consented to the use of cookies. It does not store any personal data.
Functional cookies help to perform certain functionalities like sharing the content of the website on social media platforms, collect feedbacks, and other third-party features.
Performance cookies are used to understand and analyze the key performance indexes of the website which helps in delivering a better user experience for the visitors.
Analytical cookies are used to understand how visitors interact with the website. These cookies help provide information on metrics the number of visitors, bounce rate, traffic source, etc.
Advertisement cookies are used to provide visitors with relevant ads and marketing campaigns. These cookies track visitors across websites and collect information to provide customized ads.