Browsing Category

Sewing Patterns

A free sleep mask project with Spoonflower!

Sewing Patterns, Tutorial

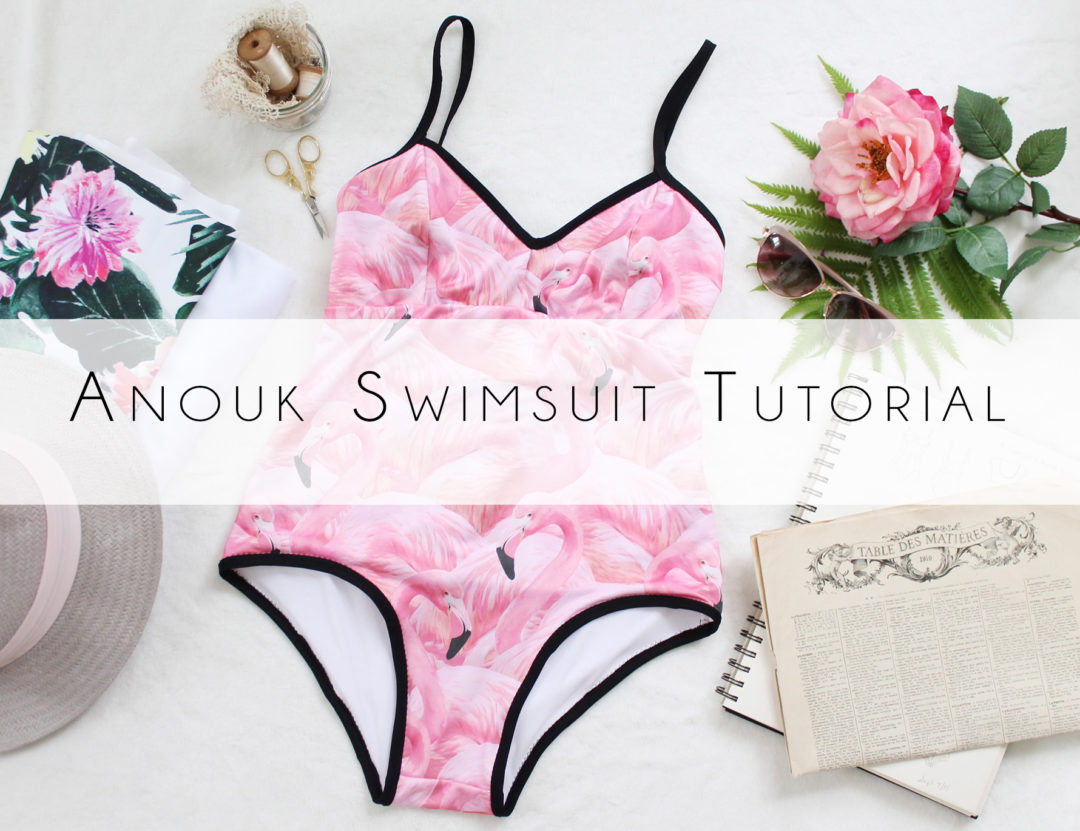
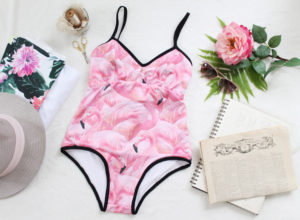
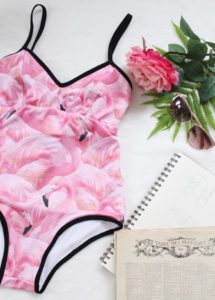
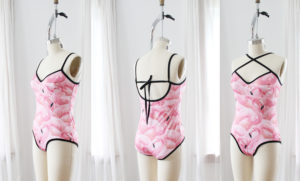
Spoonflower graciously sent me fabric in exchange for this tutorial.

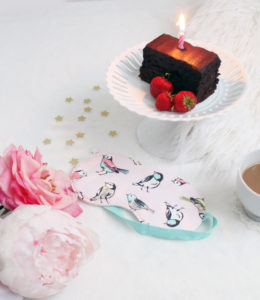
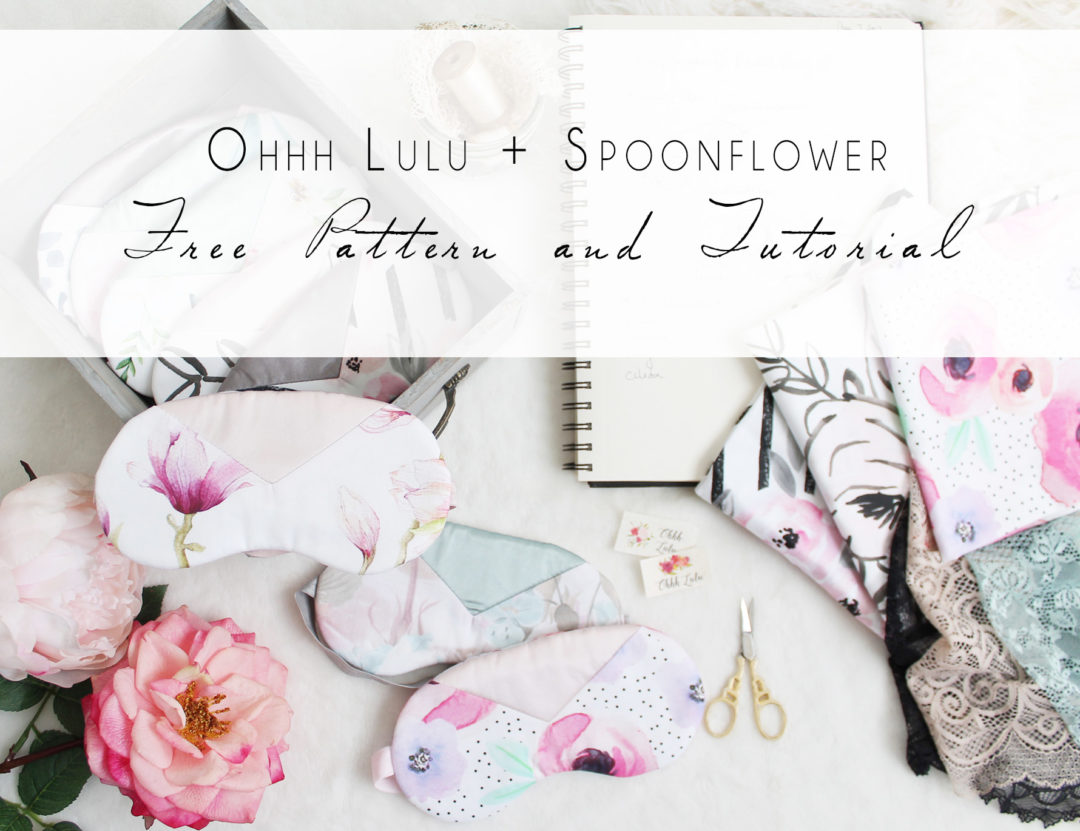
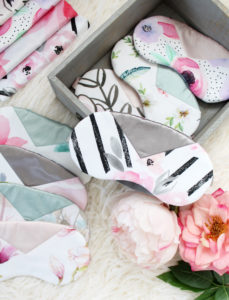
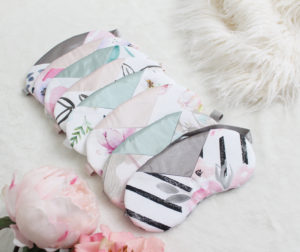
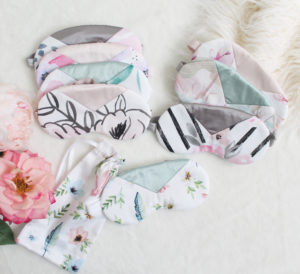
Combining prints and colours is one of my favourite design decisions to make. I love mixing prints and combining unexpected colours – that’s why I love the Clara Sleep Mask Pattern. Not only does it let you use up all the small scraps you’ve been holding onto all of these years (yes, I’m talking to you!), but it also lets you experiment with different colour and pattern mixes!

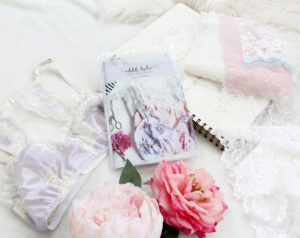
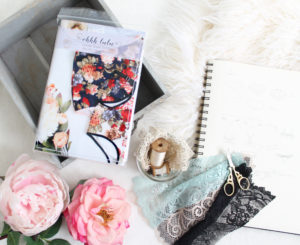
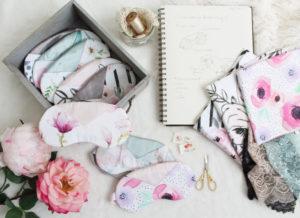
I was so excited when Spoonflower approached me about working on a “Very DIY Wedding” tutorial. I love Spoonflower because their choice of prints is endless. And you know me, I love a good print. I wanted to create something that a bride could gift to her bridal party, and customize to each persons specific personality. I thought back to my wedding and how each of my bridesmaids were so different and unique – I loved the idea of creating a “set” of something that is also personalized to each bridal party member. I’m not sure about you, but prints speak to me, and in each of these I thought, “Oh, this one is definitely an Abbey (or Amanda, or Pam).”

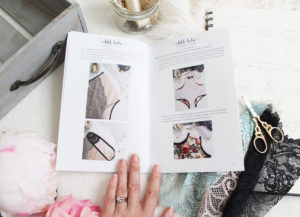
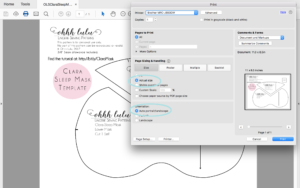
You can head on over to the Spoonflower blog to view my step-by-step tutorial on how to make a Clara Sleep Mask. The template is available for download on Spoonflower, or Here on my site.

Just a quick note about printing, and this goes for all printable sewing patterns. Make sure you’ve selected “No Scaling” and “Auto Portrait/Landscape” To ensure your pattern prints right the first time.

For my project, I used Spoonflower’s Fill a Yard 2-yard cheater quilt in Cotton Sateen. Sateen is one of my favourite fabrics for sleep masks as it is easy to work with and has just a slight sheen. I paired each of the prints with scraps of silk charmeuse (backed with interfacing) from my own stash.

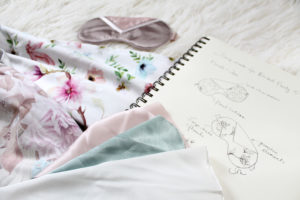
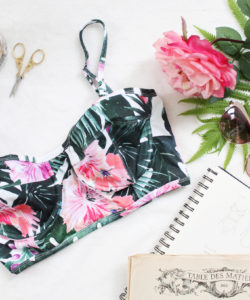
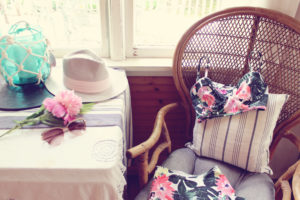
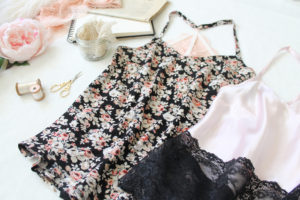
I wanted to select floral prints that incorporated some modern elements, and contained shades of blush, and grey-blue/green. I went through some of my favourite prints and created a collection, and from there filled up my cheater quilt with 8 different prints. You can see the prints I used here!

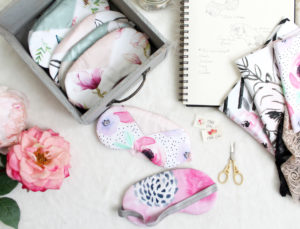
Even after making these with self lining (they are reversible!) I had a plenty of each print left over to make a little gift bag, and the rest is now at home in my quilt box.

Thanks again to Spoonflower for this fun project!


Printed Patterns are Here!

Sewing Patterns

The hardest part of running a small business, aside from feeling like you’re always at work, is having to do things that you have no idea how to do. For instance, I’ve had to fumble my way through figuring out how to file sales tax, how to set up import numbers, how to build a website (still figuring that one out!). Truth is, I just can’t afford to outsource all of these things, so I DIY it. I spend a lot of my day going, “I HAVE NO IDEA WHAT I’M DOING!!!”

Printed patterns was one of those projects where I had no idea where to start. Lucky for me, my best friend Abbey just happens to work in printing! She amazingly took on this project with me and helped me get professionally printed paper patterns and gorgeous glossy booklets!

When these first arrived in the mail a few weeks ago, my jaw dropped when I opened the box of booklets. I’ve looked at my PDF’s until my eyes were ready to shrivel up like raisins, but I had never seen them in full glossy professional print! They look so beautiful! I’ve always wanted to create products that are not only fun to use (or wear!) but also beautiful to display, and I have to say that these nail it!

And… I have to give a HUGE shout out to my dear Abbey for working on this for me.  I could not have done it without her.

I’ve started out with my Jasmine & Ava patterns (but hope to release more if there is the demand) as they are two of my favourites.

With my printed patterns you will receive the pattern printed on a single sheet of paper,  no taping required, and a pretty glossy booklet containing large, full-colour photographs, all packaged in a re-sealable plastic pouch.

You can purchase the printed patterns HERE or through my Etsy Shop!

If you run a sewing shop or boutique and would like to carry my printed patterns, please send me an email or contact me through Etsy for details.

This project was so fun to work on and Abbey and I already have a couple more things up our sleeves!

It’s my birthday… sale.

Anxiety, Lingerie, Sales, Sewing Patterns

Happy birthday to me… happy birthday to me!

My birthday really snuck up on me this year. I guess that’s what happens when you get older. Sigh…

33 has been a pretty good year. Well actually, it was difficult. 33 was the year I got help for my anxiety ‘issue.’ It’s kind of funny, because I am ending out 33 doing not quite so well, but during this year I’ve learned so many things about how to maintain my sanity. Most importantly I learned that I don’t have to feel like something terrible is about to happen all of the time.

On the bright side, I sleep now! And I very rarely have nightmares. I did have a bout of sleep paralysis/wake-up screaming two nights ago, but as a whole, my sleep is much better. However, my bouts of nightmares really make me feel like a crazy person. There is no nice way to put it. They are terrifying and the feelings linger for days. Actually, when I think of it, a lot of my intrusive thoughts as well as my dreams leave me feeling like, “a good/normal person wouldn’t have these thoughts. There is something wrong with me.” It’s not a good feeling to have, on top of the effect of the imagery and content of my dreams and intrusive thoughts. I feel embarrassed sharing this, but I know there is probably at least one other person out there who feels the same way!

My physical health is much better. I’m running 10k on a regular basis and planning on training for 15! On the downside, I’m finding that my mental health maintenance is lacking… I’ve really let it slip and it’s showing. My body images has also been not so good – this is a thing I still don’t feel I have a good grasp on. But as a whole, I am doing much better.

Life is full of highs and lows and lots of stuff in between. It’s the “in between” times that I have a hard time with, and summer is always one of those times for me. Things drag along a little more slowly, which I should enjoy, but I thrive off of the adrenaline rush of being busy (or of crisis). I’m trying… really trying to be ok with life just chugging a long.

Anyway, enough about me…

I decided to celebrate, I’d have a sale, and it’s going to be my BIGGEST sale of the year. Take 20% off all lingerie & sewing patterns with the coupon code HappyBirthday 20. Offer expires Monday July 3 at midnight!

Shop Lingerie on Etsy

Shop Sewing Patterns on Etsy

Or, shop directly on my blog!

I thought this might be a good time for a sale since it’s a long weekend for many of us, with Canada Day and July 4th in the US. This is a great opportunity to pick up a couple sewing patterns and work through my new swimsuit tutorials *wink wink*

And YES! I ate that giant brownie.

Enjoy!

Anouk Swimsuit Add-On Tutorial

New Items, Sewing Patterns, swimwear, Tutorial

I’m in swimsuit mode this summer, despite the not-so-sunny weather. It’s been a pretty cool and really rainy summer so far, but I guess it’s still early!

I’ve just finished up a free add-on tutorial for my Anouk Bodysuit. This 25-page tutorial will show you how to sew the Anouk Bodysuit as a swimsuit! 

The tutorial includes instructions on how to sew a fully lined Anouk Swimsuit, with elastic stabilized bindings and straps.

This tutorial does not go over the ballet-wrap variation, but the technique is essentially the same – just instead of sewing a centre front seam, you finish the neckline edges with binding, then overlap down the centre front, just like directed in the Bodysuit Instructions.

There are also various ways you can tie the straps!

I really like the straps on this. I can’t wear halter straps – the weight of my boobs on my neck causes migraines. I know I’m not alone in this! This swimsuit eliminates that issue. You can criss-cross the straps in the back or front, or just do straight shoulder straps. They then connect at the centre back.

This swimsuit also has underbust elastic. I can’t wear a one piece without it, I just don’t find it comfortable. However, if you are more petite in the bust-area, you can omit that step!

This swimsuit utilizes similar techniques as my recent Cindy tutorial, so those videos make for a great reference, in addition to my tutorial.

You can download the tutorial Add-On HERE and you can purchase the Anouk Bodysuit Pattern HERE.

Video Tutorial: Ava Swimsuit Bottoms

Sewing Patterns, swimwear, Tutorial, Videos

The Ava Pattern is my favourite pattern to use for making bikini bottoms. I find the cut to be comfortable and flattering on my figure. Perfect for chasing toddlers around on the beach, or just a more retro vibe.


In this short video tutorial I’ll show you how to sew the Ava Pattern as a swimsuit bottom. It’s very simple, but I use some different techniques to finish the waist and legline so it looks less lingerie and more beach.

You’ll need a couple different supplies. First of all, you’ll need swim-appropriate fabric, so something like a nylon spandex/lycra blend is ideal. In my Cindy Bikini Post, I outline some places to buy swimsuit fabric. You’ll also need swimsuit lining, in the same yardage as your exterior fabric.

You’ll also need swim elastic, so something that is chlorine resistant, though really almost any plain elastic will do. Just looking for something 1/4″-3/8″ wide. The elastic is not visible on the finished garment, but I try to get something that coordinates with my exterior fabric – white for light coloured bathing suits and black for darker fabrics. I also use a twin needle. I’ve used the Ava Pattern for my swimsuit, but really any panty pattern you like should work!

Here’s the Tutorial! Subscribe to my channel to be the first to see new videos.

Share your makes with me on Instagram, use the hashtag #OLSBikini so I can see them!

Pattern Hack: Strappy Cindy Bikini Top with Underwire

Sewing Patterns, swimwear, Tutorial, Videos

Looking for a weekend summer sewing project? I’ve got just the thing for you!

I made one of these bikinis last summer and I wore it SO often to the beach with Isabel. We are lucky to have a nice sandy beach just down the road and we spend a lot of time down there (not so much this rainy summer though!).

I used my Cindy Pattern to make this bikini top. My Cindy Pattern is a fairly simple to sew underwire bra with full coverage through the cups and a long-line band. This bra is designed to be sewn with stretch fabric through the cups. It’s a personal preference of mine, I’m not a big fan of foam or rigid cups. I like a softer fit and look.

I altered the pattern just slightly by omitting the centre back pattern pieces and cutting off the “tabs” on the upper cups.

I love this pattern as a bikini top because it is supportive and offers coverage while still being stylish and a little sexy.

You’ll need the same basic materials as you would if you were sewing the top as a bra, but with a couple of substitutions. You’ll need swimsuit fabric – so a fabric that is normally a nylon / spandex / lycra blend. You’ll also need swimsuit lining – I use it to line the cups. The band is lined in power mesh.  Get a little bit of extra fabric to use as your binding and straps. I also use some rubber swim elastic, but pretty much any plain elastic will do! Look for something 3/8″ or narrower.

I’ve decided to offer this tutorial in a two part video series on my YouTube Channel. It’s quite long, with each part being about 30 minutes.

My local Fabricland sells an assortment of swimsuit fabric and some lining, but I find they tend to be pretty expensive. The Sport Lycra from Spoonflower (which I used here) is amazing and comes in endless prints. I’m pretty sure Fabric.com also has an assortment of swimwear fabrics. Spandex World is also a great resource, though if you’re in Canada, shipping can be expensive. I also always recommend supporting Etsy sellers!

Here is Part 1 of the tutorial:

And Part 2:

In this video series, I show you how to sew self-binding with encased elastic. I like this finish for swimwear as it provides some extra stability to your openings, and when top stitched with a twin needle, gives a professional finish. These finishes and techniques  can easily be applied to other sewing patterns too!

I was excited to take some of these pictures in my very lush back yard and newly decorated back porch.  The previous owner of our house did an amazing job landscaping. Other than maintenance, there’s not much to do with our yard. It’s a gardeners delight. Isabel loves to run around the paths and play explorer. Just last weekend Dan and I spent some time putting up some curtains, lights and other bits and bobs in the back porch. When I first saw this house it’s part of why I fell in love with it. It feels like my very own cottage.

Jasmine PRISM Add-On

Design Diary, Lingerie, New Items, Sewing Patterns

A few weeks ago I added a new style to my Lingerie Shop. I talked a bit about why I designed this Jasmine adaptation earlier, but I’ll recap. I had been experimenting with sewing the Jasmine Bra with a cut-out at the front but was experiencing some unsightly gaping and pulling no matter what I did. So I had the idea of adding  a sheer mesh insert to fake it and it worked out amazingly.

So, from there I experimented with adding a scalloped lace insert, which also was a nice detail, and a little different, design-wise. So I decided to release this as an Add-On to the Jasmine Pattern.

Let’s take a peek inside…

With the Jasmine PRISM Add-On, you get two additional pattern pieces which you use instead of using the original Front Cup Piece. I’ve written up a 29 page instructional manual that will show you how to sew the bra with the alternate pattern pieces, as well walk you through how to add a lace longline band, how to use hook and eye tape, and how to add some lace detail to the straps.  Some of these are techniques I have already gone over in my Valentine’s Day Sew Along, but here you will have them all in one place.

The PRISM Add-On is only $2, but it only works in conjunction with the Original Jasmine Pattern – so you need to have both. I hope this helps you get even more wear out of my Jasmine Pattern!

A year in the making, the Kate Camisole Sewing Pattern is Here!

Design Diary, Lingerie, New Items, Sewing Patterns, Videos

I think it was a year ago or so that I first posted a photo on Instagram of this camisole… As I mentioned in my video post a couple of weeks ago, I went back and forth on a bunch of things (darts, fullness, etc.) and toyed with various ways to write up these rather complicated instructions. The pattern itself is very simple – just two pattern pieces! But there are just so many ways you can sew it – dressed up or dressed down!

Anyway… without further adieu, here is the Kate Camisole!

So far, of all of the variations I’ve sewn, I think this one in Cotton + Steel Rifle Paper Co. challis is my favourite. Even Isabel has asked for one in her size! I absolutely love this print and fabric.

The pattern comes with instructions on how to add a ruffle – I give suggestions as to how long to cut your ruffle, but you could even experiment with cutting an extra long ruffle band to turn the top into a flowy, bohemian summer dress.

I experimented sewing these tops out of linen, chiffon, double gauze, gauze, challis and silk charmeuse. I think my favourite fabric to work with for this style is rayon challis. It is just so light and drapey. Silk charmeuse is a close second.

The Kate pattern is an excellent pair for with any of my woven bottoms, like the Jane or Miyu panties. But remember, you can also use a woven fabric for the front of my Claudia Panties too! It works great in silk.

You can purchase the Kate Camisole pattern directly from my website HERE or on Etsy!

To view a video-tutorial outlining the basic construction methods, hop on over to my Youtube Channel!


New! The Anouk Bodysuit

Design Diary, Lingerie, New Items, Sewing Patterns, swimwear

You’ll see a few short, but picture-heavy posts coming through today! I’ve been working hard finishing up a couple of patterns that I have been pouring over for months… But, I think my effort was well worth it!

The first new pattern I’ll show you today is my Anouk Bodysuit. The pattern will walk you through how to sew it with snaps at the crotch so you can wear it as lounge/lingerie/casual wear, but you can easily make this into a swimsuit. In fact, I’m going to do a tutorial in the coming weeks to show you how to make that very simple alteration.

This pattern comes with two neckline variations: a simple v-neck and a ballet-inspired faux wrap front. The v-neckline on this bodysuit is a little different form my Abigail Swimsuit, which has a true triangle cut cup. I find the Anouk is more comfortable and flattering on my body type, which has a fuller bust.

The instructions will show you how to line the cups and add supportive underbust elastic.

I really love the shape of the back – it was a spin off from my Romy Bra.

Also with this pattern I will show you how to do a lace overlay. I wanted to show you how to place the lace so that you can change things up and experiment with your own lace overlays. Adding an overlay is so easy once you know how to do it.

I’m really excited to see how you guys interpret this pattern! I am totally loving it, and can’t wait to make a swimsuit out of it.

You can purchase my new Bodysuit Pattern directly from my website HERE or on Etsy!

New Pattern Preview! A Cami and a Bodysuit

Design Diary, Sewing Patterns, Videos

I’ve been working really hard on two new patterns… one of them (my camisole pattern) is a year in the making! I’m currently just finishing up writing the instructions and am still waffling back and forth on some aspects of the design and construction. I always like to design patterns that can be sewn in multiple ways – I find it to be a fun creative exercise seeing how much variety I can get out of a simple pattern. This can create some difficulty when putting a pattern together.  The patterns I sell are much different than the patterns I would make for my own use, or even for production. I put a lot of time and effort into explaining things so that a sewists of a variety of backgrounds and experience levels can sew my patterns. As with all of my patterns, I try to teach techniques instead of spoon-feeding how to recreate a garment. I love seeing the unique ways all of you interpret my designs!

I made a short video discussing my new patterns that are so close to being ready for release.

I’m super excited to start prepping for my swimsuit sew along! My fabric should be arriving this week, so once I clear a few projects off my table I’ll set a date.