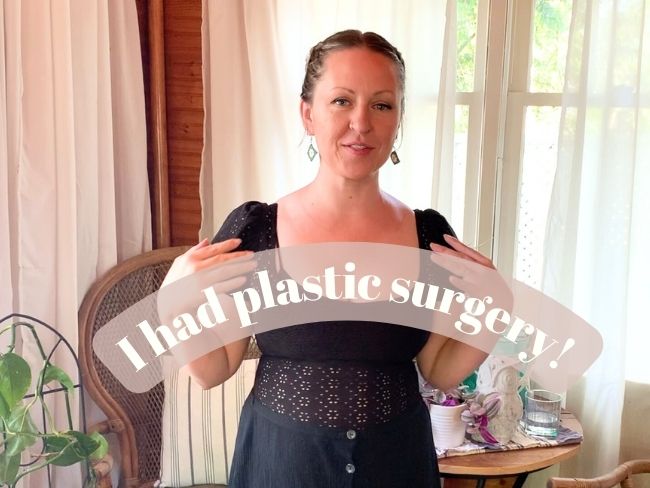
It’s been 4 weeks since my breast reduction and things are feeling pretty good around here! The first couple of days post surgery I was pretty uncomfortable, but still able to get out for walks and do most daily tasks. By about a week post surgery I was pretty much back to work!
I had my dressings taken off two weeks ago and was surprised to see how quickly my incisions closed up. I’ve never had surgery before so the whole recovery thing was brand new to me. Since I’m still healing, I’ve still got some swelling and lots more healing to do, but I am so incredibly happy with the results.
Surgery was much less scary than I had thought. The day of the surgery i felt very calm and very ready, and the hospital staff were all so kind and helpful that it really just put me at ease. I arrived at the hospital at 8am and was home by about 4 or 5. Surgery itself lasted 3-4 hours.
The best part about having the surgery is that my mid-back pain is gone. Simple tasks like chopping vegetables for dinner use to hurt my back so bad. It is completely gone now. That’s not to say I don’t have any back pain. I’m months away from turning 40… I have aches and pains, but the worst of it is gone! I can’t wait until I am able to get out running again to see how different it feels. I can’t even begin to describe how much more comfortable I feel, physically and emotionally.
I went thrifting last week and picked out a dress with a deep v-neck that I would have never been able to wear before hand. I brought it home, gave it a wash, and threw it on. It fit perfectly. I wasn’t spilling out. The fabric wasn’t straining. I didn’t have to wear some sort of modesty garment underneath. It felt amazing.
I still have to wear my post surgery bras for a few more weeks. I’m very much looking forward to the day when I can go braless. I’m also REALLY looking forward to making myself some new bras!
If you’re interested in learning more about my experience, I went over everything on YouTube
This post includes affiliate links. Purchases made through the links provided may earn me a small commission at no cost to you. This helps keep my blog and youtube channel going!
Today marks 7 days since I had surgery! I’m just getting back to work today, even though my recovery has gone surprisingly smooth. I took a few days to just lay around, rest, go for leisurely walks… It was nice, but I’m glad to be getting back into the groove.
I had intended on posting this before my surgery but was running a little behind, as is my usual style! Anyway, better late than never!
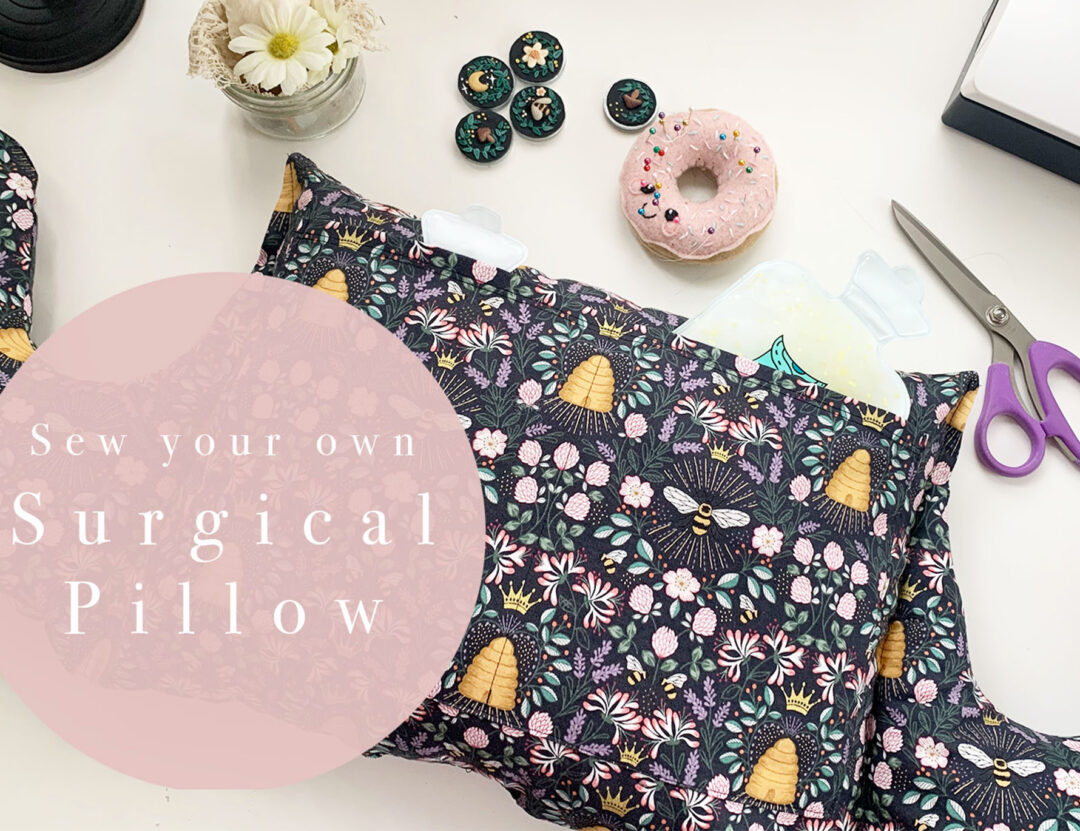
The objective of a surgical pillow is to give you something to hold or brace yourself against after having surgery that involves incisions in the chest and abdomen. I would think that it could be helpful for recovering from anything from mastectomy to c-sections. It can be especially useful for in the car to prevent a seat belt from pressing against you, or for simply holding icepacks (this was amazing). I used mine in my first few days to keep my very snuggly toddler from accidentally bumping into me.
Pillows are one of the most basic things to sew. This surgical pillow is just a step up from your basic square or rectangular pillow. It’ll require sewing some curves, as well as adding optional pockets (I highly recommend), but overall it is a great beginner project.
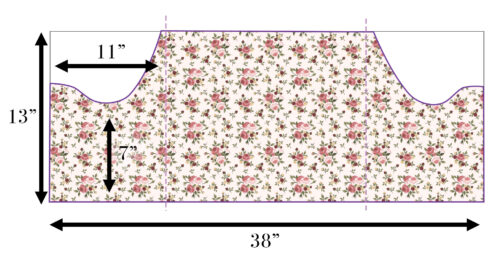
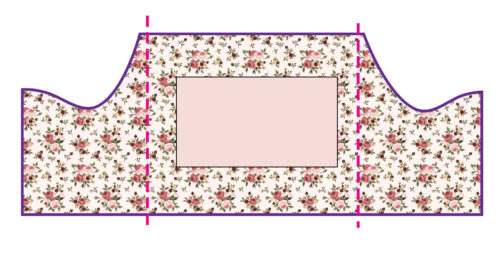
Cut out a TWO rectangles approximately 38″ wide by 13″ tall.
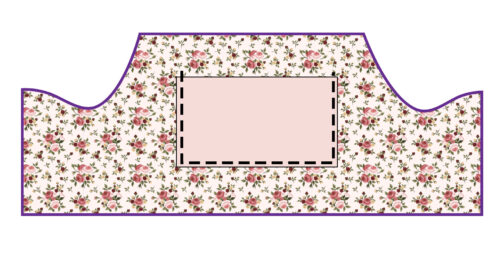
Using your marking pencil, draw a line 11″ in from each side.
Create an armhole on either side
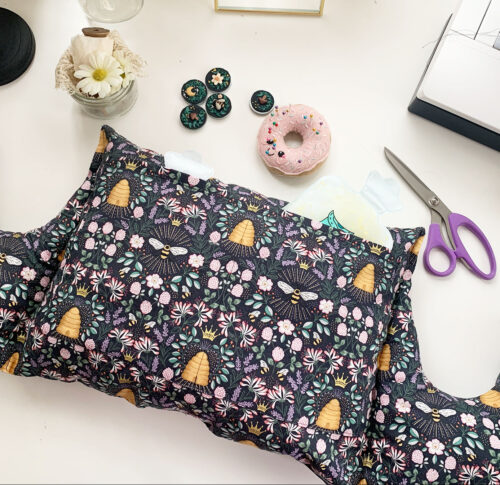
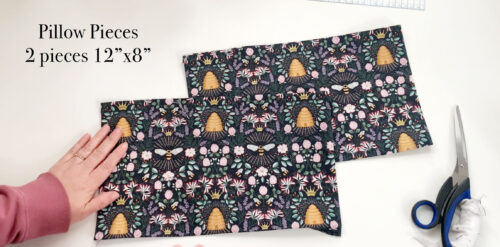
4. Cut out 2 optional pocket pieces that are approximately 12″x8″. Press raw edges under 1/2″ and top stitch the upper edge down.
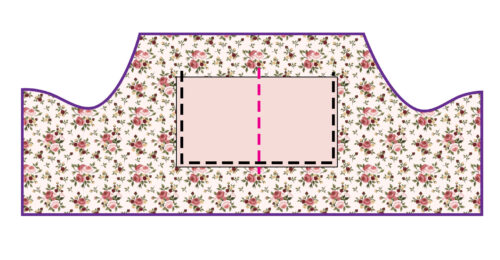
5. Pin the pocket pieces onto each side of the pillow and top stitch in place. For the side that will sit against your chest, you may want to divide the pocket into two sections for ice packs.
You can divide the pocket into two sections by top stitching down the middle.
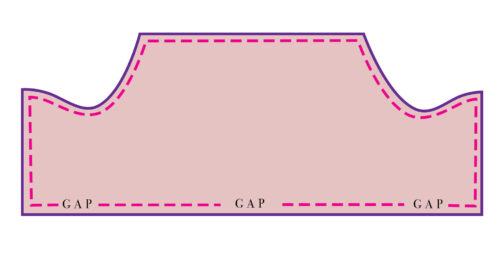
6. With the Pillow Pieces facing right sides together, stitch around the perimeter of the pillow, leaving three openings at the bottom (one on the left side, one in the middle and one on the right side). Clip corners and clip and slash curved portions.
7. Turn right side out and press flat.
8. Run a line of stitching on either side from top to bottom, about 1/2″ away from where the pillow begins to curve down. This divides the pillow into three sections.
9. Stuff the pillow with fibre fill.
10. Hand stitch the 3 openings closed.
This is just the quick and dirty. I’ve got a more thorough tutorial over on YouTube.
If you follow me on social media or YouTube, you’ll be well aware that I am in the process of getting a breast reduction surgery.
Smaller breasts is something I’ve wanted since I first needed a bra. I was one of those kids who just woke up one day with boobs. I was a pretty reserved, shy kid, so finding a bra that fit, when the B’s, C’s and D’s from my local department store back in the mid-90’s barely covered what needed covering and the bands were all so big I’d fall out the bottom felt really embarrassing. I got unwanted attention, and being at that time only around 12 years old, I didn’t even understand what people (ie. boys and men) were talking about. It wasn’t until really reflecting upon this over the past few years that I realize how much it effected me.
I remember the first time I stumbled upon a 32DD bra at LaSenza (Canada’s version of Victoria’s Secret). It was a bra that nearly, almost, kind of fit. Sure I still got a bit of a quad boob, as I’d pop out the top, and I’d have to frequently pull my boobs up so they didn’t slip out under the still too-loose band, but it was a far cry from the bras I was used to wearing!
In my teens and twenties, I was in a much smaller body. But even then, proportionally, I had a larger chest.
Now, in my 30’s (almost 40!), I’m in a much healthier space mentally and physically, however my breasts (and my body) have gotten even bigger. And after having my second child, they kind of just went out of control. I breastfed for 2 years, which was 2 years longer than I anticipated! And somehow, they just never shrunk back down to their previous size. So, the 30FF bras that used to fit pretty perfectly have now been set aside and replaced with 30H. I actually just had to undo my bra to check. I think I thought I was a G… but here I am in an H cup Curvy Kate bra.
Physically, the feeling of my breasts give me a sense of discomfort, physically and emotionally. The weight… the sweat… the underboob rashes… the feeling of just all this “stuff” around my chest… It is so uncomfortable. My shoulders and mid back hurt all the time. I actually thought for the longest time that having a constant back ache was just part of being alive, but apparently it’s not! Running is hard… but running while carrying the equivalent of a bag of flour strapped to your chest is even harder. I want to jump rope with my kids, but it just is so uncomfortable to do so. That all sucks, but the other thing that sucks emotionally is how hard it is to find clothes that fit/flatter/are comfortable for larger breasts. I obviously can make my own bras and my own clothes, but honestly… I just want to be able to buy something cute from Aerie, or wear a crop top from Old Navy that my boobs don’t entirely consume.
I’ve never had any type of surgery before besides dental surgery, so I’m not entirely sure how my body and mind will react. I have had the experience of seeing my parents both go through very serious surgeries, so I feel like I have a decent idea of how tired and out of it you are for the first little bit. After spending way too much time on the r/Reduction subreddit, I’ve decided that there is absolutely no way to predict how much help I’ll need and how my body will recover. I just need to listen to my body and accept all the help I can get.
So, that’s all the background. It’s something I wanted for the longest time, but my cup size increase after my second child really spurred me on. One of the hardest initial things to do was talk to my family doctor. Not because she isn’t patient, and understanding, and all around a wonderful human being, but because I was worried I’d be bothering her with a “trivial” issue. Let me be clear, my back pain and discomfort is not trivial, I just have this mindset that there’s always someone else worse off so I don’t want to bother people with my problems… I was relieved to hear her say that she totally agreed that I shouldn’t have to live in pain. One of the complicated parts with where I live in Ontario, is that it is fairly rural. We do have a great local hospital, but the one plastic surgeon in the area was not taking patients. So, I had to look a little farther than my home town. After doing a bit of research, I found a surgeon fairly close by who was doing consultations.
This was about two years ago, so the timeline is a little fuzzy! When I finally got in to see the surgeon, she was really receptive and kind. When she found out I sew and make sewing patterns, she was excited because she could relate a lot of what she does to what I do as a pattern maker. Her excitement about it really was motivating and also put my mind at ease. I could tell she was really passionate about her job. Parts of the consultation were uncomfortable. I had to have photos and measurements taken to be submitted to our provincial healthcare plan. I’ve been so self conscious about my size that I basically am never braless.
Within about 8 weeks or so, I found out I was approved for the surgery! Woohoo! However, this was still during Covid. There were huge backlogs in surgery dates… so my elective surgery was obviously not a huge priority.
I finally followed up again about two months ago. Their office had to submit the paperwork for insurance approval again, but it was quickly approved and I was given the option of 3 dates. I decided to go with the soonest date so that I am recovered by the time my kids are out of school and daycare for the summer. It’s a little daunting as I thought originally I’d have my mom here to help me, but unfortunately SHE had to have a very serious surgery a couple of months ago and is still not back to her normal self yet. But, I’ve enlisted the help of other family members and friends. My kids are (almost) 4 and 8. My oldest is very self sufficient. I’m a little worried about how Sparkle, my youngest, will do. She is very clingy to me, so that might be tough for a bit. But whenever I do it, it’ll be hard! So, I’m just going to do it…
The nerves about it all didn’t really set in until last weekend. I’m not so concerned about the surgery itself as the recovery and making sure my kids get to all of their places and that my husband maintains some level of sanity while also managing many of my day-to-day tasks. I’m not terribly worried about pain, but perhaps this is naive of me.
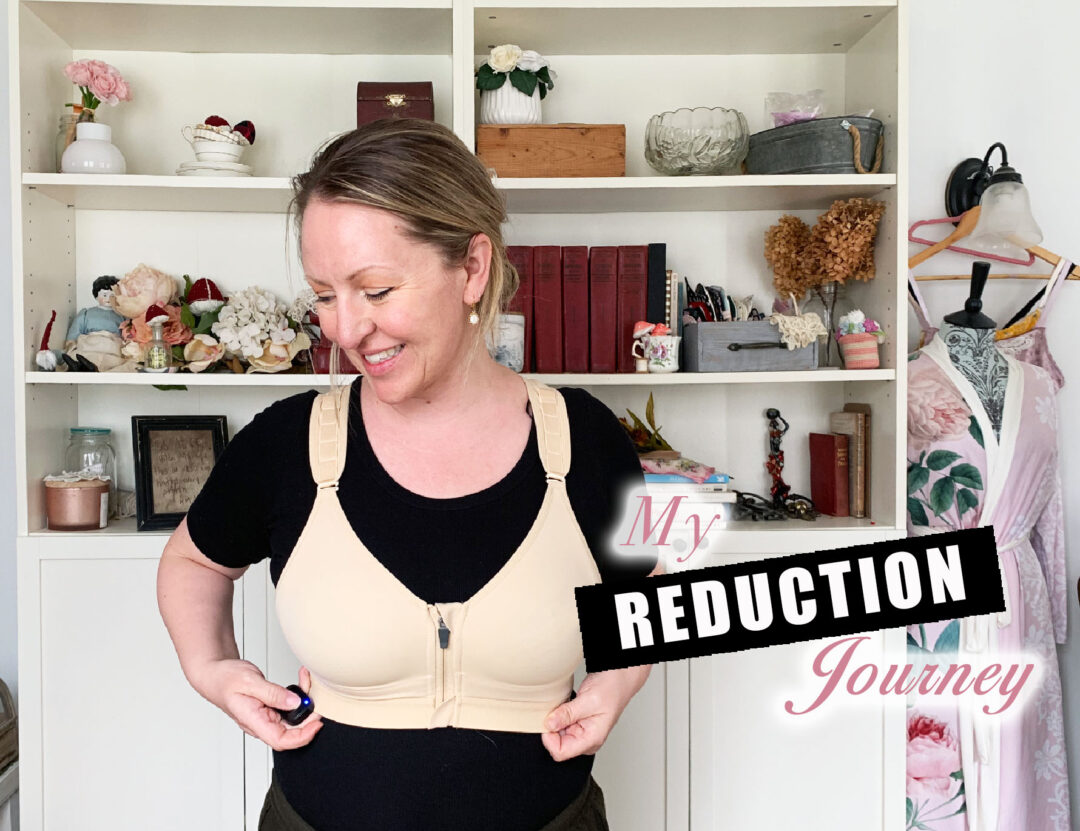
Ive started doing all of my pre surgery prep, like ordering a few surgical bras, preparing a few things to read and do while I’m relegated to the couch, meal planning, and giving the house a good clean.
Buying a surgical bra was kind of surreal. First, I was able to buy 3 bras for about $50 on amazon. I haven’t been able to buy one bra in my size for that price in ages! When I got them, and tried them on I was so excited about the prospect of being able to fit into something like that comfortably. I can get them on as I am, but I’m all kinds of popping out of them.
If you’re curious about the bras I bought, you can find them on Amazon. I felt a little overwhelmed by the task of buying a surgical bra, so I thought I’d share what I bought. I’ll be sure to add an updated after my surgery to let you all know how they faired. These are affiliate links, so if you happen to purchase one of these bras, I may receive a small commission from amazon.
I’ve been sharing my experiences over on YouTube, but if you’re not an avid youtube viewer, I’ll update here as time permits!
Thank you so much to everyone who has messaged, emailed, and commented on my posts with their experiences and well wishes. It is so reassuring to hear everyone’s stories!
A little while ago I was on the hunt from some Zorb fabric for a super special top secret project I’m working on. I wanted to find it within Canada to save on shipping and get it quickly as I am very impatient.
One of the first shops that popped up in my search was The Fabric Club / Club Tissus (en francais!). I’ve seen this shop many times but hadn’t ordered from them. As the name implies, you can purchase a “club” membership which gets you special pricing. This is similar to Fabricland stores (Canadian chain) sewing club card, which get you a special discount (and special sales, etc). I didn’t buy the membership at this time, but it was tempting!
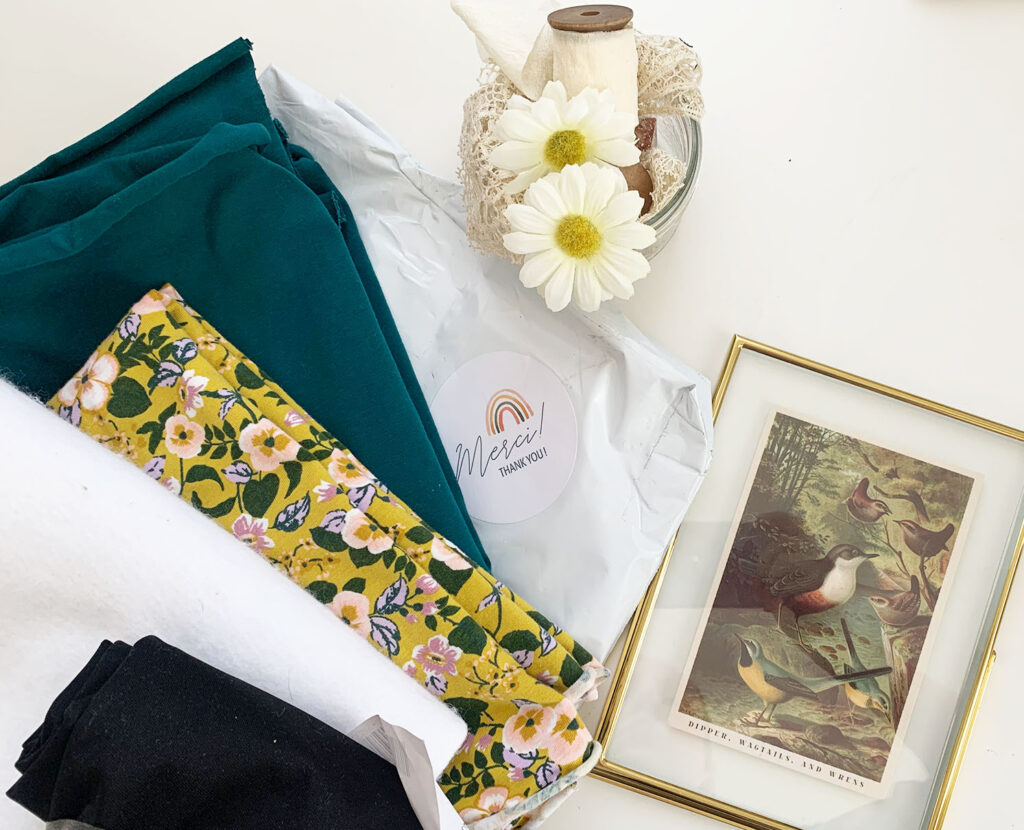
I am trying to be more conscious of my consumer consumption, so I’m trying to buy just what I need for a project, as opposed to what I want. So I got a little bit of Zorb, a bit of PUL, some really nice printed modal jersey and a beautiful teal cotton lycra jersey. The modal is very much as I expected, super soft, light and airy. The cotton jersey was quite solid, similar to the Luxe Jersey I like from the Fabric Snob. It has a fairly sturdy hand, but still lots of stretch and quite soft.
I was quite happy with the turn around on this little order. I ordered it on the Thursday before Good Friday, and received it the following Friday. So, despite the holidays, I still got it in about a weeks time from Quebec to Ontario!
I just pulled everything out of the dryer and am excited to get started on my top secret special project. Comment below if you have an idea what I’ll be making!
Affiliate Disclosure: I am an Etsy and Aliexpress affiliate. Applicable purchases made through the links I provide may earn me a small commission at no cost to you. This helps keep my blog and youtube channel running! I appreciate your support.
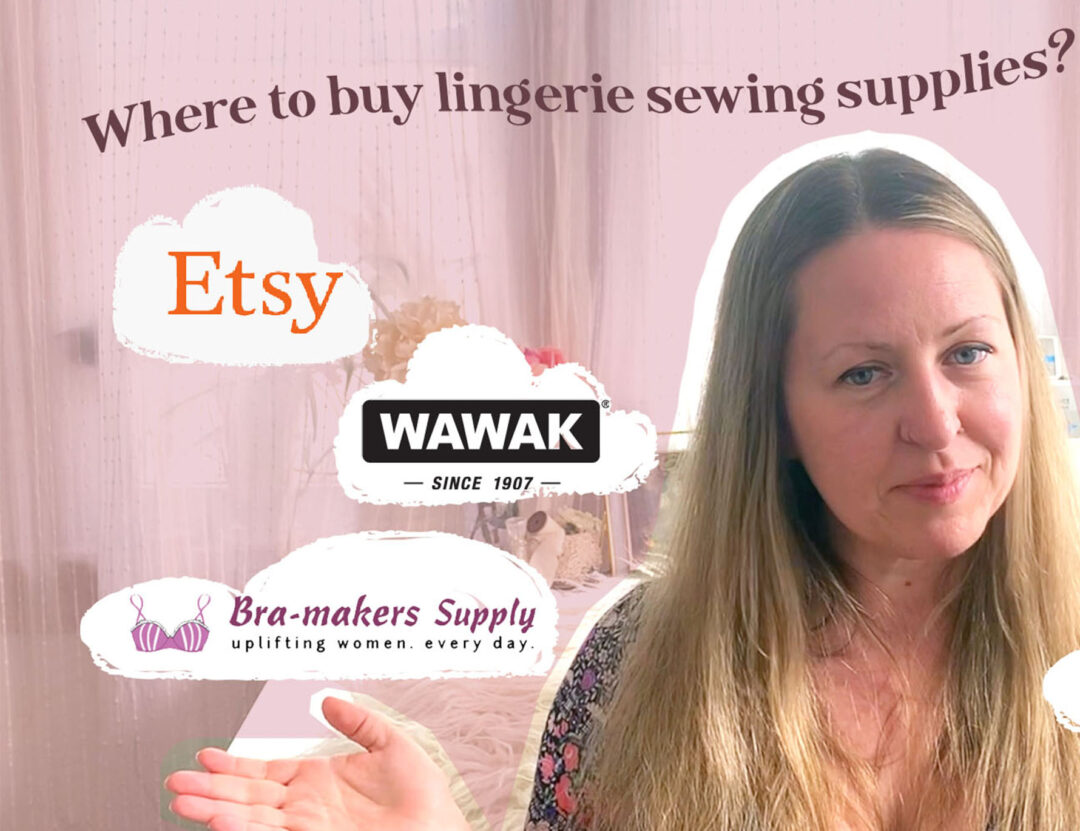
It’s basically been 100 years since I’ve updated my Where to Buy Lingerie Making Supplies video and blog posts, and a lot has changed since then… mostly, the loss of Fabric.com. I’m still mad about that. Amazon totally ruined a great thing!
I’m sure I’m not the only one who spent a lot of time at the beginning of the pandemic doing lots of online shopping. During that time I discovered some new shops that have become go-to sources for me.
I’ve outlined it all in a video on YouTube, but I’ll provide a full list here with links. If I’ve missed your favourite online store (or in person shop!), let me know in the comments. I always love discovering new stores.
Spoonflower – the “original” USA based custom printer, with thousands of indie designer prints to choose from.
Carriage House Printery – a newer USA based custom printer. Print your own designs or choose from their large selection of designer prints. A great selection of bases, including bamboo!
Canada
The Fabric Snob – carries high quality knit fabrics (luxe jersey is my fav) and a selection of custom prints.
Halo Fabric Addicts – specializes in athletic/performance fabrics, and carries custom prints.
Fabric Fabric – Large Toronto-based fabric retailer. Carries everything from fashion fabric to home decor.
GK Fashion Fabric – Ontario based fabric store with some really great selection of knits and silks. I have not purchased from them yet, but they have been in my favourites for a while! I’m hoping to visit their location.
Threadcount – lots of cotton quilting prints, but also a large assortment of fashion fabrics and knits.
Mimi Fabrics – I forgot to mention them in my video as it was getting a little long, but they carry some nice fabrics and turn around was really quick!
Simplifi Fabric – my go-to for organic/eco-friendly fabrics.
International
ETSY! – I love shopping for fabric on Etsy. There are several shops I have purchased from repeatedly in Japan, South Korea and Easter Europe. The wonderful thing about Etsy is you can narrow down your search by location. I show you how in my YouTube Video.
My Go-To Shops for Elastic and Notions
In no particular geographic order
Bra-Makers Supply – they literally have everything. Based in Ontario, Canada.
Sew Sassy – one of my old favourites for elastics, but I haven’t purchased from them in a long time!
TailorMadeShoppe – USA based shop that sells supplies, fabric and kits!
EmeraldErin – Ontario, Canada based lingerie pattern maker who also sells supplies and kits for her patterns.
Porcelynne – a fantastic source for lingerie making supplies, books and ebooks. Pretty sure I have one of her books in my collection…
Aliexpress – a great resource if you need to purchase in larger quantities.
Wawak.ca / Wawak.com – Next day delivery in the US and quick in Canada too! My #1 source for thread, general workroom supplies, and they have a good selection of elastics and some bra making supplies as well.
I hope this has been helpful! Did you discover some new shops in this list? Did I somehow skip over your favourite? I’d love it if you’d leave me a comment!
Affiliate Disclosure: I may receive a small commission from purchases made through links provided in this post. This is at no cost to you and helps me keep my blog and YouTube Channel running! Thank you so much for your support.
I am OBSESSED with polymer clay!
When I was a kid, my cousin and his wife owned a miniatures store. They had all of these tiny little clay foods and treats and accessories… I was absolutely in love with all of it. One year for Christmas, they gave me a miniature pumpkin pie. It’s still one of my prized possessions, and lives safely tucked away with my eraser collection. So, I kind of grew up around clay. We used to play with FIMO as a kid and now that I have my own kids, we play with Sculpey and also air dry clay, as it’s a little easier for small hands to work with.
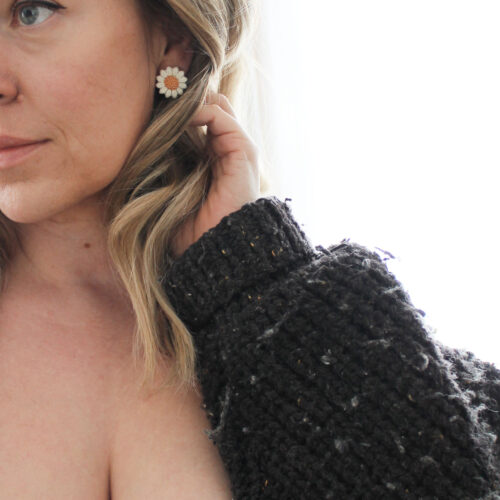
A while back, I started seeing these clay earrings popping up on Pinterest. I decided I’d try my hand at those and quickly became re-obsessed with clay. I’ve even added a few earrings to my Etsy shop because I can’t stop making them. But then I had a great idea! I should make them into pattern weights!
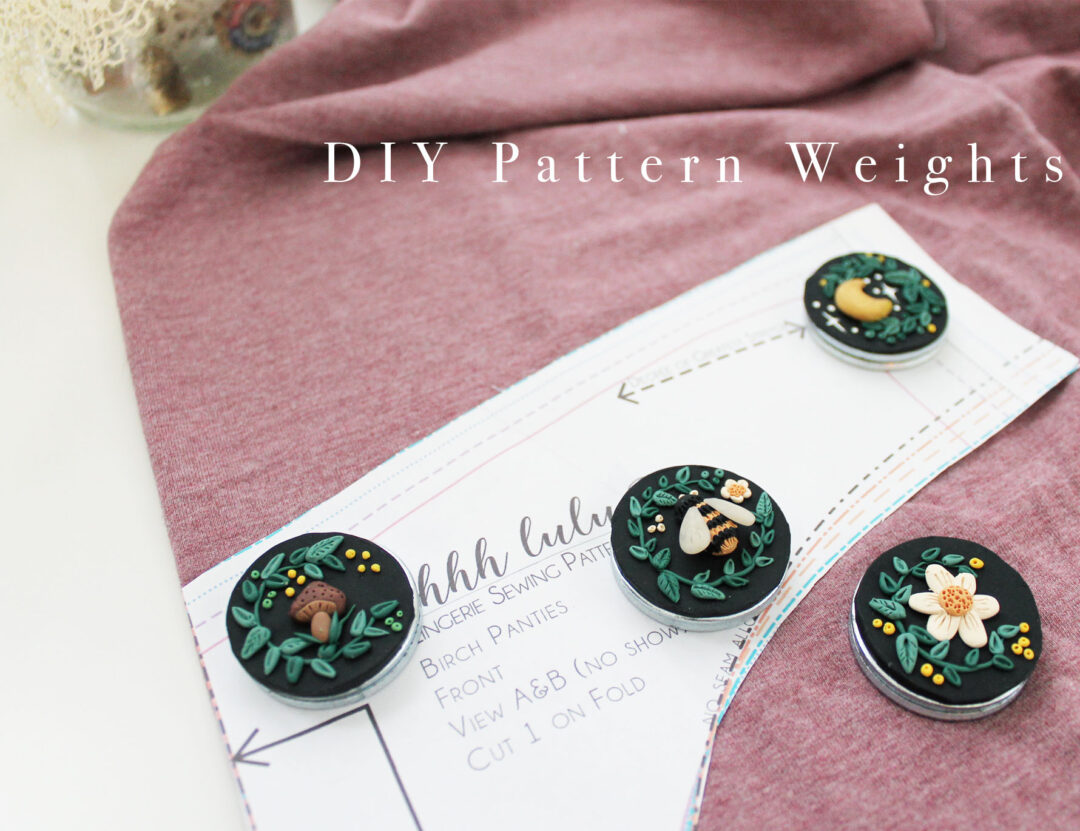
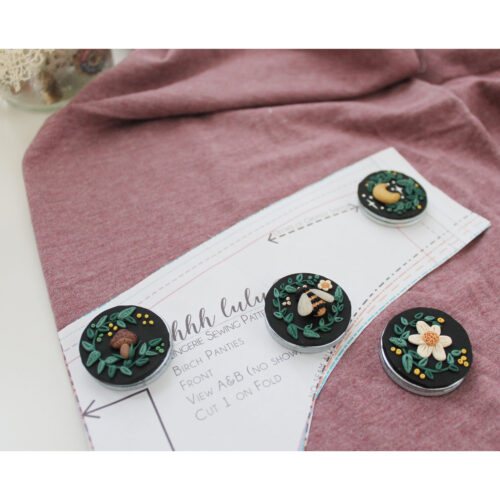
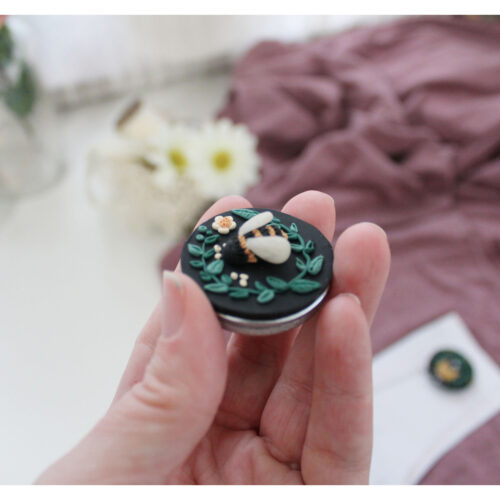
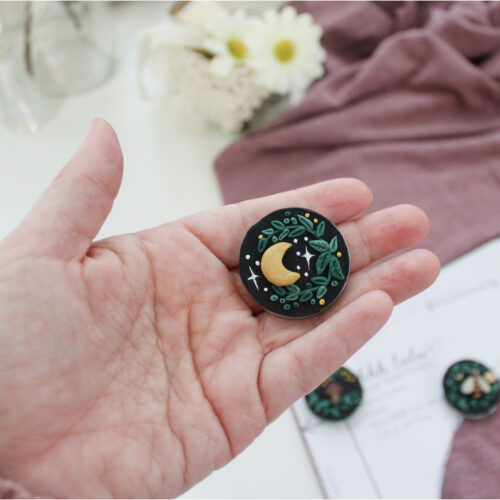
So, I sent my husband to the hardware store in search of washers and he found just the right thing. I ended up using 2x 1 3/8″ washers glued together as my base, and then polymer clay on top. I recorded the process of making the floral motif weight, but ended up making 4 different styles, with the bee being my favourite.
One of the things I’ve been wanting to experiment with is painting on polymer clay. So for my crescent moon weight, I used some acrylic paint and a fine brush to paint on some simple stars before baking. I really love how that turned out and I’ll definitely be experimenting with painting on clay some more.
You can find the full instructions on how I put these together on my YouTube Channel. They are pretty simple to make and with a little practice I’m sure you can come up with some really amazing designs. I went with a nature-cottagecore theme… which is basically my life’s aesthetic.
Here’s what you need to make your own Pattern Weights:
1 3/8″ (3.5cm) metal washers (available at most hardware stores)
Affiliate Disclosure: I may receive a small commission through purchases made through the links in this post. This helps support my website so I can continue providing content! Thank you!
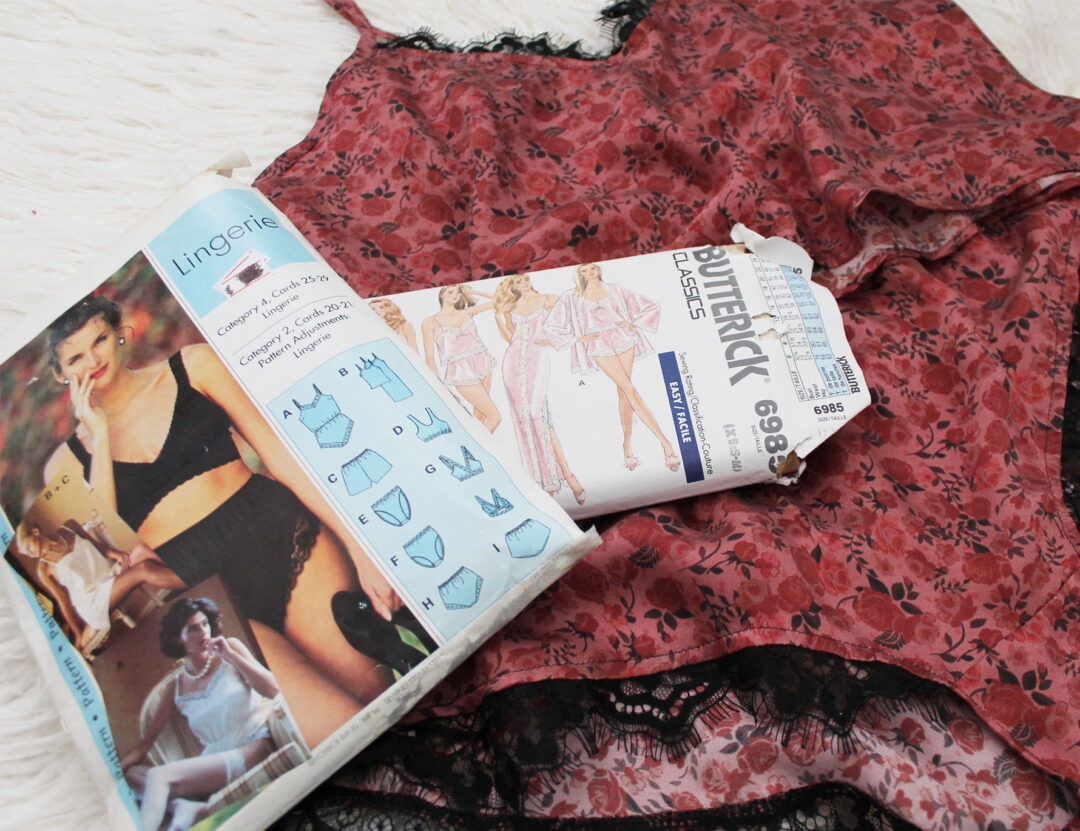
Years before I started sewing lingerie, I walked into a local thrift shop and spotted a 1980s lingerie pattern from one of the Big 4 Pattern companies. It had already been cut and was missing a couple of pieces, but I was able to cobble together one of the teddies and a pair of underwear. It kind of sparked that lingerie-sewing love within me.
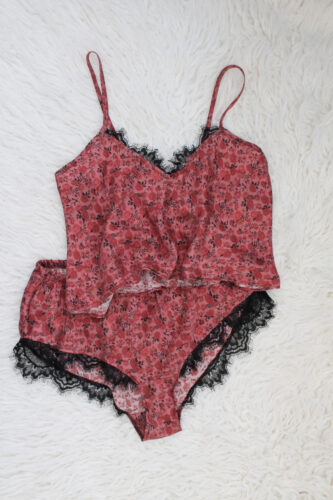
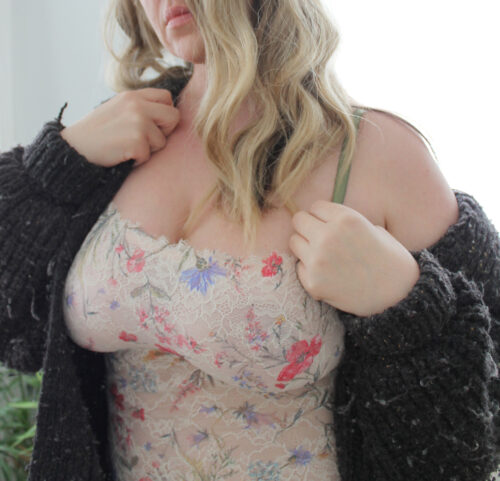
Since then, whenever I see an older lingerie sewing pattern, I pick it up. I had great luck a few months ago and found 3 at my local ValueVillage! I decided that for Valentine’s Day, I wanted to sew myself something special. I was wanting a new silk camisole (I love silk under knitted sweaters) and some matching bottoms to go with it. I wanted something comfortable, but still pretty and romantic feeling, even though at this season of my life, romance to me and my husband is watching an episode of the Last of Us and passing out on the couch… at least I can do that in something pretty!
I decided to document my process on my YouTube Channel in three parts. Part one goes through the patterns, tracing them off, and cutting my silk.
Parts two and three walk through the steps of sewing the top and bottoms. However, part of the way through this process I realized I was missing the instructions for one of the pieces, so there was a lot of trial and error involved.
I always find that the Big 4 (Vogue, Simplicity, Butterick, McCalls) always have a ridiculous amount of ease. So, unsurprisingly, both my pieces ended up much to big, even though I sized down. This is always such an annoyance to me. Nothing needs as much ease as what these patterns include! Anyway, I suppose that is part of the process! I’m spoiled by being able to just sew my own patterns!
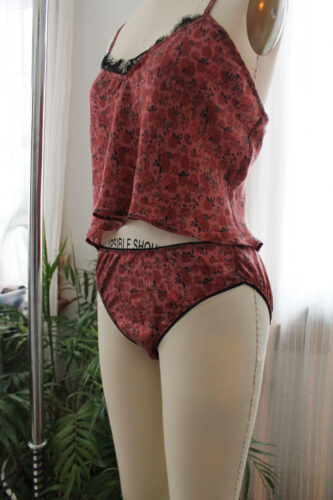
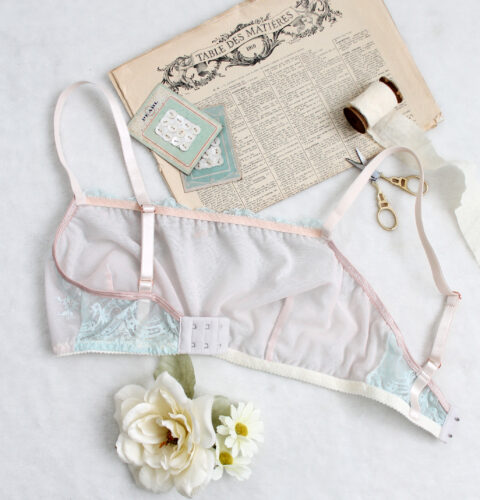
In the end, I was 95% happy with the results. The cami was great and I’ve already worn it once. The bottoms aren’t my favourite fit, so I ended up making a pair of Jane Panties (shown on the mannequin below), which I LOVE and has inspired me to make more silk underwear.
If you are interested in trying out some vintage lingerie patterns, there are many available on Etsy as instant downloads (my friend Anna from Mrs Depew has lots of pre-1950’s patterns, or you can check out SewGirlPatterns for 1960s-1980s patterns), or you can get your hands on the original things. Many of these patterns are meant for woven fabrics, as knits weren’t as widely available even just 20-30 years ago (trust me, I remember this!). Here is a nice source for silks that I have purchased from before! Be warned though, once you wear silk lingerie, it’s hard to go back!
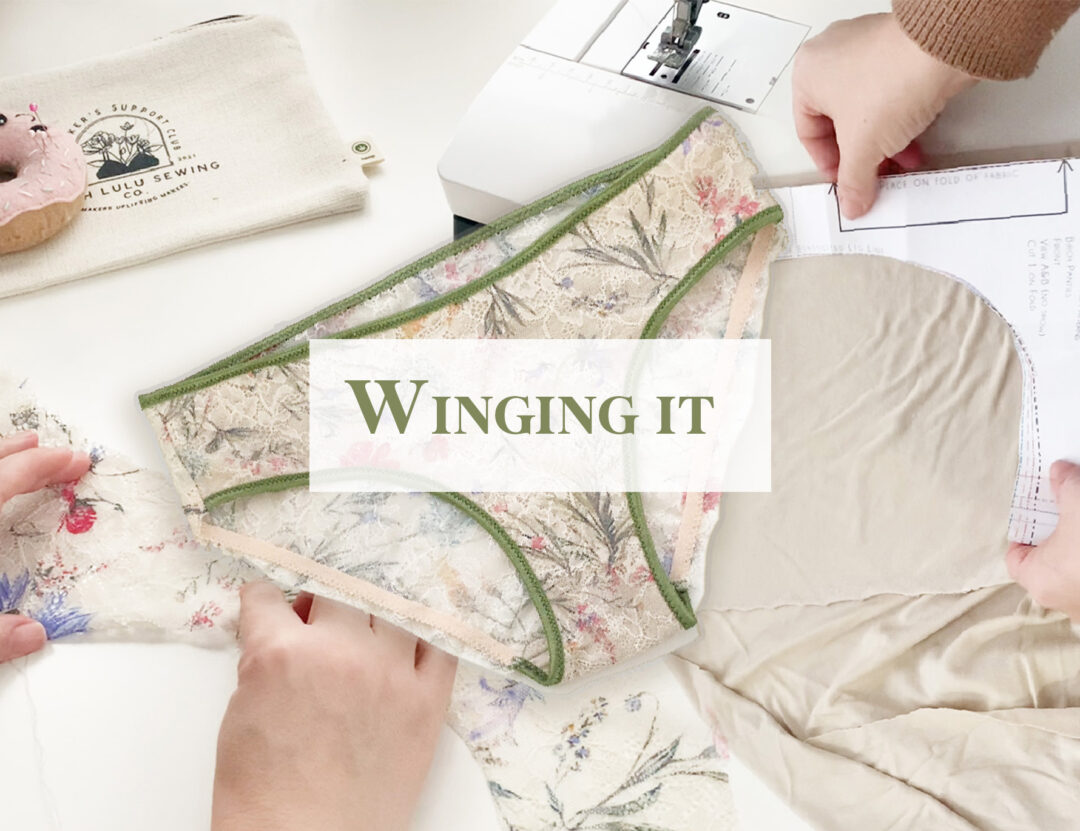
I’m envious of those sewists who plan things out thoroughly and sew with intention and precision. That’s not to say my sewing isn’t excellent. I am very confident in the quality of my construction methods and demand a high level of quality from myself especially when making something for others. However, my methods can be quite chaotic… and I think there is actually some benefit to this chaos. I often come up with new ideas and techniques along the way. My mom always jokes with me that I don’t follow any of the rules and yet still end up with something beautiful.
I decided to turn this chaos into a series on my YouTube channel. I’ll just show you my designing/construction process, complete with the mistakes I make a long the way. I always liked that Bob Ross quote, “Happy accident.” So often a little mistake in my design will turn turn into a feature with a little creativity. For me, a design isn’t something I always initially see in completion. I get the idea or the feeling, and let it take a life of its own.
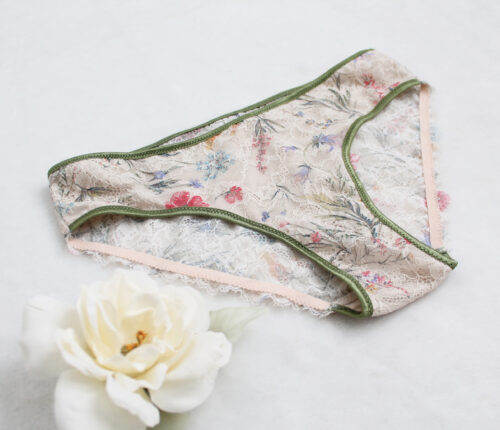
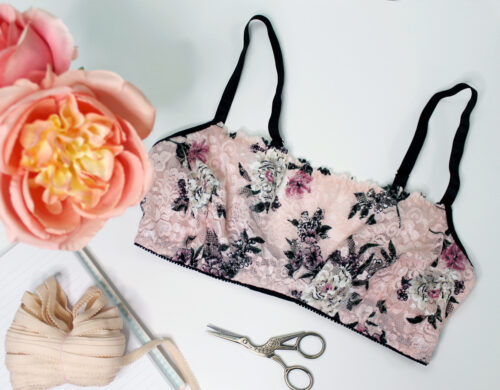
For this first episode, I wanted to use my Birch pattern (my current favourite for day-to-day wear), but I wanted to sew it entirely out of a relatively narrow stretch scalloped lace. I also prioritize comfort these days, so I wanted to sew them in a way that they would be pretty, but still comfortable for chasing after a toddler, working, and walks about town.
I’m really trying to grow my YouTube Channel. As I think more about what makes me happy, it’s just creating. Videos like this allow me to make practical use of that creative spark. I really appreciate the likes, comments and subs! It really does help the channel grow.
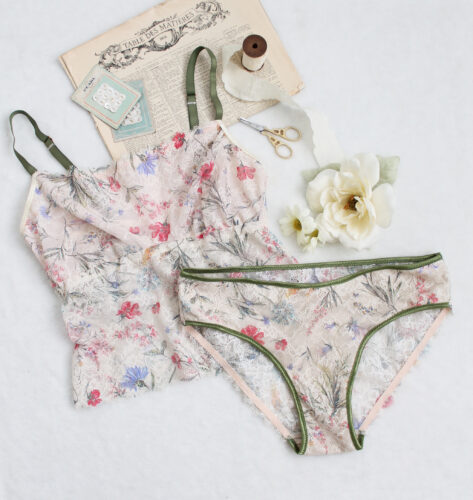
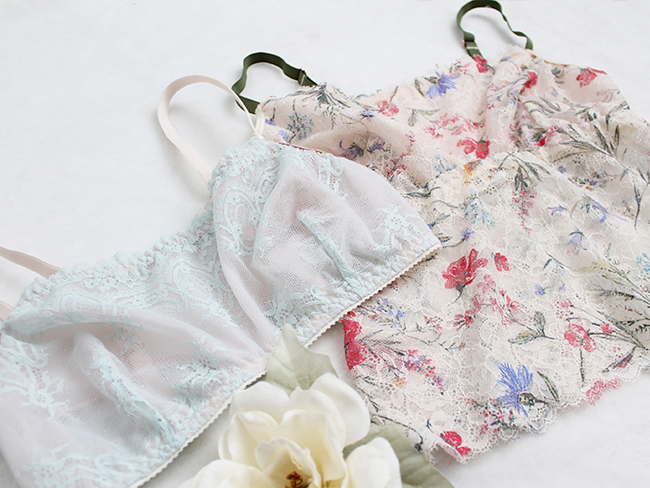
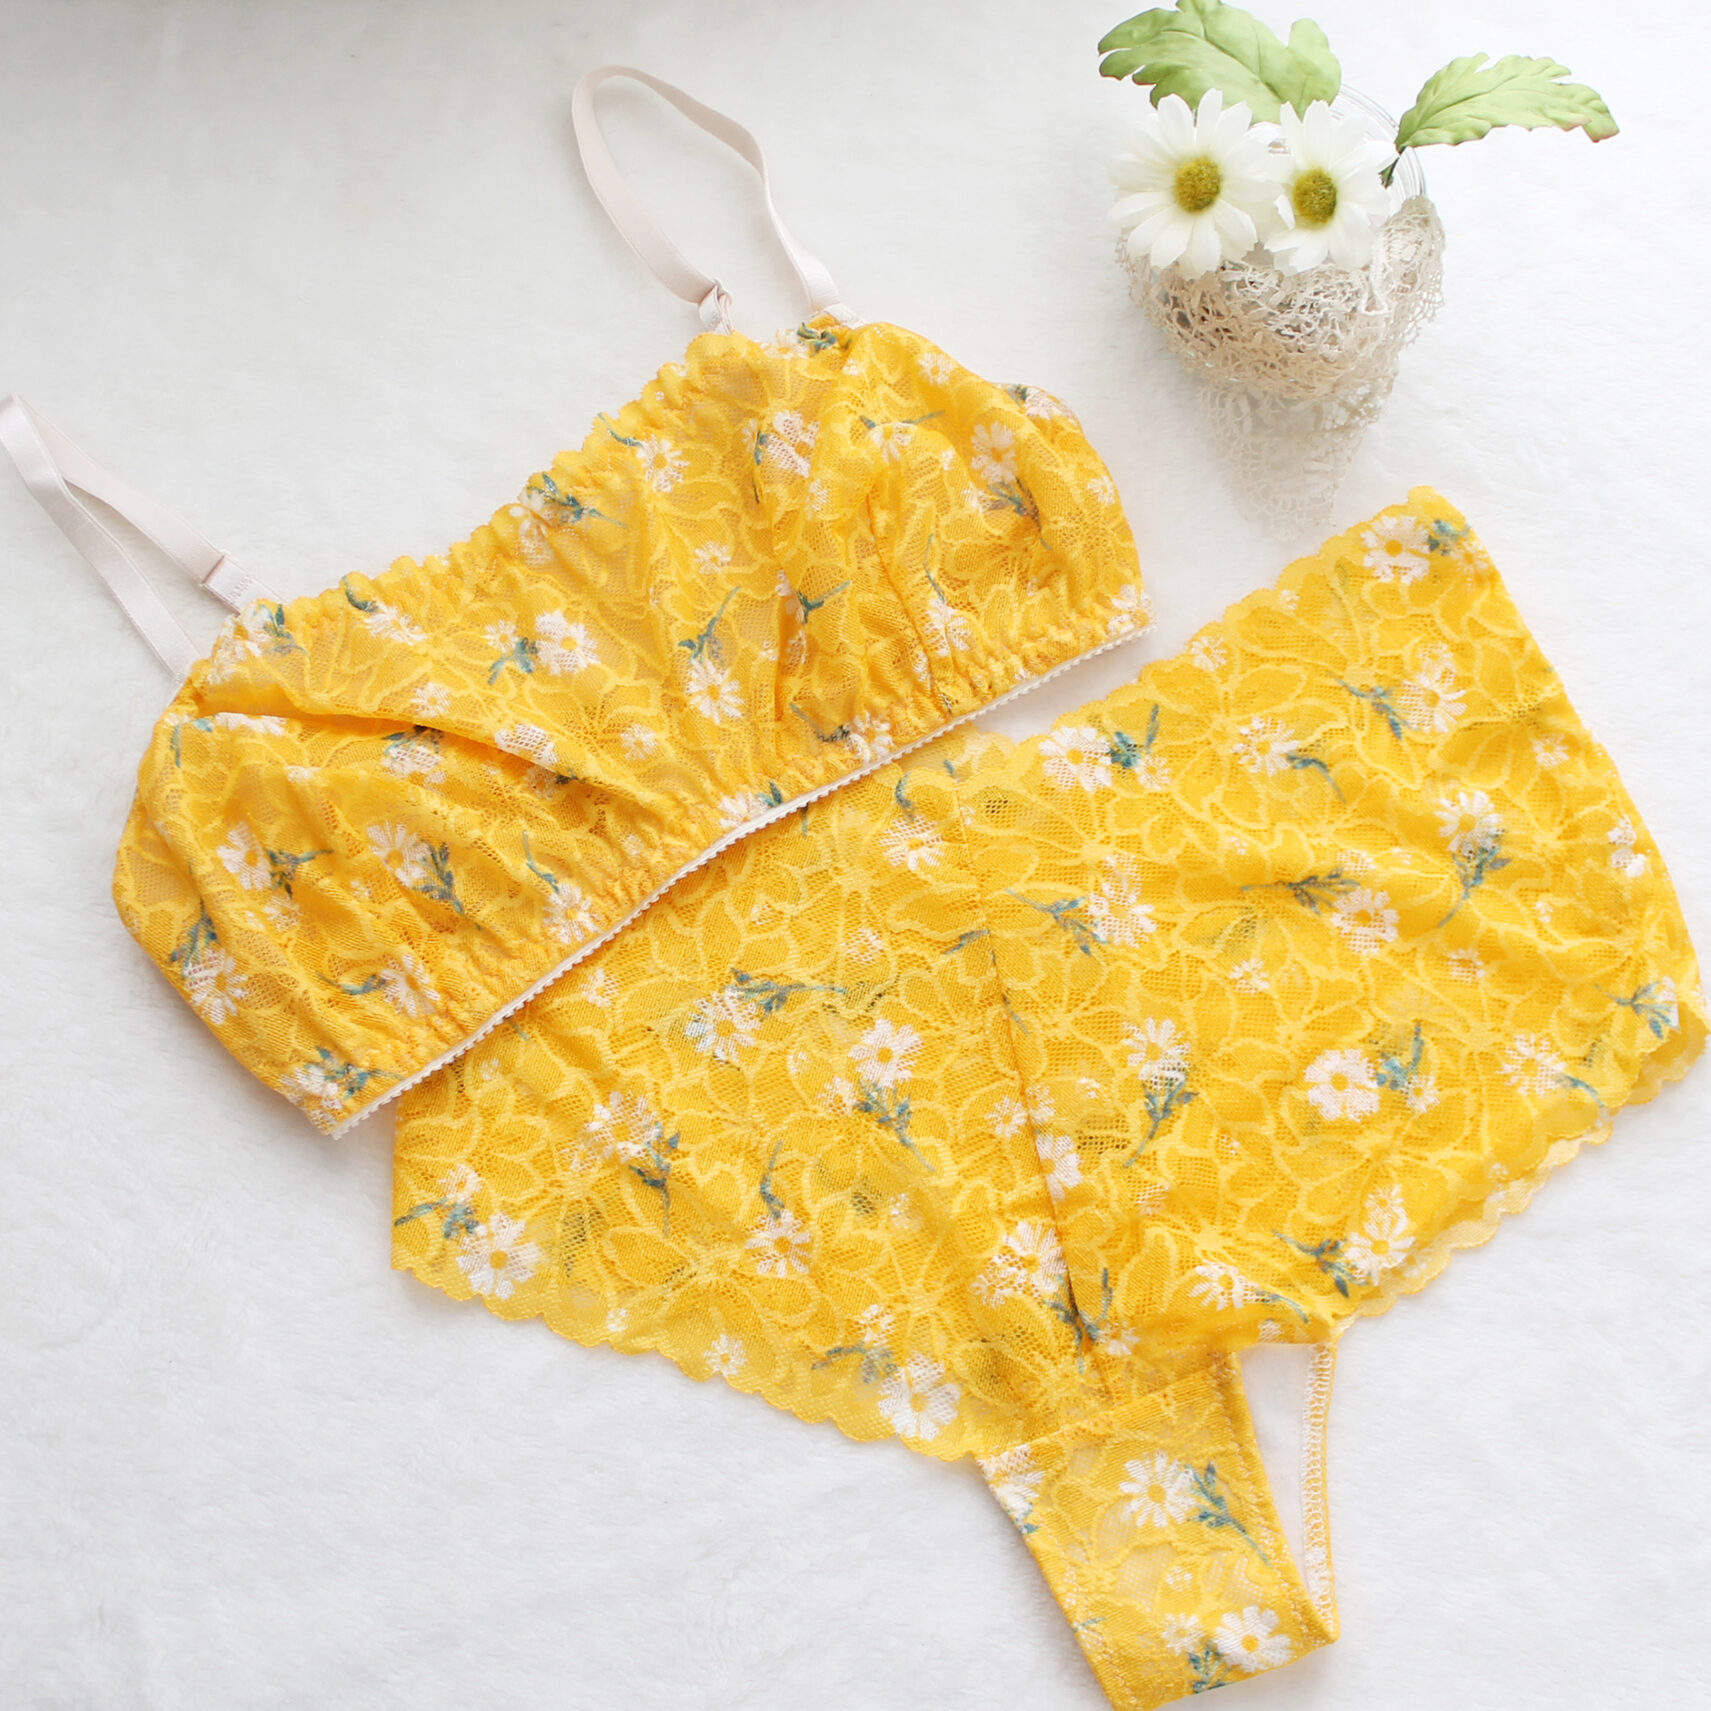
A while back, I stumbled upon some really pretty printed lace. First, there was the sunshine yellow daisy print lace… then I found some classic black and pink… and finally the most perfect lace with sprays of wildflowers… And I wanted a pattern that let the lace be the focal point.
The Daisy Bra is available made to order while fabric supplies last!
The yellow daisy bra has been available for a while now in my lingerie shop, and it’s been one of my most popular sets. I decided to build upon that style and turn it into a cami. I went a little outside my comfort zone and used darts instead of princess seams for shaping, but still used the enclosed seam method you’re likely used to using when sewing lingerie. I’m really happy with the results!
Because lace comes in so many different widths, the width of the lace you choose will effect the overall length of the camisole, if you choose to try out that variation. I’ll be posting a video in the coming weeks that discusses more in depth how to cut scalloped lace.
You can find the pattern in my Etsy Shop or Here. As always, I have videos on my YouTube Channel to help you sew the trickier parts.
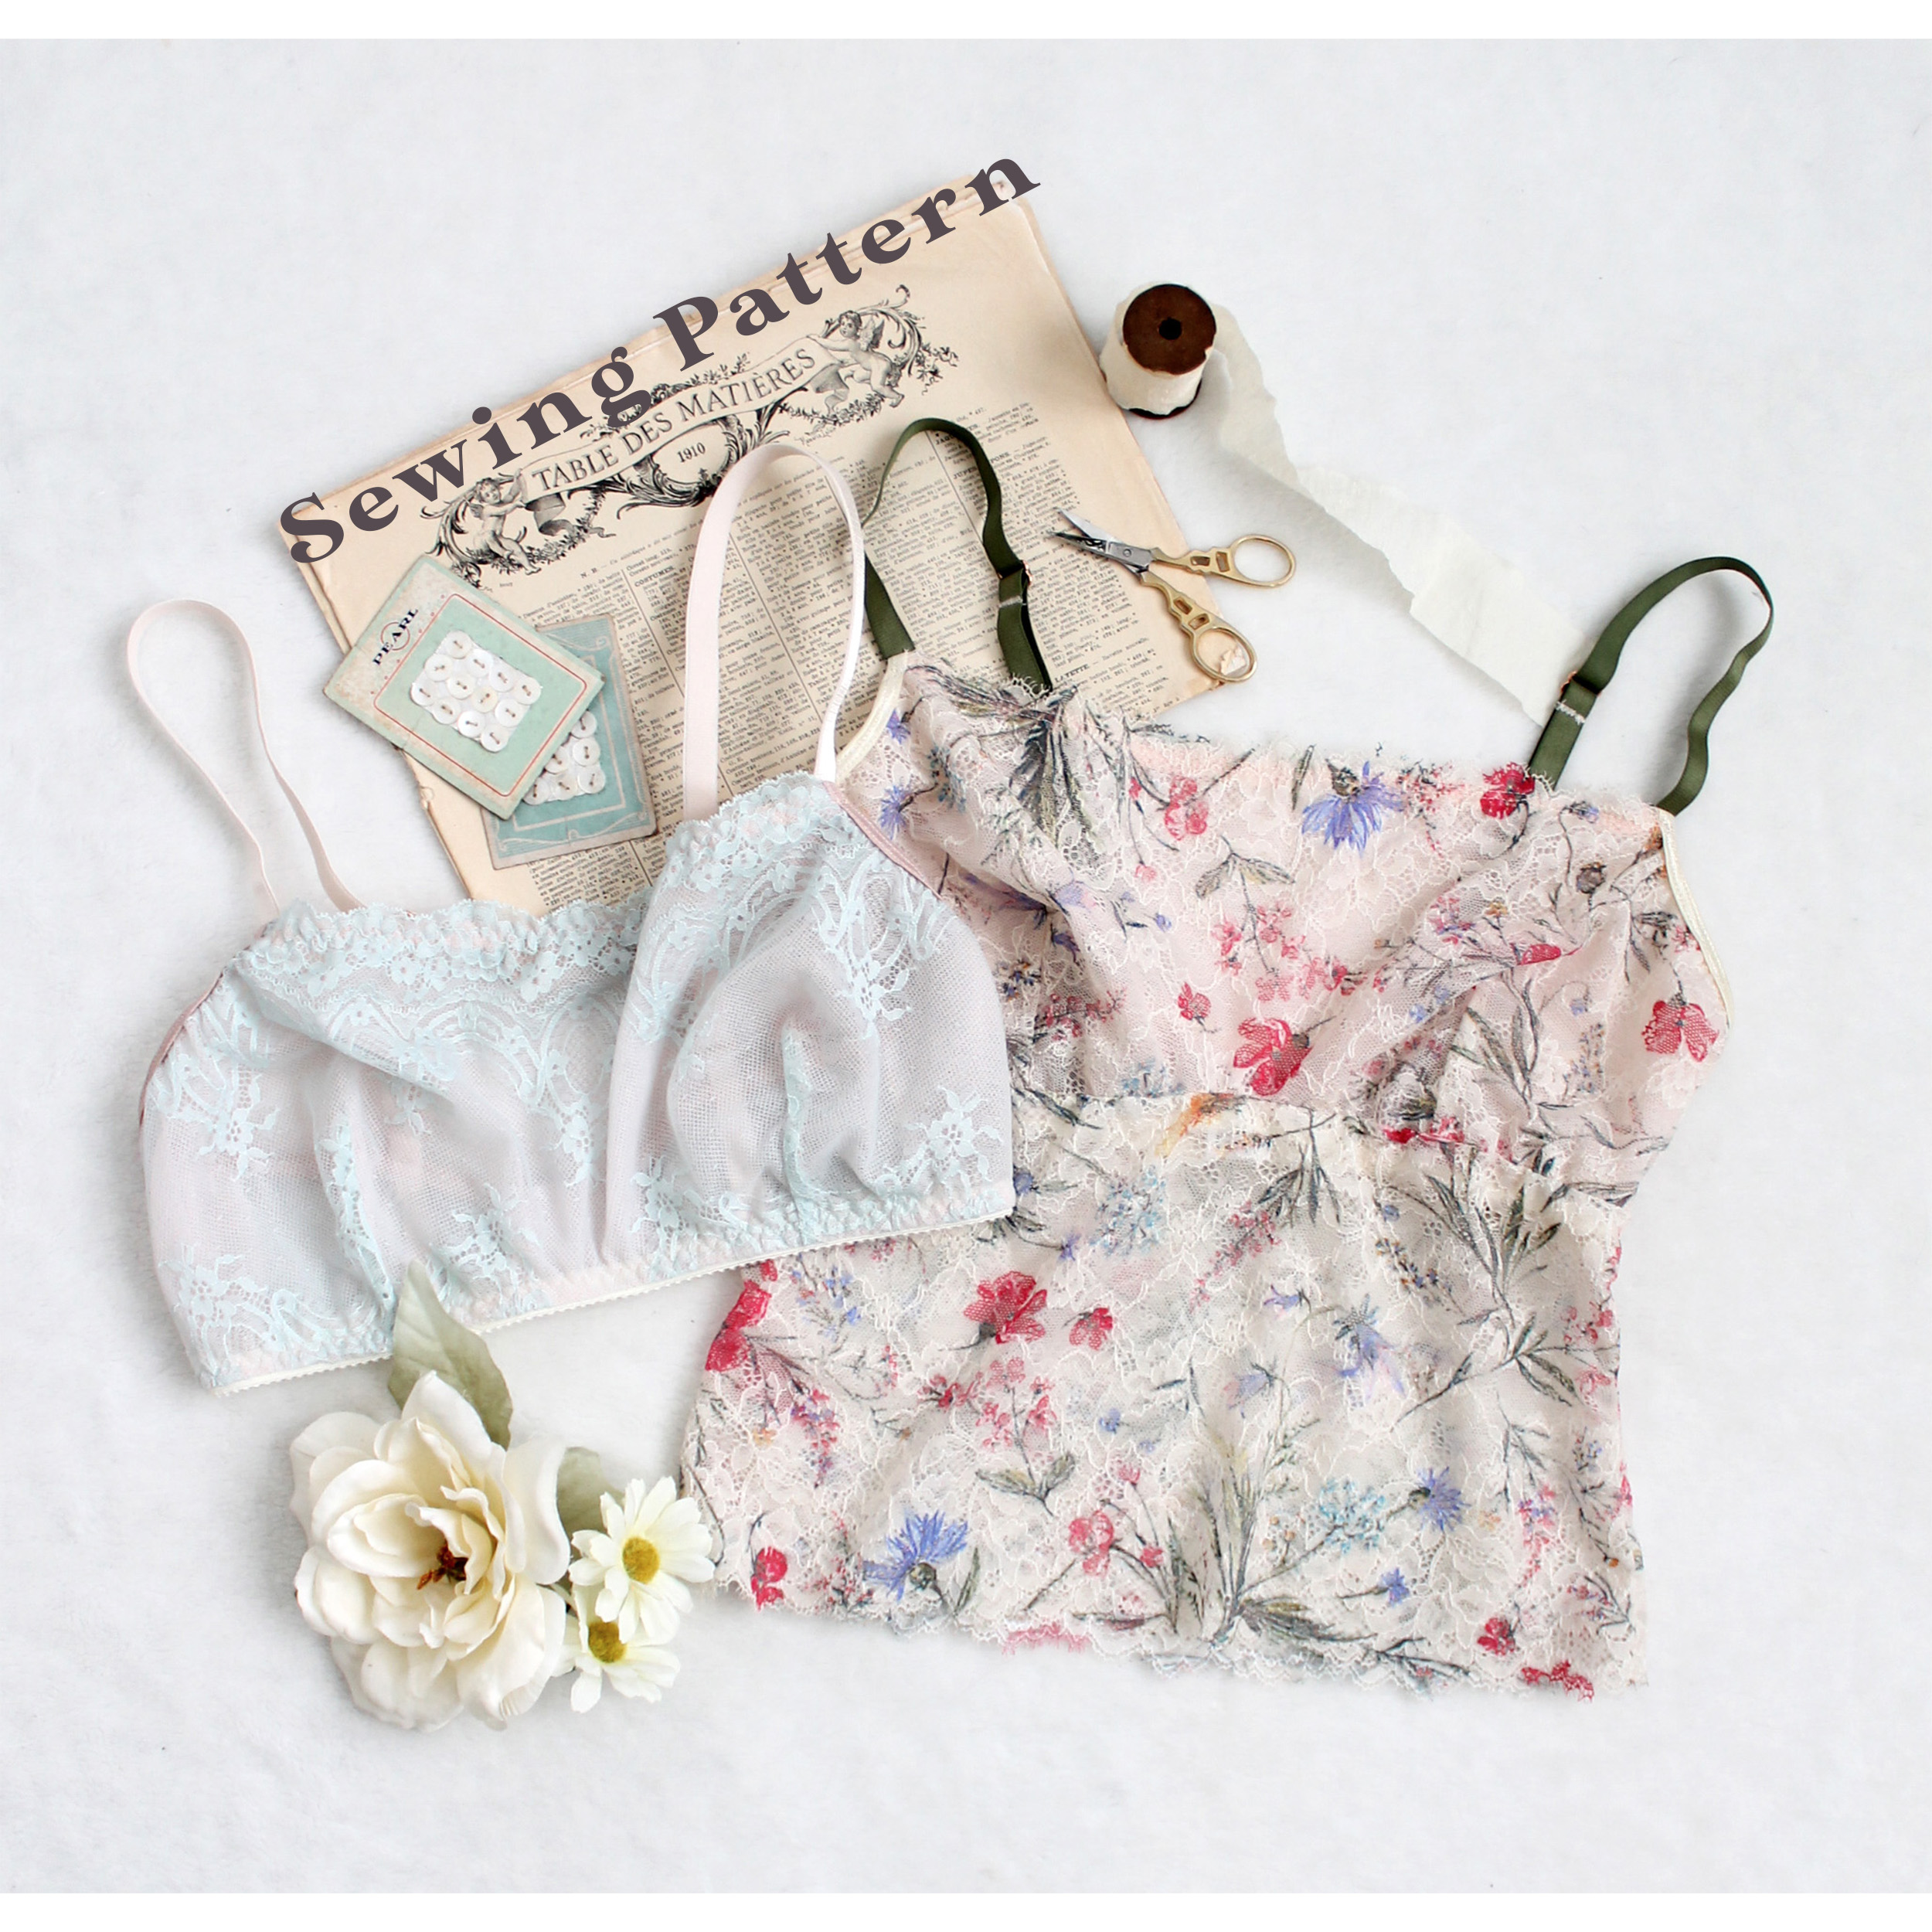
The Meadow Pattern walks you through the steps of sewing a simple lace bralette or camisole. Perfect for Layering!
This pattern is a digitized version of Ohhh Lulu’s hand drafted pattern. You will receive 2 digital files, containing instructions with images, and the multi-size pattern. Video tutorials are available on my Youtube Page.
Skill Level:
Ohhh Lulu Patterns are geared towards Intermediate Level Sewists. Required skills include how to apply lingerie and foldover elastic, how to sew a dart, basic knowledge about how to work with lace.
Size Guide:
Pink – 34-35”Bust, 24-25″ Waist, 33-34″ Hips
Purple – 36-37” Bust, 26-27″ Waist, 35-36″ Hips
Blue – 38-39” Bust, 28-29″ Waist, 37-38″ Hips
Teal – 40-41” Bust, 30-31″ Waist, 39-40″ Hips
Orange – 42-43” Bust, 32-33″ Waist, 41-42″ Hips
Red – 44-45″ Bust, 34-35″ Waist, 43-44″ Hips
Black – 46-47″ Bust, 36-37″ Waist, 45-46″ Hips
**As with any pattern, please sew a test garment in a fabric of a similar stretch to determine the proper sizing for you, and to make any fit alterations**
We use cookies on our website to give you the most relevant experience by remembering your preferences and repeat visits. By clicking “Accept All”, you consent to the use of ALL the cookies. However, you may visit "Cookie Settings" to provide a controlled consent.
This website uses cookies to improve your experience while you navigate through the website. Out of these, the cookies that are categorized as necessary are stored on your browser as they are essential for the working of basic functionalities of the website. We also use third-party cookies that help us analyze and understand how you use this website. These cookies will be stored in your browser only with your consent. You also have the option to opt-out of these cookies. But opting out of some of these cookies may affect your browsing experience.
Necessary cookies are absolutely essential for the website to function properly. These cookies ensure basic functionalities and security features of the website, anonymously.
Cookie
Duration
Description
cookielawinfo-checkbox-analytics
11 months
This cookie is set by GDPR Cookie Consent plugin. The cookie is used to store the user consent for the cookies in the category "Analytics".
cookielawinfo-checkbox-functional
11 months
The cookie is set by GDPR cookie consent to record the user consent for the cookies in the category "Functional".
cookielawinfo-checkbox-necessary
11 months
This cookie is set by GDPR Cookie Consent plugin. The cookies is used to store the user consent for the cookies in the category "Necessary".
cookielawinfo-checkbox-others
11 months
This cookie is set by GDPR Cookie Consent plugin. The cookie is used to store the user consent for the cookies in the category "Other.
cookielawinfo-checkbox-performance
11 months
This cookie is set by GDPR Cookie Consent plugin. The cookie is used to store the user consent for the cookies in the category "Performance".
viewed_cookie_policy
11 months
The cookie is set by the GDPR Cookie Consent plugin and is used to store whether or not user has consented to the use of cookies. It does not store any personal data.
Functional cookies help to perform certain functionalities like sharing the content of the website on social media platforms, collect feedbacks, and other third-party features.
Performance cookies are used to understand and analyze the key performance indexes of the website which helps in delivering a better user experience for the visitors.
Analytical cookies are used to understand how visitors interact with the website. These cookies help provide information on metrics the number of visitors, bounce rate, traffic source, etc.
Advertisement cookies are used to provide visitors with relevant ads and marketing campaigns. These cookies track visitors across websites and collect information to provide customized ads.