Browsing Tag

garter belt

The Cora Elastic Strap Garter Belt

Lingerie, Sewing Patterns

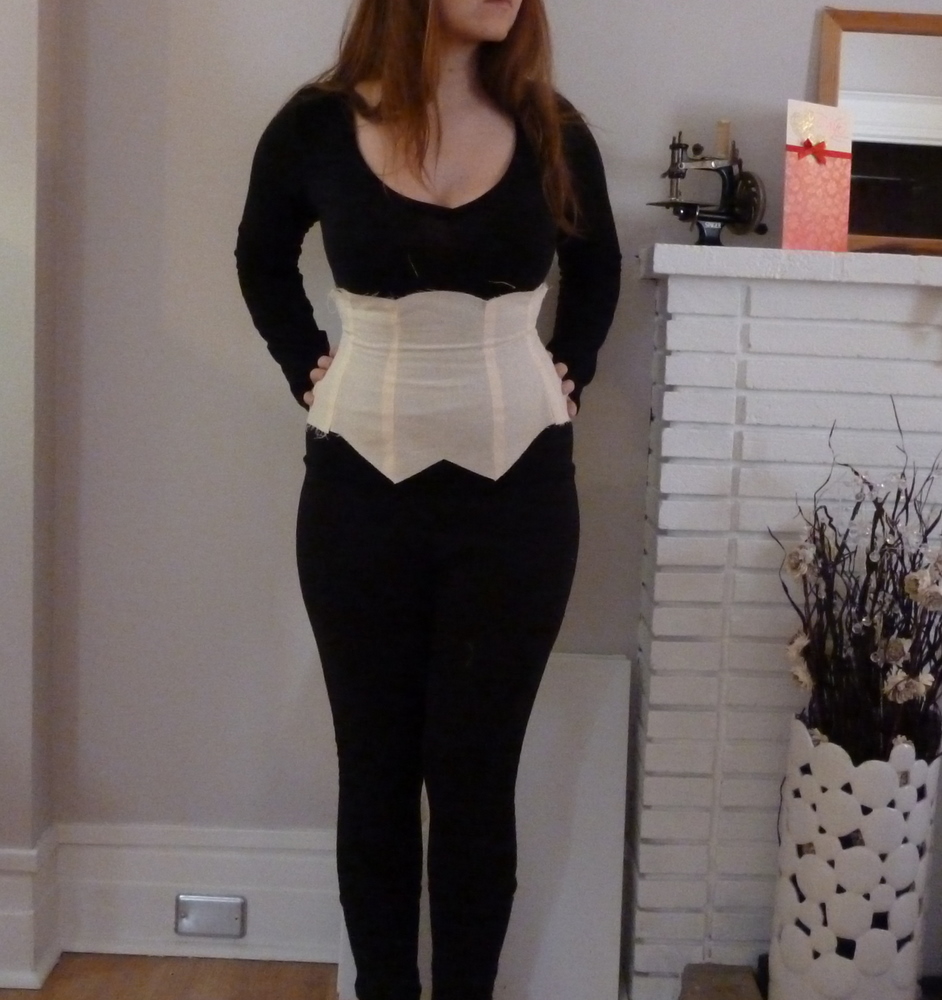
When I spoke to Rachel from Maker Style a while back, we talked breifly about how our styles have changed over the years. I definitely would say I’ve developed a more modern, minimalist aesthetic.  When I first started designing, my focus was on making things as elaborate, complicated and filly as possible. Over the last couple of years, I’ve come to learn I feel most comfortable in the most simple things. Simple lace undies, comfortable cotton bras (but in fantastic prints), staple black leggings, staple oversized top.

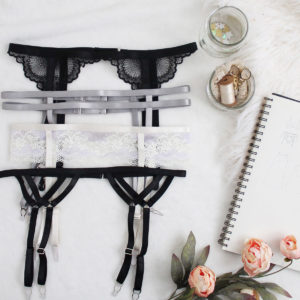
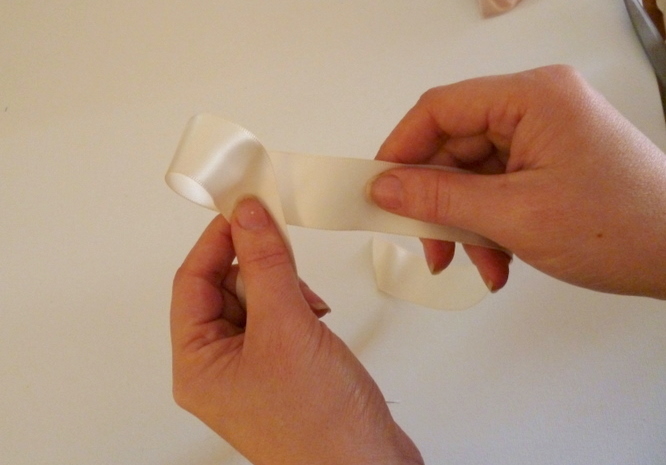
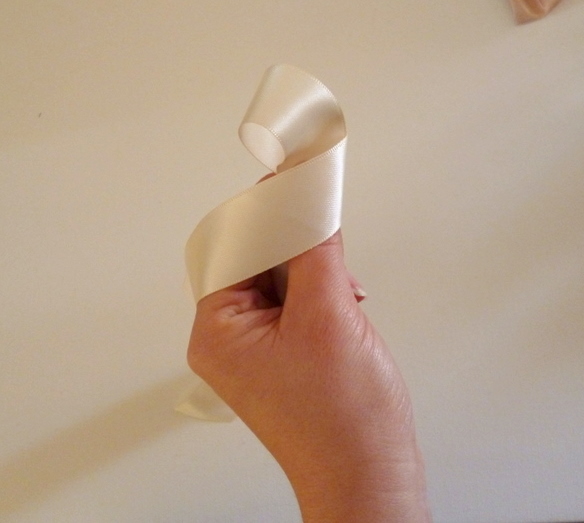
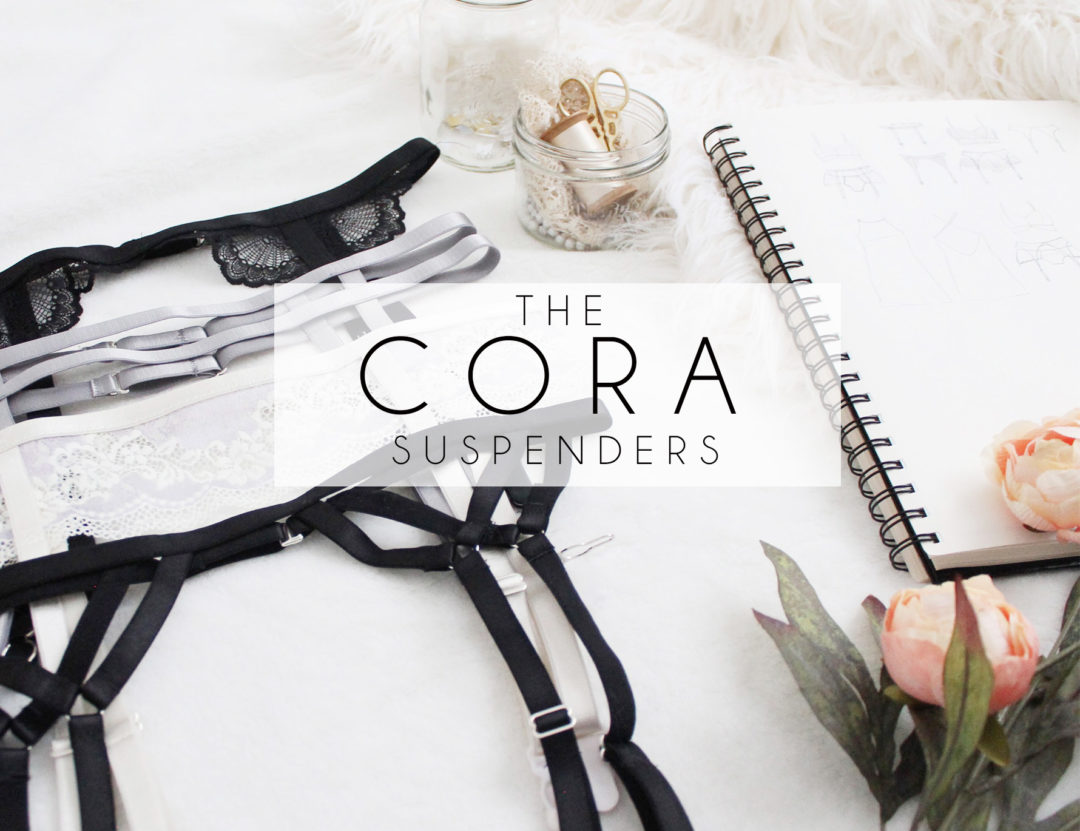
So, I really like this garter belt. The Cora tutorial does not come with any pattern pieces, but measurements and instructions on how to make a variety of elastic strap garter belts. You can make these in a variety of widths of elastic, which will slightly change the overall look, but I’d recommend not using anything less than 1/2″.


I’ve actually released this in two versions. There is a full tutorial for $2.99 that will walk you through all of the styles. Then, I have a FREE version that will walk you through how to sew the Lace-V style.

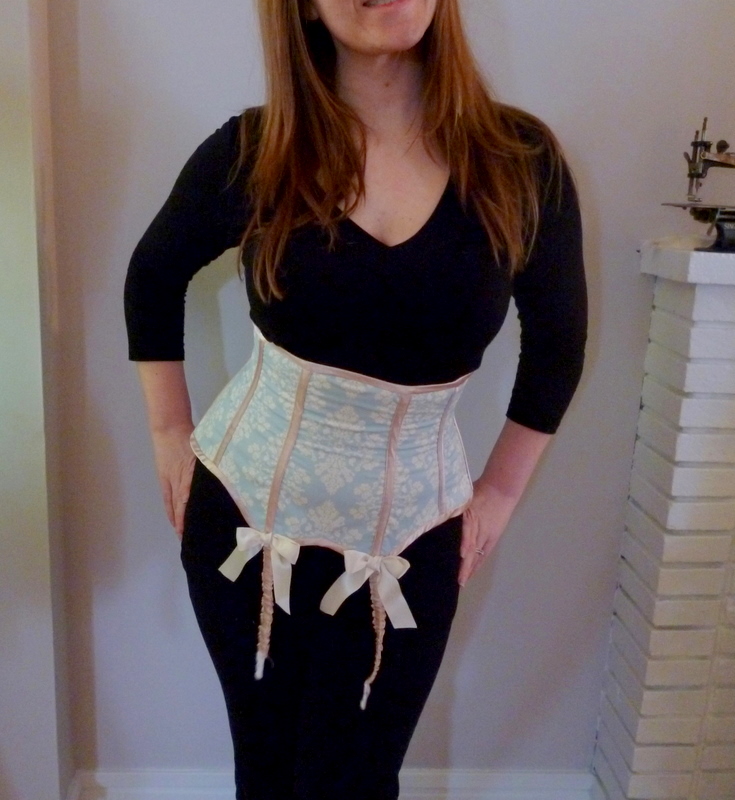
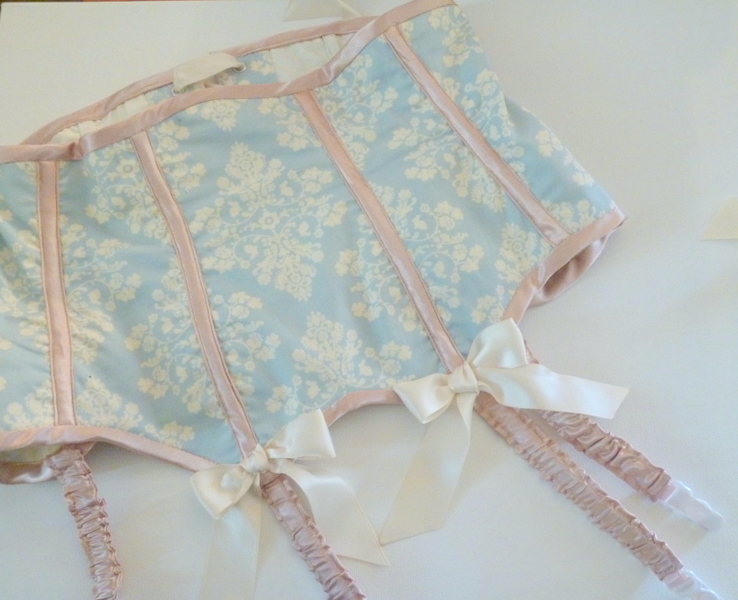
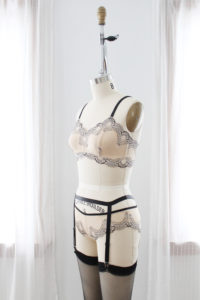
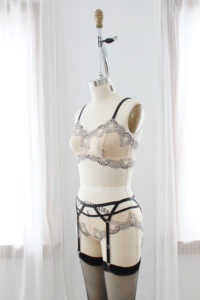
Out of all 5 styles, I think the single strap version might just be my favourite!

Ooh la la Pin Up Sew-Along… Adding Bows.

Uncategorized
We have a saying around my house… “Bows make everything better.” Whenever I finish something that I’m not 100% thrilled with, my husband suggests I “slap some bows on it,” and you know what? It usually works!
I am adding bows to the “points” on my corset above my garter straps.  I’ll show you how to make 2 kinds of bows.
The first kind of bow is a sewn bow.  Cut a large rectangular piece – I cut mine on the bias.
Fold in half length-wise and stitch around the edges, about 1/4″ Seam allowance, leaving a small gap where you will turn the rectangle inside out.  Clip your corners, flip right side out, and pull your corners out with a pin.

Grab a piece of left over bias trim, or make a small strop of fold over bias tape.

Add a row of basting stitches down the center of your rectangle and gather, tying off both ends.

Sew your bias strip around it, forming a loop.  I left a raw edge on the back of mine.  This can then be hand sewn onto your corset.

My favourite bow, the the bow I am using on my corset, is a hand tied ribbon bow.  I took a piece of 1 1/2″ satin ribbon.

And tied a bow.  Cut the ends on an angle, at equal length, and singe with a lighter.  Give your bow a press with a hot iron (but not so hot as to melt the ribbon – always test on a scrap first).

I machine stitched my bows on, but you can also hand stitch.

Here’s my best pin up pose!

Voila! What kind of embellishments will you use on your corset?

Ohh La La Pin Up Sew Along… Sewing your French seams.

Uncategorized
There is no one “Right” way to sew a garment. This corset can be finished any number of ways – lined, flat lined, sewn in bone casings, flat felled seams… What ever works for you.

My Cotton, flat lined corset is sewn with stitched down french seams, which form the bone casings. I stitched decorative strips of bias cut satin over my casings for some contrast.

The width of seam you use will depend on the amount of seam allowance you added to your pattern and the width of your boning. I am using ¼” boning, and have drafted ⅝” seam allowances. Here is how I am sewing my seams:

If you are flat lining your corset, Treat your lining and your self piece as 1 piece of fabric.

Wrong sides together, pin your seams in place, stitch ¼” in from raw edge.

If you are flat lining your corset, to prevent too much bulk in your seams, trim back the excess, staggering the layers.

Press, and fold right sides together so your first seam is encased. Stitch ⅜” in, and press to one side. Stitching as close to the edge of your seam as you can, top stitch the seam down.

There are lots of layers in there! The boning will get inserted right into these channels. Be precise with your stitching, or it will get tight to put your boning in!

Ohh La La Pin Up Sew Along… Sewing your Muslin.

Uncategorized

I have to admit… I can be a lazy sewist, when I am sewing for myself, but lingerie muslins take no time to sew, because they are so small! No need to worry about interfacings or linings for your mock-up -You just need something to test your fit!

For my muslin, I did not worry about sewing flat felled seams, like I will be sewing in my finished garment. I stitched regular seams, 5/8″ in from the raw edge and pressed flat. The pieces fit together perfectly – great work on Anna’s part!

For the laced corset – On the centre back pannel, fold your 2″ extension flap over (towards the inside), press, and stitch 3/8″ in from the centre back edge to form a bone casing, and again 1 1/2″ in from the center back. We will add 2 bones to the mock up corset to test the fit. Insert a bone along the centre back, beside where the corset will lace. Always round off the edges of your boning, to prevent the bone from wearing through your fabric.

Instead of using eyelets on your mock-up, make a mark every 1 1/2″ down where your lacing will go and make a small button hole – this will allow you to lace up your corset to test the fit, without any waste of precious eyelets!

You now have a corset that laces up the back! Try it on and see how it fits.

Mine looked good from the front, but didn’t quite do up all the way in the back. I added 1/8″ of an inch to the side front and side back seam, which corrected the fit.
Oooo… Curvy! Va va va voom!

For those of you making a hook and eye corset, if you have extra hook and eye tape, you can add some to your muslin to test your fit.

Remember to transfer any changes you made to your muslin, over to your pattern.

So, how did your muslins fit? Did you need to make a lot of adjustment?