Browsing Tag

Ginger Sew Along

The Ginger Swimsuit Sew Along: Finishing with Elastic

Uncategorized
Once all of the major assembly has been completed (side seams and crotch seam), and we’ve basted on our shoulder straps, we can sew the elastic the leg openings and neckline.  To get an idea of the length of elastic you need, wrap a piece of elastic snugly around your leg, or around the chest where the neckline will sit.  Snip about 1″ longer than what you need.  Using a long zig zag stitch, anchor one end to the right side of the swimsuit, as close to the raw edge as you can get it neatly – if you have seam allowance that hangs over, that is fine, just snip it afterwards.

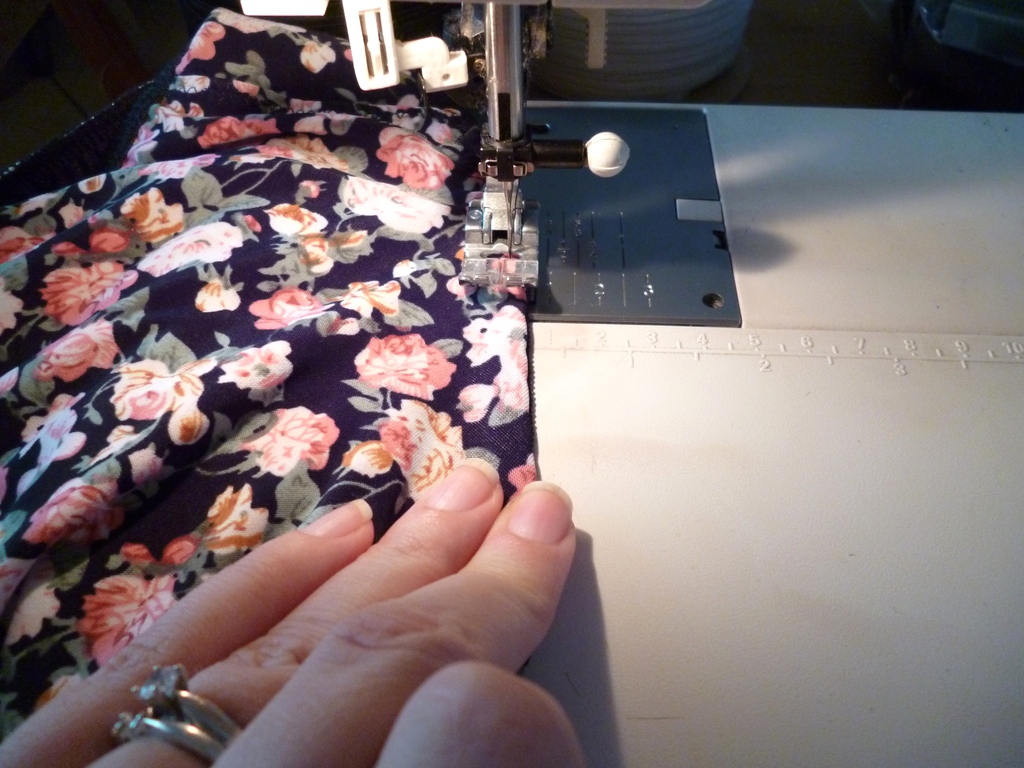
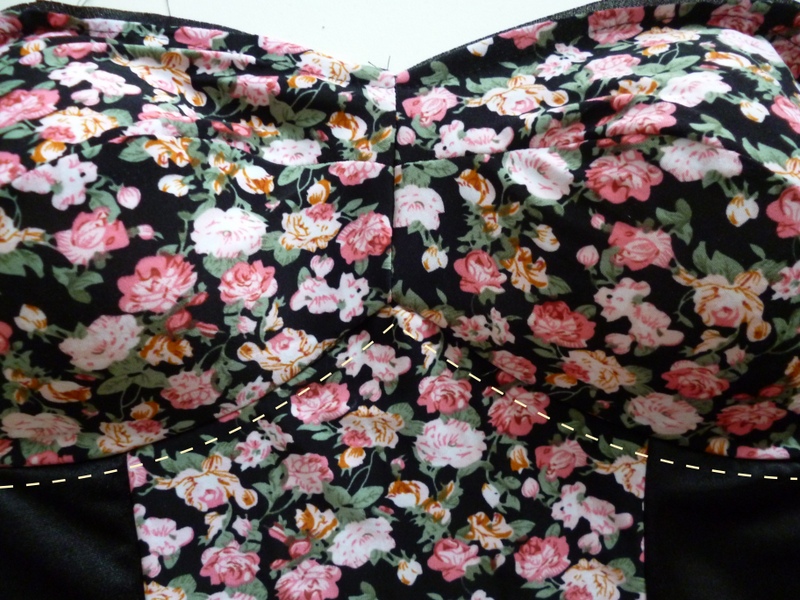
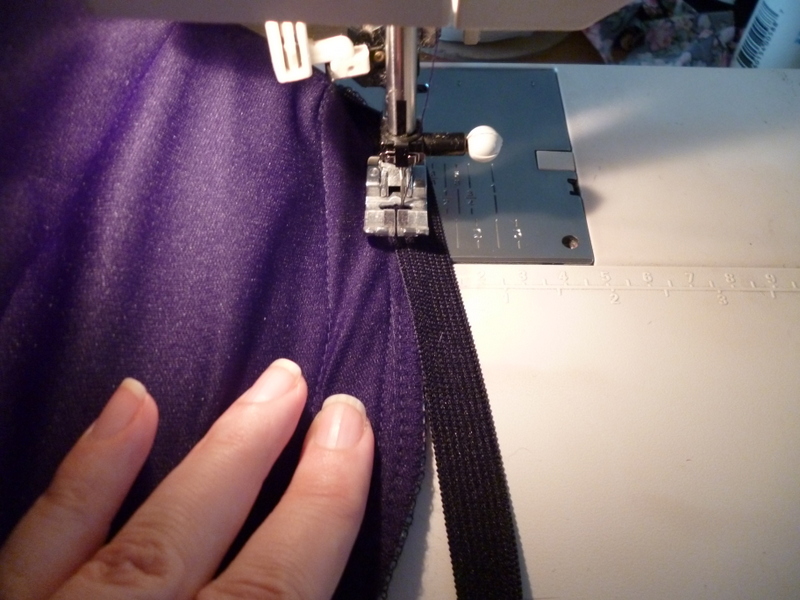
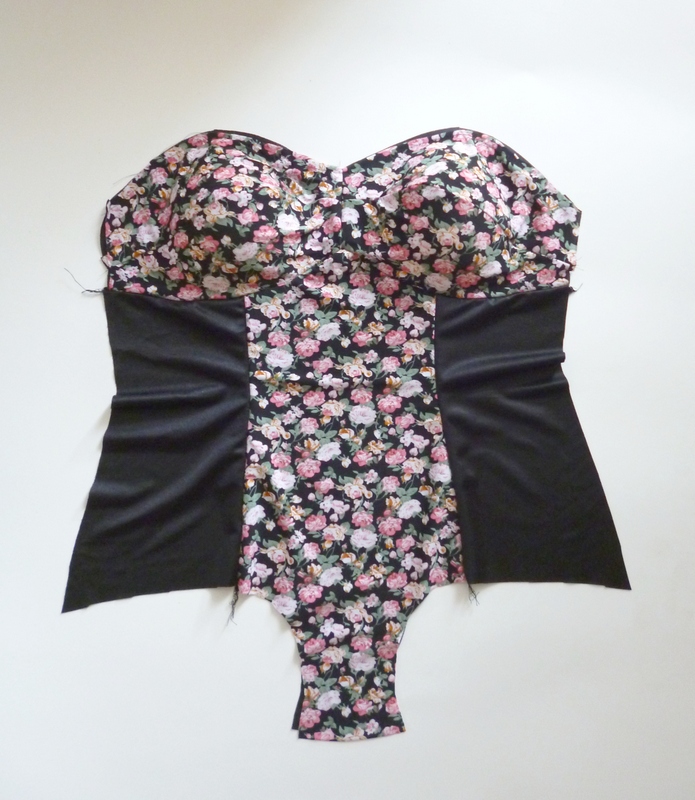
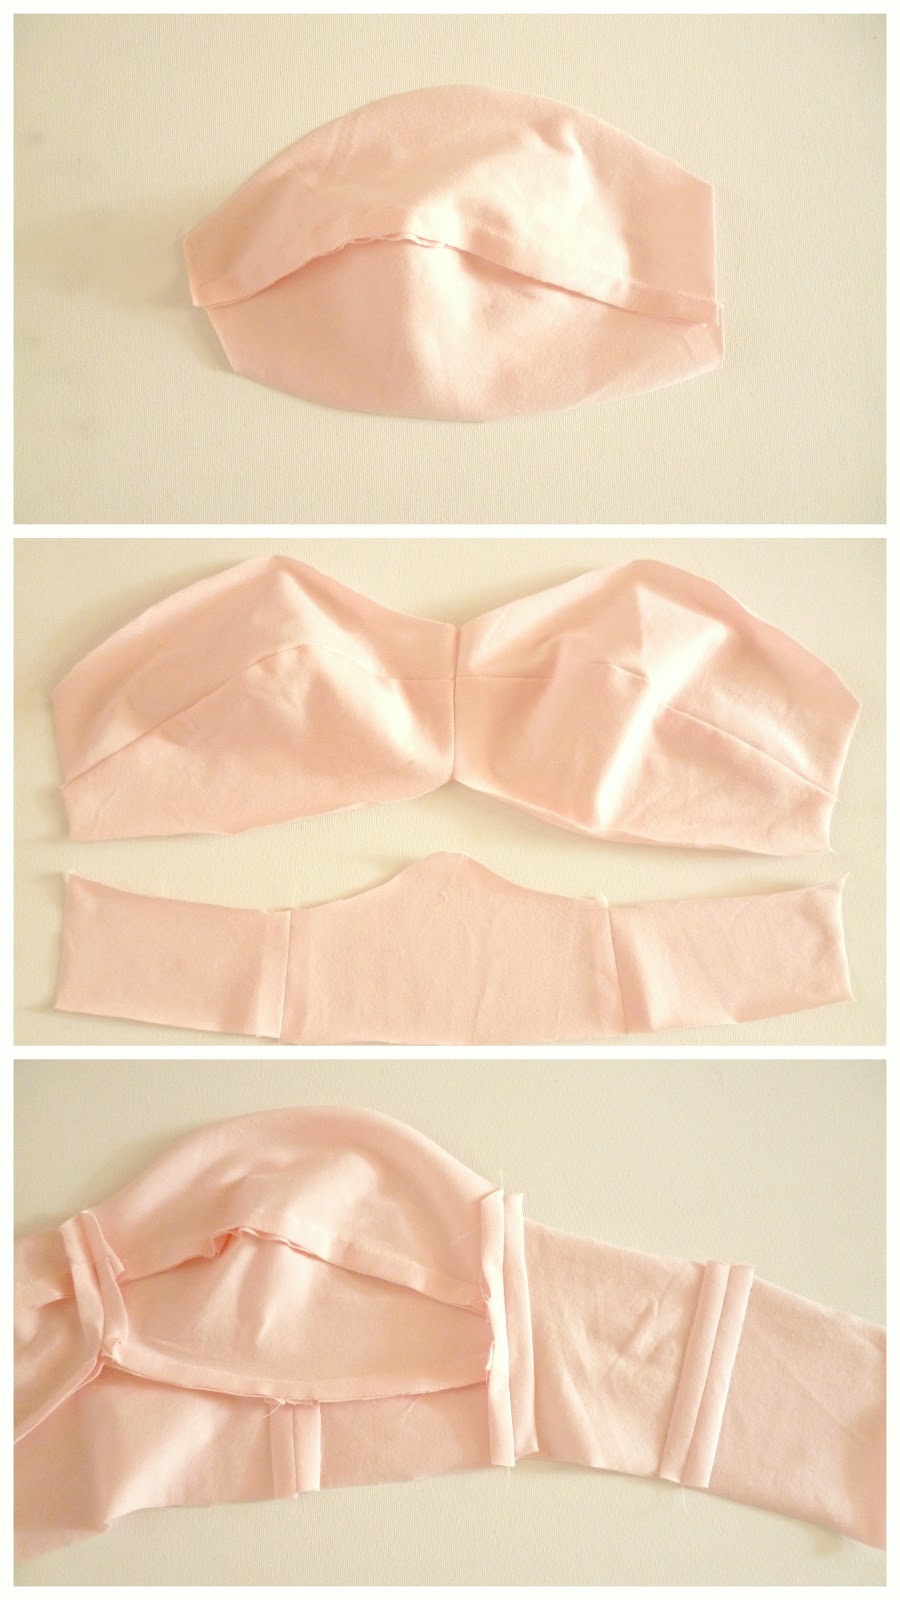
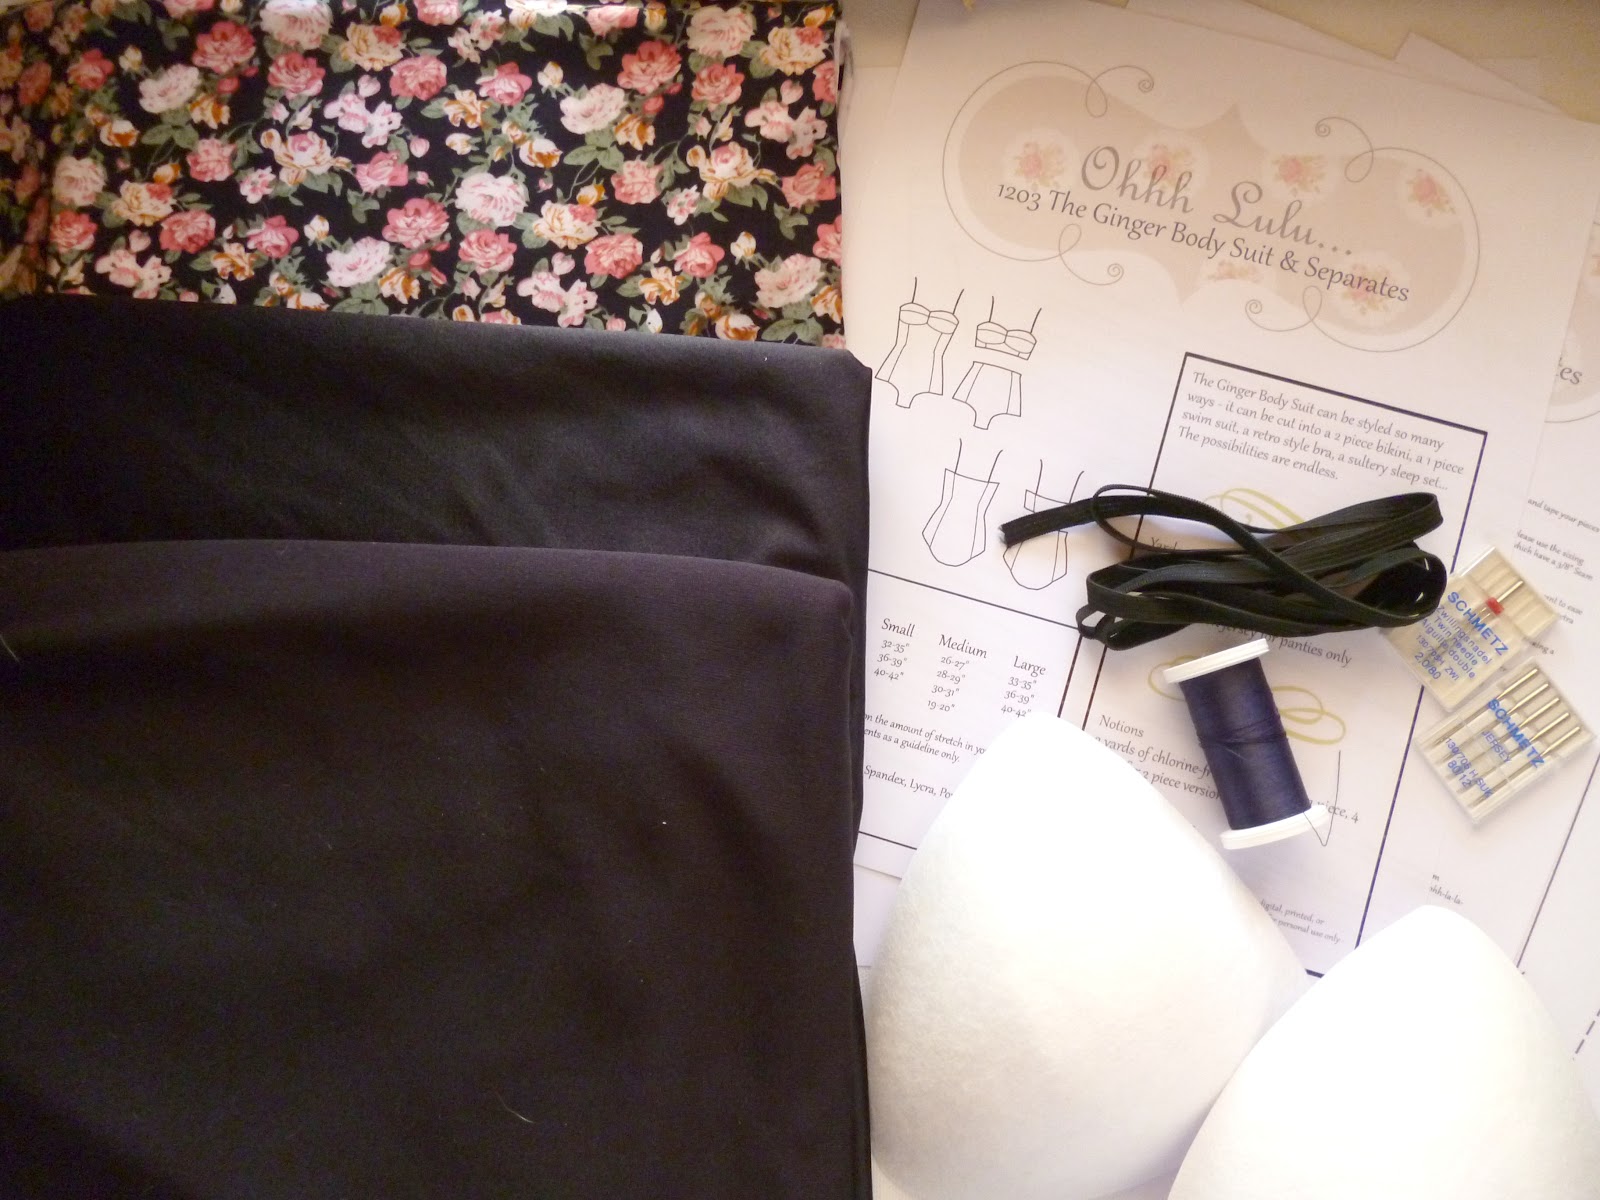
As you begin to stitch, gently pull the elastic – you will see that as you stitch, the elastic will start to “wrinkle” the fabric it is attached to.  I do not have a real formula for this… After sewing a million pairs of panties, you get the knack for how tight to pull it.  If you haven’t sewn elastic like this, you might want to try on a few scraps, or on your muslin first to test out your tension.  You do not want to shirr your fabric, you just want to create some tension so that your suit doesn’t ride up or fall down!

When my zig-zag stitch zags to the left, in towards the garment, I am stitching just over the elastic.

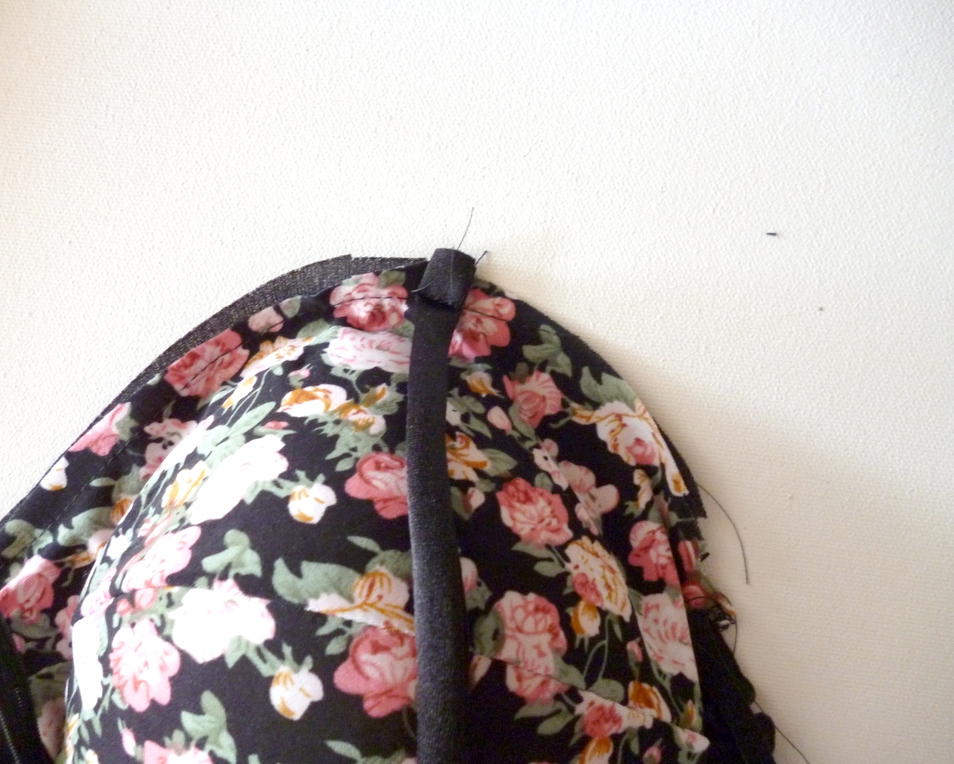
When I get to the end, I just overlap my elastic, and zig-zag in place. This is the most easy way to finish your elastic – For me this is a fun summer sewing project, and I am after easy. Alternatively, you can begin by sewing your elastic into a loop and stitching it on, OR sew your elastic on prior to sewing your crotch seam (and leave the top of one side seam open at the neckline).  This way, when you sew your crotch seam your raw edges of elastic get hidden in the seam.  If you do it this way, I highly recommend top stitching the seam down, or at least doing a bar tack to securely anchor the elastic down.  There will be a lot of tension at that seam, and the last thing you want is it unravelling at the beach!

Trim off any excess fabric that extends beyond your elastic, fold under, and top stitchwith a wide zig-zag stitch. When the needle zigs to the right, I am about 1/8″ away from my edge. When the needle zags to the left, I clear the elastic on the other side.
And there you go – snug, elasticized leg openings and neck openings.

The ginger Sew Along: Adjustable Straps.

Uncategorized

If you haven’t done so already, you can go a head and stitch up your side seams.  Depending on how you want to finish your elastic, you may want to leave 1″ open at the neckline on 1 side seam, or when we get there, you can just overlap your elastic, like I will be doing.
Like for any strap, you are going to cut a long strip of fabric.  My sliders are 1/2″ sliders, so I cut a piece of fabric that was 2″ wide.  1/2″ seam allowance on either side + 1/2″ x2 for my actual strap. The total length should be about 45″.
Right sides together, I serged my strip into a long tube.  Using a safety pin, I turned it inside out. 
Then I divided my tube into 4 parts – 2 2″ pieces, and 2 roughly 18-20″ pieces (if your straps will be stretchy like mine, I recommend cutting them on the smaller side)
Using a light iron, press your strip flat (Careful not to singe your spandex!).  Stitch your tubes onto the o-rings and sliders.  Back Tack, or bar tack these in place.  Loop your long strip through the o-ring, and weave it through your slider. 

Right sides together, baste the strap onto the front and the back.  I put mine at the peak of the the cup in the front, and at the side back seam in the back.  Be careful not to twist your strap! This is very important because next we will be applying our elastic and you really won’t want to be picking those stitches out (trust me, I have done, and will continue to do this!).

Strap Alternative #1: If you do not want this style of strap, sew two long tubes, any desired width, and about 20″ long, baste them to the front only, tie behind the neck, and Voila! – halter straps.

Strap Alternative #2: Sew 4 tubes, 20″ long each, any desired width.  Baste one on the peak of each cup, and one at each side back seam – tie the straps at the shoulder and turn under the ends.  Bow-straps!

The Ginger Swimsuit Sew Along: Adding a little support

Uncategorized
If you are larger chested, you might find that you need some support under the cups to keep everything in place.  Before you sew your side seams, you might want to try adding a piece of 1/2″ wide elastic onto your seam allowance, under your cups.  For those of you who followed the Oooh La La Sew Along, we’ll be doing the exact same thing we did there!  This step is completely optional! 
See the yellow dashed lines? That’s where I need some more support.  I am going to apply the elastic right along the seam allowance where the bust cups meet the body of the swimsuit.

Line your elastic up with the seam line, so that the excess of the elastic hangs over the seam allowance.  Using a long zig-zag stitch, make a couple of stitches through your elastic and your seam allowance to anchor the elastic.  As you sew, gently pull the elastic so you create just a LITTLE bit of tension.  We want the elastic to just hold the base of the cups closer to our bodies, we do not want to pull so tight that it shirrs the fabric.

When you get to the center, with the needle down, lift the presser foot, gently pivot, and continue on.  You could easily do the same thing by adding clear elastic into your seam line.

If you need some extra clarification on this step, Visit this Post, which talks about it in more depth.  Once you have zig-zagged the elastic on, you can top stitch with a zig-zag stitch, or twin needle, or just leave it loose. 

Ginger Swimsuit Sew Along: Sewing the Seams + Flat Lining

Uncategorized
While swimsuits are normally sewn with a serger, I’ve sewn bathing suits for myself before on a straight stitch machine.  If you only have a straight stitch, long-length, narrow-width zig zag stitches are your friend, as is gently pulling your fabric as you sew, so that your seams will stretch. Most machines, if not all, can accommodate twin needles.  This is also an excellent way to achieve a stretchy seam without a serger. I am a firm believer in making do with what you’ve got at hand!
You are going to start by layering your lining and self pieces, wrong sides together.  You will treat them as one piece.  Line up your side back and centre back piece, and stitch together, 1/2″ away from the raw edge. 
You will assemble the front in the same manner.  Layering your self and lining, treating as one, and sewing side front to centre front, ending up with this:

Looks nice and neat on the inside, huh?

Flat lining is the easiest way to line a garment, since you just treat your lining and self as one piece.  I like this method for lingerie and swimsuits because it prevents any shifting between the lining and outer layer, which is important on garments that are close fitting.  A shifted lining can cause lumps and bumps that show through.

Once you have completed sewing the side fronts to the centre, you can stitch your bust cups on.  I start my stitching line from the centre.  For me this is the best way to keep that nice sharp point where the cups meet in the centre!

Ginger Swimsuit Sew Along: Assembling the Cups

Uncategorized
The first part of construction, is assembling the bust cups.  What you do to the exterior fabric, you will do to the lining.
Start by pinning your upper cup to your lower cup, easing in any excess. 

Sew 1/2″ away from the raw edge.  I’m straight stitching mine.

Any time you sew a seam that curves out, you always have to notch your seam allowance, so that when you press your seam allowance open, you avoid any extra bulk.

Once you have assembled both cups, sew them together down the centre seam.  To ensure that the horizontal lines running across the bust match up, I often place them together (right sides together), and make a small tack on the sewing machine, through the seam that I want to match up.  I find this works better than pins, because pins can slip.  This is an easy way to get seams that match up, every time.

After you have sewing your lining and your self, and notched your seam allowance, using a pressing ham, press your seams open.

 Now we are sewing our cups to our lining.  Mine sit about 1″ up from my raw edge at the end, and about 1/2″ up from my raw edge, towards the middle of the cup.  I want to avoid getting the cup stuck in the seam where the body of the swim suit gets stitched on.  This is why I have placed it here.

I stitched around the entire circumference of my cups, directly onto my lining.  I literally placed the lining over my bust, the smacked the cups down over top to see where they felt “natural.”  You’ll feel like a goof, but it’s the best way to see where the cups will feel best on you. I get the weirdest looks from Dan when I sew…
Now that the padded cups are stitched in, lay your exterior fabric over top, so that the wrong side of the lining is facing the wrong side of your self fabric, and baste the two parts together.  Now you can treat this as 1 piece throughout the rest of the process.

Ginger Sew Along: Cutting your fabric and lining

Uncategorized

Now that you have transferred your alterations to your pattern you can cut your fabric. Cutting your fabric and lining is easy. 
  1. Cut 2 of the Upper Cup in Self and in Lining
  2. Cut 2 of the Lower Cup in Self and in Lining
  3. Cut 1 on fold of the Centre Front in Self and in Lining
  4. Cut 1 on fold of the Centre Back in Self and in Lining
  5. Cut 2 Side front in Self – optional to cut lining too. I am using a heavy spandex so I didn’t feel I needed a lining.  If you are using a light coloured fabric, or an unstable knit, line it!
  6. Cut 2 Side back in Self – lining here is optional too

Why line a swimsuit if your fabric is opaque?  Lining does a couple of things.  It gives your fabric stability – especially if you are not using a spandex swimsuit fabric.   Fabric clings when they are wet, proudly displaying every nook and cranny that you may not necessarily want on display at the local beach.  Lining gives you that extra layer. Lighter fabrics, as many of us know, lose their opacity when wet. Lining will prevent an unwanted “Surprise” when you emerge from the water.  So, the moral of the story is, it’s very important to line a swimsuit.

Pins are your friend when cutting knits.  When sewing for myself, I am sometimes so excited to get a project underway, that I am skimpy on the pinning.  Properly pinning your fabric will prevent it from sliding, so you’re sure to get exact cuts each time.

**If you are sewing a 2 piece version, you follow these directions exactly, except that you cut along the waist lines** I’ve included a crotch lining gusset piece for people who may want to sew the bottoms as panties, but don’t want a fully lined garment.  You will find that the crotch seam on this garment sits pretty close to the middle of the legs, which slightly off-sets the crotch lining, providing more coverage up front than towards the back.

Ginger Sew Along: Preparing your Pattern & Sewing your Muslin

Uncategorized
Now that the “Fun” stuff – like the Give away – is over, it’s on to the un-fun stuff.  Sewing a Muslin! I always hate this step, because I get to anxious to get down to the nitty-gritty and see my envisioned garment come to life. But, with the one-piece version it is especially important.  I’ve sewn several bathing suits from commercial patterns, and I’ve always would up adjusting length.  I am a petite lady, just 5’2″ – sometimes torsos are too short, sometimes too long…

 First, print your PDF Pattern – make sure that you have selected “none” for page scaling.   Cut along the dotted lines of the margins and tape your pieces together.  Use the Alpha Numeric markings as a guide so your pages don’t get mixed up.  For me, this is a large pattern – 12 pages, and some pattern pieces look similar, so it’s easy to get mixed up.

And, if all goes as planned, you should wind up with a pattern that looks like this.  You can cut out these pieces and use them as your pattern, or trace them onto tissue paper.  I have already added 1/2″ SA to all seams, and 3/8″ SA to the leg and neck openings.
I am going to keep the muslin sewing breif.  Your “muslin” will be made out of a fabric similar to your actual garment fabric.  I use an inexpensive jersey to sew my test garments – it’s stretchy, like my spandex so I know my finished garment will fit.  
There is no need to line your muslin.  Just follow the “Self” cut guidelines on the pattern.  
Assemble your Cups first – sew side front to center front, attach to cups.  Sew side back to center back.  Stitch Side Seams.  Stitch Crotch seam.  The pictures below show the 2 piece version of the pattern, but the general construction will be basically the same.
From there, try it on, pinch and pin anywhere that needs to be pulled in.  Slash anywhere that needs to be let out.  Transfer your changes to your pattern, or take apart your muslin and use that as your pattern.
Some common fit issues:
1. Bust too big.  If the bust cups are too big, decrease the curve of the cup seams.  You can also decrease the height of the cups, but rememember you will have to decrease the height of the side back and center back seams as well.
2. Bust not Big Enough.  If the Cups are Not big enough, you can increase the curve of the cup seams.  Gertie has some great tips and links on Bust-Fit Issues Here
3. Garment is too short.  Slash each piece at the waist and extend.
4. Too Tight around the legs.  Add extra to your side seams, and/or crotch seam length.
5. Not Tight Enough! Take in your side Seams, adjust the side back seams.
6. Too Long! Cut your patter at the waist, and overlap, reducing the overall length of your pattern.

Ginger Sew Along: Planning

Uncategorized

Swimsuit fabric can be expensive and hard to find, but there are lots of sources online that have a good selection for a decent price.

I often scour Ebay for fabric-finds.  A simple search for “Swimsuit fabric” will bring up a few pages of goodies. Fabric.com has a good selection of Swimwear fabrics, as well as polyester ITY knits, that when lined, will work well for this swimsuit. Etsy as well is a great source for supplies. Sew Sassy has really reasonably priced lining, and solids.

Swimwear fabrics often make me cringe.  Neon, gigantic hibiscus florals, cheesy designs… I find that using prints sparingly tends to make a more… sophisticated suit.

Sew in swimsuit cups can be found at most fabric stores and most online retailers.  They usually come in a range of sizes, A-B, B-C, etc.  They come lightly padded or push up, so decide which you prefer.  We will be stitching these directly to our lining. Sew Sassy is a great resource for these kinds of findings. The added cups are 100% optional and do not need to be added.

Swimwear elastic is often quite rubbery – or the clear type.  I hate that clear elastic, it’s sticky and makes me mad.  I am using a chlorine-friendly elastic that looks just like any elastic you would buy at the fabric store.  It is up to you what kind of elastic you use.  You will need a resilient elastic, no wider than 3/8″ for your leg and neck openings, and a 1/2″ elastic (optional) for under the bust.  I am using bra strapping for this.

Clear elastic can be used to stabilize your seams, depending on how structured your fabric is.  I am not going to be doing this.

I’ve kept construction of this suit as easy as possible. I’m a sewist who loves to sew, I’m not a sewist who obsesses over the “rules” (I am a “whatever works” seamstress).  My goal is always to enjoy what I do, and end up with a garment that I feel great wearing!

This pattern was designed as a lingerie piece, but looks pretty darn cute as a swimsuit if I say so myself.  I am by no means a swimsuit expert so I really look forward to learning some trick and tips from all of you along the way!

The Ginger Swimsuit Sew Along + GIVE AWAY! CLOSED!

Uncategorized

Oh my goodness… I sewed like a mad woman over the last few days, testing my new pattern… and, I think it’s ready to go! So, I am happy to announce that I will be also hosting a sew along for the 1 piece swim suit version of the Ginger Pattern.

Here’s a sneak peek:

The instructions in the digital pattern do not go over things like adding elastic under the bust, or how to sew in the padded cups, so I will be going over all of these things here.  I’ll also be showing how to sew on the elastic and how to make adjustable straps.

You are going to need a few things that might be hard to source if you are from a small town like me.  First, you will need swimsuit fabric.  While Spandex is the best, it is expensive and not always easy to find.  I am using a combination of black Spandex with a polyester knit that I will line.  If you cannot find Spandex, 100% polyester knits are good because they dry quickly.

 This swimsuit will be lined, so you also need swimsuit lining.  Swimsuit lining is often made of nylon or polyester, and is very stretchy.  It is important that all of the fabrics that you use are 4-way stretch fabrics, or you will need to make some major fit adjustments.

Spandex World has a great selection of Swimwear fabrics. Spandex House is also great.

The most important things about the fabric that you choose are: 1) they will be chlorine and water friendly.  Synthetics tend to dry quicker, and fabrics like polyester tend to have good chlorine resistance. 2) They are 4-way stretch knits.

You will need to buy enough fabric to do a mock up and your actual garment.  I recommend buying 1 yard of inexpensive stretchy knit fabric to test the pattern, and 1 yard of “good” fabric for your actual swimsuit. Don’t forget to buy a coordinating swimsuit lining in either white, beige or black!  I can’t stress enough how important the muslin is for 1 piece swimsuits.  In my experience, finding the right length for the swimsuit on your first go is very, very tricky!

You will also need 2 yards of chlorine-friendly 1/4″ – 3/8″ wide elastic to match your fabric, 1/2 yard of soft elastic for a band under the bust, and sew in swimsuit cups.  Optional are bra strap sliders and clear elastic.

Of course, you will also need a pattern.

To Kick off the Sew Along, I’ll be giving away a free copy of the PDF pattern to TWO Lucky winners! Here’s now to enter:

1. Comment here letting me know what kind of embellishments, fabrics, etc, you’ll be using for your swimsuit.
BONUS ENTRIES!
2. “Like” Ohhh Lulu on Facebook.
3. Tweet about the Sew Along on Twitter


I’ll be choosing two winners on August 1st, and will post my first sew along post on Friday August 3rd!