Browsing Tag

sewing with sequins

Valentine’s Sew Along: Stabilizing & Finishing the Leg Line

Tutorial, Valentine's Day Sew Along, Videos

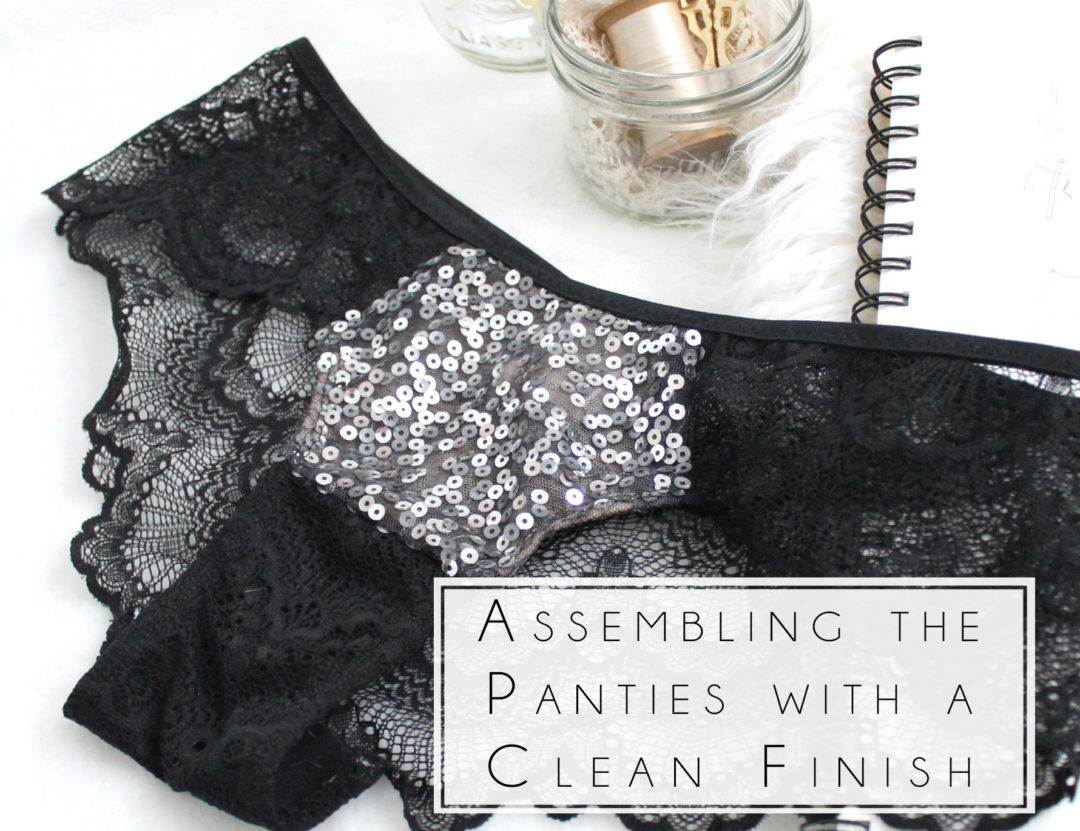
This is a short and easy step, then we’re almost done the panties!

If you haven’t already, give the undies a try-on to make sure they don’t need to be taken in or let out at all.

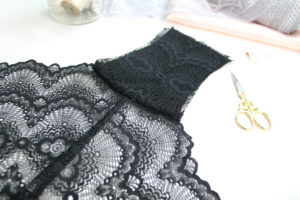
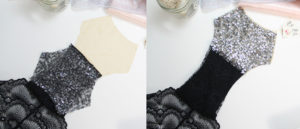
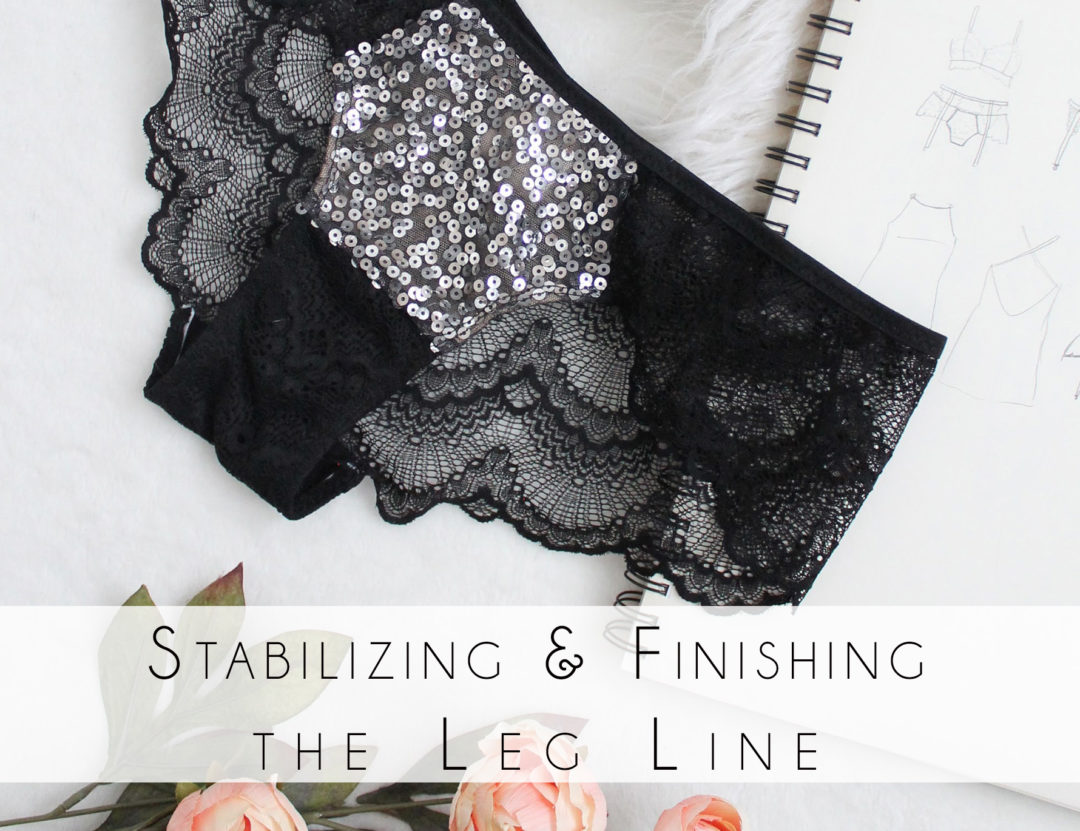
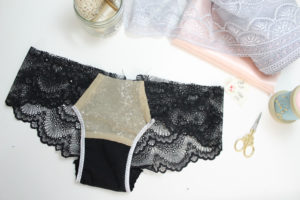
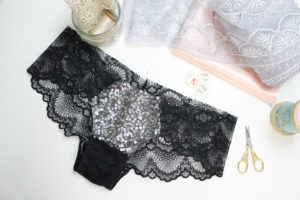
Now, we need to stabilize the leg-line of our panties with some elastic. I’ve found that this gives the most comfortable fit and best finish. However, you may opt to simply turn the edges under and use a twin needle or zig-zag stitch to finish the raw edges of the gusset and sequin front.

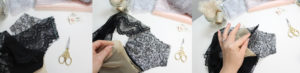
I use a zig-zag stitch to apply the elastic to the inside of the garment along the Panties Front & Gusset. This step is why it was important in our last step to make sure that the gusset and sequin fabric overhang the scalloped edge of the lace by about 1/4″. The elastic will now get zig-zag stitched along that edge, then turned under and top stitched in place with a twin needle.

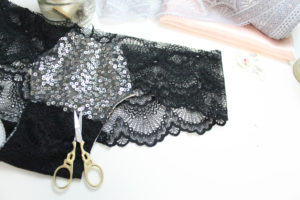
Before you apply the elastic, you may want to snip off any sequins running along the edge of the panties, so that you end up with a 1/4″-3/8″ strip of sequin-free area along the leg line.

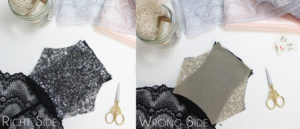
The elastic here acts as a stabilizer and prevents these undies from stretching out uncomfortably during wear (or bunching and scrunching, no one needs that). You should only apply the tiniest about of tension. I’m using just a plain old knitted elastic that’s relatively thin and very stretchy.

Once the elastic has been zig-zag stitched onto either side, trim any excess fabric that extends beyond the edge of the elastic.

Turn the elastic under, towards the inside of the garment, and use a twin-needle to top stitch in place. Please make sure you have switched from a zig-zag stitch to a straight stitch, and go slowly over the sequin areas.

I’ve added a video to my YouTube channel that will walk you through these steps in even more detail.

We’re almost done sewing these pretty, sparkly undies already! I’ll post tomorrow about how to finish the waistline with fold over elastic, then we’ll move onto the bra.


Valentine’s Sew Along: Assembling the Panties

Tutorial, Valentine's Day Sew Along

Ok, I’m going to admit, this part can get a little confusing, which is why I’m doing it first.

Sequin fabric can be really scratchy, so my goal is to sew these with as clean a finish as possible. This means hiding as much of the seam allowance between the lining and sequin fabric as possible.

We’re going to start by sewing the gusset pretty much the same as in the pattern instructions. With the Panties Back sandwiched between the Lace Gusset Piece and Gusset Lining, stitch in place using a 1/2″ seam allowance. The Gusset should overhang the edge of the scalloped lace by about 1/4″.

Folding the gusset forward, so that the seam allowance is encased between the lining and lace layers, pin the sequin fabric along the straight edge of the gusset, going through both the lace and lining layers of the gusset. The right side of the sequin fabric should be facing the right side of your gusset. You can baste this here, or just flip it over, and pin the lining along that same seam. Stitch using your sewing machine or serger.

That part was do-able, right?

Here’s the tricky to explain part:

With the right sides together, baste the Sequin Panties Front to the Panties Back down the “side seam” (I put that in quotes because it’s not technically at the side, but this phrase will do). The mesh lining is left loose at this point! Make sure your sequin fabric overhangs the scalloped edge of the Panties Back by 1/4″. This is important for the next installment.

Now that the seam is basted together, working from the inside of the garment, take your mesh lining and twist it so that the right side of the fabric is facing the wrong side of the lace, and pin in place down that newly basted seam. Stitch using a 1/2″ seam allowance.

Are you thoroughly confused?

I made a video to walk you through the process:

I would consider this an advanced technique, but in my opinion it’s a must-do for this style of panty. The video will show you how to sew the gusset, as well as both side seams so that the seam allowance is completely hidden between the lining and sequin fabric.

If you are really struggling with this method, just sew a regular seam. Treat the sequin fabric and lining as one, and pin it down the side seams so that the sequin fabric overhangs the scalloped edge by 1/4″, and finish with a zig-zag or serger.

In my opinion, this is the hardest part of the sew along, so once we’re done this, we’re in the clear!

Next up I’m going to show you how to finish the leg line with some elastic for stability, and how to finish the waist with fold over elastic.

Valentine’s Sew Along: Cutting Your Fabric

Tutorial, Valentine's Day Sew Along

Now that we’ve gathered supplies, and prepared our patterns we can go ahead and cut into all of that pretty lace and sequin fabric.

Cut the sequin fabric is exactly the same as you would cut any other fabric. Fold it in half, and place your new upper front piece on the fold and cut 1. Be sure to use sharp scissors and be prepared to have sequins everywhere. You may not want to use your best fabric scissors to cut the sequin fabric, as the sequins can dull your scissors, but you still want to use a good, sharp pair. Remember to also cut your new upper front piece out of stretch mesh.

The ‘new’ lower-front piece gets cut out of the same lace you are using on the back of the panties. I folded my lace in half lengthways and cut 1 that way. Don’t forget to also use your Gusset Lining pattern piece with the additional 1/2″ seam allowance added to the upper edge to cut your lining – any cotton jersey will do.

The Claudia Panties Back get cut out exactly as indicated in in the pattern instructions, so that the straight lower edge is running along the scalloped edge.

In total, for the panties you should have the following pieces:

  1. Upper Front – Sequins
  2. Upper Front – Mesh
  3. Lower Front – Lace
  4. Gusset Lining – Cotton Jersey
  5. Panties Back – Lace

I’ve made a video showing you exactly how I cut out my stretch lace, so if you need a little more info, this is for you!

The Jasmine Bra gets cut the same as in the pattern instructions. We’ll be adding the longline band in a later step, so don’t worry about that part quite yet.

Here is a “how-to” video on how to place your Jasmine Pattern on scalloped lace.

Don’t forget to also cut the Jasmine Front and Side Front out of stretch mesh for lining.

The most important thing to remember when using scalloped lace is to make sure the motif is mirrored on either side. Take some extra time to make sure that when you fold your lace in order to cut 2 of each piece, that the scallops and motif of the lace all line up.

If you find that your lace is a little too short for the Panties Back, I’ve got some tips on how to make-do in a separate post, Tips & Tricks for Sewing Scalloped Lace.

Now it’s on to the fun stuff!