Browsing Tag

valentine’s day sew along

Valentine’s Sew Along: Preparing the Patterns

Tutorial, Valentine's Day Sew Along

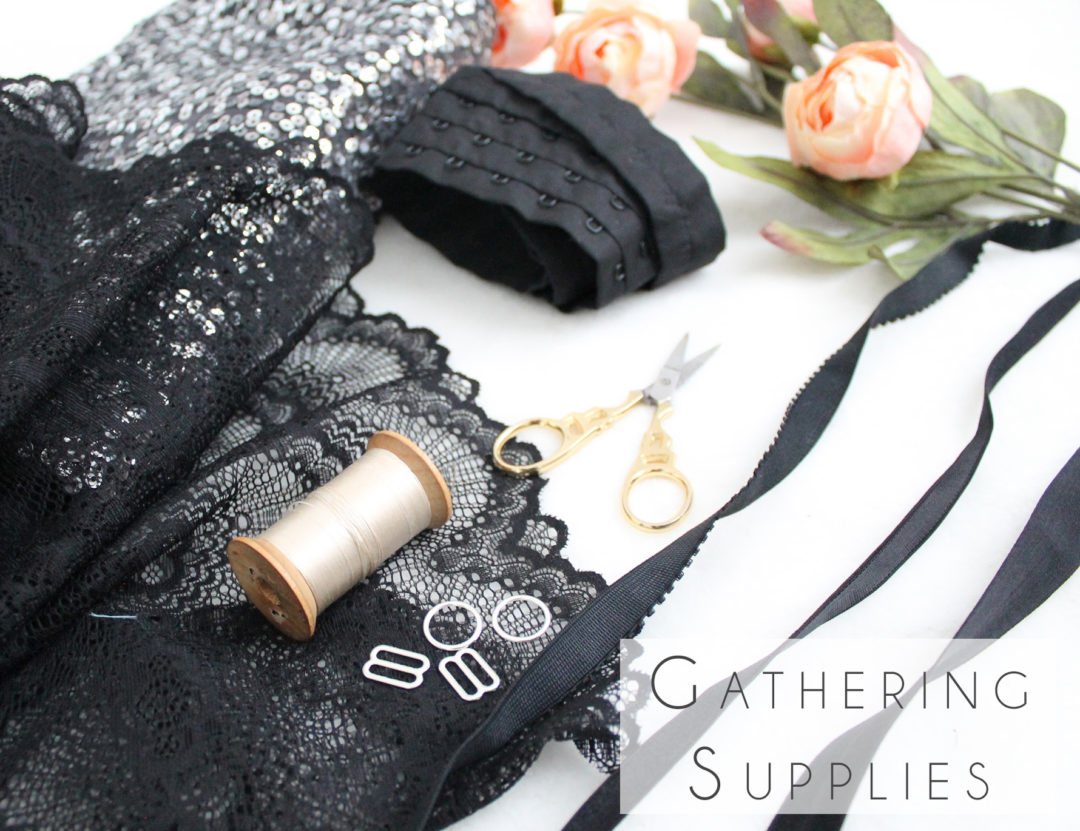
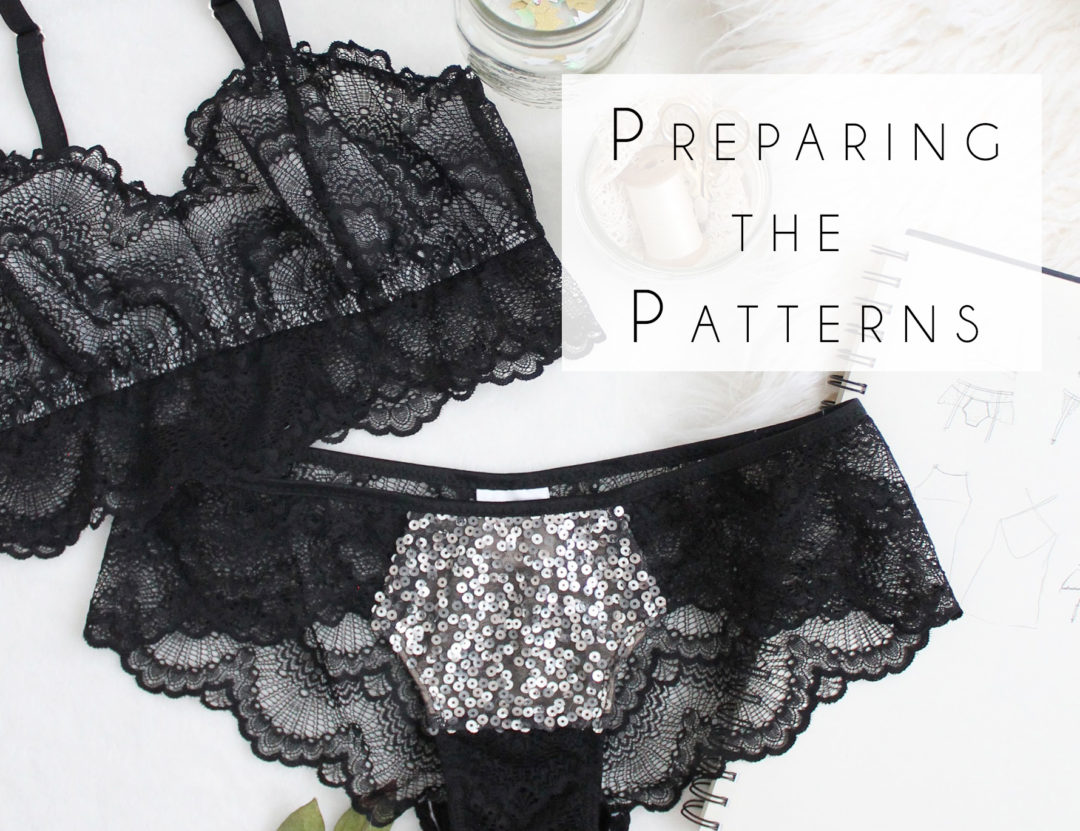
If you’ve ordered your supplies online and have to wait for them to arrive, now is a good time to print & assemble your patterns.

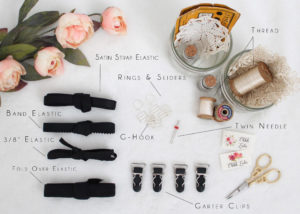
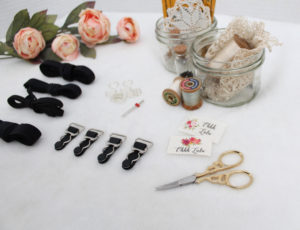
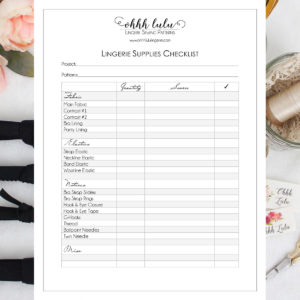
As a reminder, you’ll need the following patterns if you want to make a similar set:
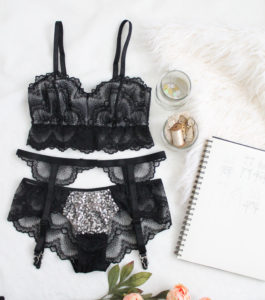
  1. The Jasmine Bra
  2. The Claudia Panties
  3. Either the Mina or Cora Garter Belt Pattern (just a reminder that I have a FREE version of the Cora Tutorial in my shop right now).

You can buy these patterns individually, or as a complete Bundle. Just a reminder, they are also available on Etsy, if you prefer to shop there.

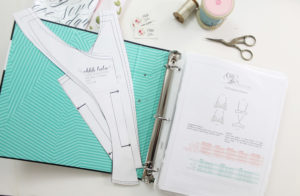
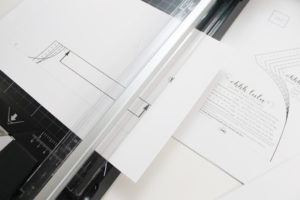
Print your patterns making sure that you have selected “no scaling” in your printer options. Measure the 1″x1″ square to make sure it has printed correctly.

I think I picked this tip up from Marie at A Stitching Odyssey, but a quick and easy way to trim the margins is to use a paper cutter. I can’t believe I didn’t think of this sooner… it has saved me so much time, and you can cut multiple pieces at once! My patterns come with a little scissor indicator showing you which margins to trim.

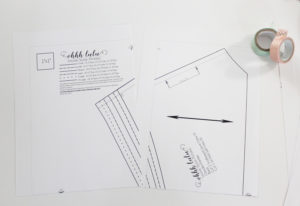
Once the appropriate margins are cut, you can tape your pages together, using the alpha-numeric indicators as a guide.

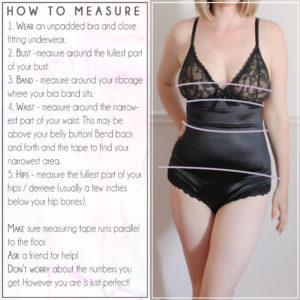
Cut out your pattern pieces in the size that closest corresponds to your body measurements. If you’re not sure how to measure, this infographic might help you out.

I highly, highly, highly recommend you sew your patterns up using some inexpensive test fabric first. You can even just use regular old knitted elastic on your mock-up, and jersey in place of the lace on the back of the panties. You’ll just want to see how the patterns fit your body.

The Jasmine Bra

If you are larger than a D-DD cup, you’re likely going to want to make some minor pattern alterations. My bust size has varied a lot over the last 3 years. I’ve had two pregnancies, one baby, gained 30 lbs, lost 40 lbs, started running, and started weight training. I’ve gone from a 30FF to a 30G during my pregnancy, and now I have no idea what my actual cup size is, but I know it’s somewhere below an F because none of my RTW bras fit anymore.

I’m going to show you what I do for my measurements.

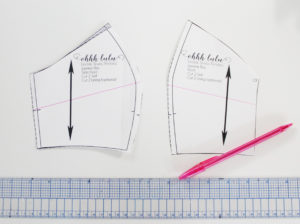
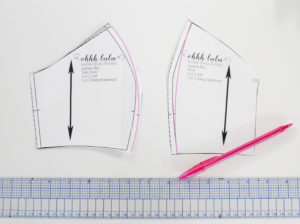
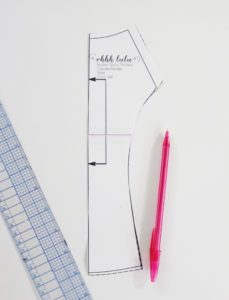
I currently have a 36″ bust, and a 29″ band measurement. I cut out a size small. I draw in a slash line at the appropriate apex of the bust extending to the side seam, and the centre front seam. The apex is the “highest” point of the bust.

I cut along that line towards the Centre Front and Side seams.

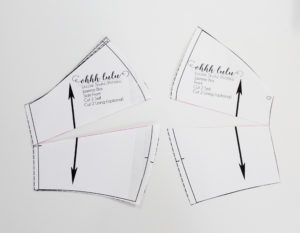
From there, I open up the slash by about 1/2″, and retrace my pattern piece. I find this is all I need to get a great fit. You may want to add more or less. You may also want to add some depth to the curve if your bust projects a lot. This is why it’s really important to test out a bra pattern first. Breasts come in so many shapes and sizes, and they change constantly with the changes in our life, so what worked for you last year, might not work today.

Alternately, if you generally wear closer to an AA-A cup, you might need to straighten out the curved seams of the cup. This is super easy to do. You may want to also shorten the cup just a tad.

All of that being said, please don’t let this scare you off. This pattern is so forgiving. I recommend it for anyone who is just starting to get into lingerie making because the fit is generally quite easy to get!

The Claudia Panties

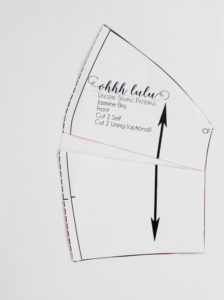
The front of the Claudia Panties is all one piece. I really love this pattern because it is so flattering and comfortable. But, I wanted to be able to add some sequin fabric to it, without the sequins scratching! I didn’t want the sequins to run as far as the gusset, because sequins between the legs doesn’t sound like a good time to me… so, I’m adding a horizontal seam to the Panties Front.

Here’s how I did that:

1.Place your Gusset Lining pattern piece overtop of the Panties Front and draw a line where the straight edge of the Gusset Lining falls on the Panties Front.

2. Cut the pattern along that line and trace them onto a separate piece of paper. Add 1/2″ seam allowance on either side of your cut line.

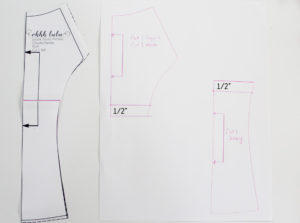
3. Add 1/2″ seam allowance along the straight edge of the Gusset Lining. I’m going to show you how to sew these so that all of the seam allowances are fully encased, so there are no scratchy bits!

Now that we’ve made the pattern alterations, store your pattern pieces away until your fabric arrives! I store my patterns in plastic sleeves in a binder.

If you’re fabric is already here (lucky), You can go ahead and cut out your pieces for your Jasmine Bra as indicated in the pattern instructions. I’ll show you how to cut the band in a later post.

Valentine’s Sew Along: Gathering Supplies

Lingerie, Sewing Patterns, Tutorial, Valentine's Day Sew Along

Lingerie-making requires some specialty supplies. If you’ve ever wondered why lingerie is so expensive to buy, it’s because there are a lot of bits and pieces that go into a single piece of lingerie! All of those pieces, as well as the labour involved add up!

Because I also sell made-to-order lingerie, I generally don’t give out the exact names of my suppliers. I like to keep some things a little private. However, I’ve purchased from nearly every big supplier online! So I’m happy to share some of my favourites with you.

As I mentioned earlier, this sew along is going to move along quite quickly. I know that many of you will need to order supplies, which can take some time. I’m hoping that you’ll be able to catch up once you receive everything you need.

Fabric

You’ll need to select a stretch scalloped lace fabric. I’m recommend looking for something at least 18cm (7″) wide. Buy the required amount as indicated in the patterns, plus an extra yard or so for the elongated band.

You will also need some sort of lining for your bra and or the front sequin panel of your panties. I like to use a simple stretch mesh. You can purchase it in a skin-tone shade for a nude look, a contrast shade to help your lace pop, or go tone on tone.

We’ll be adding a sequin panel to the front of the panties, so you’ll need to pick up some sequin fabric (or specialty fabric of your choice). This doesn’t necessarily have to be a stretch fabric. As long as it’s not too heavy, almost any specialty fabric will do.  My local Fabricland and Lens Mills stores both cary sequin fabrics, but if you need to source online, fabric.com is a great resource. If you’re looking to source locally, try browsing second-hand and vintage shops for old formal dresses.

The last bit of fabric we will need is a small piece of cotton jersey to line the gusset. Any cotton jersey will do, even an old t-shirt!

Elastics

We’re going to need a variety of elastics to complete this set.

Strap Elastic – this is the elastic we will use to make our bra straps and the Cora version of the garter belt. I used 1/2″ elastic for my straps and 5/8″ for my garter belt. I actually also used 1/2″ strap elastic on the waistband of the Mina version of my garter belt. Which ever size you choose is up to you and your personal preference.

Neckline Elastic – this elastic will run along the inside of the bra, so pick something soft. I just use a regular 3/8″ wide knit elastic.  I like to make sure this elastic feel soft and is not scratchy, since it will lay against the skin.

Band Elastic – this elastic will go along the underbust seam of the bra, and can be also used on the waist edge of the Mina garter belt. Band elastic comes with one plush side – this is the side that lays against the skin. It also usually has a decorative edge running along one side. I’m going to be adding a 3/4″ band elastic to my bra, but 1/2″ tends to be the standard.

Waistline Elastic – I’m using fold over elastic. It works best with the sequin fabric we will be using, since it will bind that potentially scratchy edge.

Other Findings

We’re going to need some basic hardware to complete our set.

First, we’ll need bra strap sliders and rings. I’ve used two rings, and a total of 7 sliders between my bra and garter belt. Buy rings and sliders in the same width that you purchased your strap elastic.

Because we are adding longline band, we’re going to have to use hook and eye tape instead of a traditional hook and eye closure. You can get hook and eye tape with a single, or triple column of hooks. I’d recommend going with the triple column.

The Cora version of the garter belt closes with a simple G-hook, while the Mina Version closes with a hook and eye closure.

We also are going to need 4 garter clips. Buy these in the same size that you purchase your strap elastic.

Misc. Supplies

Make sure you have ball-point needles on hand for your sewing machine. These are ideal for sewing stretch fabrics.  We will also be using a twin needle. Of course, buy some thread to match and make sure you have a pair of good, sharp scissors.

Of course, we are also going to need patterns. I’m using the Jasmine Bra, Claudia Panties, and I’m making two garter belts: the Cora and the Mina. I’ve created pattern bundles which you can purchase directly here, or through my Etsy Shop. Remember to use coupon code BeMine to receive 15% off until January 16, 2016.

I think that just about covers everything! I know that this is a lot of stuff, so I’ve made a printable checklist for you. I’ve made it as generic as possible so hopefully you can use it for other lingerie-sewing projects in the future!

Download the list here:

Lingerie Supplies Checklist

Where to Buy Lingerie Making Supplies

Now you’ve got your list, you need to actually find the stuff. Here are a list of shops I recommend.

Tailor Made Shop  (USA)

Blackbird Fabrics (Canada)

Bra Makers Supply (Canada)

Sew Sassy (USA)

Lace Heaven (USA)

Sewing Chest (UK)

Vena Cava (UK)


I hope you find this to be a helpful resource! I’m really excited to get started but will wait a few days for everyone to organize their supplies. If you have any questions, I will do my best to answer them here. If you want to share your makes and progress on social media, use the hashtag #ValentinesSewAlong and/or #SewingWithOhhhLulu .