
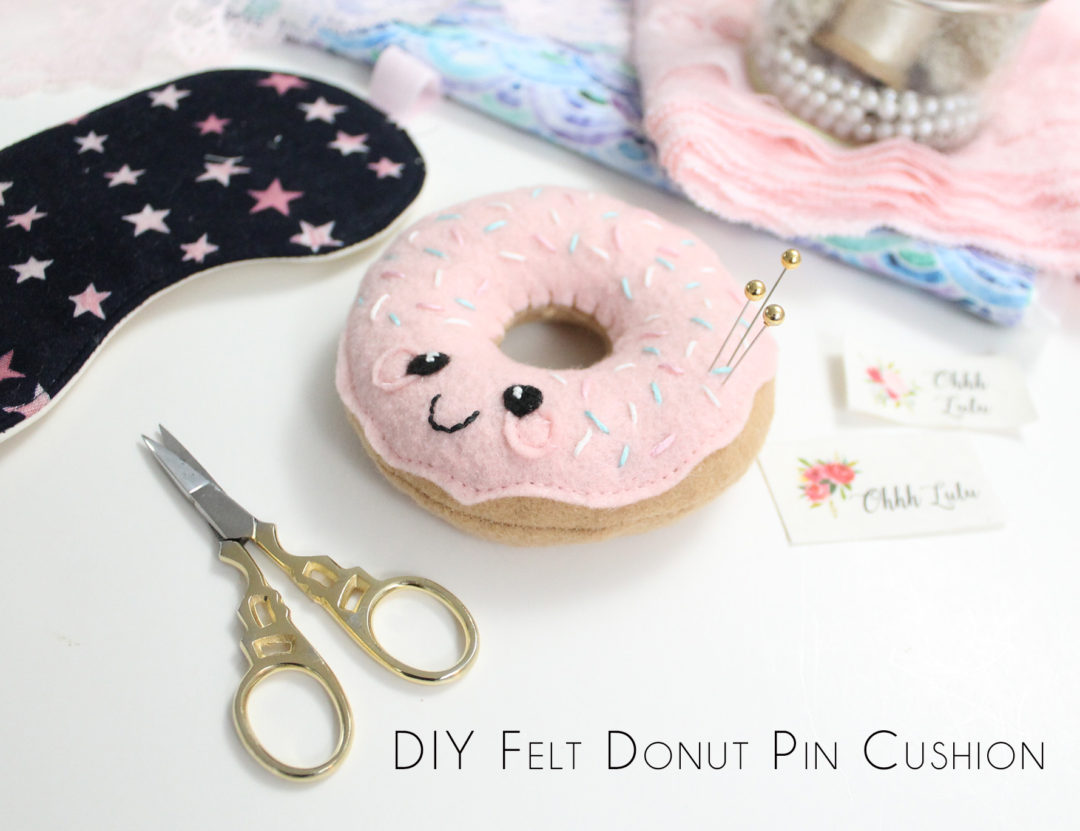

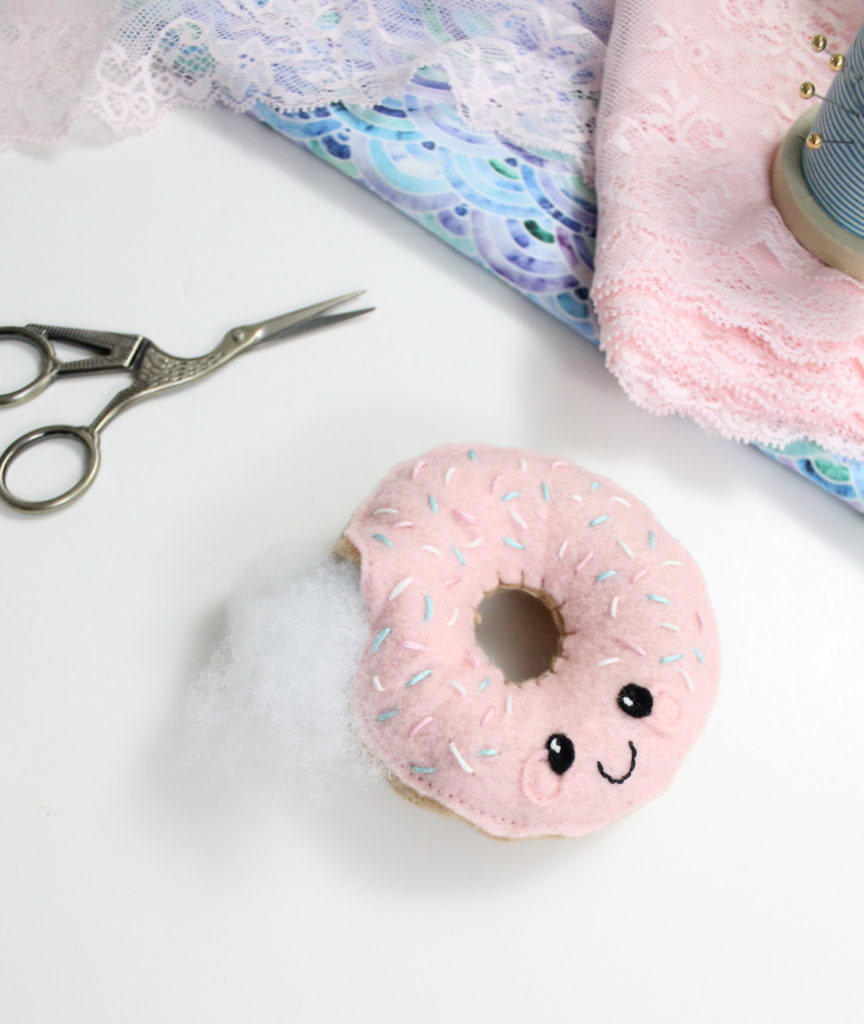
I made this happy little donut a couple of years ago around Valentines Day. Isabel was still in daycare and I wanted to make a little stuffy for each of her friends. So, I made some cute and cuddly donuts out of felt! They were so adorable and fun to make that I snuck in an extra one for myself to use as a pin cushion. I get so many comments and questions about this little guy whenever I post photos of him, so I am very excited to be offering a step-by-step tutorial and printable template today.
What You’ll Need
The supplies required are simple to find at most craft shops, or if you’re a craft-supply hoarder like me, you may have everything you need already in your stash. You can use acrylic craft felt, or if you can find it, wool felt is even nicer to work with and creates a bit of a finer finish. I particularly like the wool blend felt from Dandelion Fabrics. You will need to know how to do some basic embroidery stitches. If you’re not familiar with embroidery, don’t worry, I’ve included links to some helpful videos. And if all else fails, just wing it!
Here’s your shopping list:
- 1 (8.5″x11″) square of brown or tan felt
- 1 square of coloured felt for “frosting”
- 1 small scrap of black felt for eyes
- Polyester batting or other stuffing material (sawdust, fine sand, ground nut shells can all be used to stuff pin cushions)
- Embroidery threads in black, white, brown and 3 colours for sprinkles
- Donut template
Method
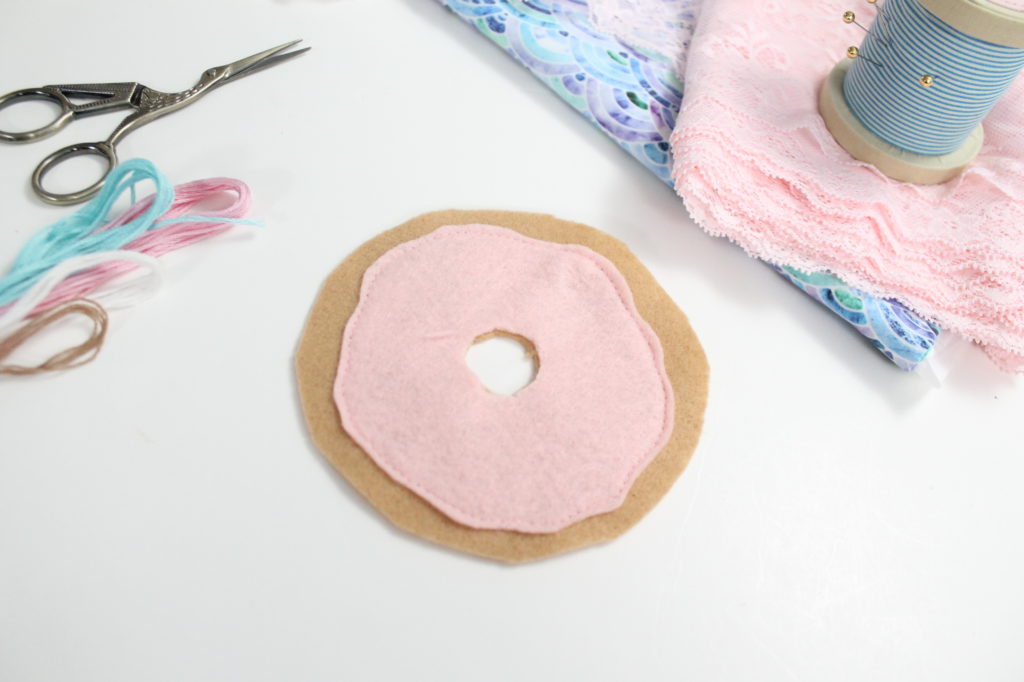
1.Begin by cutting out 2 Donut shapes out of brown or tan felt, and 1 Frosting shape out of colourful felt. Place the Frosting on top of one of the Donut shapes and using a straight stitch on your sewing machine, top stitch around the perimeter of the Frosting. Alternatively, you can use a needle and embroidery thread for a more decorative look. I opted to use my sewing machine for speed.
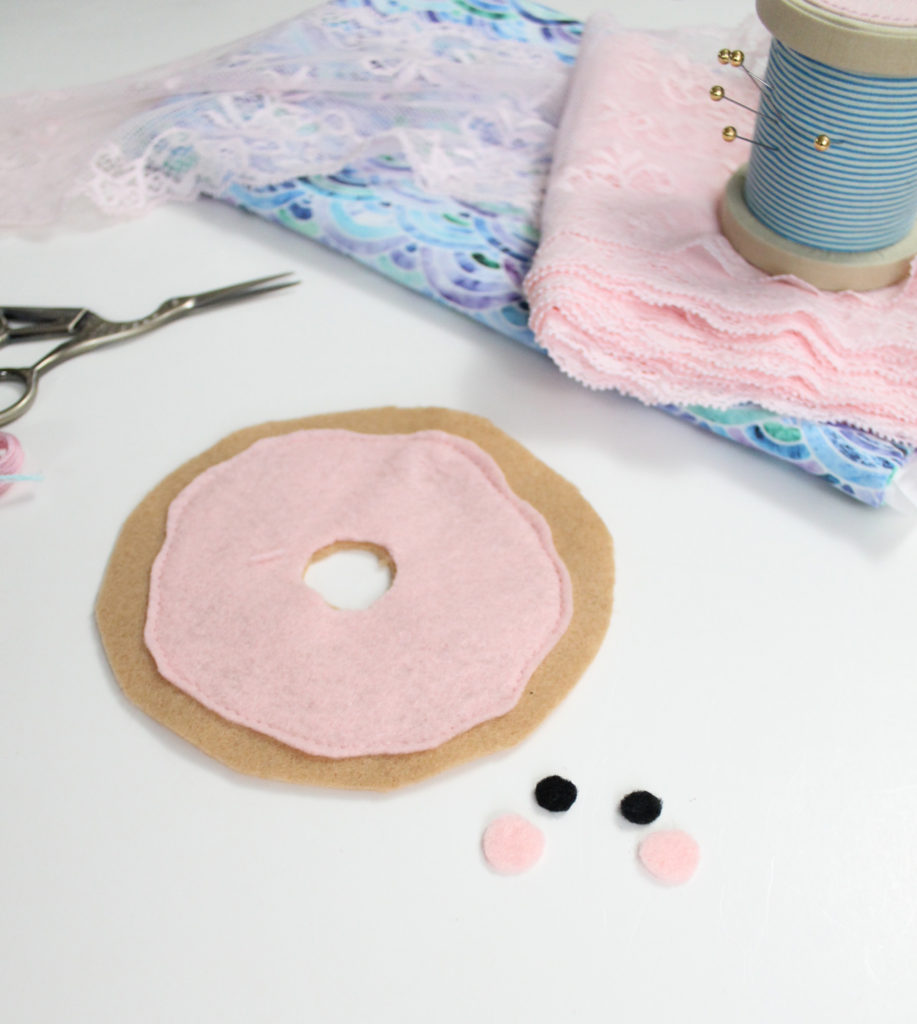
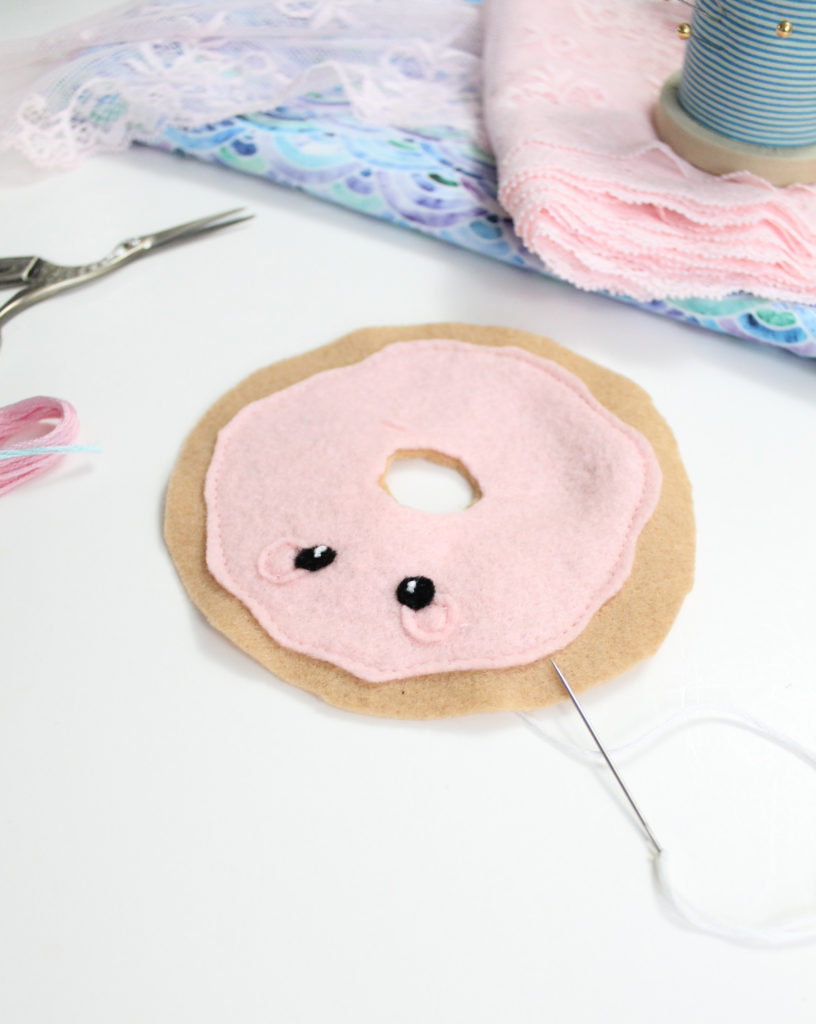
2. Cut small circles out of black felt for eyes and slightly larger circles out of pink felt for cheeks. If you are handy with an embroidery needle, you could skip these steps and just embroider a cute face. I’m not as confident with my embroidery skills as I am with my sewing skills, so I chose to do felt eyes and cheeks.
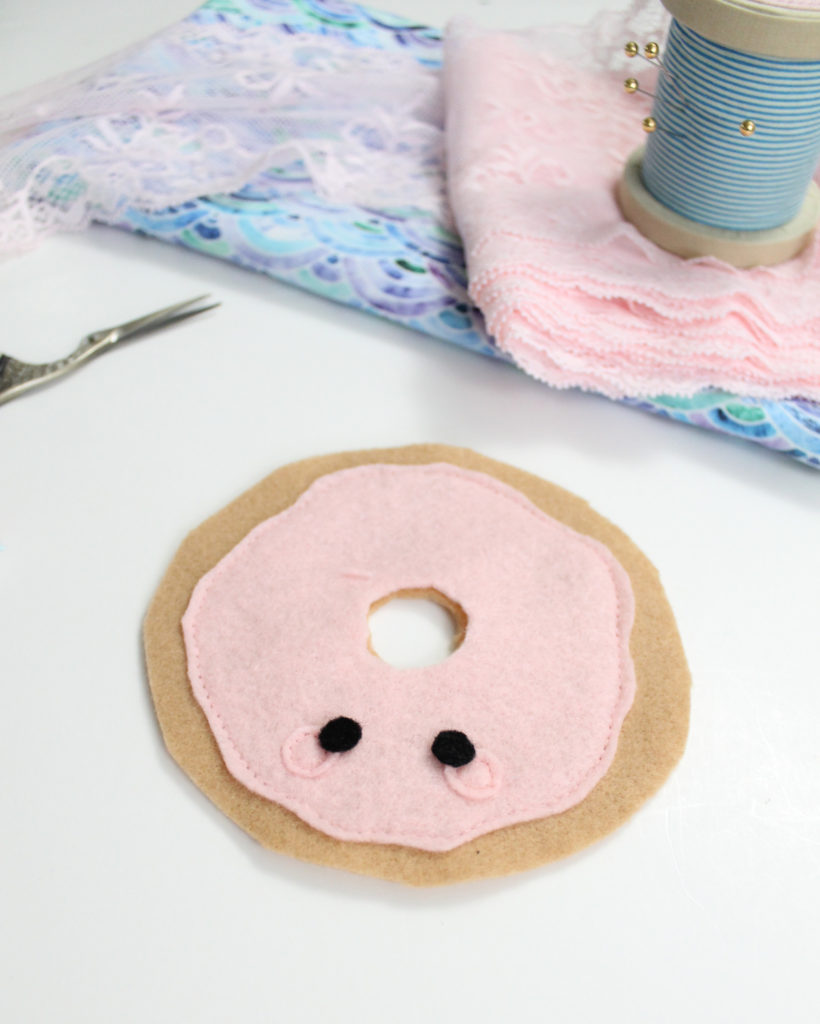
3. Stitch the cheeks in place first, then layer the black eye circles overlapping the cheeks. I chose to sew these on using my sewing machine, but a needle and thread will work just as well!
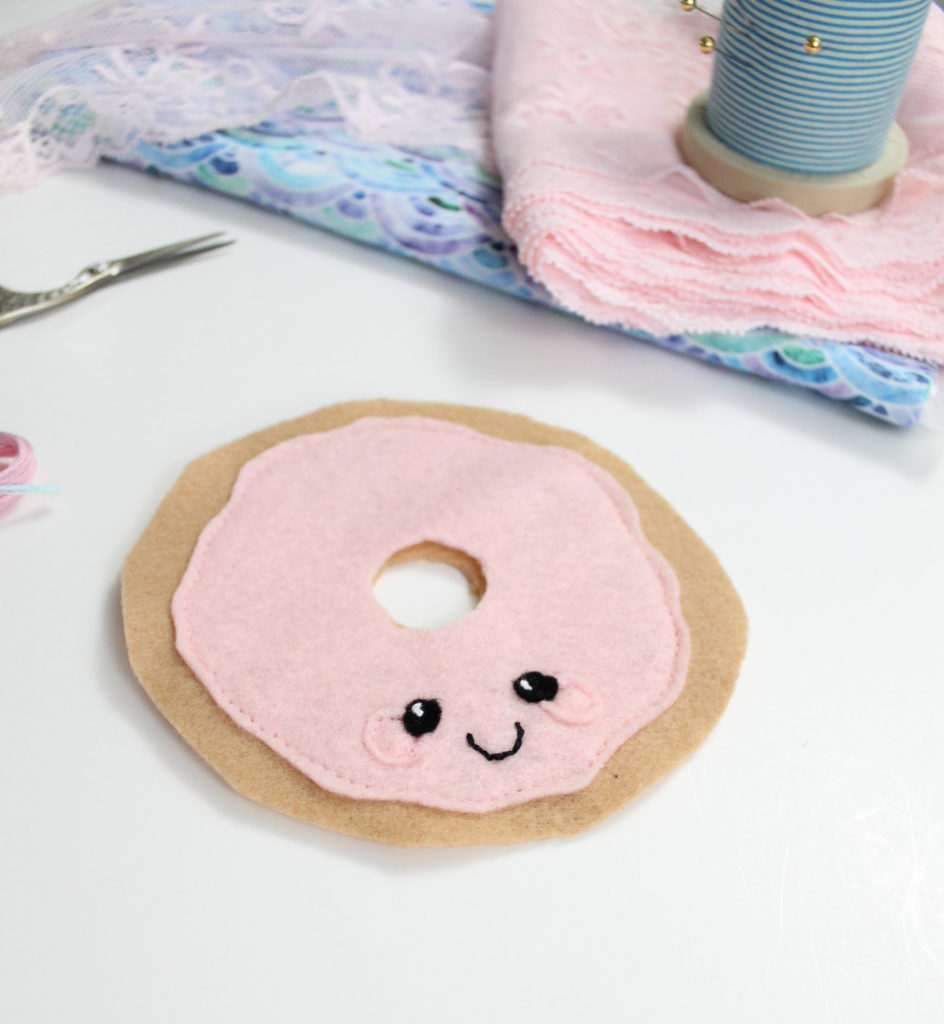
4. Using the white embroidery thread, sew a french knot in each eye to add a little “twinkle”. Using the black embroidery thread, use a Backstitch to create a little smile.
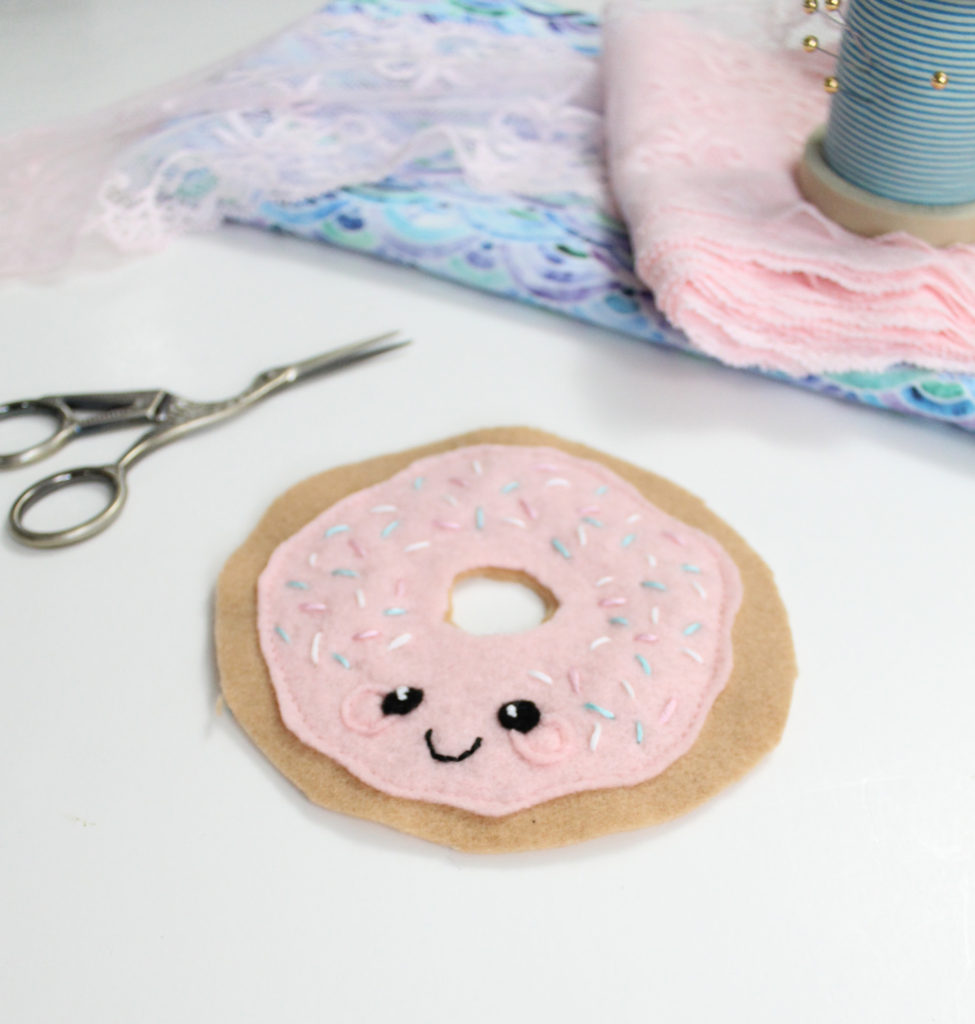
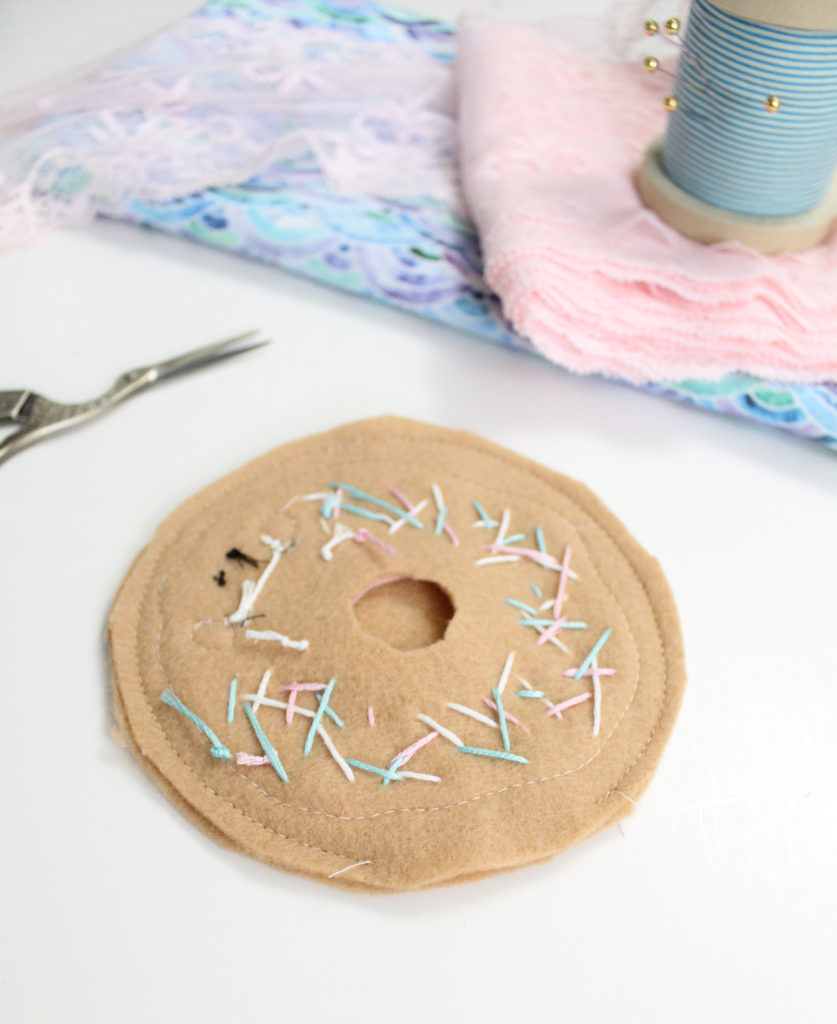
5. Using your colourful embroidery thread, sew random “sprinkles” across the frosting. I used white, pink and blue for my sprinkles. It’s ok if it looks messy from the back. It will be hidden between the layers soon!
6. With the right sides of the donut facing each other, stitch the donut together around the outer perimeter using a narrow, 1/8″-ish seam allowance. Do not sew the donut “hole” and be sure to leave a 1.5″ gap so that we can stuff the donut in a later step!
7. Turn your donut right side out. Using the brown embroidery thread, use a Blanket Stitch to close up the donut hole.
8. Firmly stuff the donut the the filling of your choice. Once it is filled up nice and firm, use a needle and thread to stitch the opening closed.
Now you’re ready to admire your handiwork and fill it full of pins!


No Comments