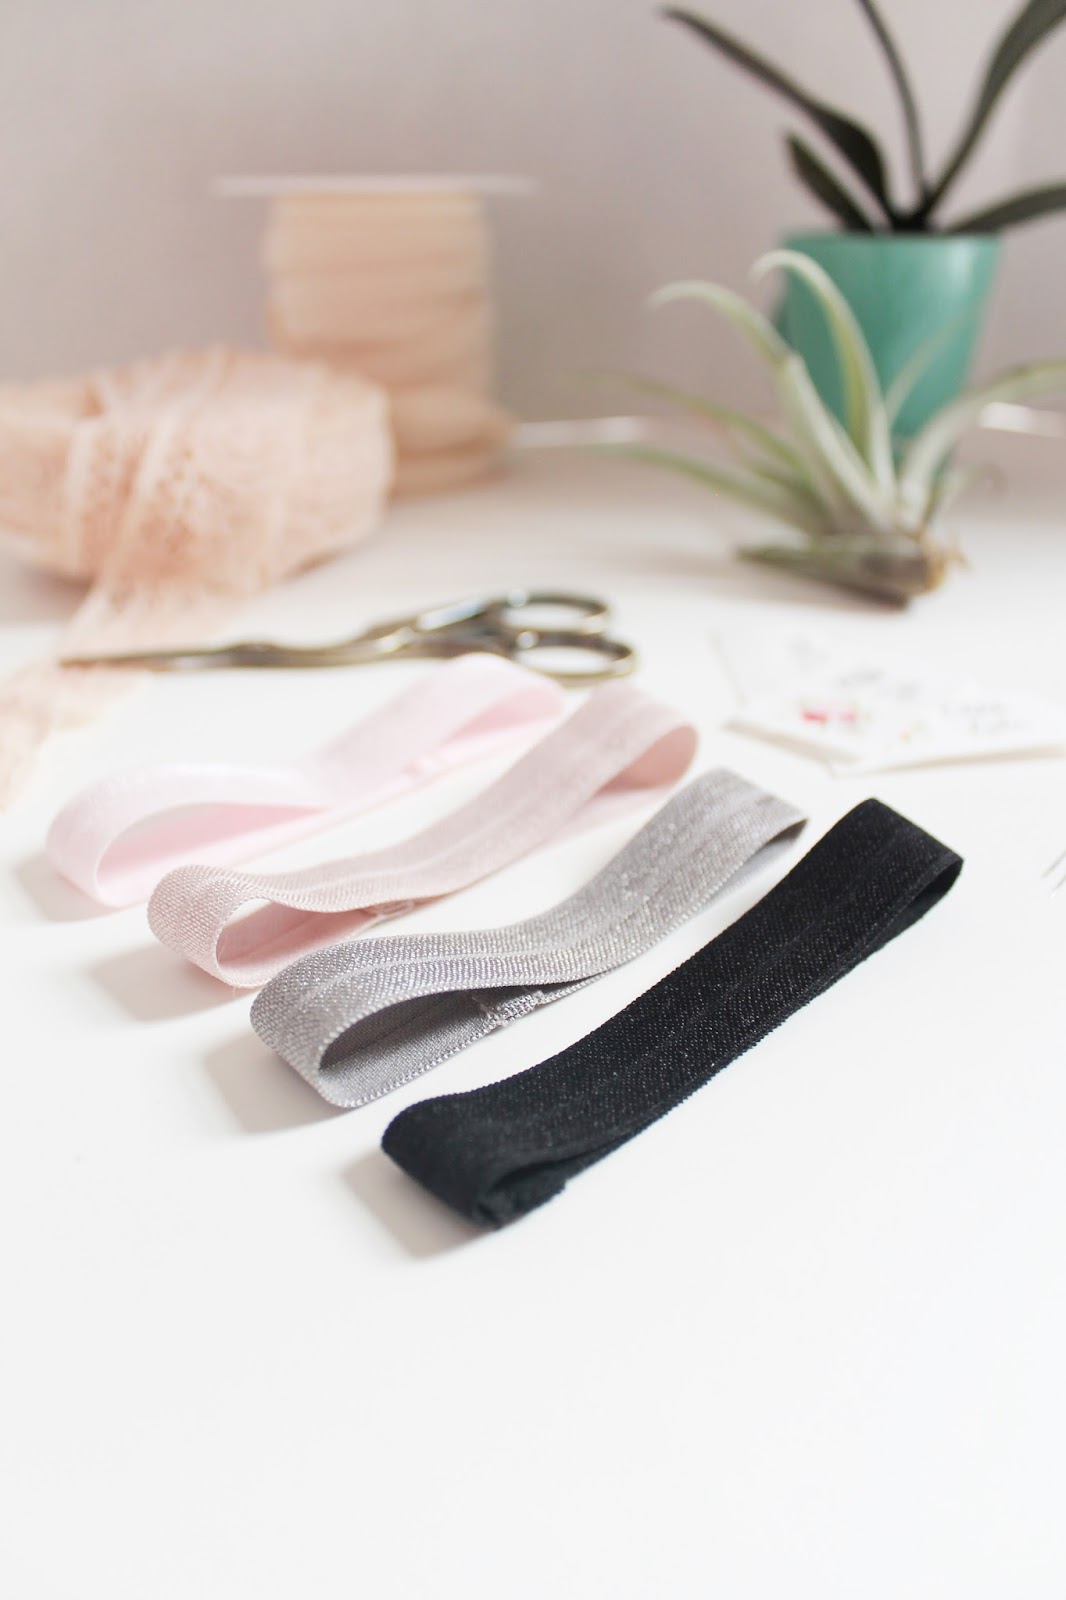
I have a lot of fold over elastic kicking around, and I often end up with little bits and pieces that I hoard away. I also lose things, particularly hair ties, so I’ve found a quick and easy way to use up those small bits of elastic to make hair ties that are amazing!
Fold Over Elastic is nice and stretchy, with good recovery and the satin finish doesn’t snag your hair. They are also nice and thick so if you often find your hair getting wrapped up in traditional elastics (like I do), this may just solve your problem. You’ve probably seen the knotted version of these hair ties, which are well and good, but I wanted mine to have a more polished finish.
How to make sewn not knotted FOE Hair Ties!
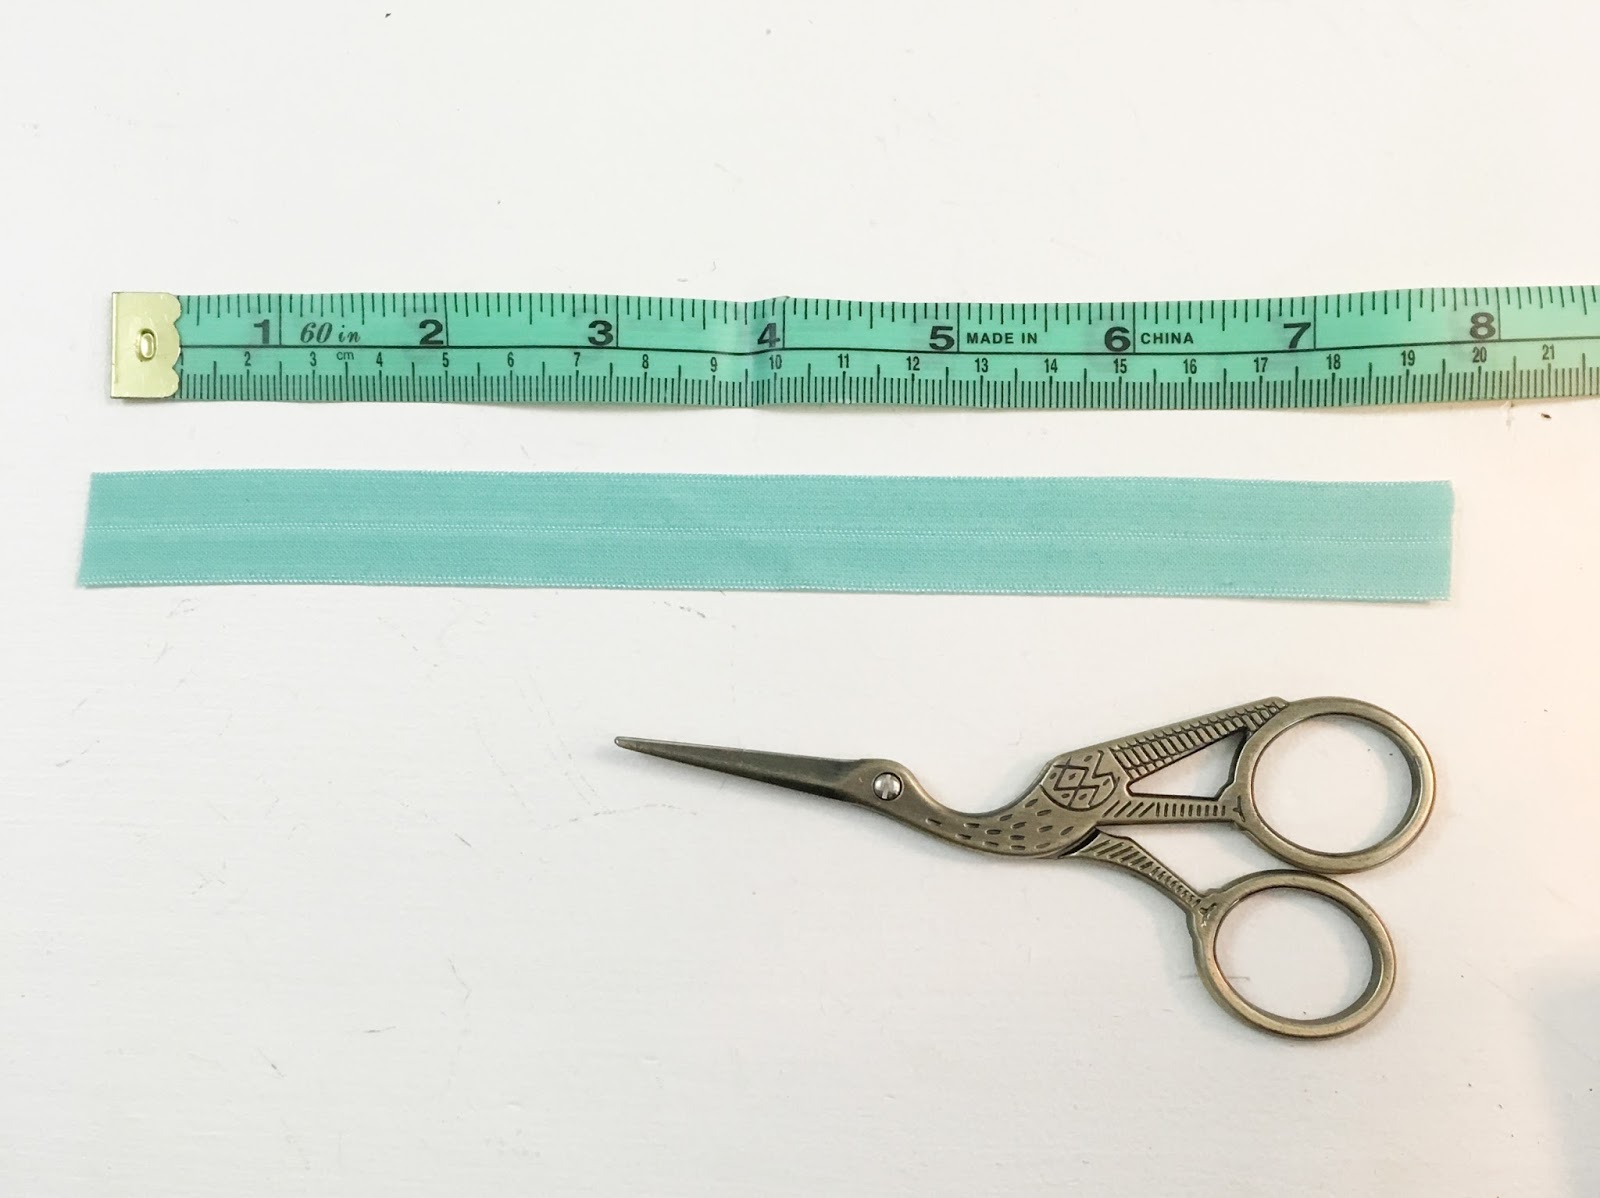
1. Cut a length of elastic about 8″ long. I’ve got super thick hair, so if you have finer hair, you may want to cut it a little shorter.
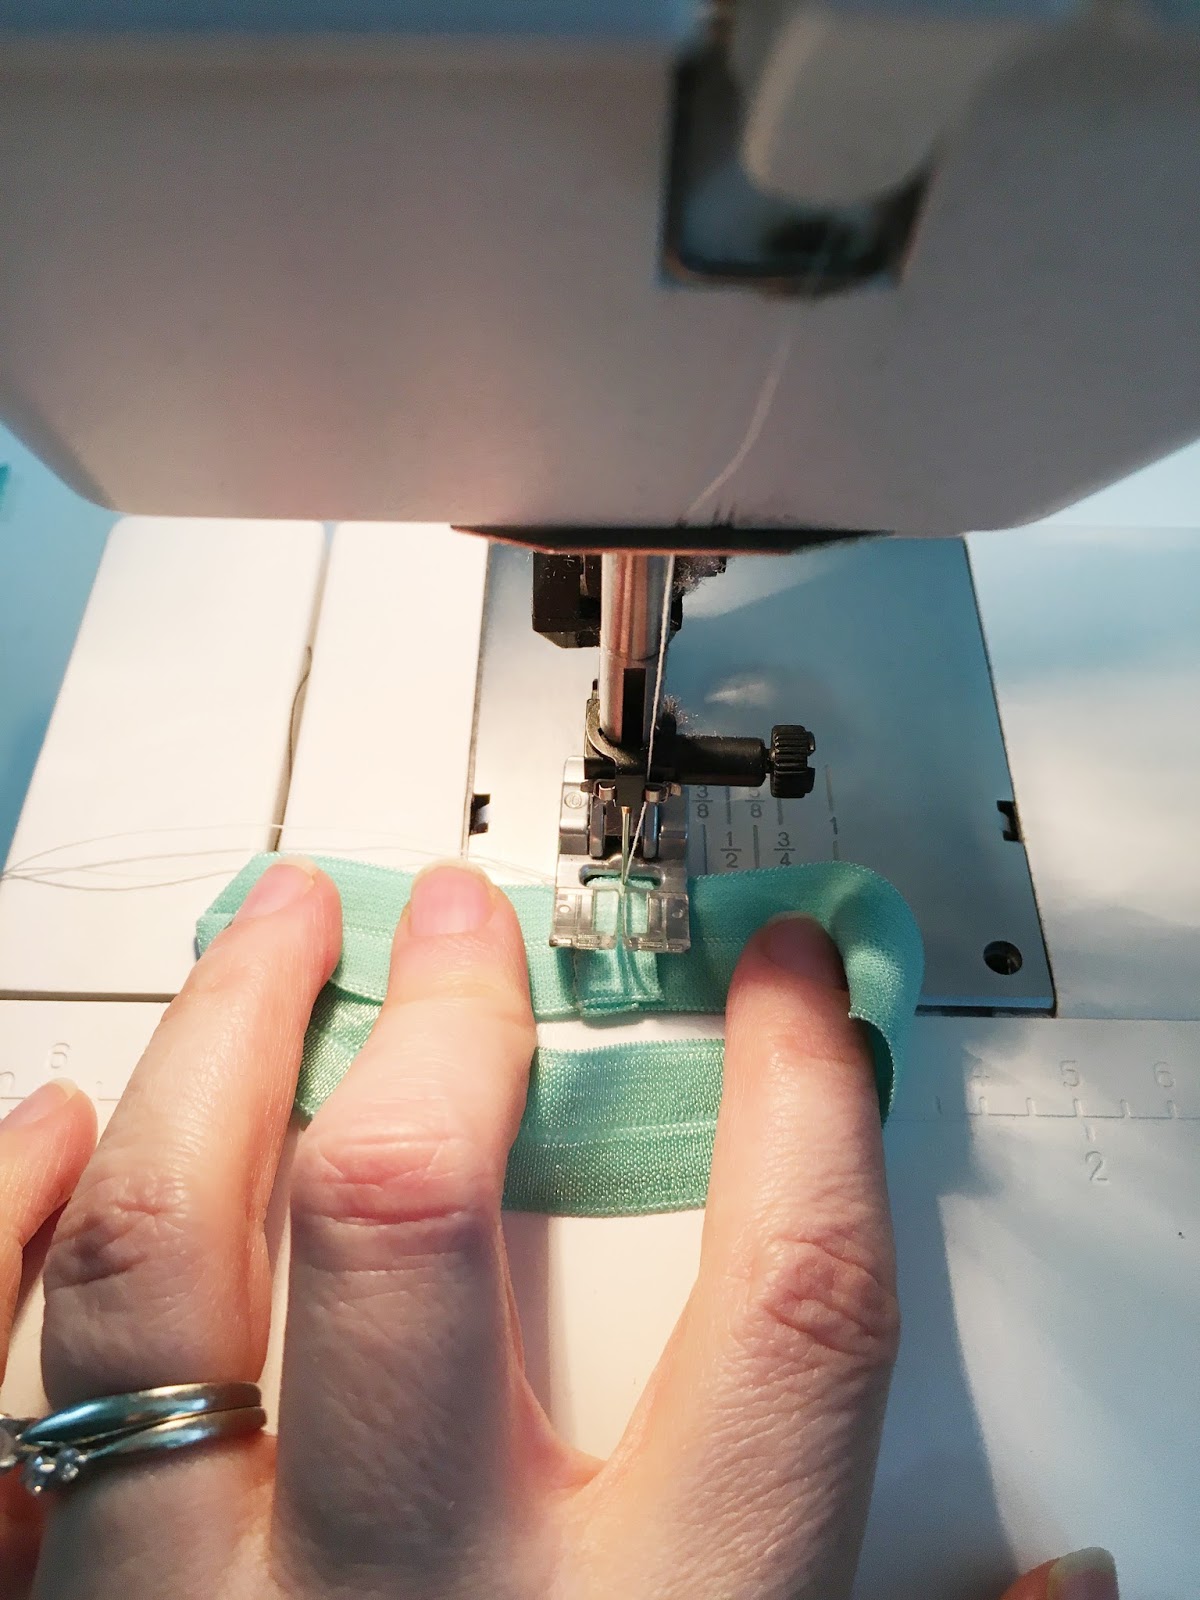
2. Fold the elastic in half, with the right sides (shiny side) facing and stitch together using about a 3/8″ seam allowance.
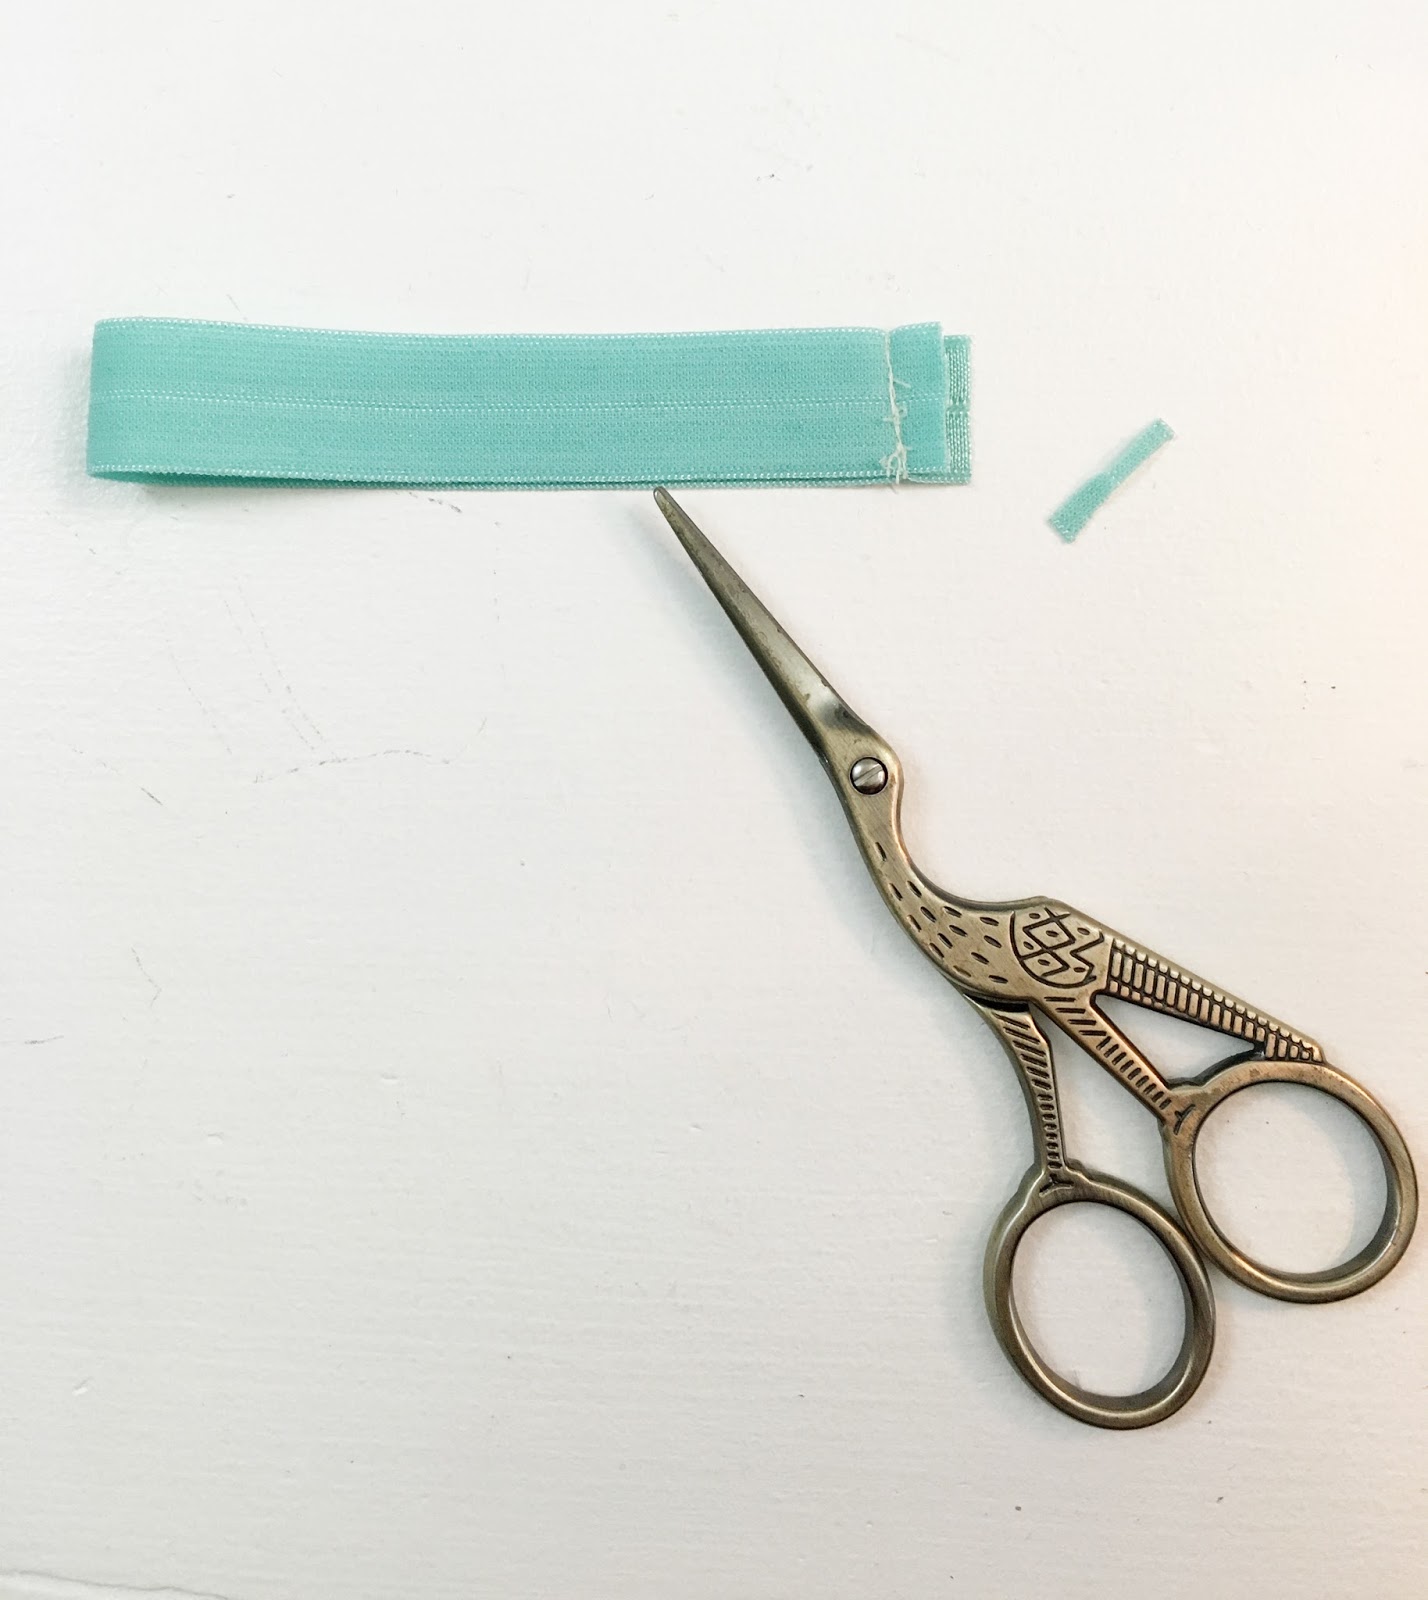
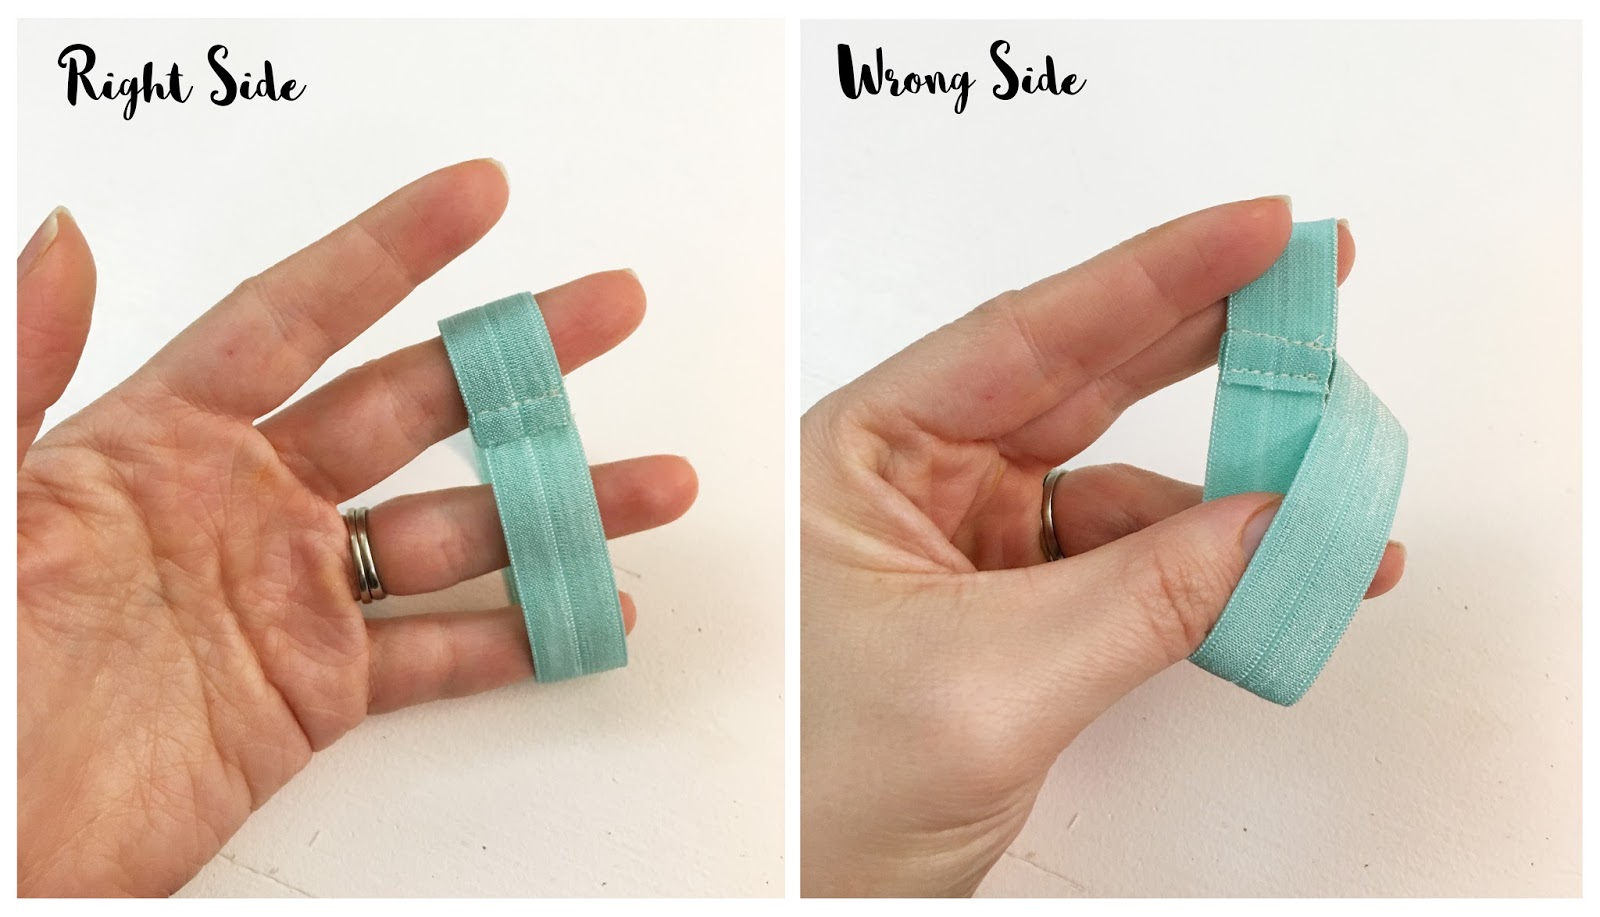
3. I snip back one edge of the Fold Over Elastic by about 1/8″. I sometimes lightly singe the end with a lighter (please be careful if you choose to do this!), though I don’t find that the elastic generally frays too badly.
4. Fold the seam allowance down so that the shorter end of the seam allowance is covered by the slightly longer end. Top stitch through all layers, being sure to backtack at the beginning and end of your seam.
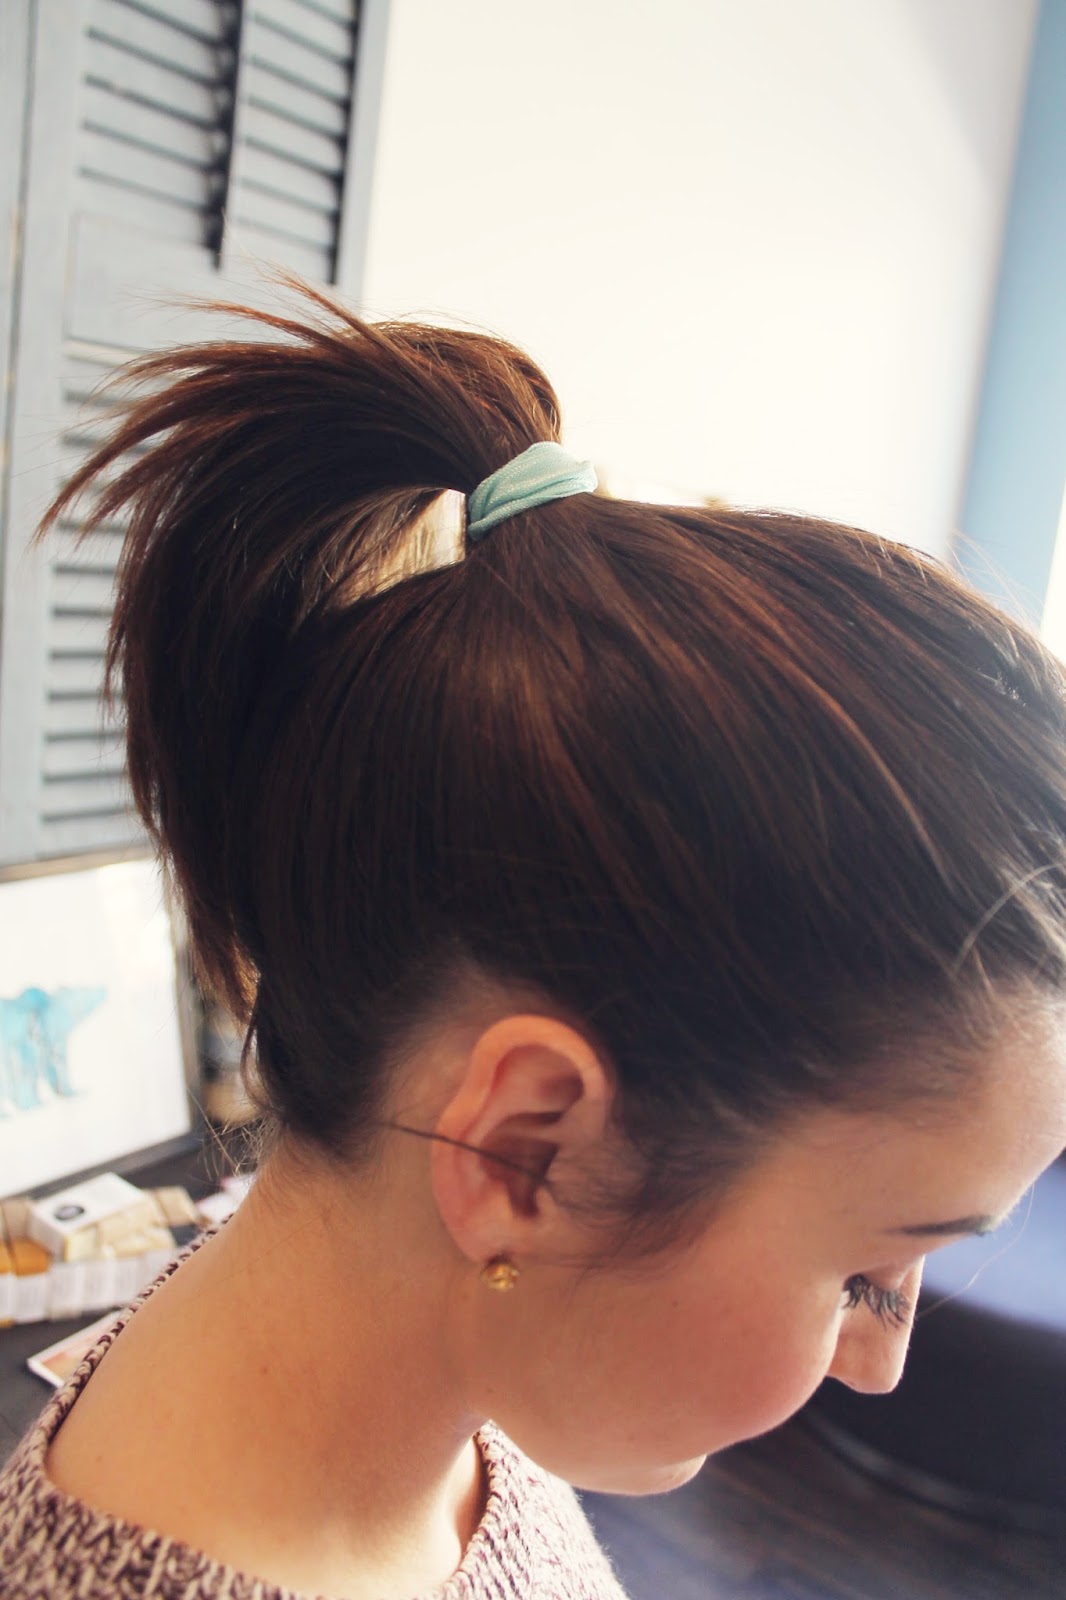
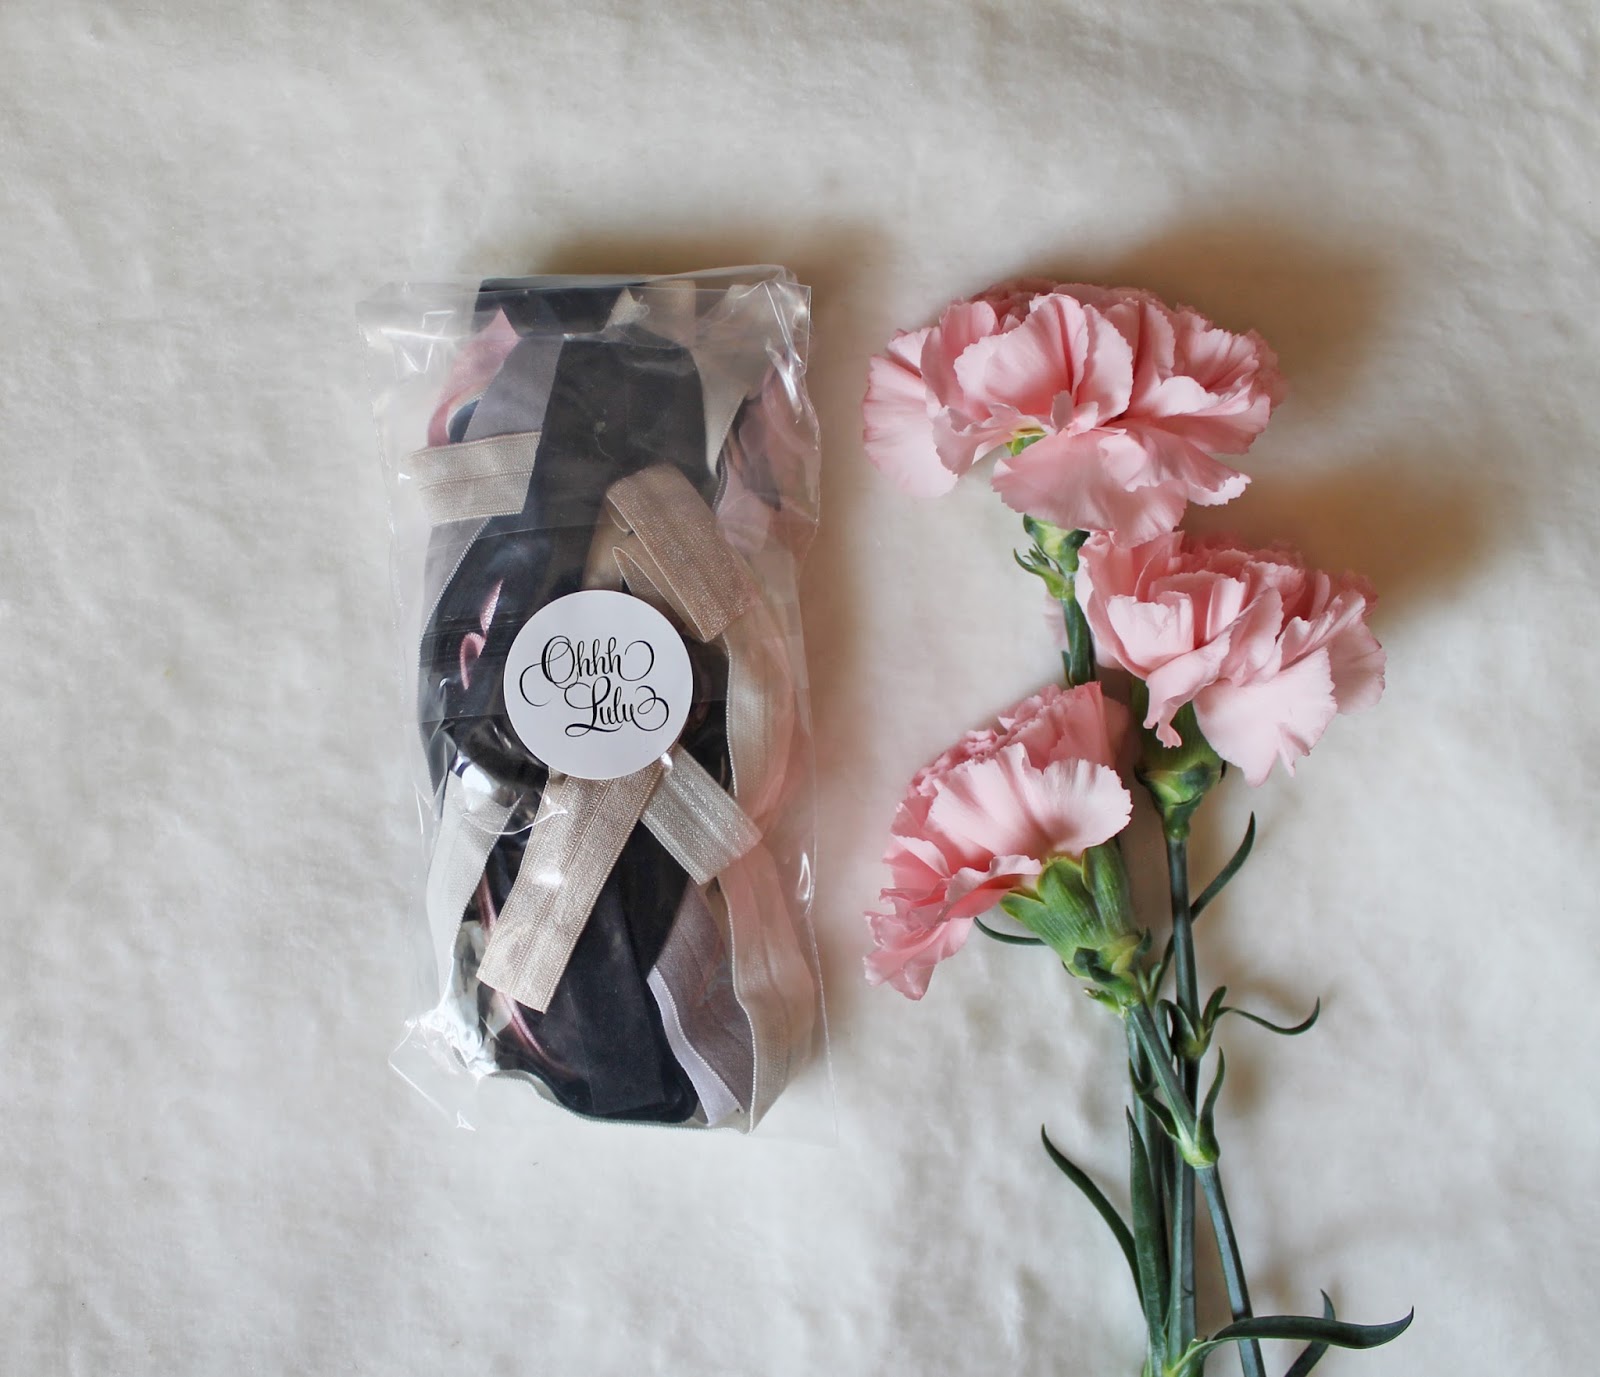
And that’s it! It takes just a minute to make them and you’ll never buy a hair tie again. Wrap a few around a printed piece of cardstock, and they make a great addition to a handmade gift. It’s also a great way to use all of that amazing printed FOE that I’m seeing all over Etsy (check out Peak Bloom, just as one example!).
Thanks to my beautiful friend, Susie, from Changing of the Garnet for modeling my little elastic for me!
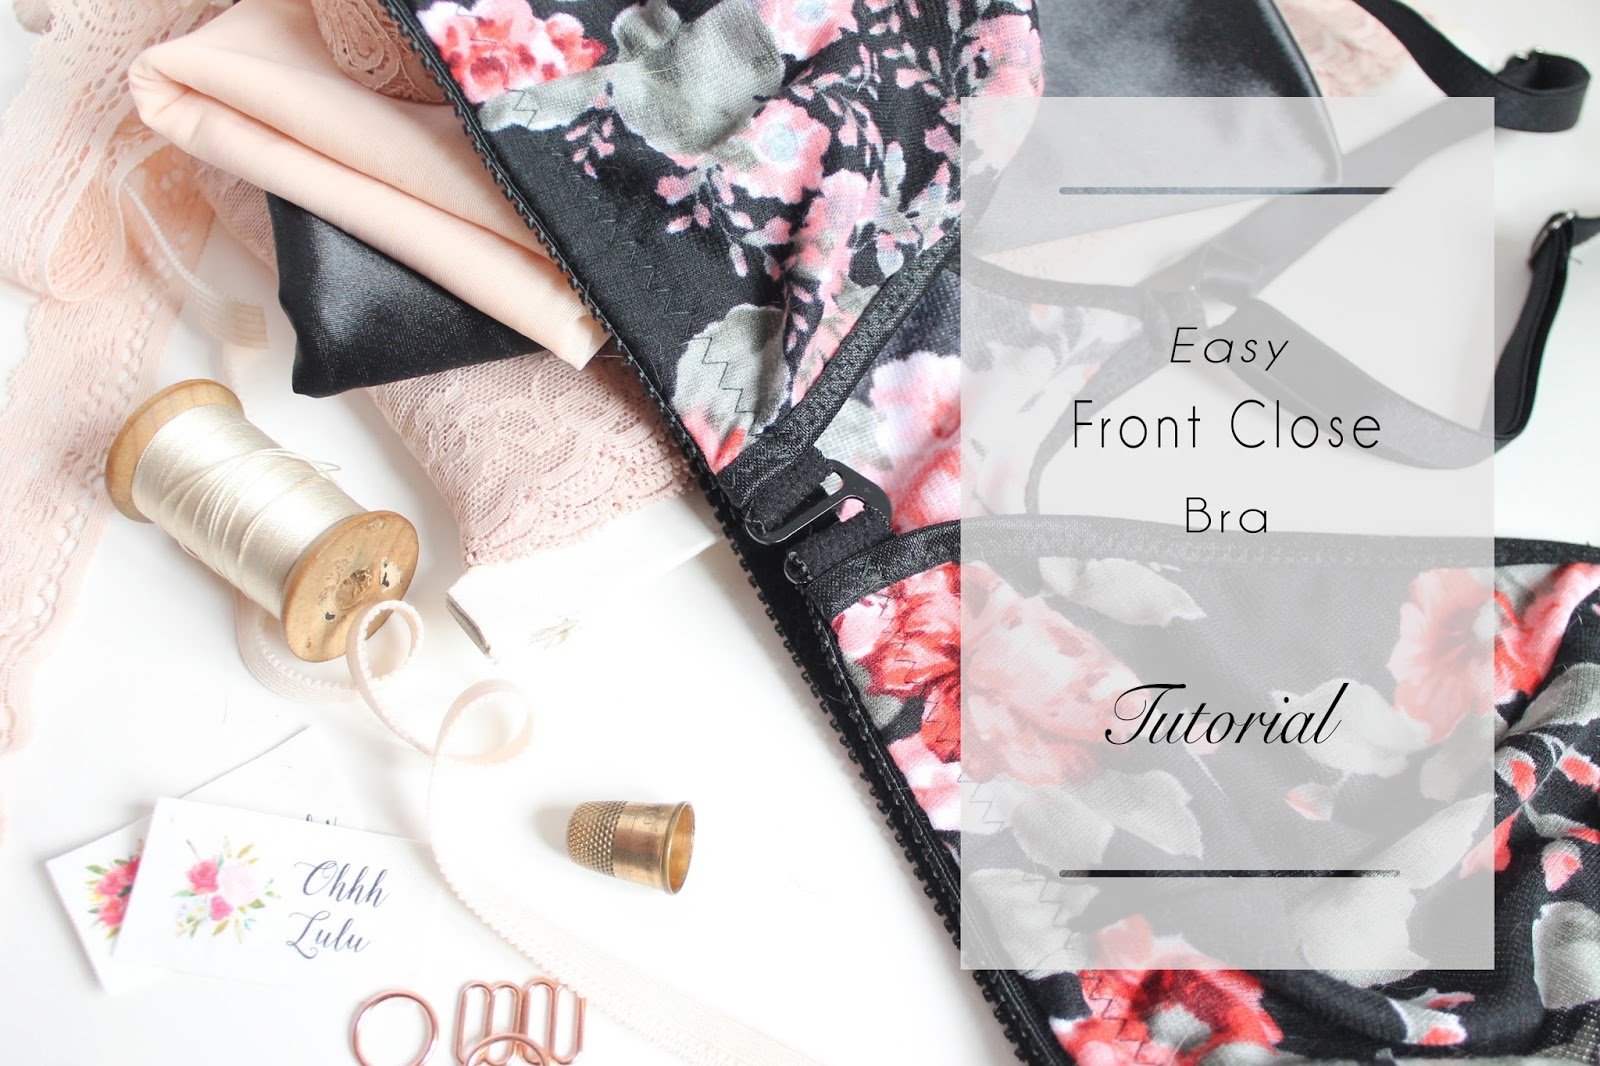
I had a customer email me a month or so ago asking for advice on how to add a front closure to one of my bras. She had some mobility issues and wasn’t able to easily get in and out of a back closing bra herself. Last week I came down with a cold (my second cold of the month, unfair!) and my whole body was aching. Strangely enough, my right hand really ached and I could barely do anything with it! I really felt for this customer who had to deal with aching hands on a daily basis.
I like this method because it uses a simple G-hook, but you can also use this method with a front clip. I sometimes also like to add a metal ring to the center front of my pull on bras, which uses basically the same steps.
What you need:
1. Any triangle front bra pattern, like my Josephine, Scarlett (which I have used here), or Brigitte Pattern.
2. Supplies as outlined in the pattern.
3. G-hook or Front Clip
Instructions:
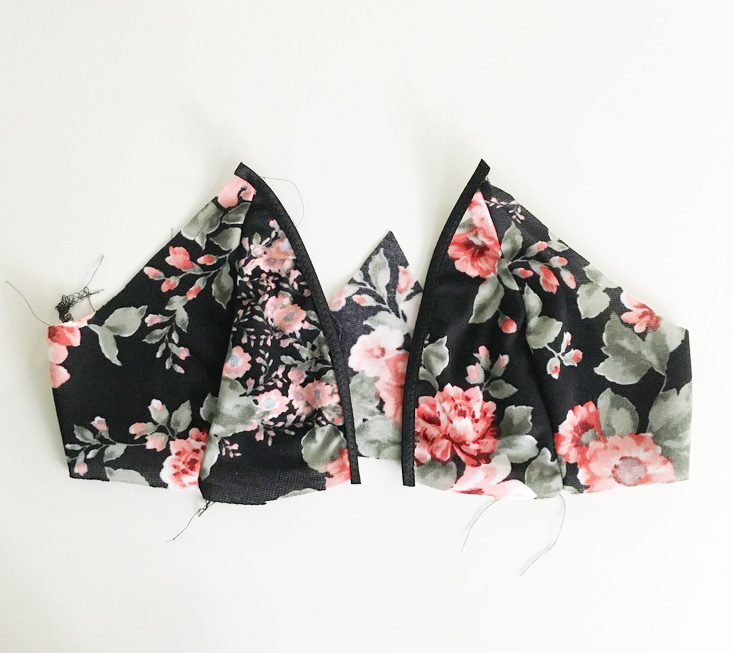
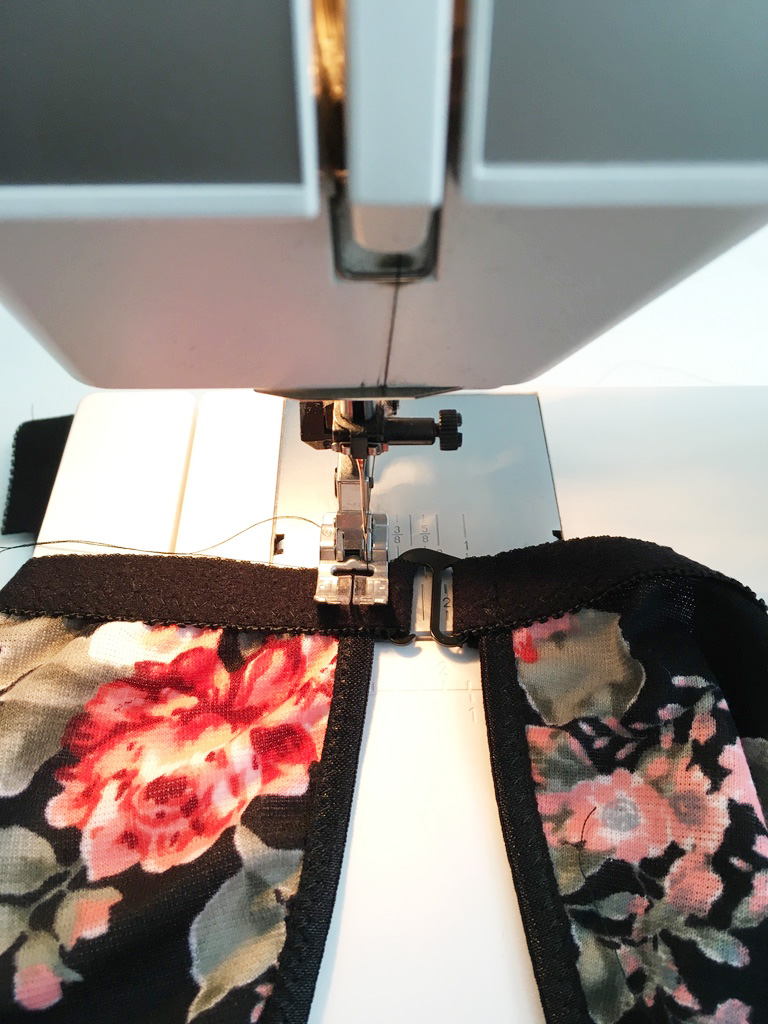
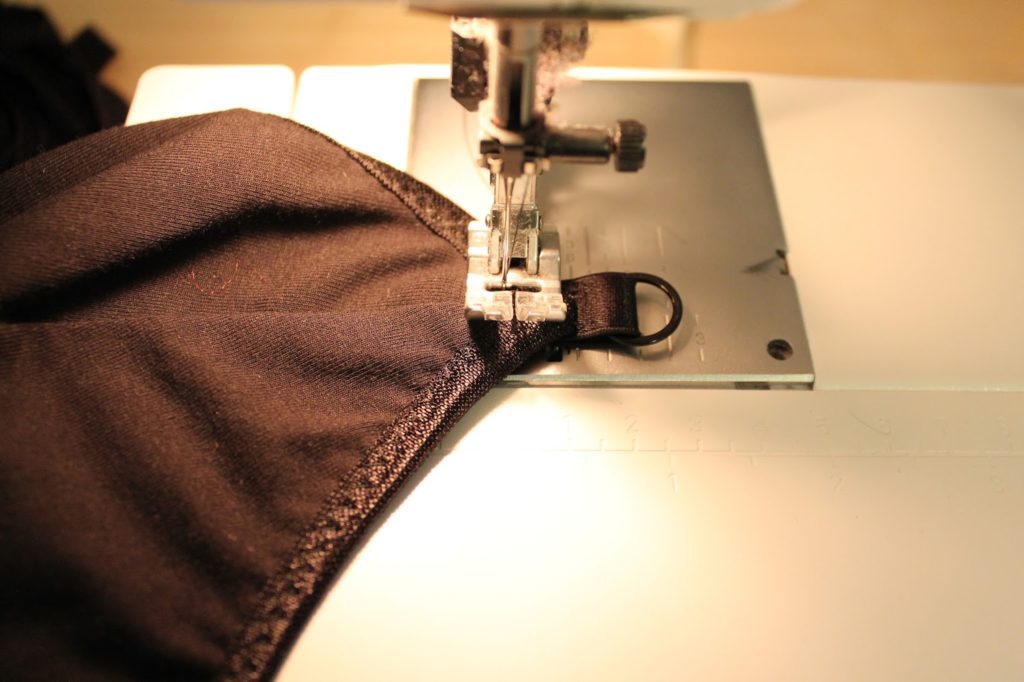
1. Following the pattern instructions, assemble cups and apply elastic around front edge.
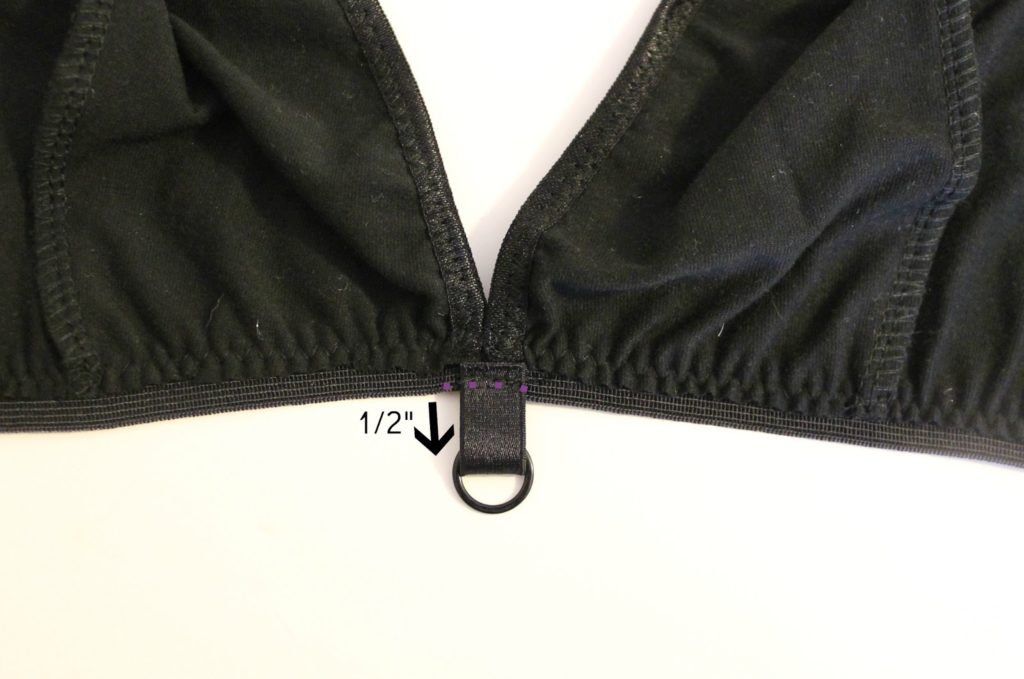
2. Beginning at the center front and leaving a 1″ tail, apply the band elastic along the lower edge of the bra. Leave a 1″ tail and the end.
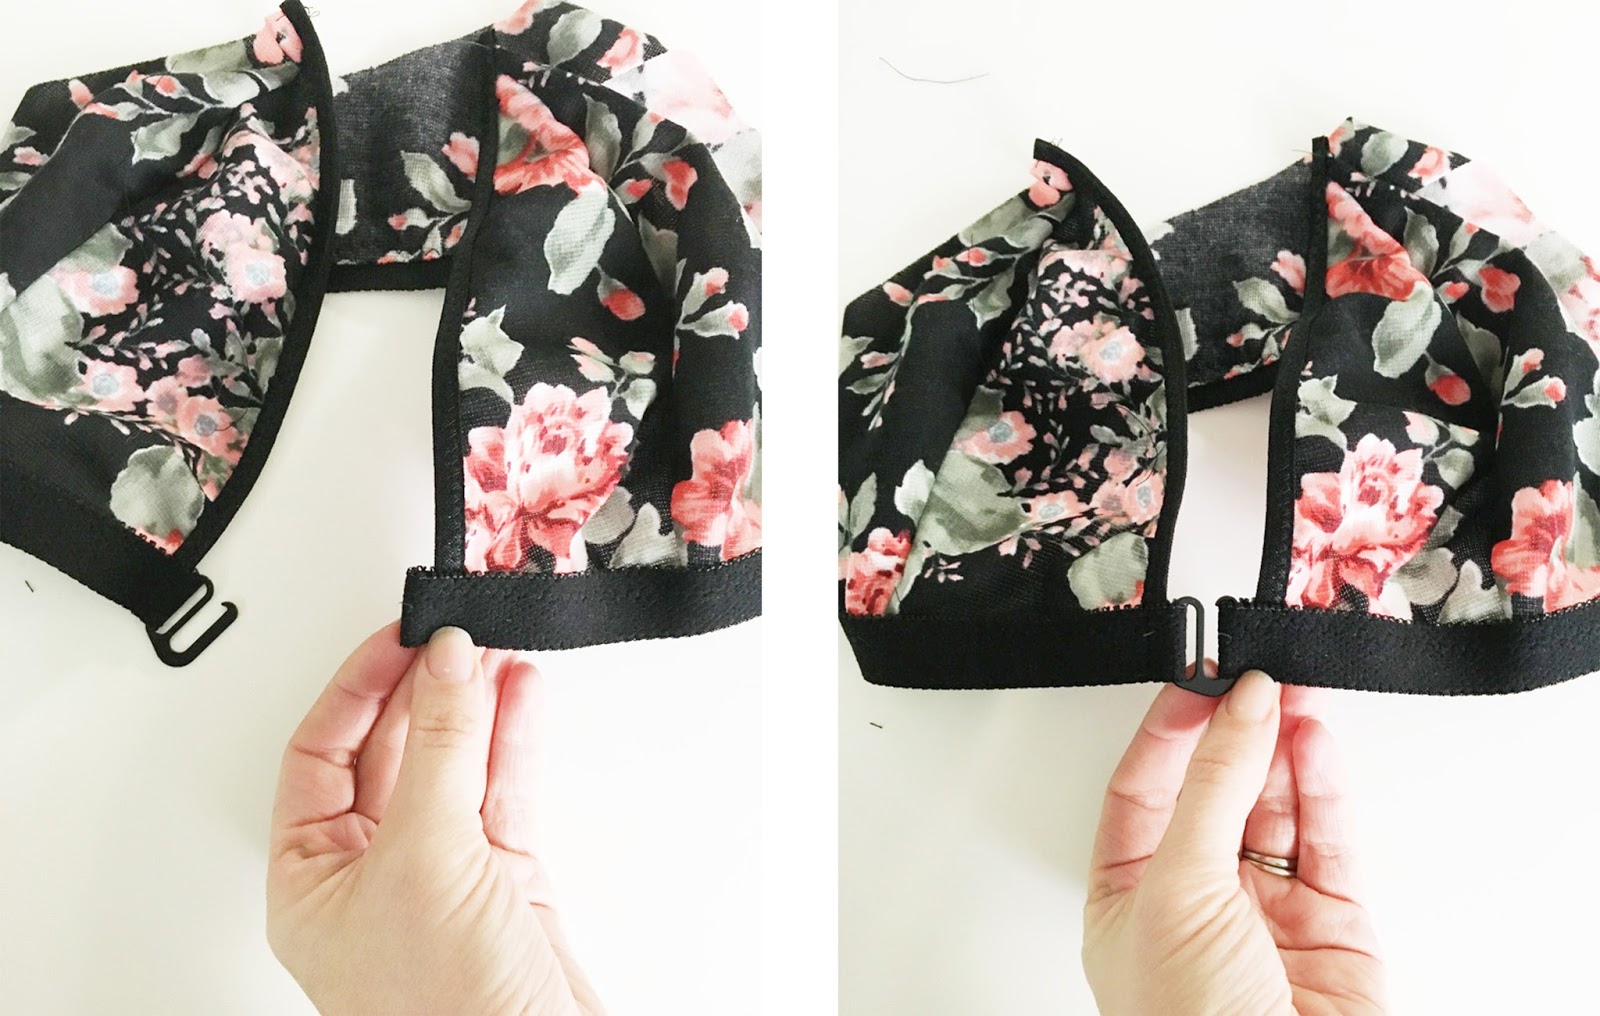
3. Feed one end of the elastic “tail” through the closed end of the G-Hook. Turn elastic towards garment and stitch in place.
4. Wrap the tail on the other side of the bra around the open end of the hook and stitch in place. This creates a small loop to catch the hook into.
Your hook should be upside down at this stage! It will get flipped around soon.
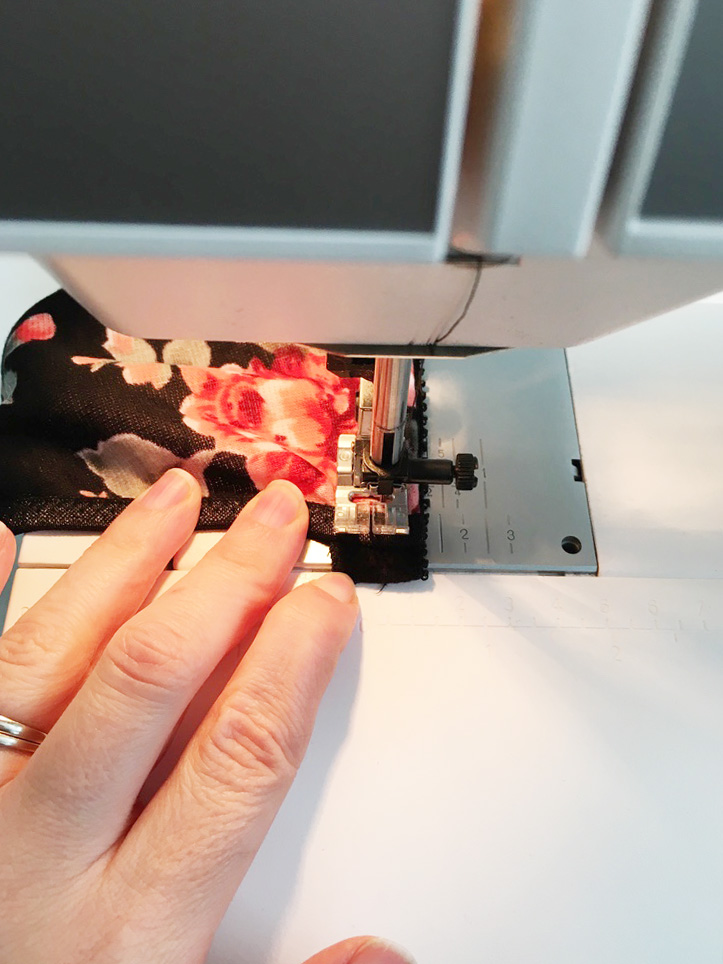
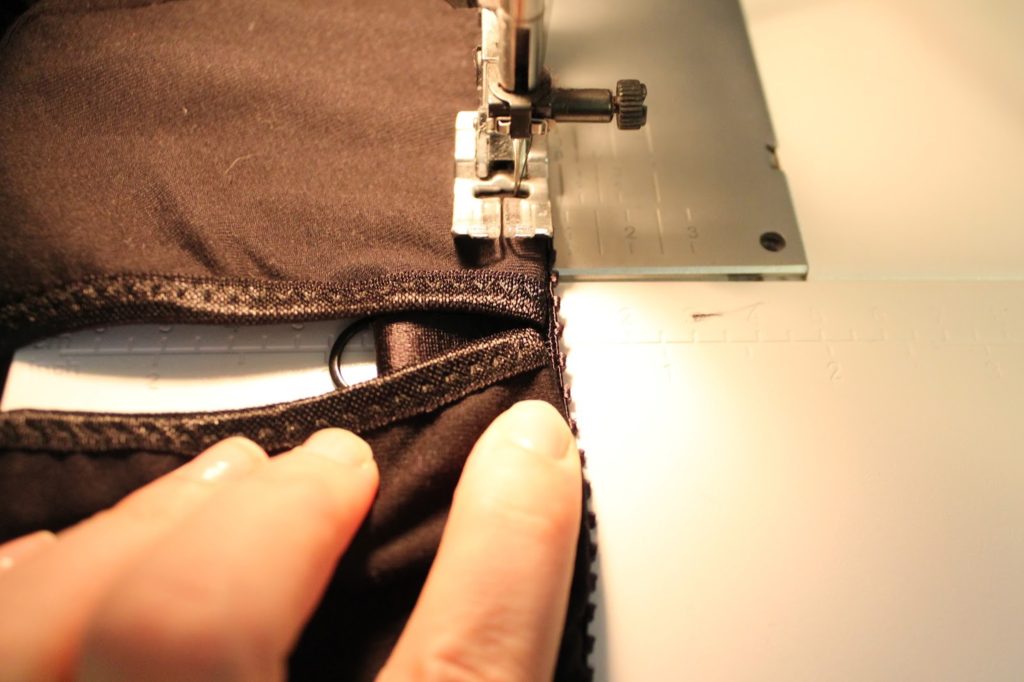
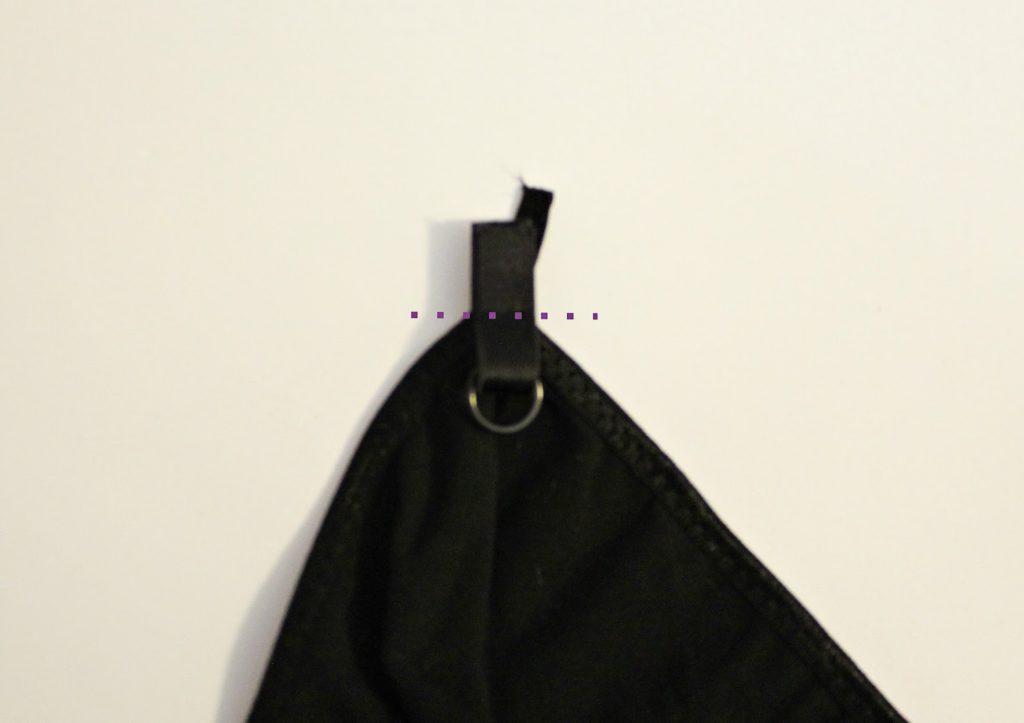
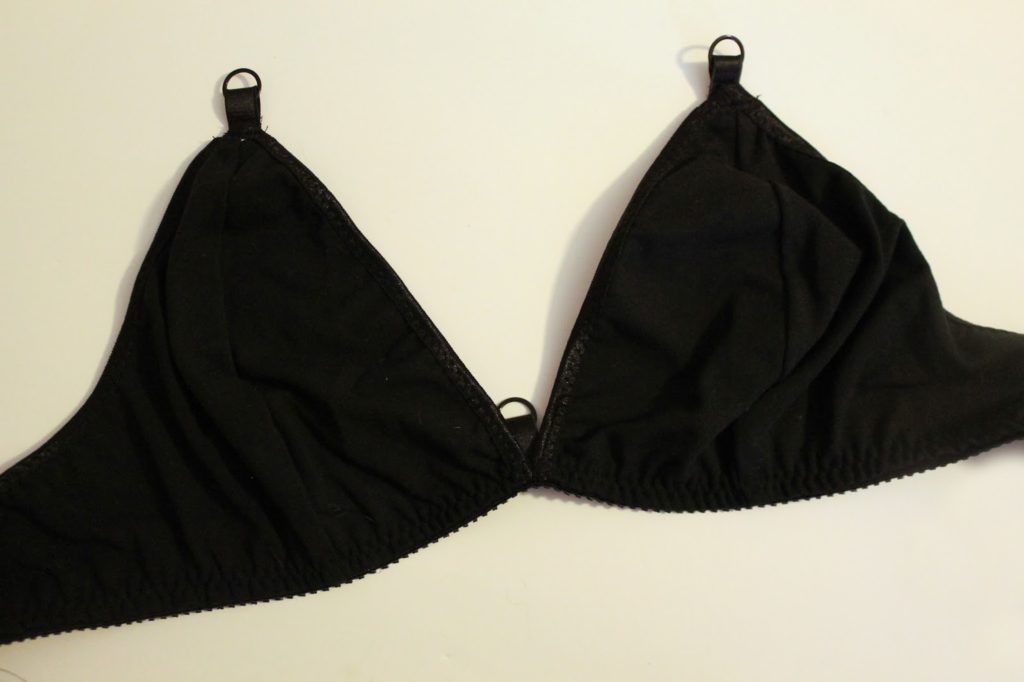
5. Turn the band elastic under and topstitch in place with a wide zig-zag stitch. Make sure to securely backtack at the beginning and end of your stitching line.
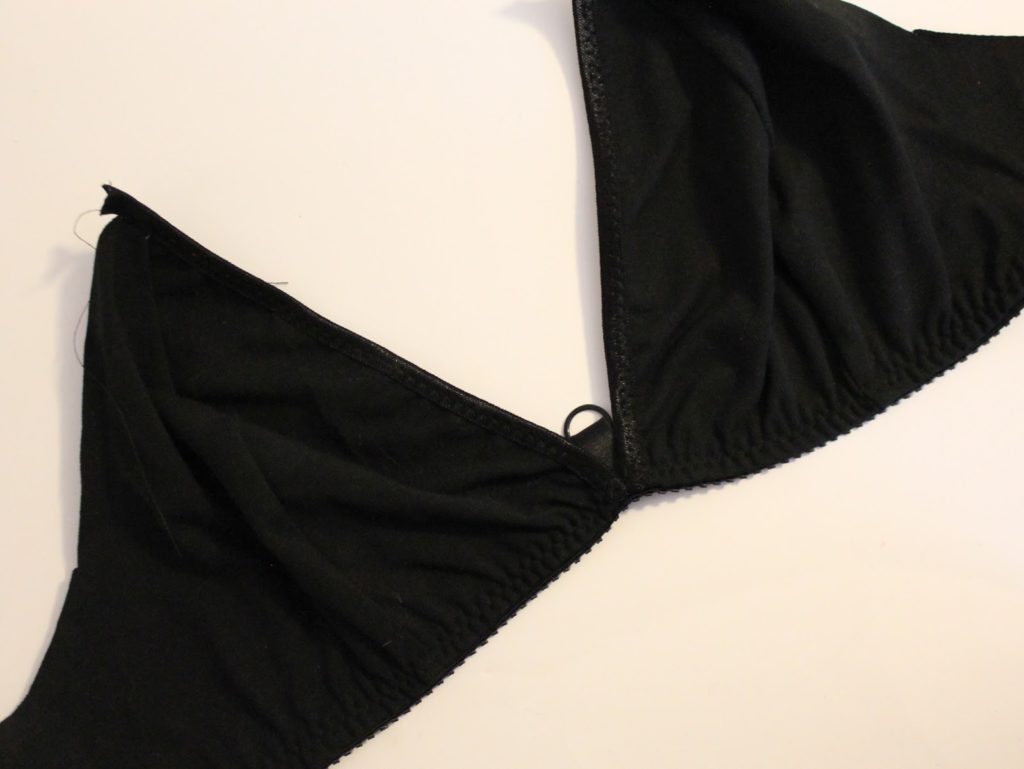
6. Finish the garment following the instructions in your pattern.
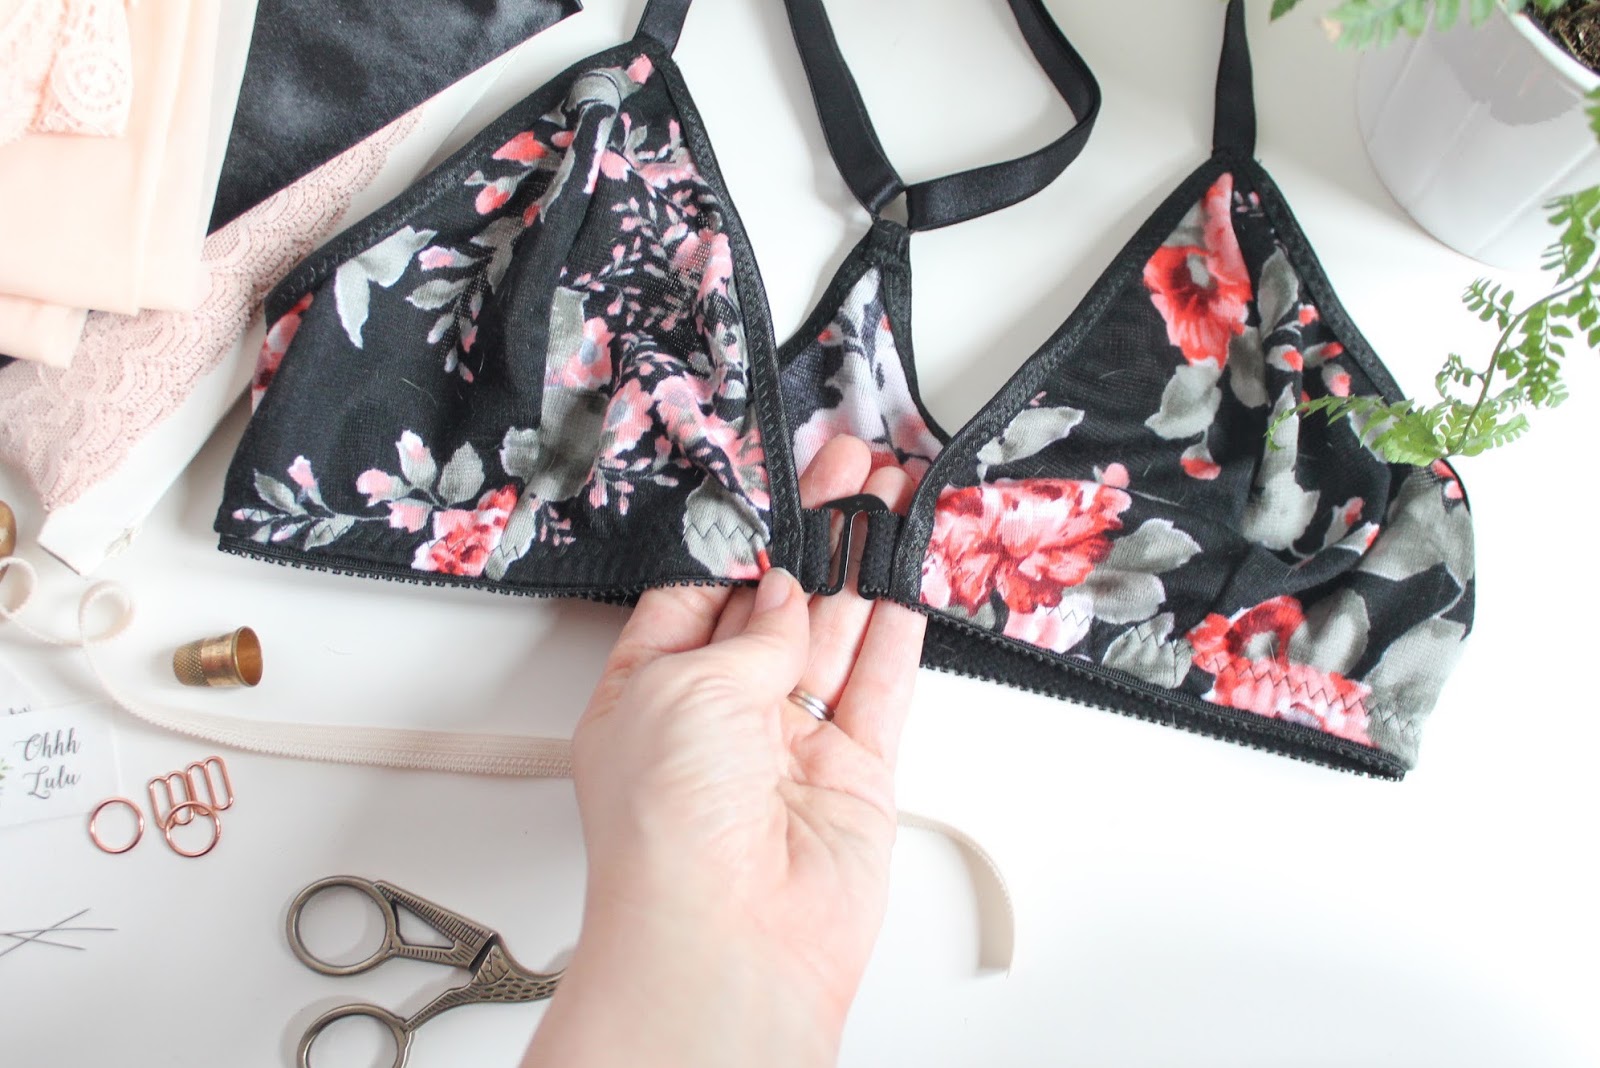
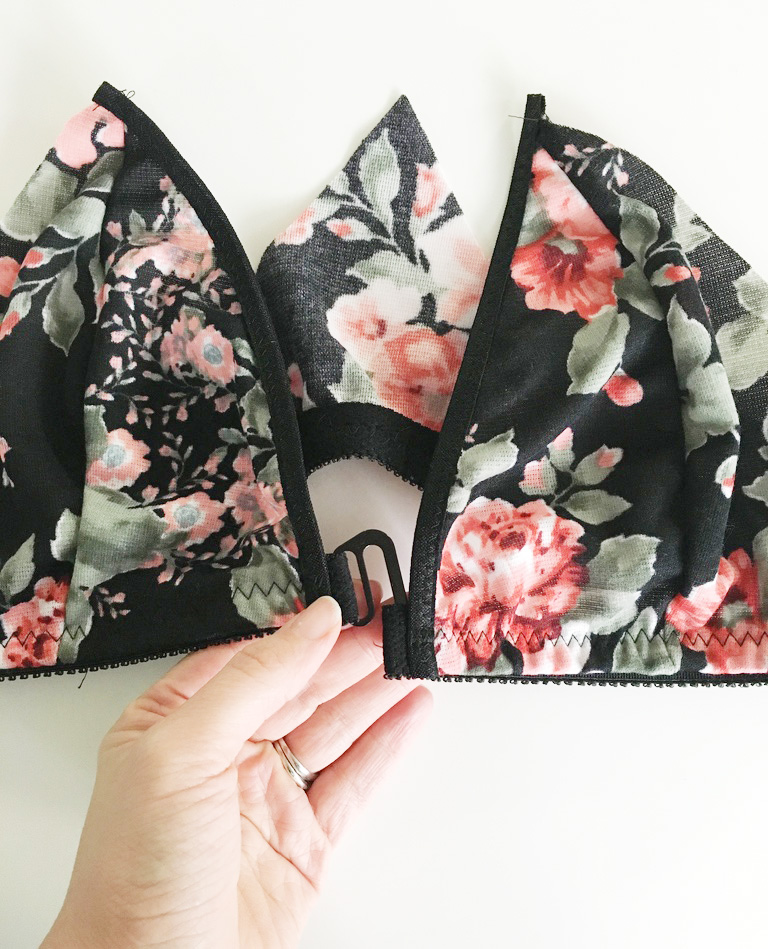
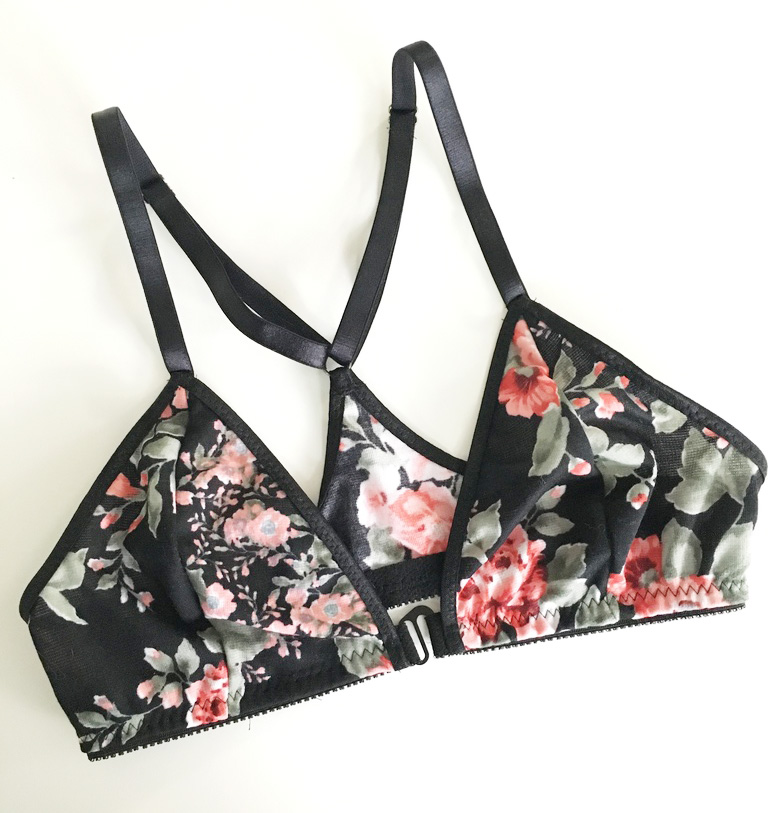
That’s it! now you have a neatly applied front hook closure! Enjoy!
One of the tricky parts of lingerie making is sourcing all of the supplies! Still to this day, I order my supplies from all over the world… shipping can get expensive and sourcing everything is time consuming (this is just one of the reasons why handmade lingerie is a little more costly).
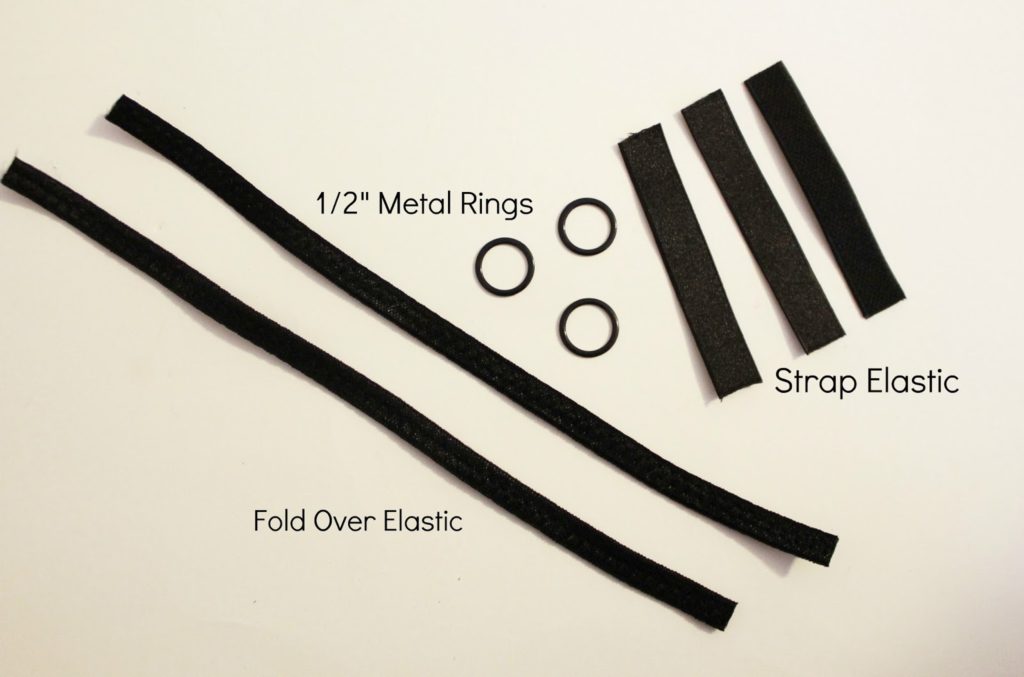
Almost all lingerie requires a variety of elastic. A bra alone requires strap elastic, band elastic, and trimming elastic. Most bras require a hook and eye closure and you need the ring and slider hardware to assemble your straps. To make matters a little more tricky, all of the elastic comes in a variety of widths, from 1/4″ and up!
Rings and Sliders – I like to use nylon coated metal rings and sliders. They come in a variety of colours and sizes. I always prefer to use metal over plastic for durability.
Strap Elastic – Generally plush on one side (the side that goes against your skin), and matte or shiny on the exterior. It comes in various widths, with the standard being 1/2″.
Bra Back Closures – These hook and eye closures come in various sizes, with the average being 2×3 hooks. The inside of these are plush, so they’re soft against your skin.
Fold Over Elastic – I like to use fold over elastic for finishing the upper edge of bras and for waist and leg lines of panties. It comes in a million shades of elastic, and if you can apply binding, you can apply fold over elastic.
Band Elastic – Just as the name implies, it goes around the band, or lower edge of the bra. One side is soft and plush and it often has a decorative edge. Band elastic comes as narrow as 1/4″, and up to 1″ wide. My preference is 1/2″, or 3/4″ for larger bust sizes.
I’ve assembled some kits, in black, ivory, pink and navy, that contain all of the most often needed lingerie supplies in the most common sizes. Each kit contains 1/2″ strap elastic, with 1/2″ ring and slider set, 1/2″ plush band elastic, satin fold over elastic, a 2×3 hook and eye closure, and two satin bows, hand tied by yours truly. There is enough elastic to complete 1 bra and 1 pair of panties.
In addition to the kits, I’ve added a few remnant grab bags to my sewing pattern shop. I’ve been cleaning out my sewing room, and found a lot of odds and ends. These bags contain various elastics in various lengths and are perfect for practice and small projects. The elastic in these vary in length from 14″ to as much as 2 yard lengths.
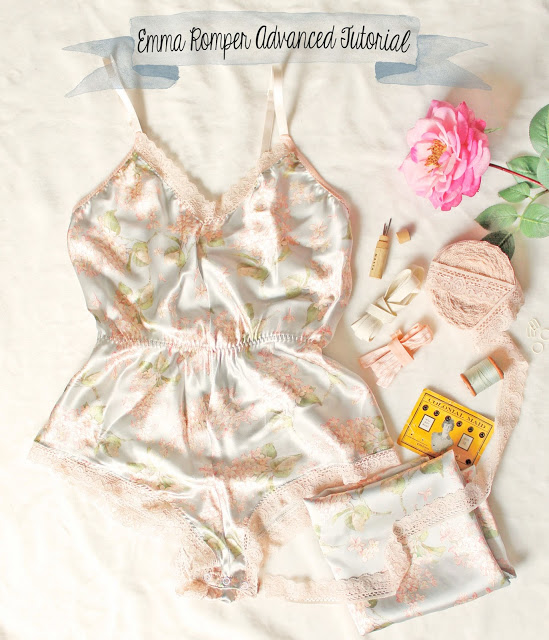
Hey guys! I finally released my romper pattern… I LOVE this pattern. It’s so versatile and comfy.
In my instructions for the Emma Romper, I give the basic assembly method… I thought it might be fun to show you how you can take this pattern to the next level with some more advanced techniques! The basic assembly remains the same, but the finishing will be finer. Instead of doing serged seams, I’ll show you how to sew french seams. We’ll finish the crotch with bias tape and snaps (hand sewn or hammered), and add some gentle shirring to the waist.
What You’ll Need:
1. The Emma Romper Pattern
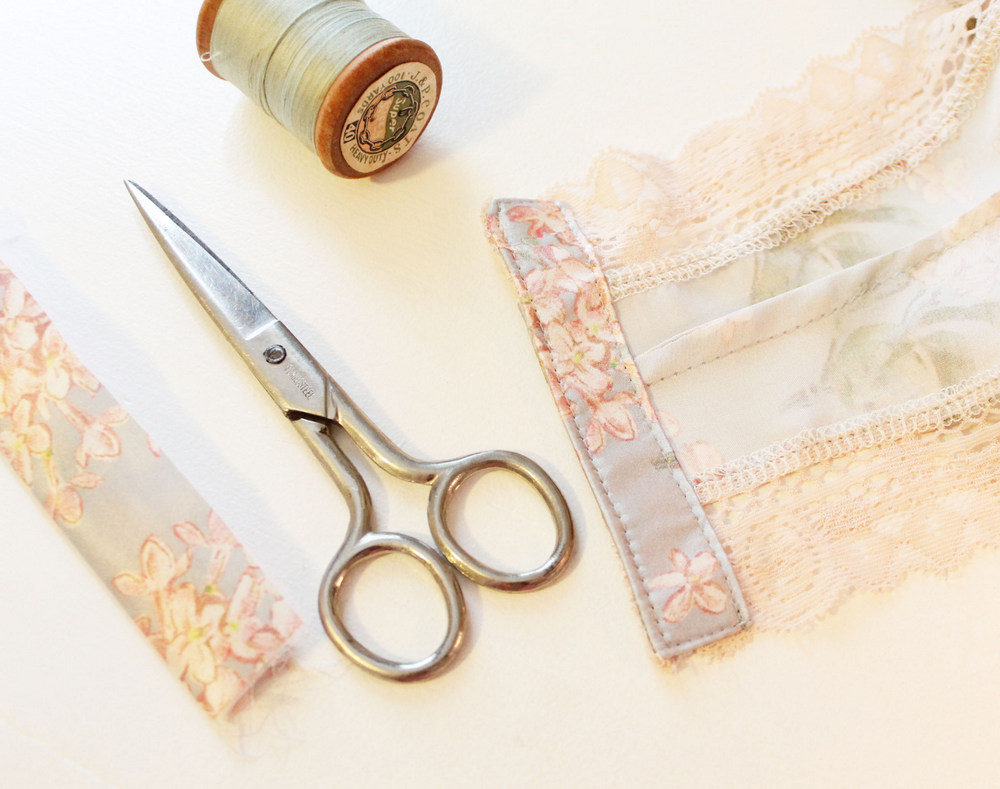
2. A fabric with a good drape. I’m using a Liberty of London silk.
3. Lace trim for the neck and legs.
4. Sew in or Hammer in Snaps
5. Small Scrap of Interfacing
6. 1/2″ Strapping and bra strap rings & sliders
7. Needles and Thread
Instructions:
1. Begin by applying lace along Front Neckline, as indicated in the Pattern Instructions.
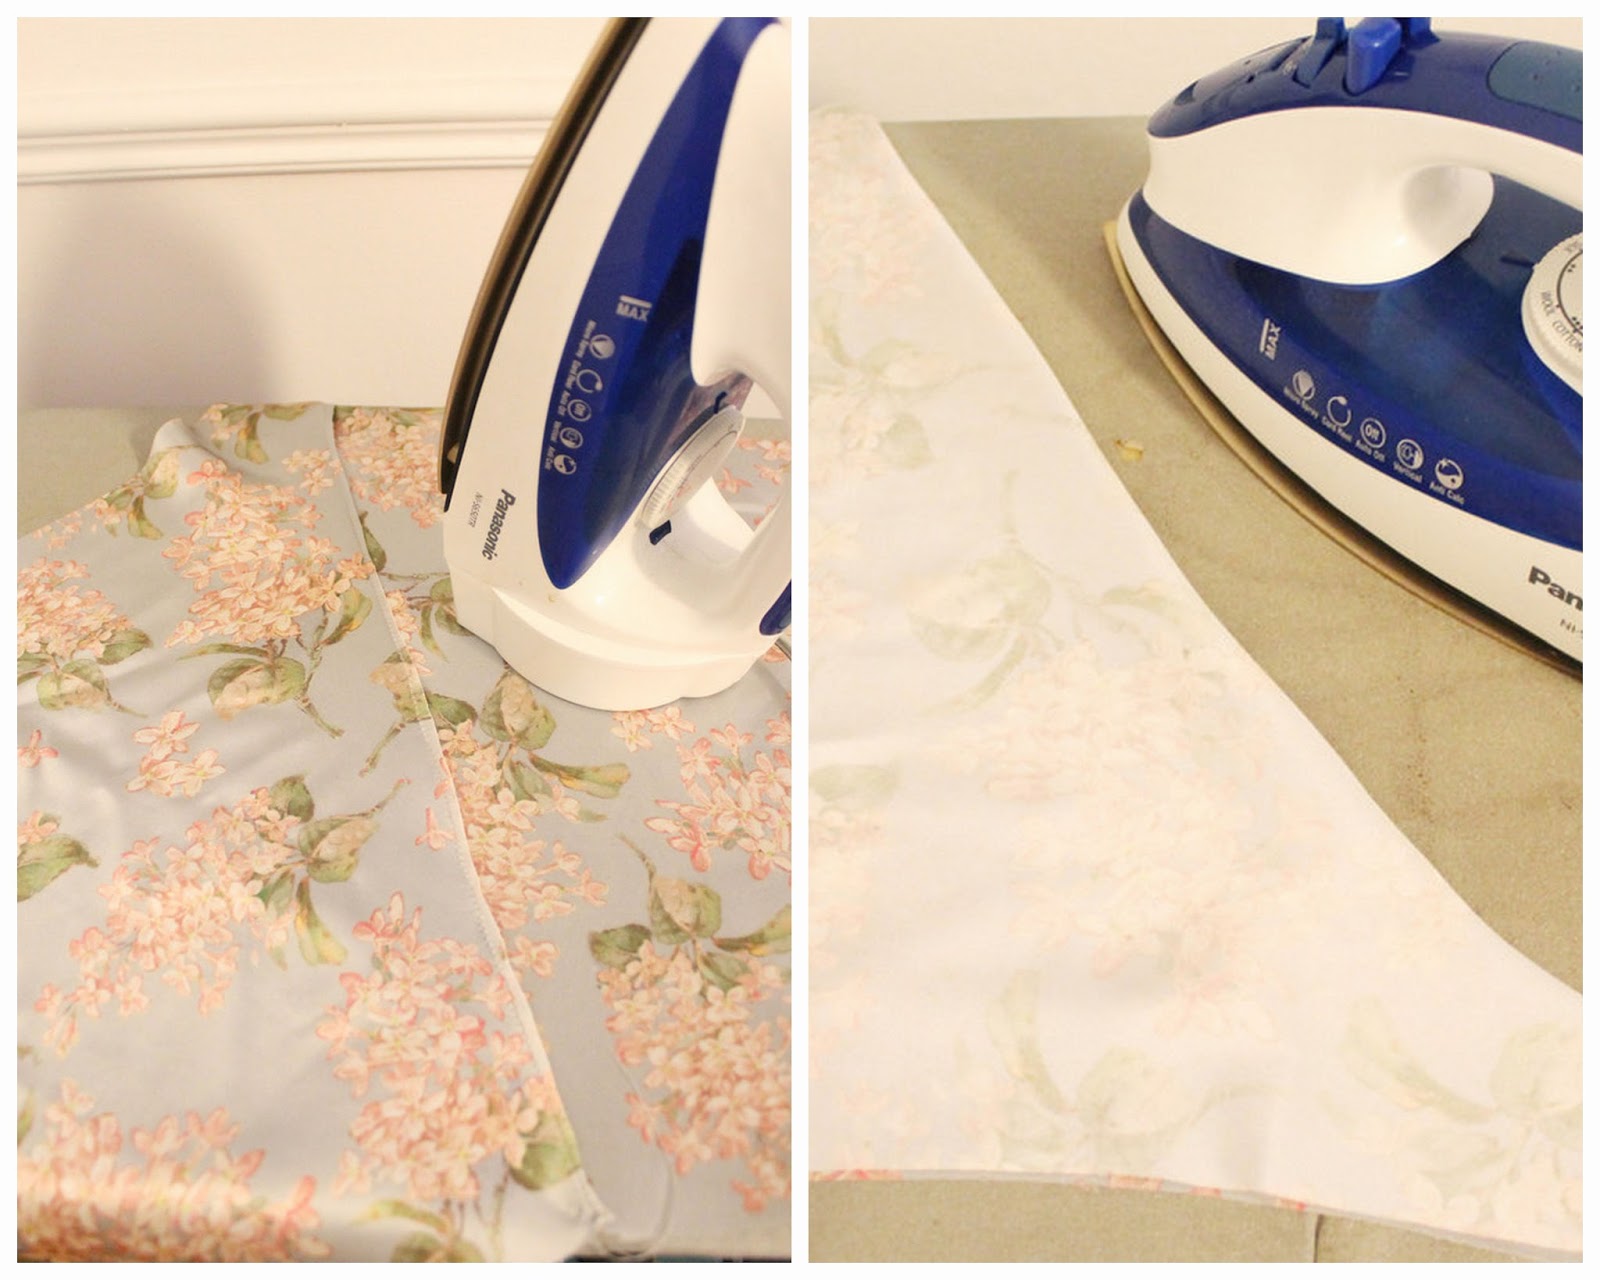
2. With the wrong sides together, pin your center front seam. Stitch together using only a 1/4″ Seam allowance.
3. Trim back seam allowance to approximately 1/8″.
4. Using a warm iron, press seam allowance to one side. Then fold your garment along the center front seam, and press flat.
5. Stitch seam closed using a narrow, 1/4″ seam allowance.
6. Repeat the same process on the Center Back and Side Seams.
7. Sew lace onto the right side of the garment. Turn seam allowance under and press. Top stitch in place. An extra pretty way to finish the leg openings would be with appliqued lace. Check out my hero, Carine Gilson for some dreamy inspration.
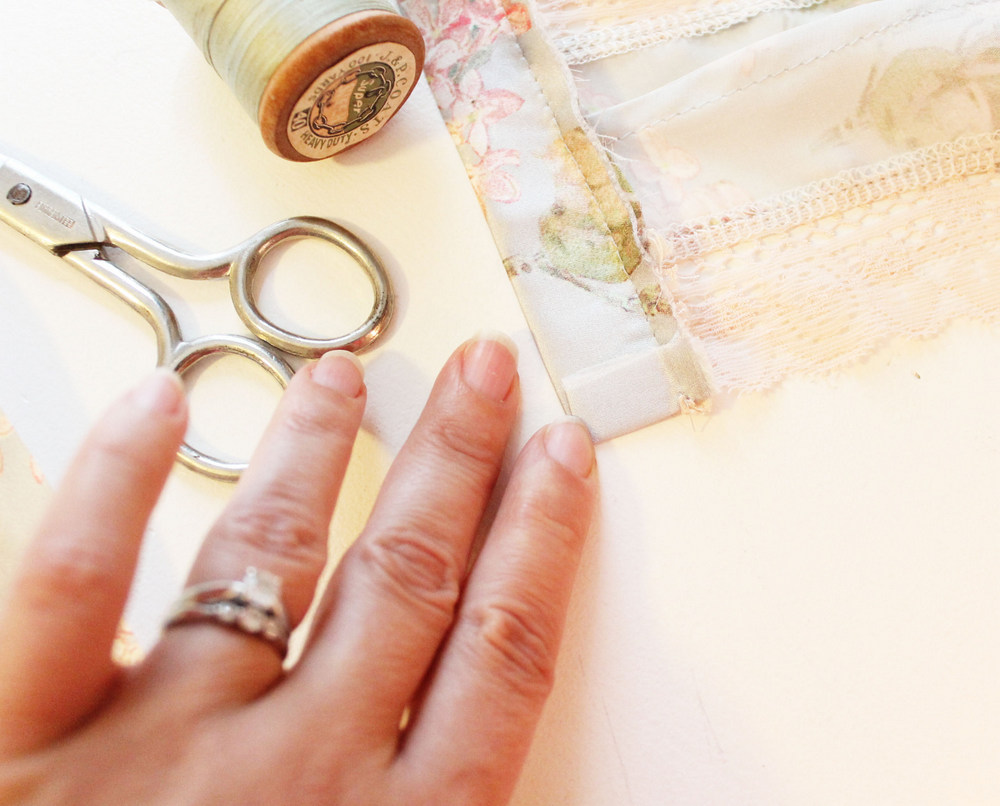
8. In this intance, I’ve finished the raw edge of the crotch seam with self fabric. I measured the width of the crotch seam (including the lace portion) and added 1/2″ to either side. I wound up with a measurement of 5″. I cut 2 pieces of fabric and 2 pieces of light weight interfacing that were 5×2″
9. Iron interfacing onto the wrong side of your fabric strips. Fold in half lengthwise and press.
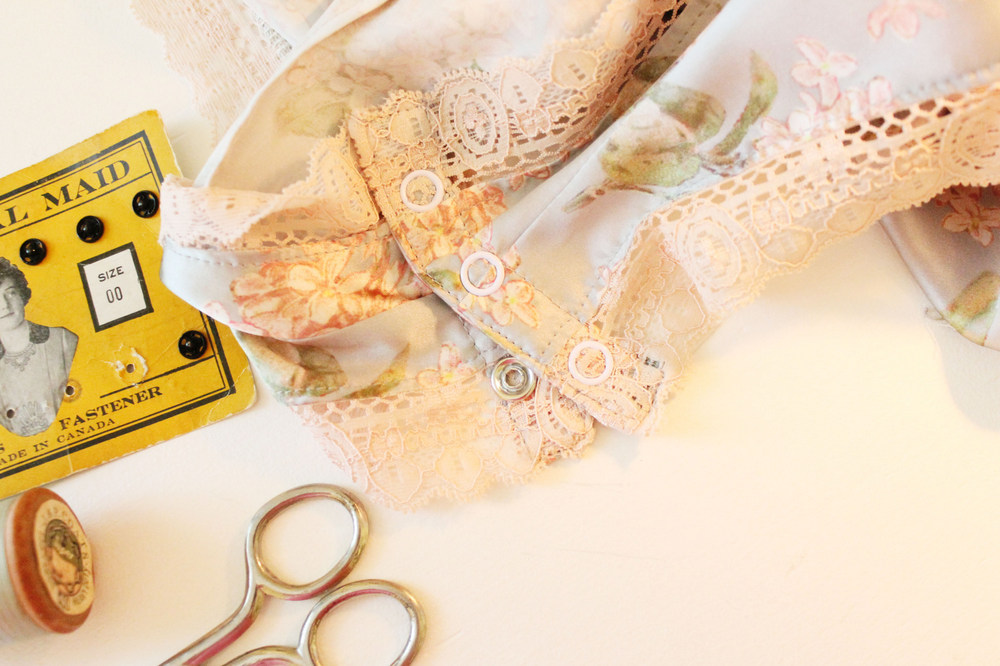
10. Pin and stitch on to the right side of the Front of the Romper.
11.Turn under the raw ends of your fabric strip.
12 Turn strip towards the inside of the garment, and top stitch all the way around the exterior of the strip. Repeat this process on the opposite side.
13. You can either hand sew on snaps or try your hand at hammered in snaps. I ended up putting hammer-in snaps in mine, but they aren’t quite as perfectly set as I would have liked!
14. Finish the upper edge and straps as indicated in the pattern.
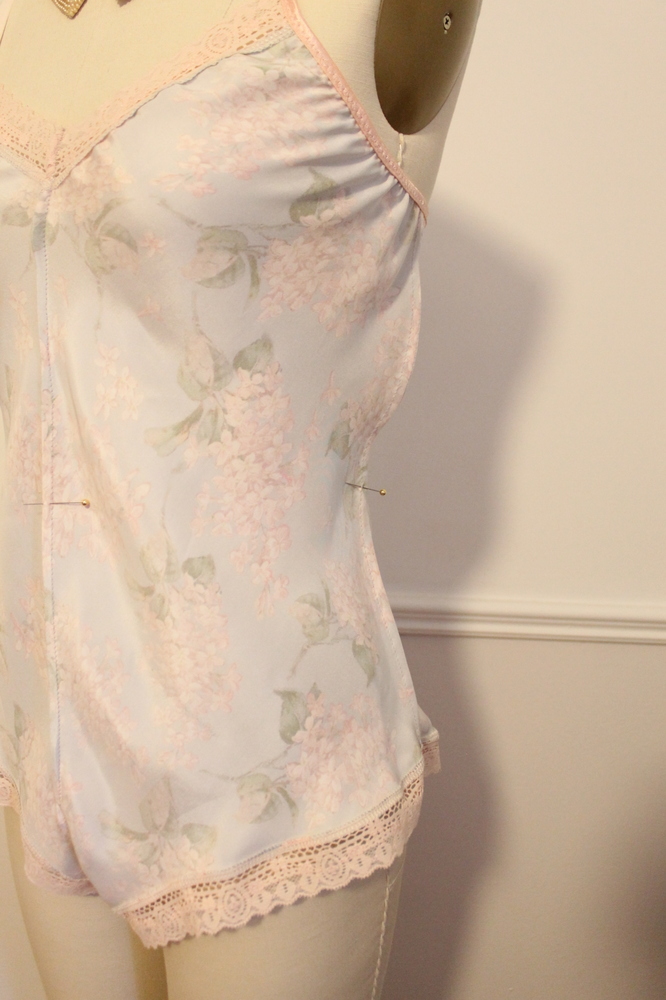
15. To add some quick contouring around the waist, Try on the romper while it’s inside out. Find your natural waist, which is the narrowest part of your torso (you can also use the waist line guide on the pattern pieces) and mark that part at each seam with a pin (or use dressmakers chalk). I suggest trying on the garment to find your natural waist because waist height varies greatly. My waist is super high. My friend’s waist is perfectly in the middle of her torso… everyone is different.
16. I used some soft, 1/2″ elastic to cinch in the waist of my romper. To do this I used my pins as a guide and zig-zag stitched the elastic onto the inside of the garment. Pull on the elastic as you stitch. This creates soft gathers and will pull in your waistline. Alternatively, you could also sew a casing onto the inside of your garment, and draw elastic through the casing. Adding button holes and a drawstring would be fun too! I have also finished these with long satin sashes tied at the waist.
Now you’re ready for some seriously luxurious lounging.
It’s time for Part Two of my Retro Bikini Tutorial. I’ve done a tutorial on how to sew the Ava Panties as Bikini Bottoms before. I did this version just a little differently. I wanted to add a contrasting band around the waist and omit the elastic around the legs. I have full hips and thighs, so these bottoms fit snug as they are. If you’re on the thinner side, you might want to add elastic or bind your leg openings like we did on the Bikini Top.
Instructions:
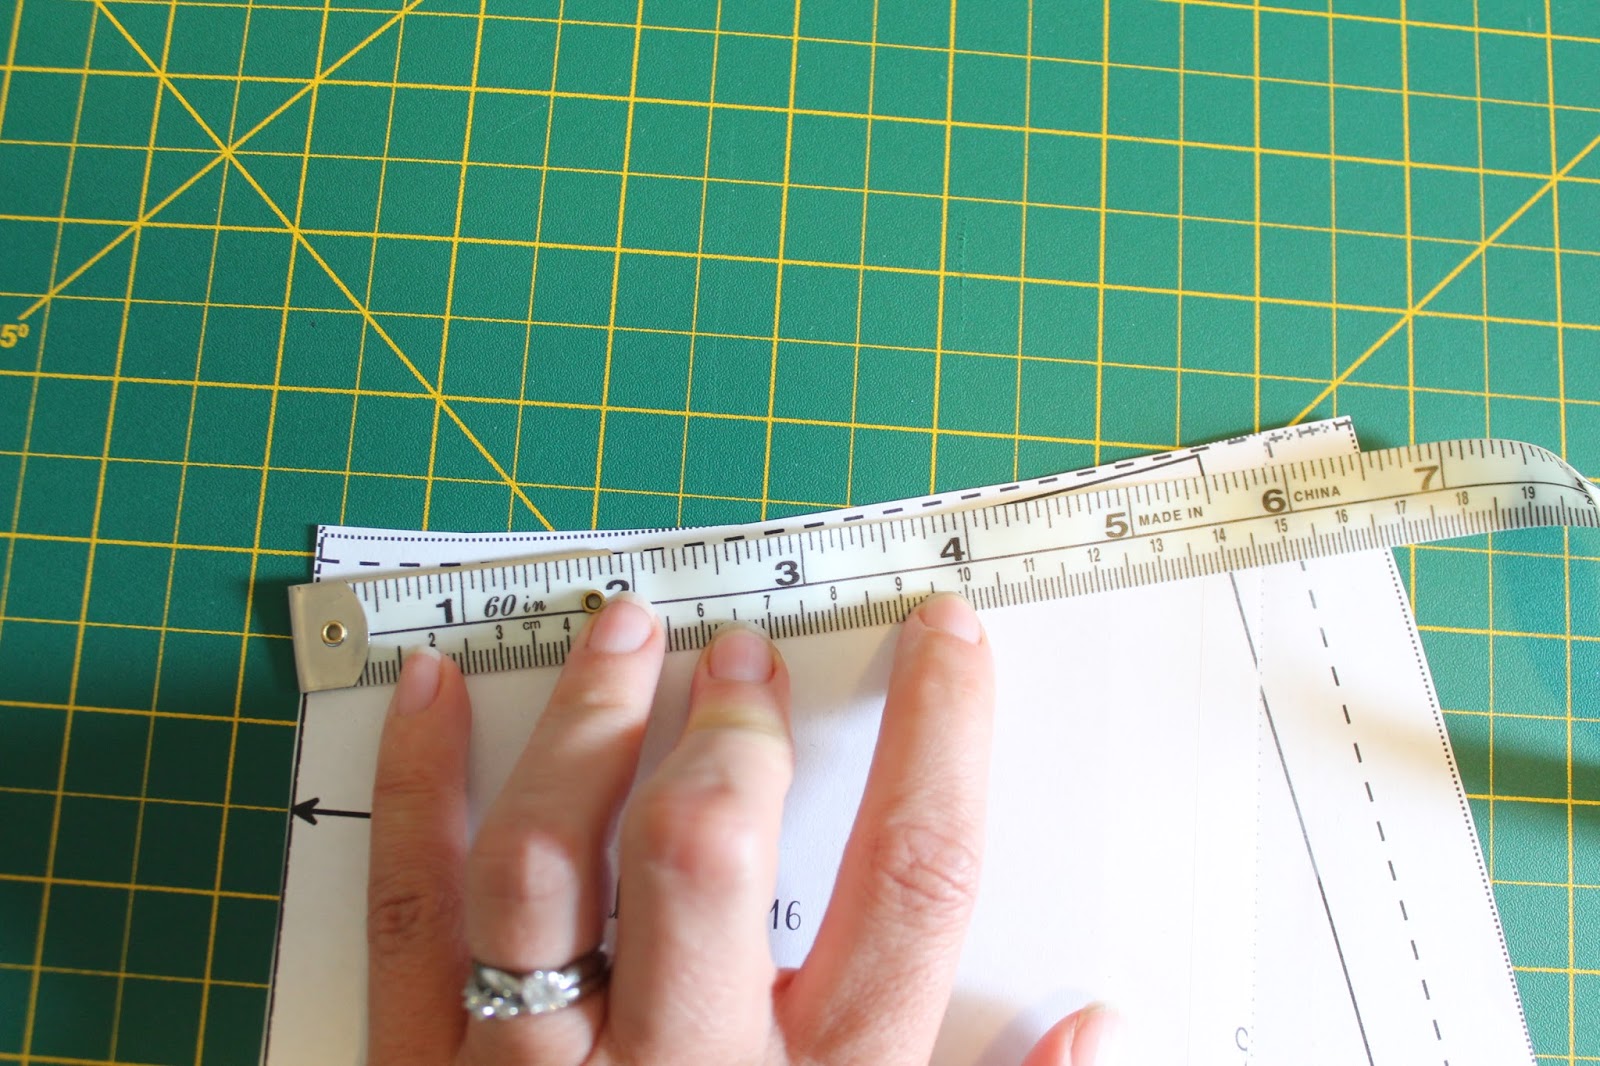
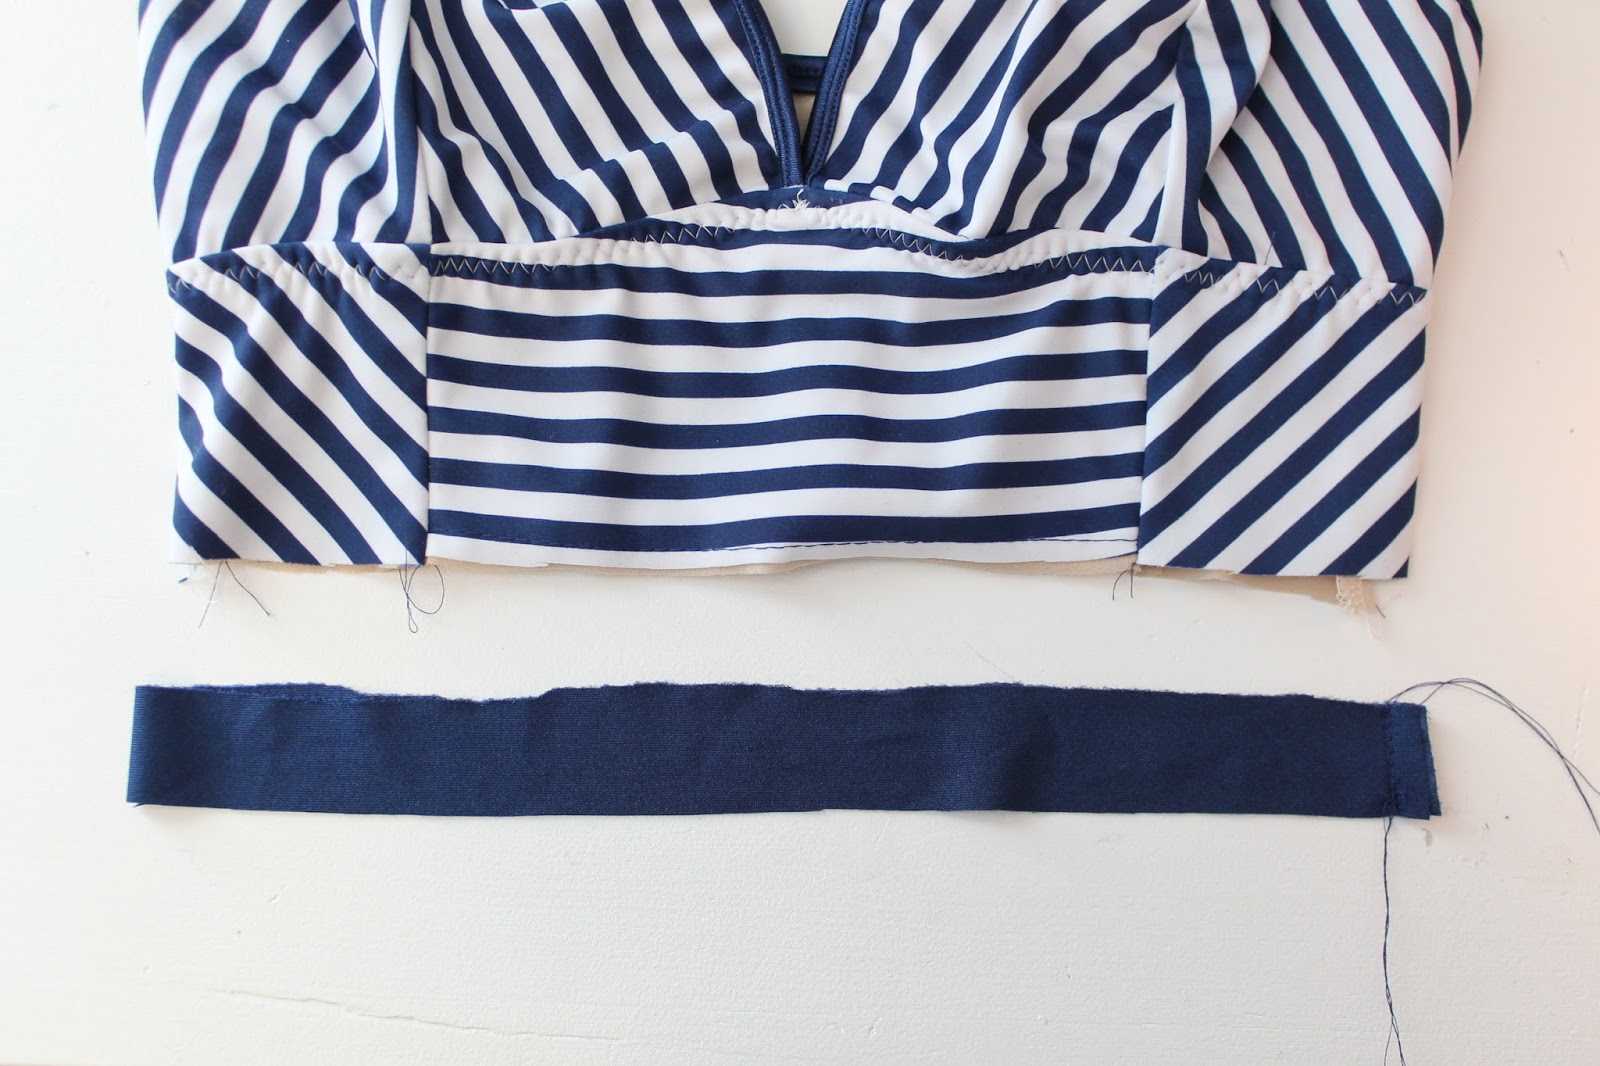
1. To make the waistband, I roughly measured the waist of the panties front and back. I cut a size medium, which had the same measurement for front and back. I then drew a straight waistband, which was 2″ wide with 1/2″ seam allowance on either side. I indicated cut 2 on my new pattern piece, as my front and back measurement was the same.
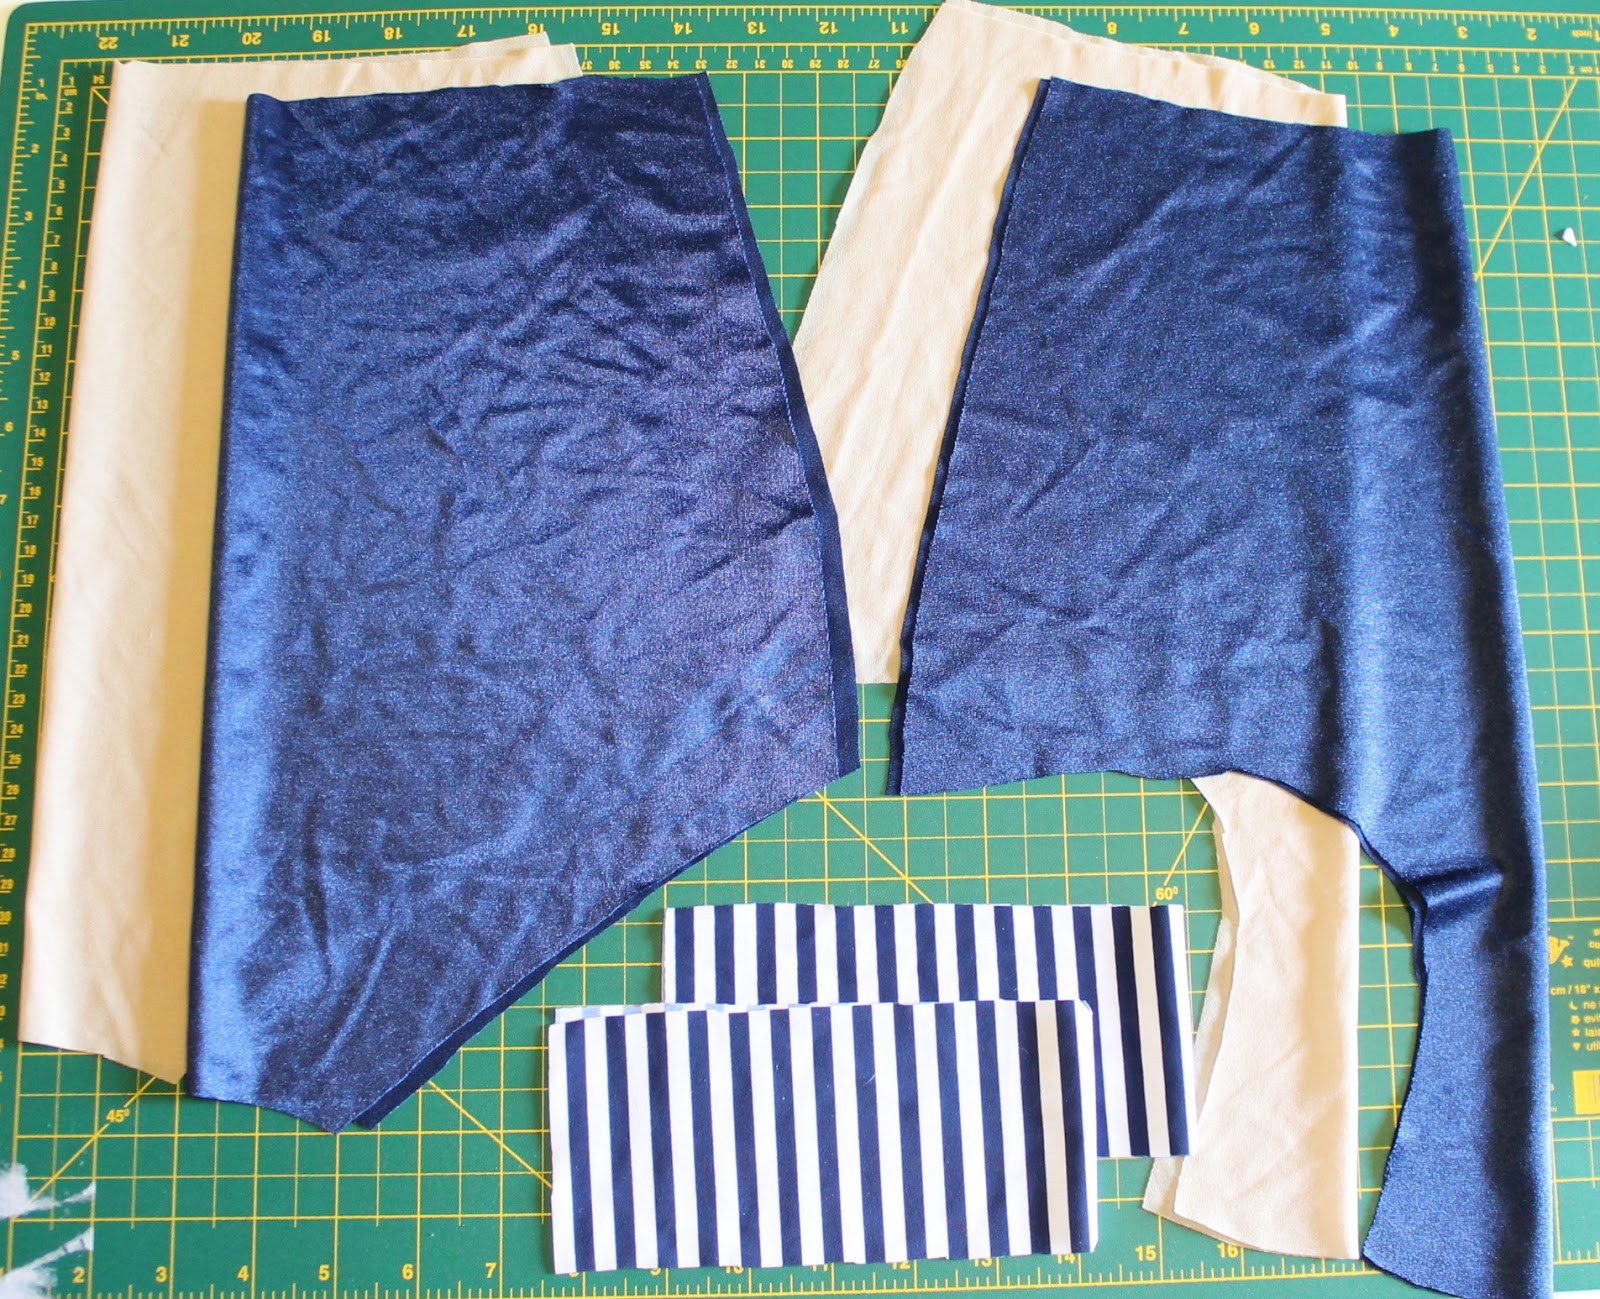
2. Cut your fabric – I’m lining the entire thing.
3. Baste your front lining to the swimsuit front.
4. Like we did with the swimsuit, we’re going to sew the lining and swim fabric all in one motion. Begin by layering: Back Self (rightside up), Front Basted Self (rightside down), then Lining. Pin together if needed and sew your seam. Now your crotch seam allowance in encased between your layers.
5. Sew your side Seams and try them on. They should fit snug all over.
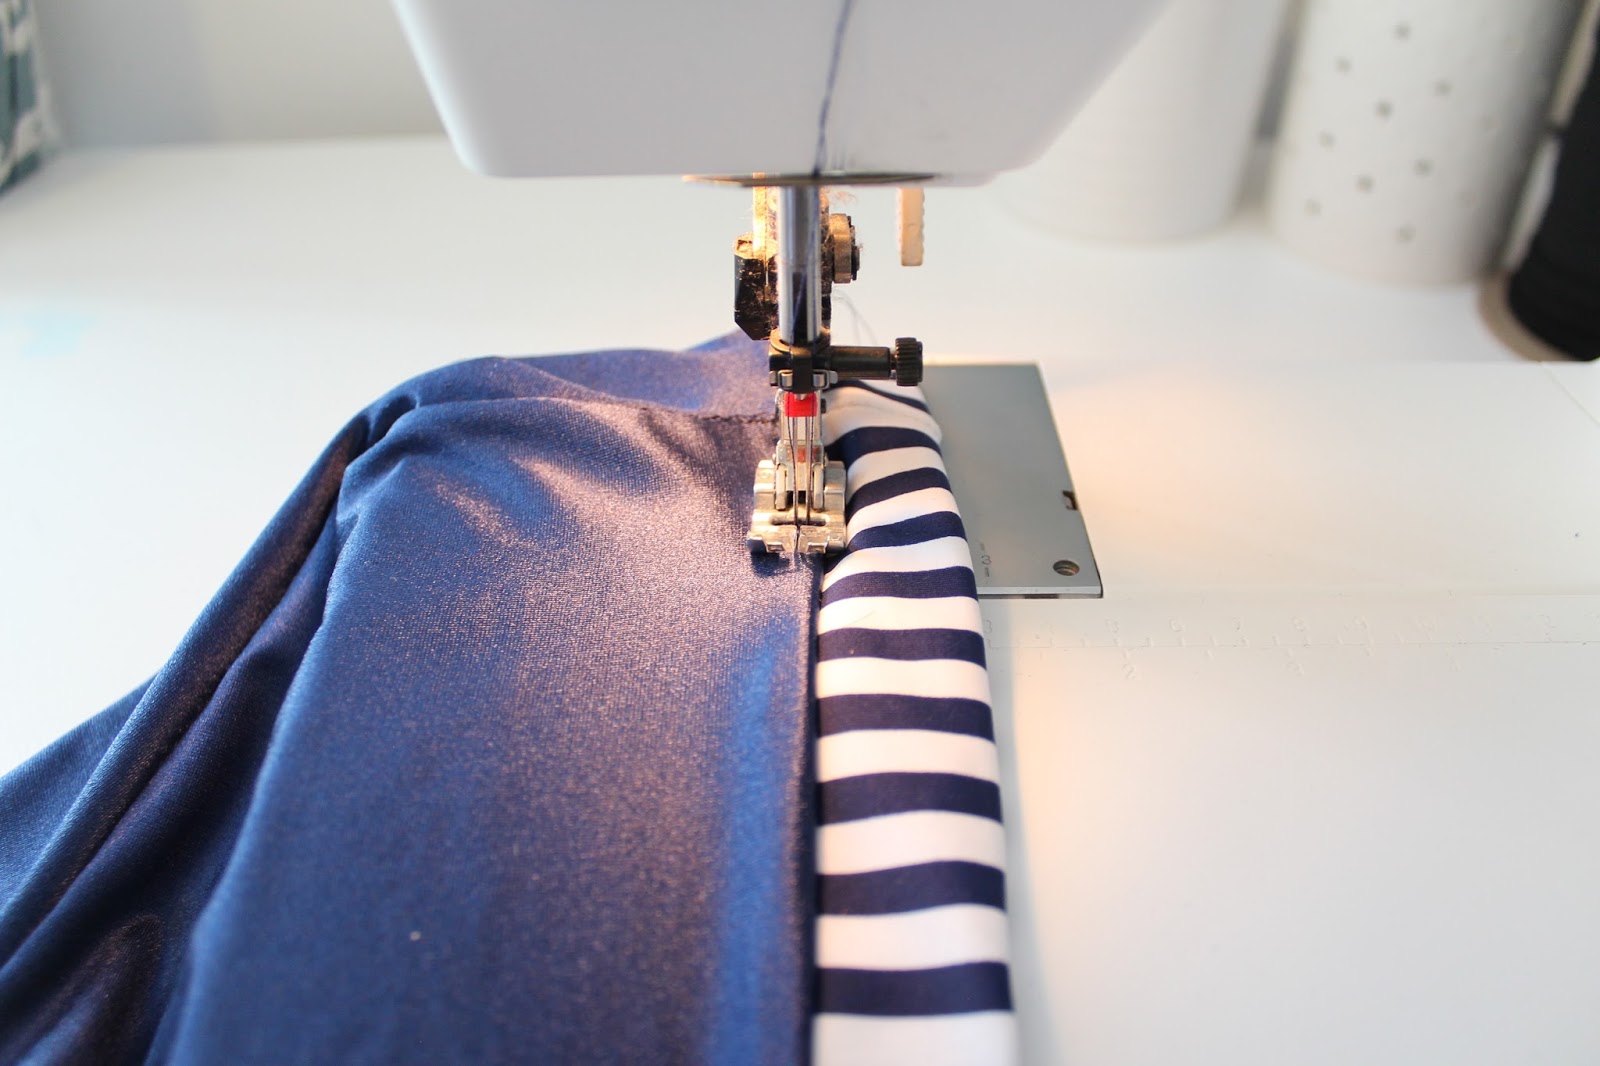
6. Sew the waistband into a continuous loop. Fold in half and press with a light iron. Attach to the waist of the panties, lining up your side seams.
7. I top stitched down my waistband seam allowance using a twin needle.
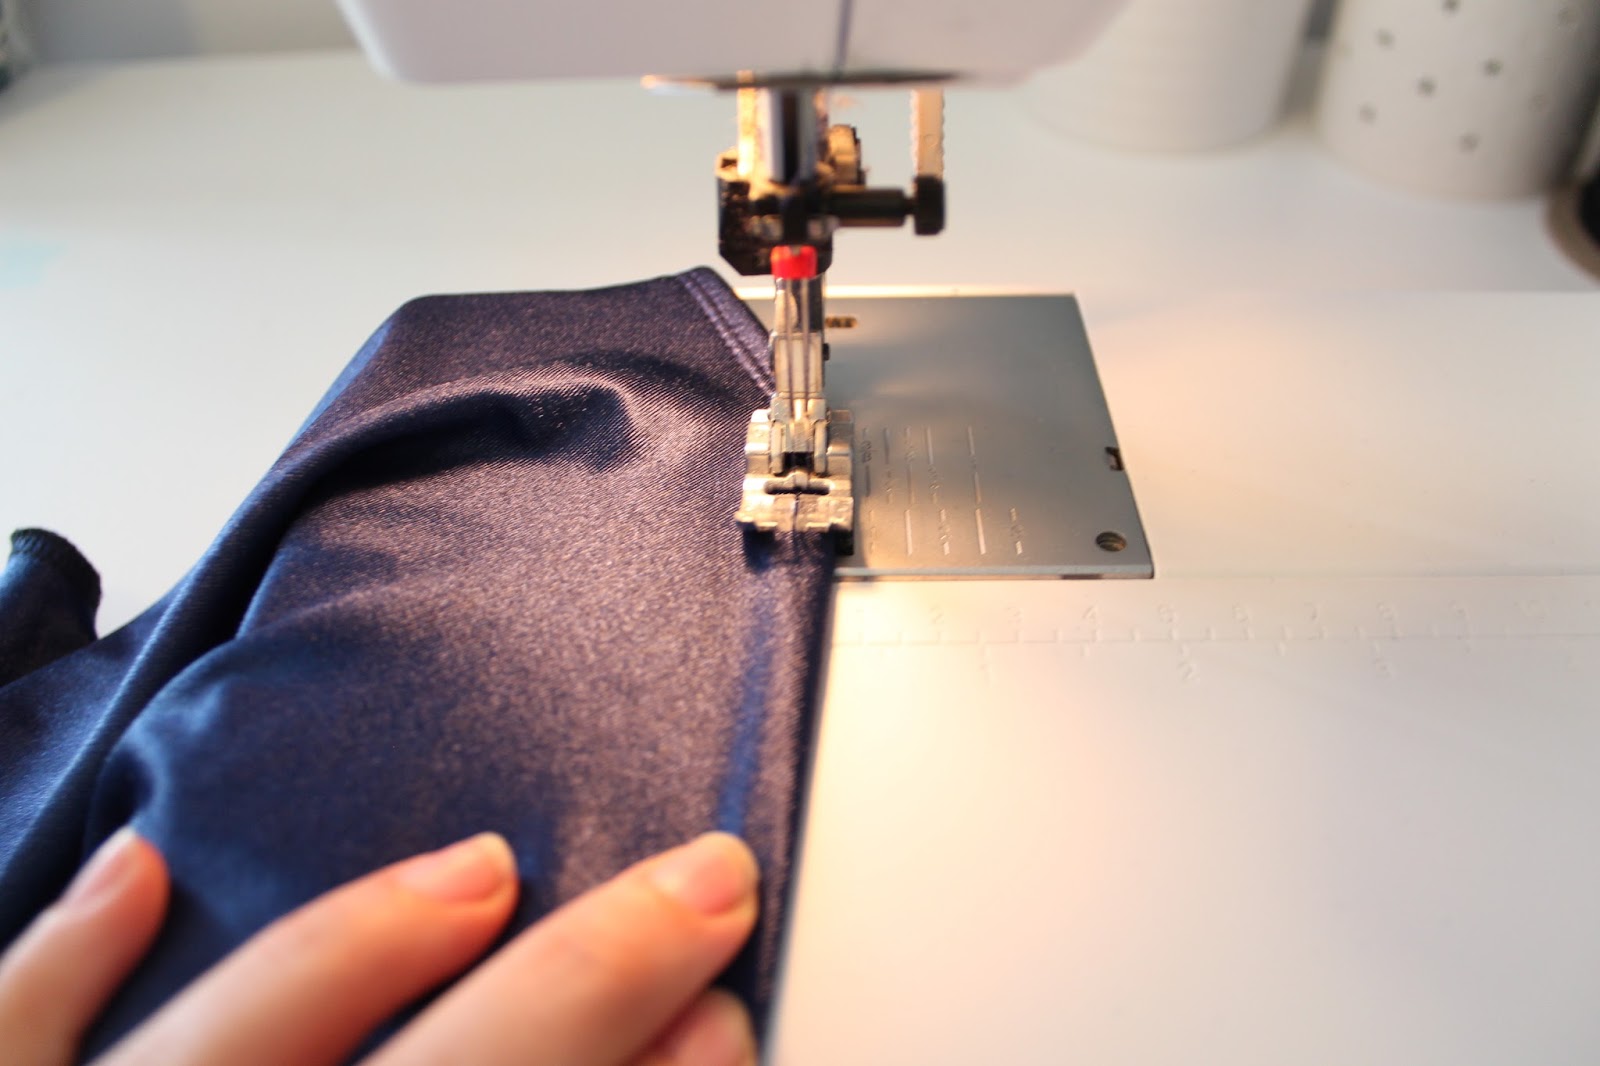
8. To finish the legs I simply finished the raw edges with my serger, then turned the edges and top stitched them with a twin needle. You can also finish with a zig-zag stitched hem, bind the legs, or use elastic.
That’s it! I’ve found it takes some getting used to sewing swim fabrics. They are slippery and can be hard to manage. But, the more bathingsuits I make, the better they get!
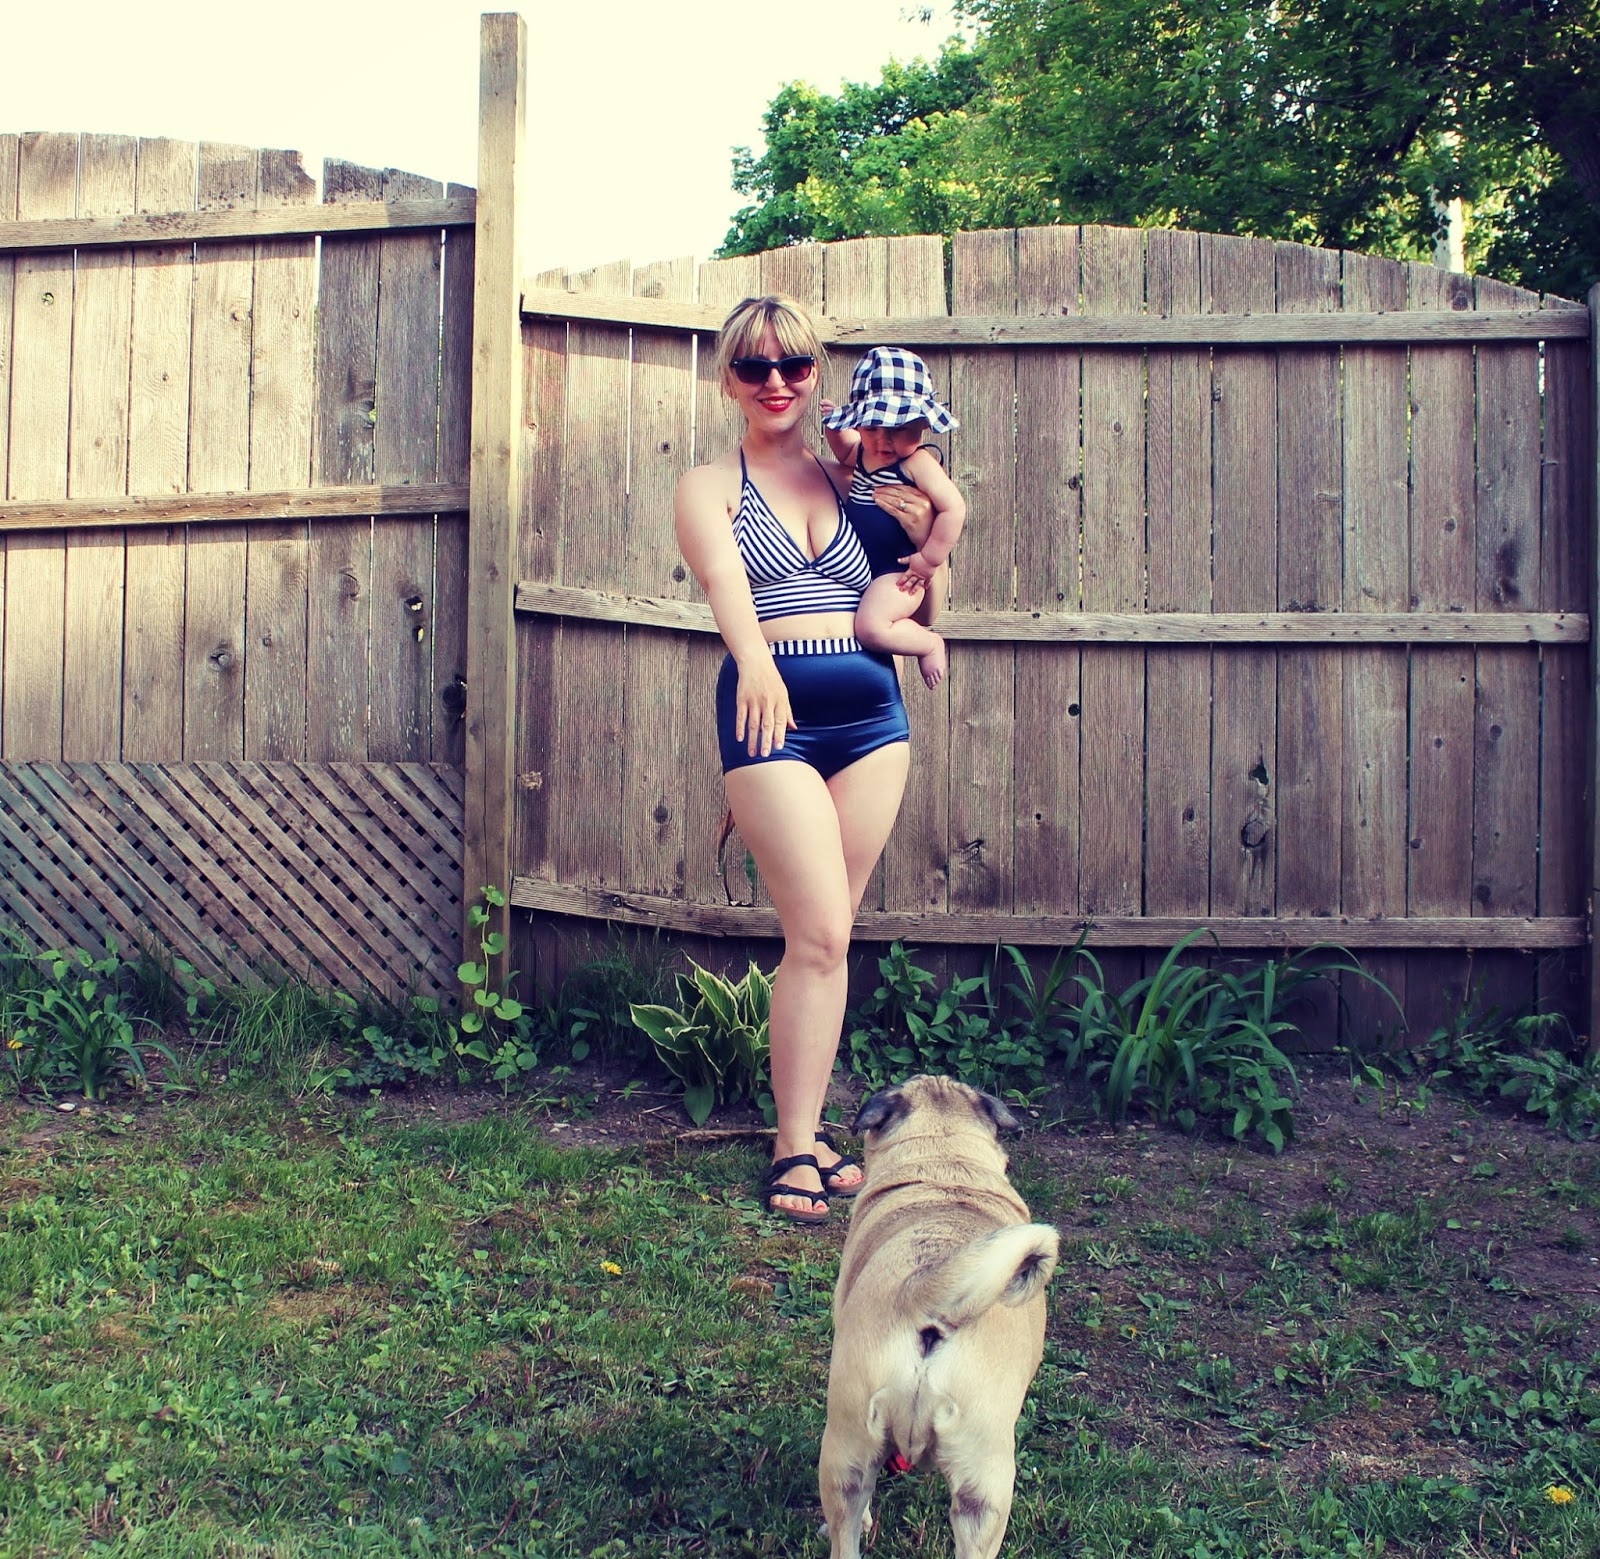
Here I am in mine. Neverind the pug butt and falling down fence. I made Izzy a matching suit too! Now hopefully the weather gets a little warmer so I can test mine out at the beach.
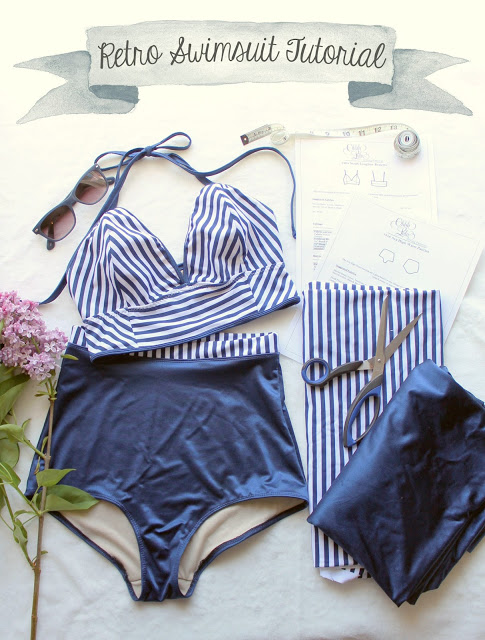
BUT! I’m not going to let that get me down! Last weekend I made this swimsuit. I was inspired by Alexia (from Whimsy Tails ) who made an amazing 2-piece version of my Abigail Swimsuit. You can see it on her Instagram. I really loved the way she place the stripes on the top. I decided I’d give it a go using my Sarah & Ava Pattern to do something kind of similar. I really loved how it turned out and I get lots of emails about using my patterns for swimwear so I thought I’d offer an indepth tutorial.
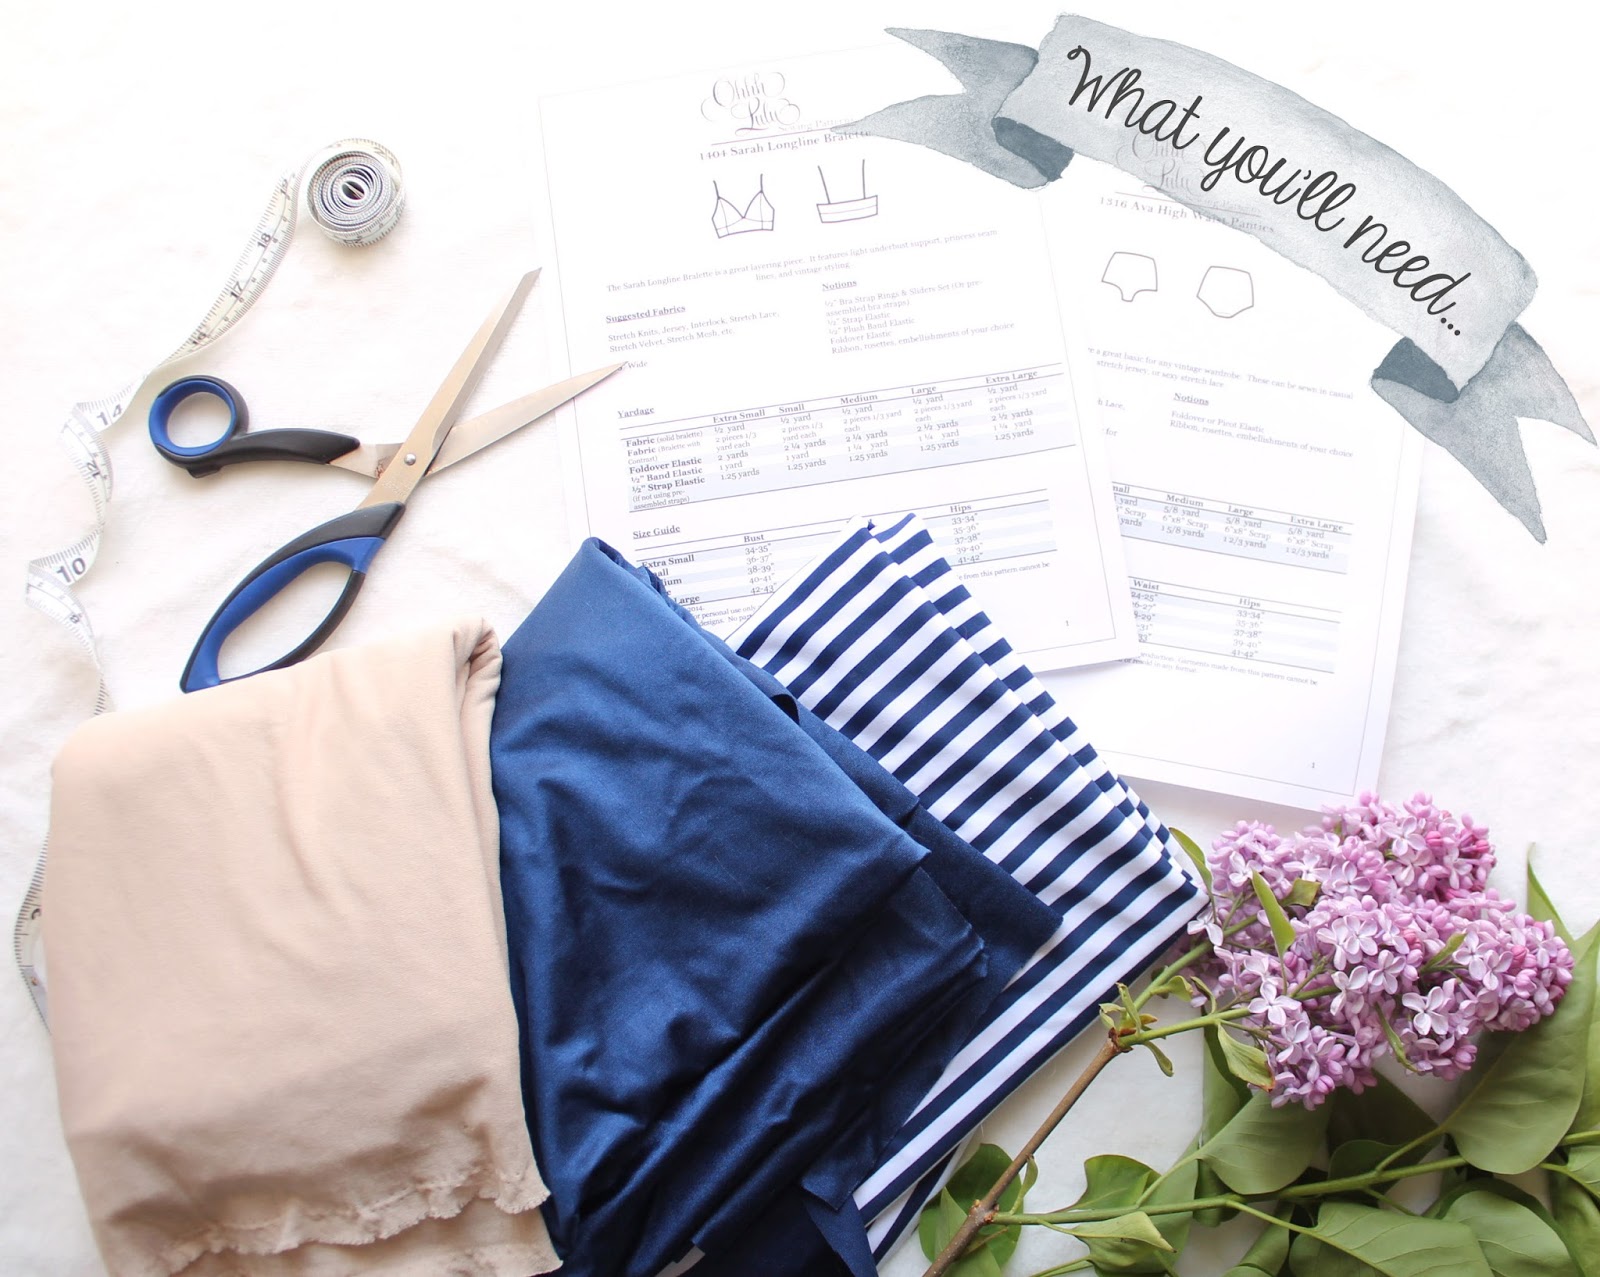
What you’ll need:
1. The Sarah Bralette Pattern and Ava Panties Pattern
2. Coordinating Swimsuit (Spandex) fabric.
3. Swimsuit Lining
4. Thread
5. Twin Needle
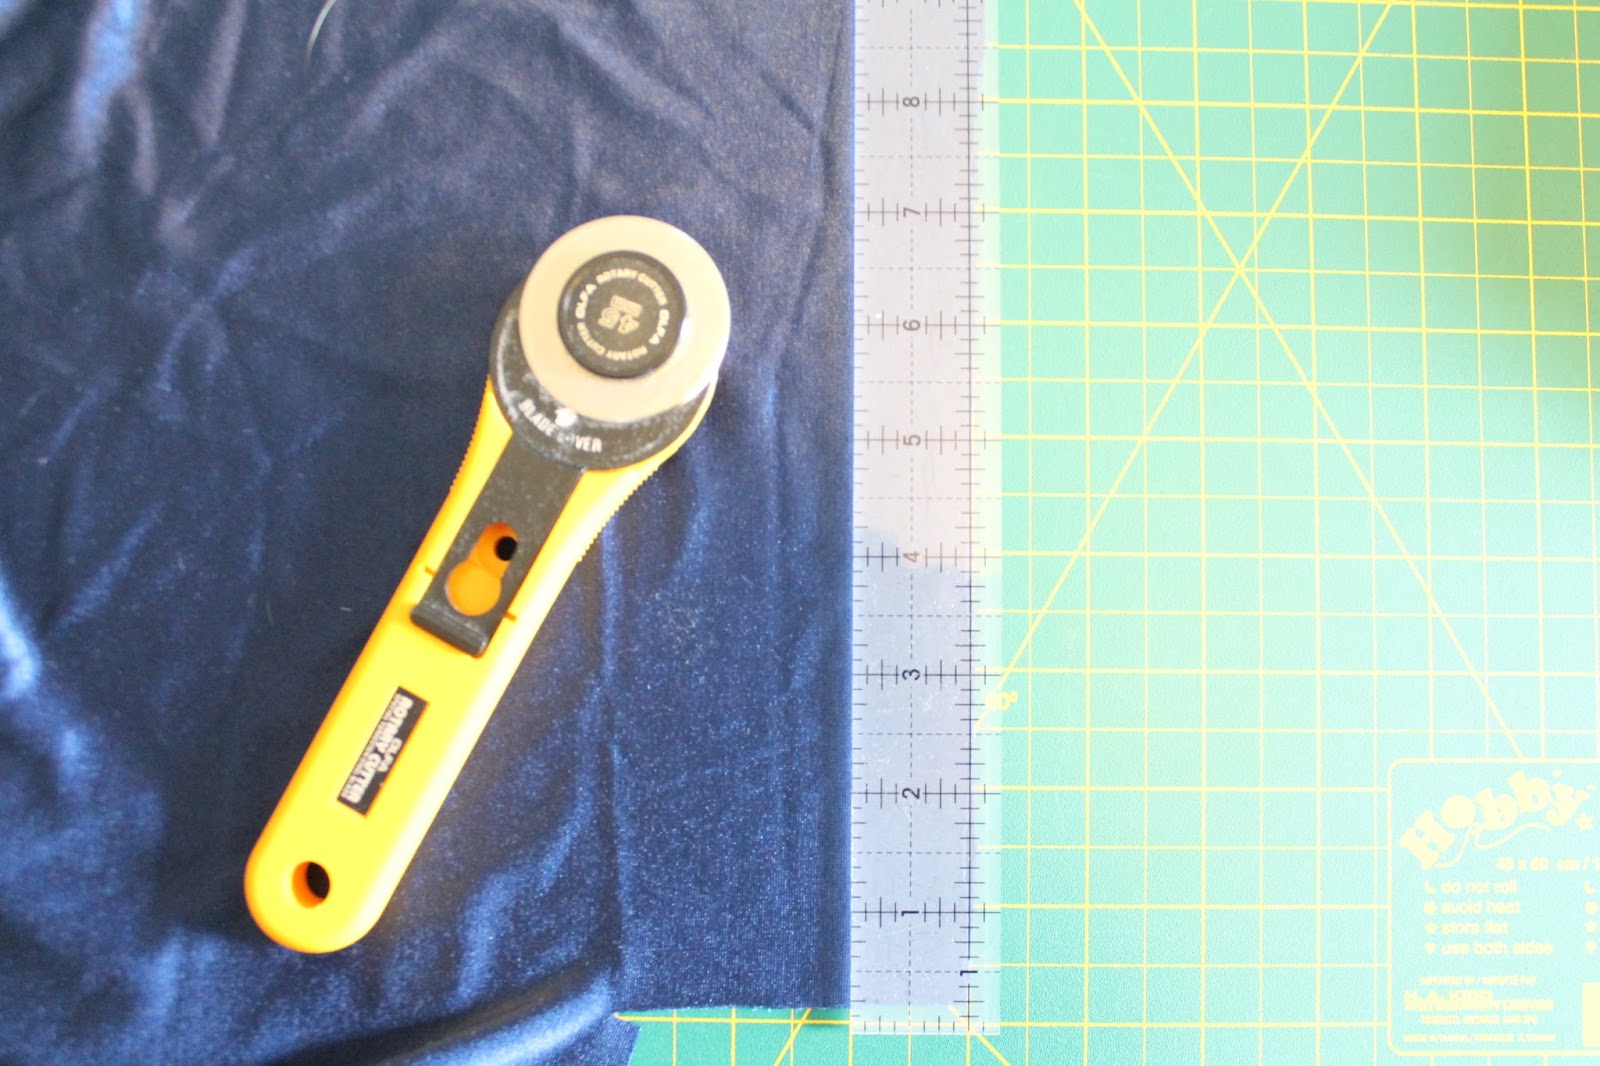
6. Rotary Cutter (optional, but handy)
Instructions:
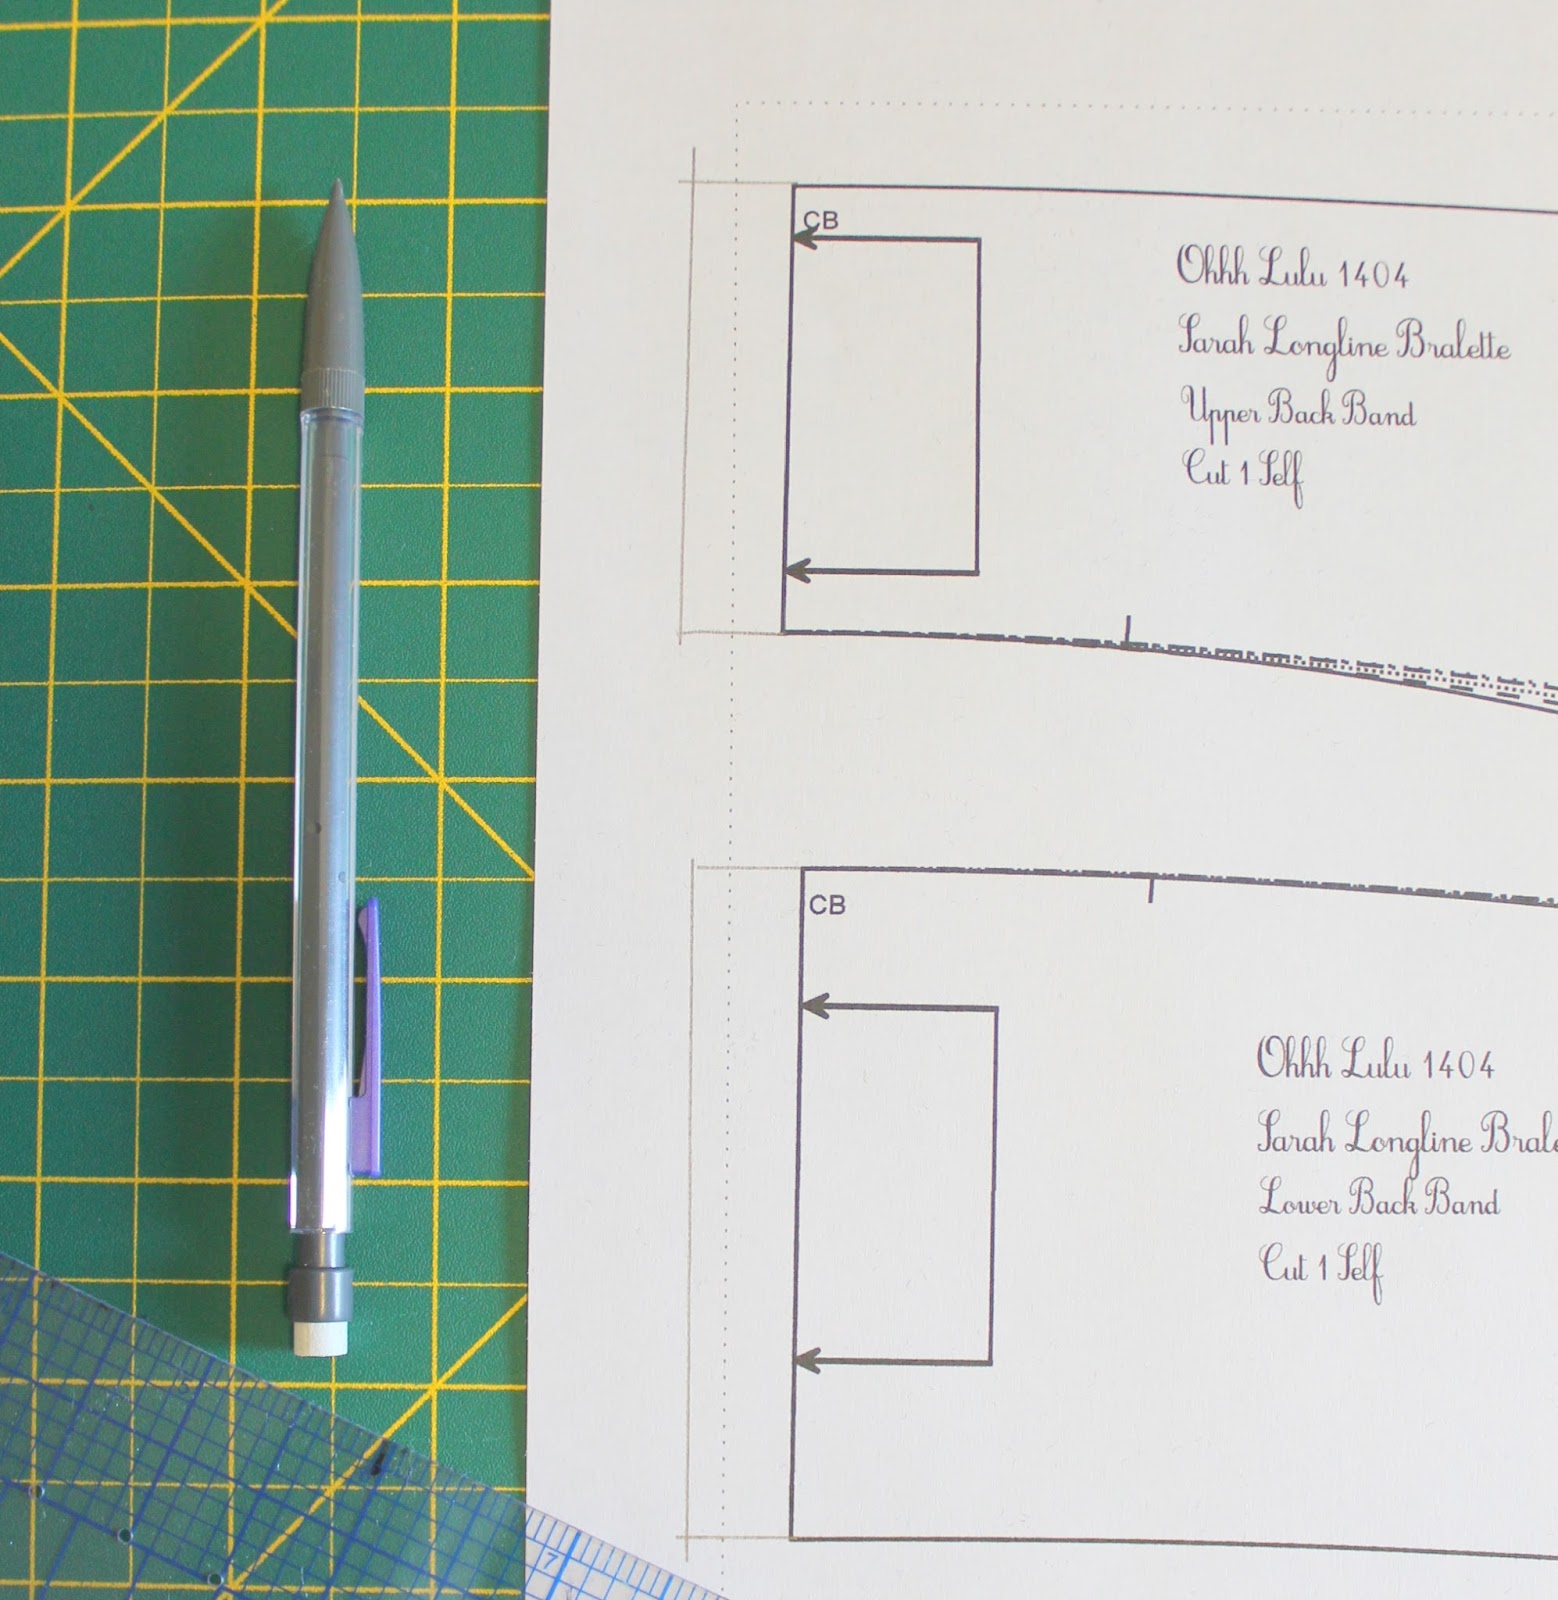
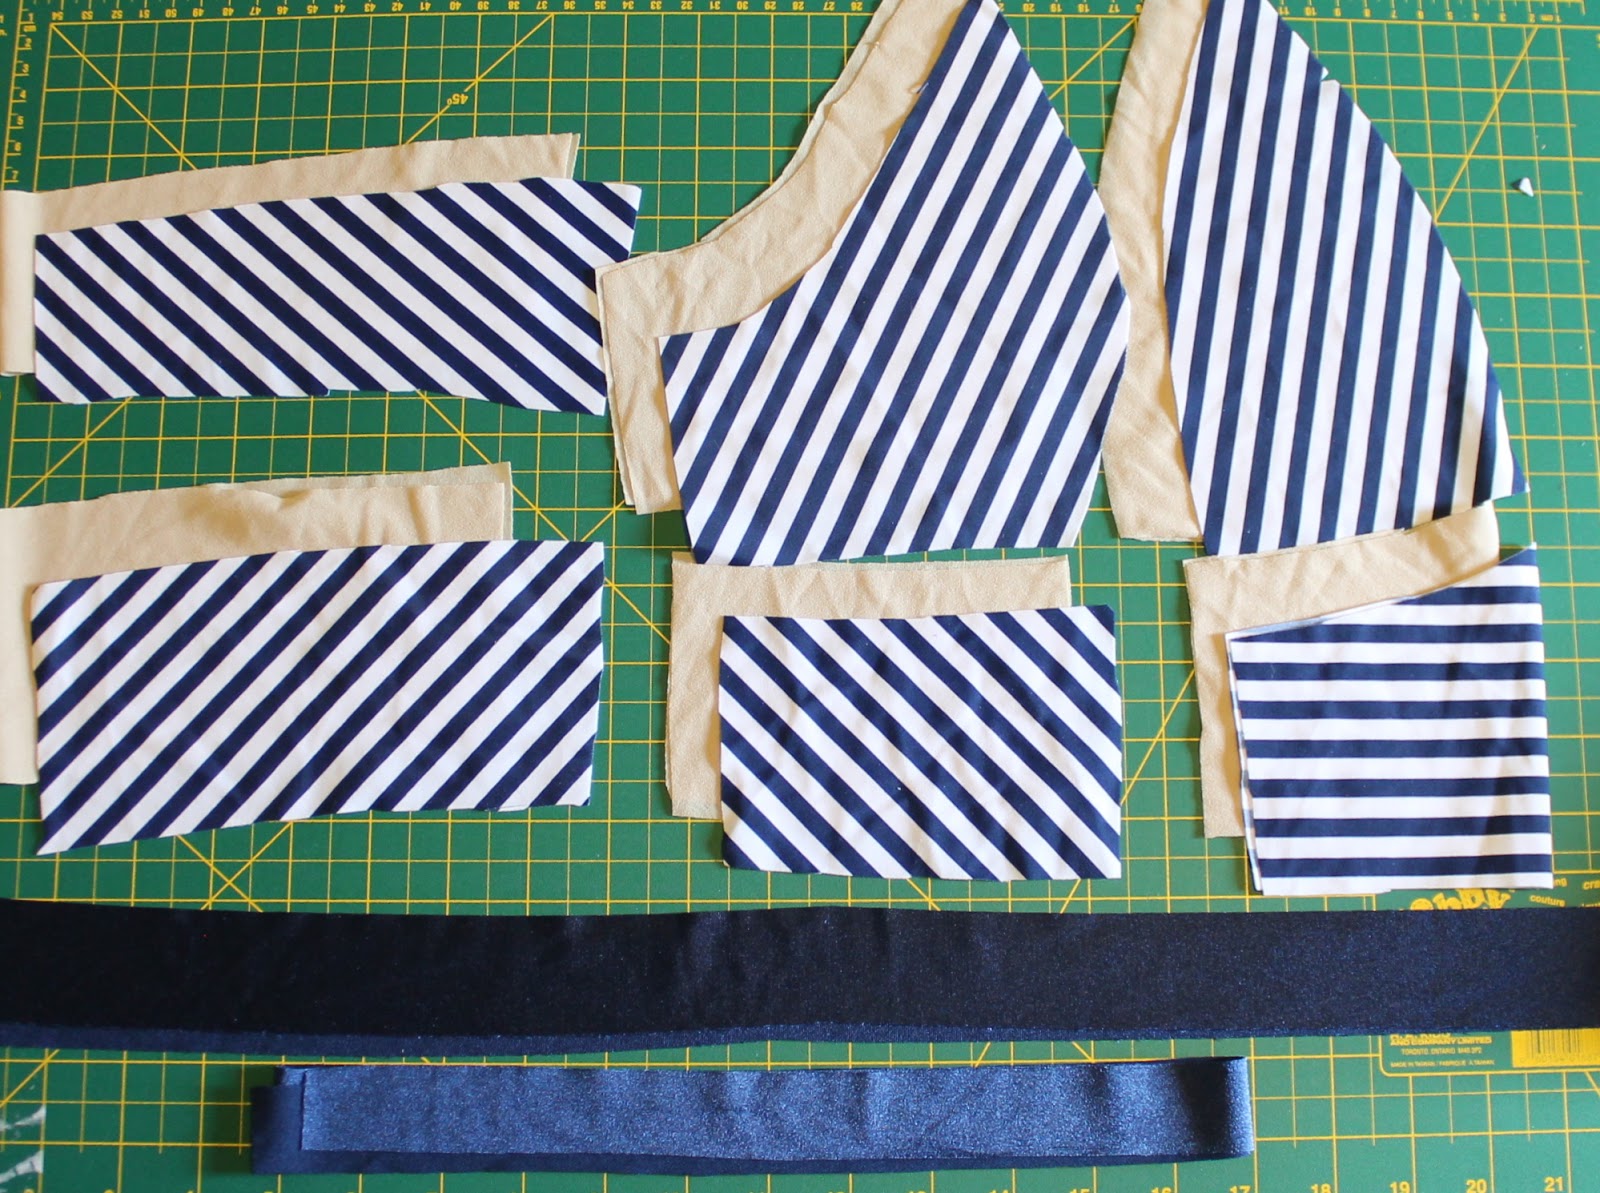
1. Print out your patterns.
2. Trim away margins where indicated.
3. Tape pattern together.
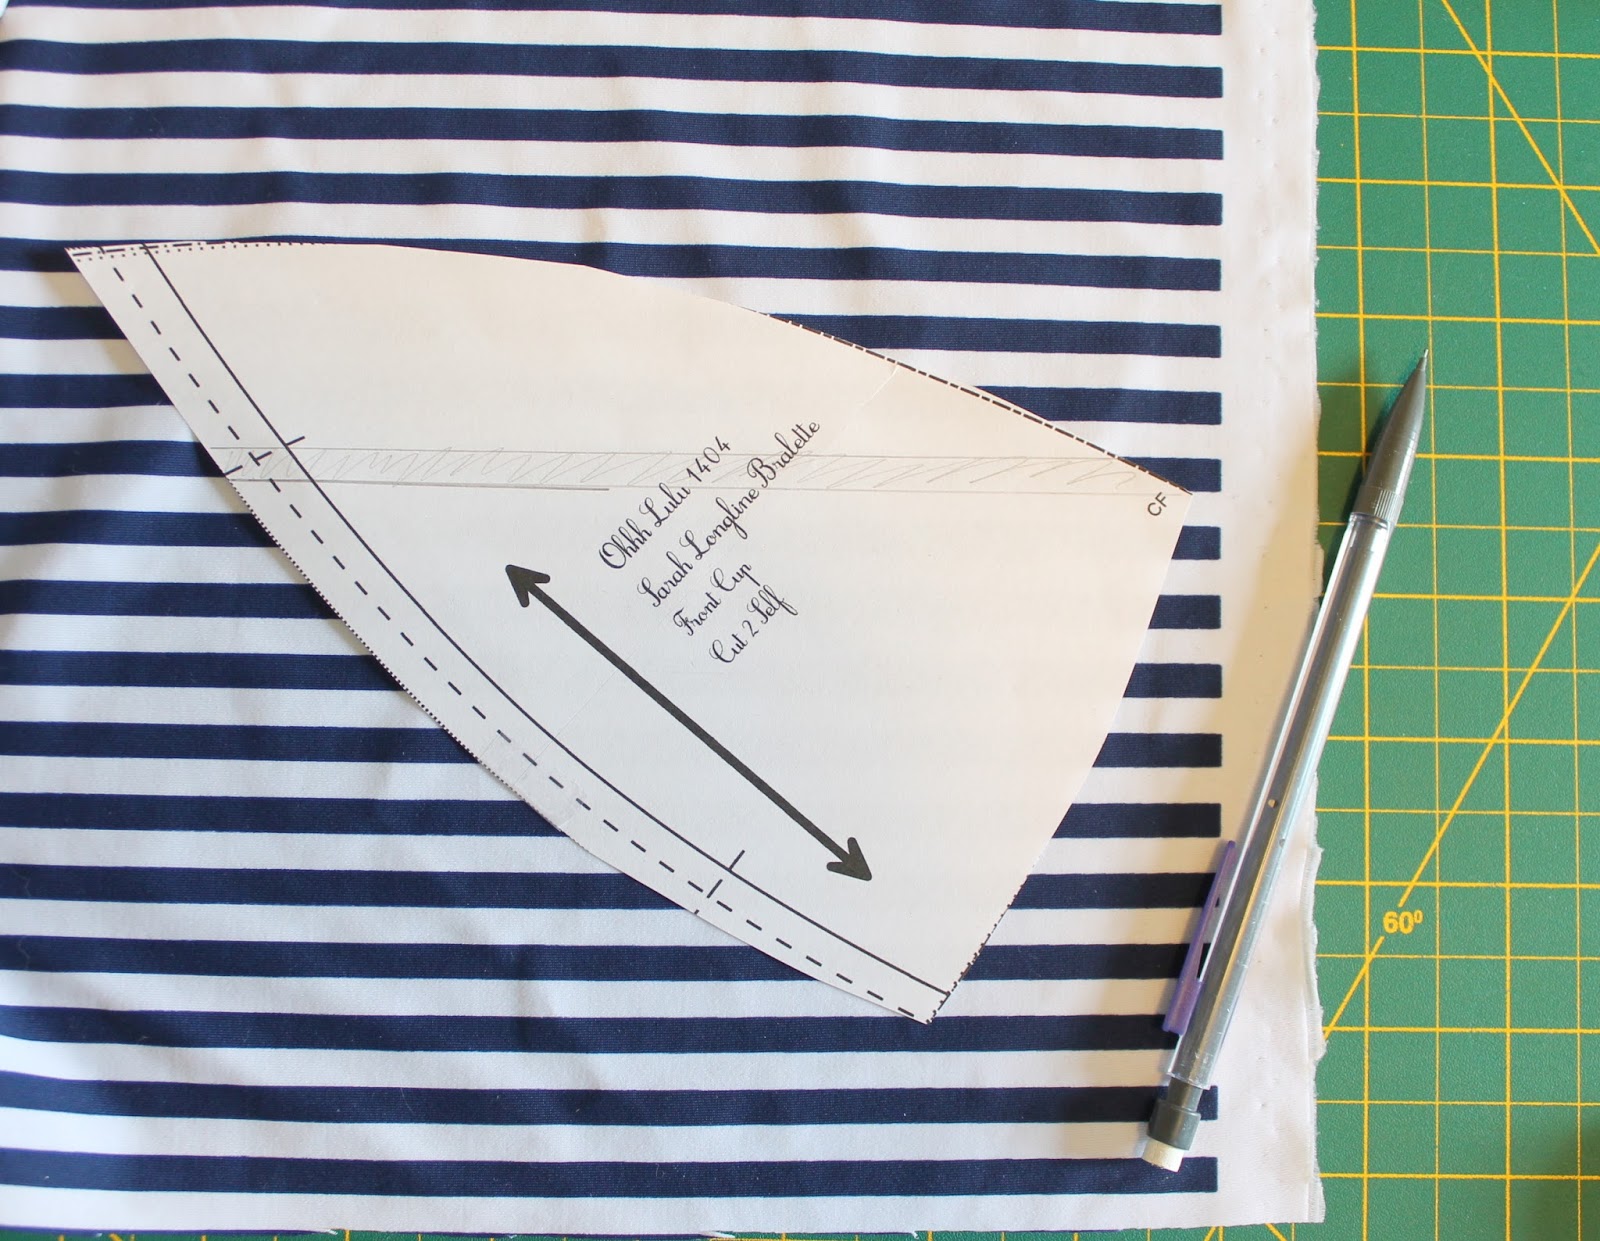
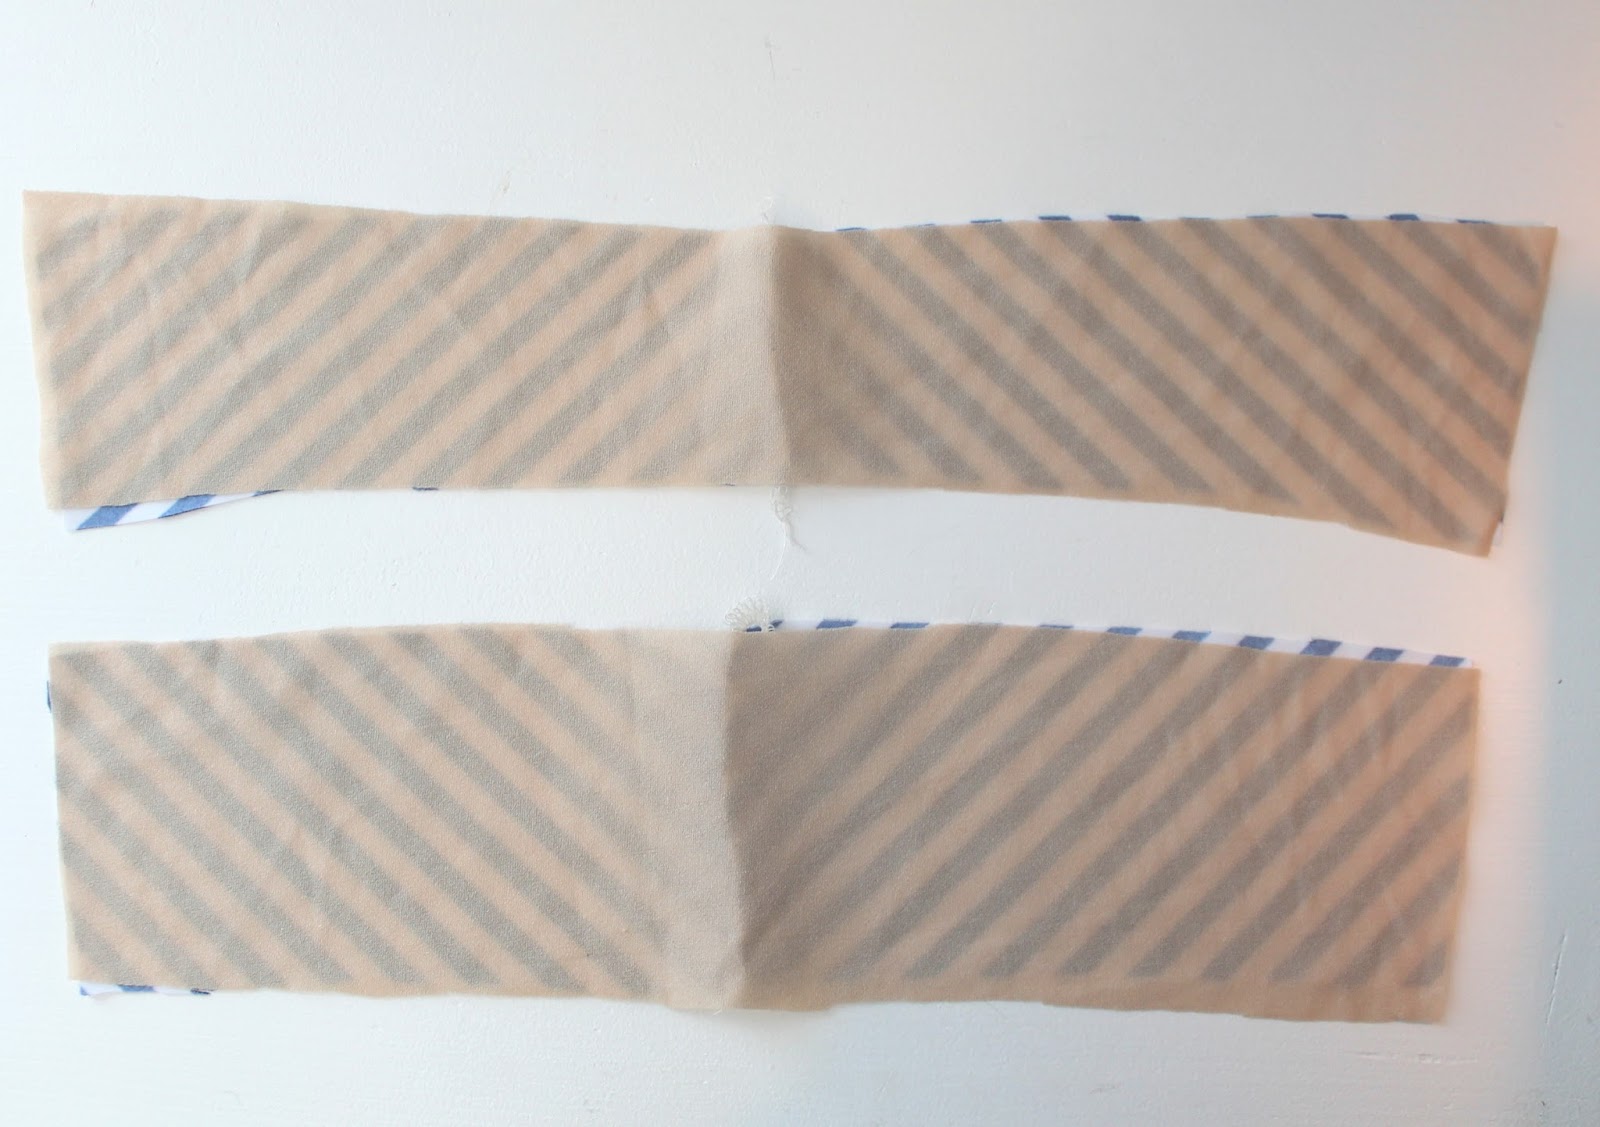
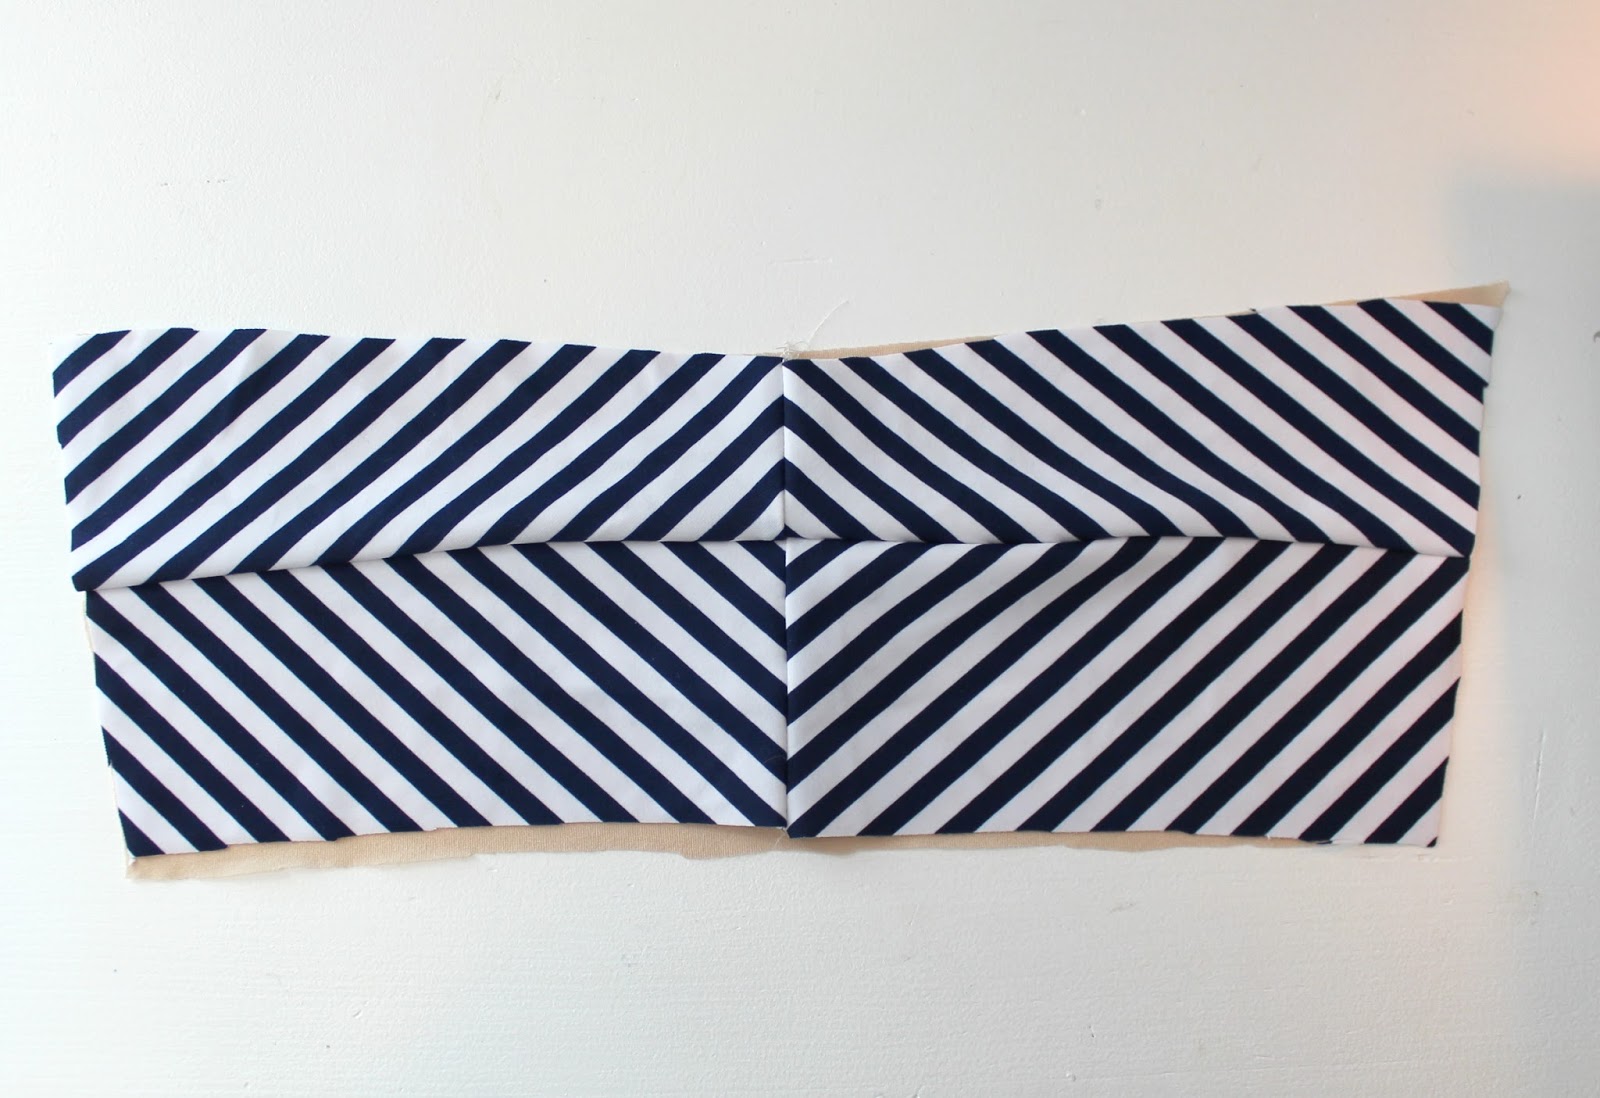
4. Optional: I wanted to have a diamond motif pattern layout on the back, so I added seam allowance to both my back pieces, instead of cutting them on the fold.
5. Make adjustments. I have a slightly larger cup size than what I’ve drafted this pattern for. All I have done is cut between a size small and medium. If you need a significant change to the bust area, you can slash and spread the cups to increase the size. You can also wing it, like I sometimes do, by just exaggerating the curve of the cup and adding some height. If you are more petite, just straighten that sucker out. Check out my tutorial on adjusting the cup size of my Jasmine Bra for some further instruction.
Cutting between a small and medium
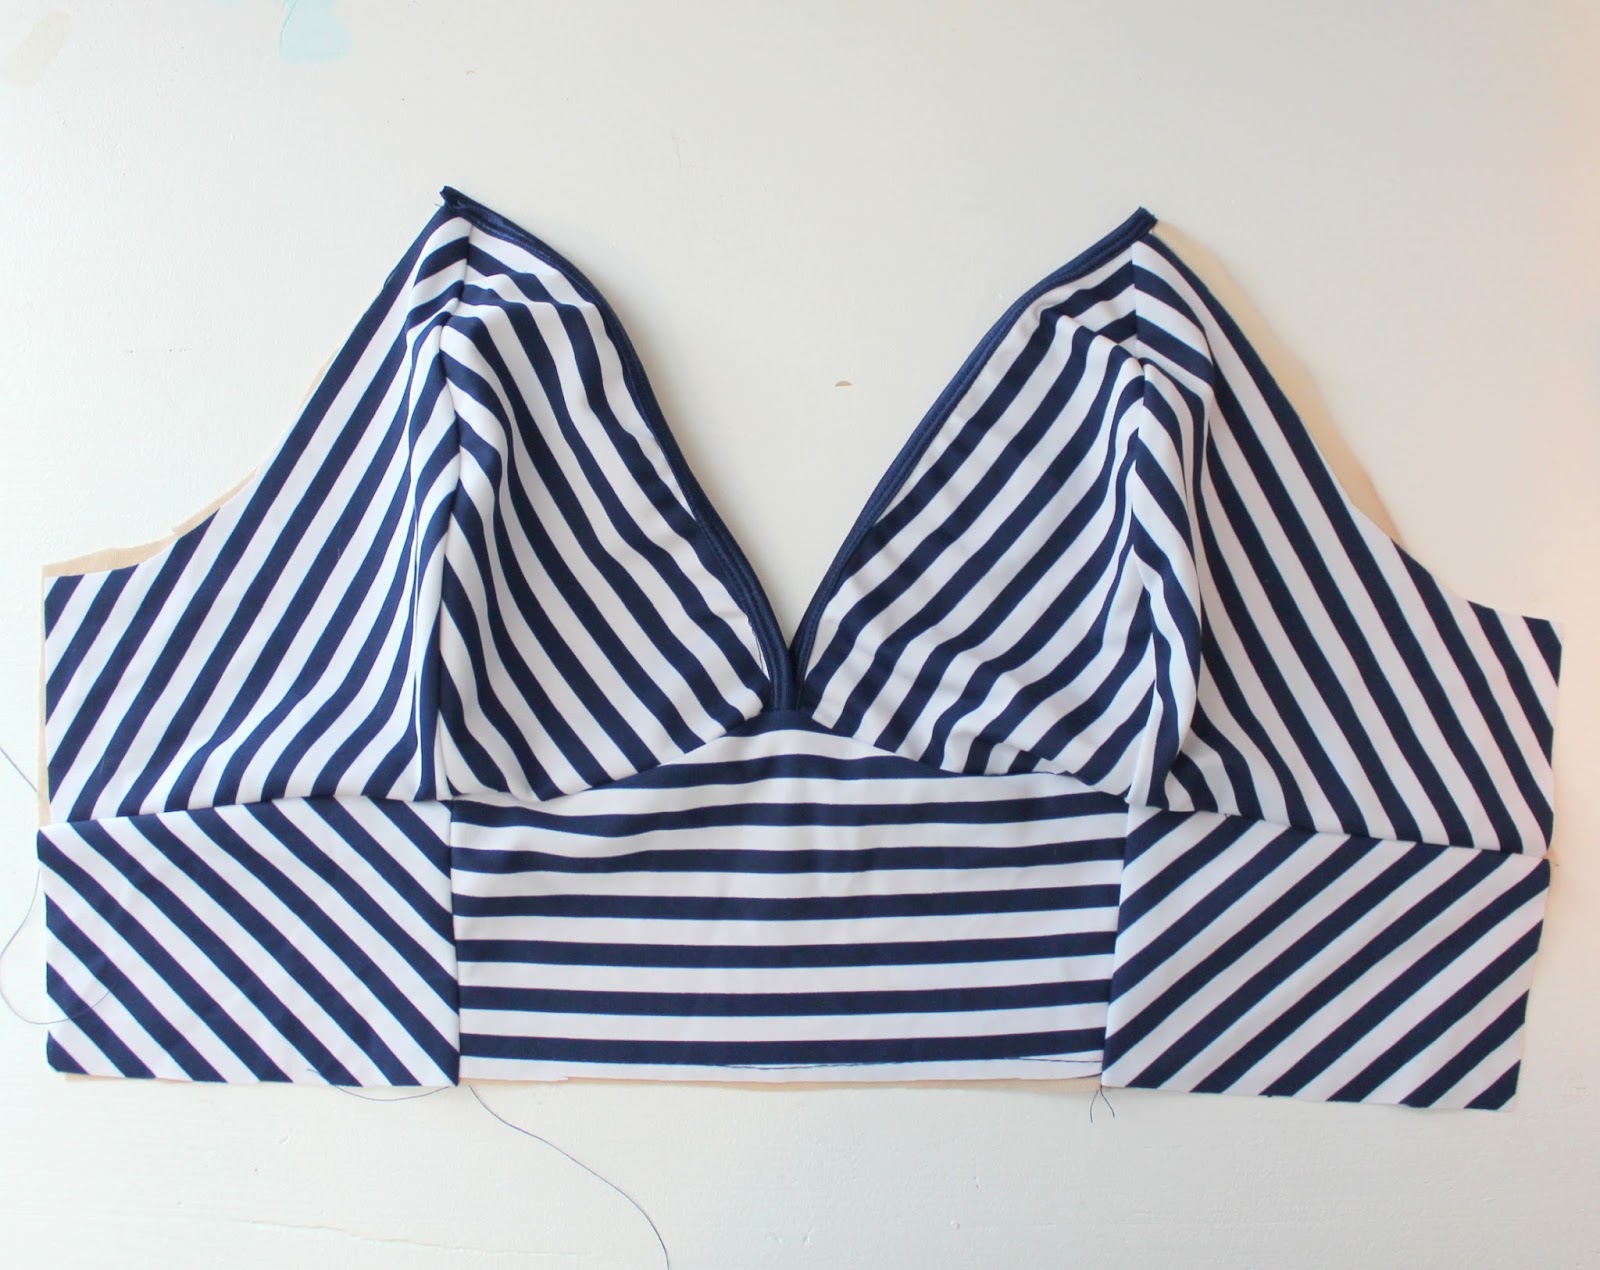
5. Optional Pattern Placement: I have drawn a line on my pattern pieces so I know where to place my stripes. I wanted to create a chevron motif over the bust so I took a little bit of time before cutting my fabric to make pattern placement indicators on my pattern pieces.
7. Cut your fabric! For a swimsuit, you’ll need to cut Lining & Swim Fabric. You don’t have to line the back, but I think it makes for a nicer suit.
8. Cut your binding. Using a contrasting fabric, cut several long strips of binding (stretch should be going lengthwise). I cut mine in 1 inch strips, as I wanted narrow, quarter inch straps and binding. Cut accordingly! Using a rotary cutter makes life a lot easier.
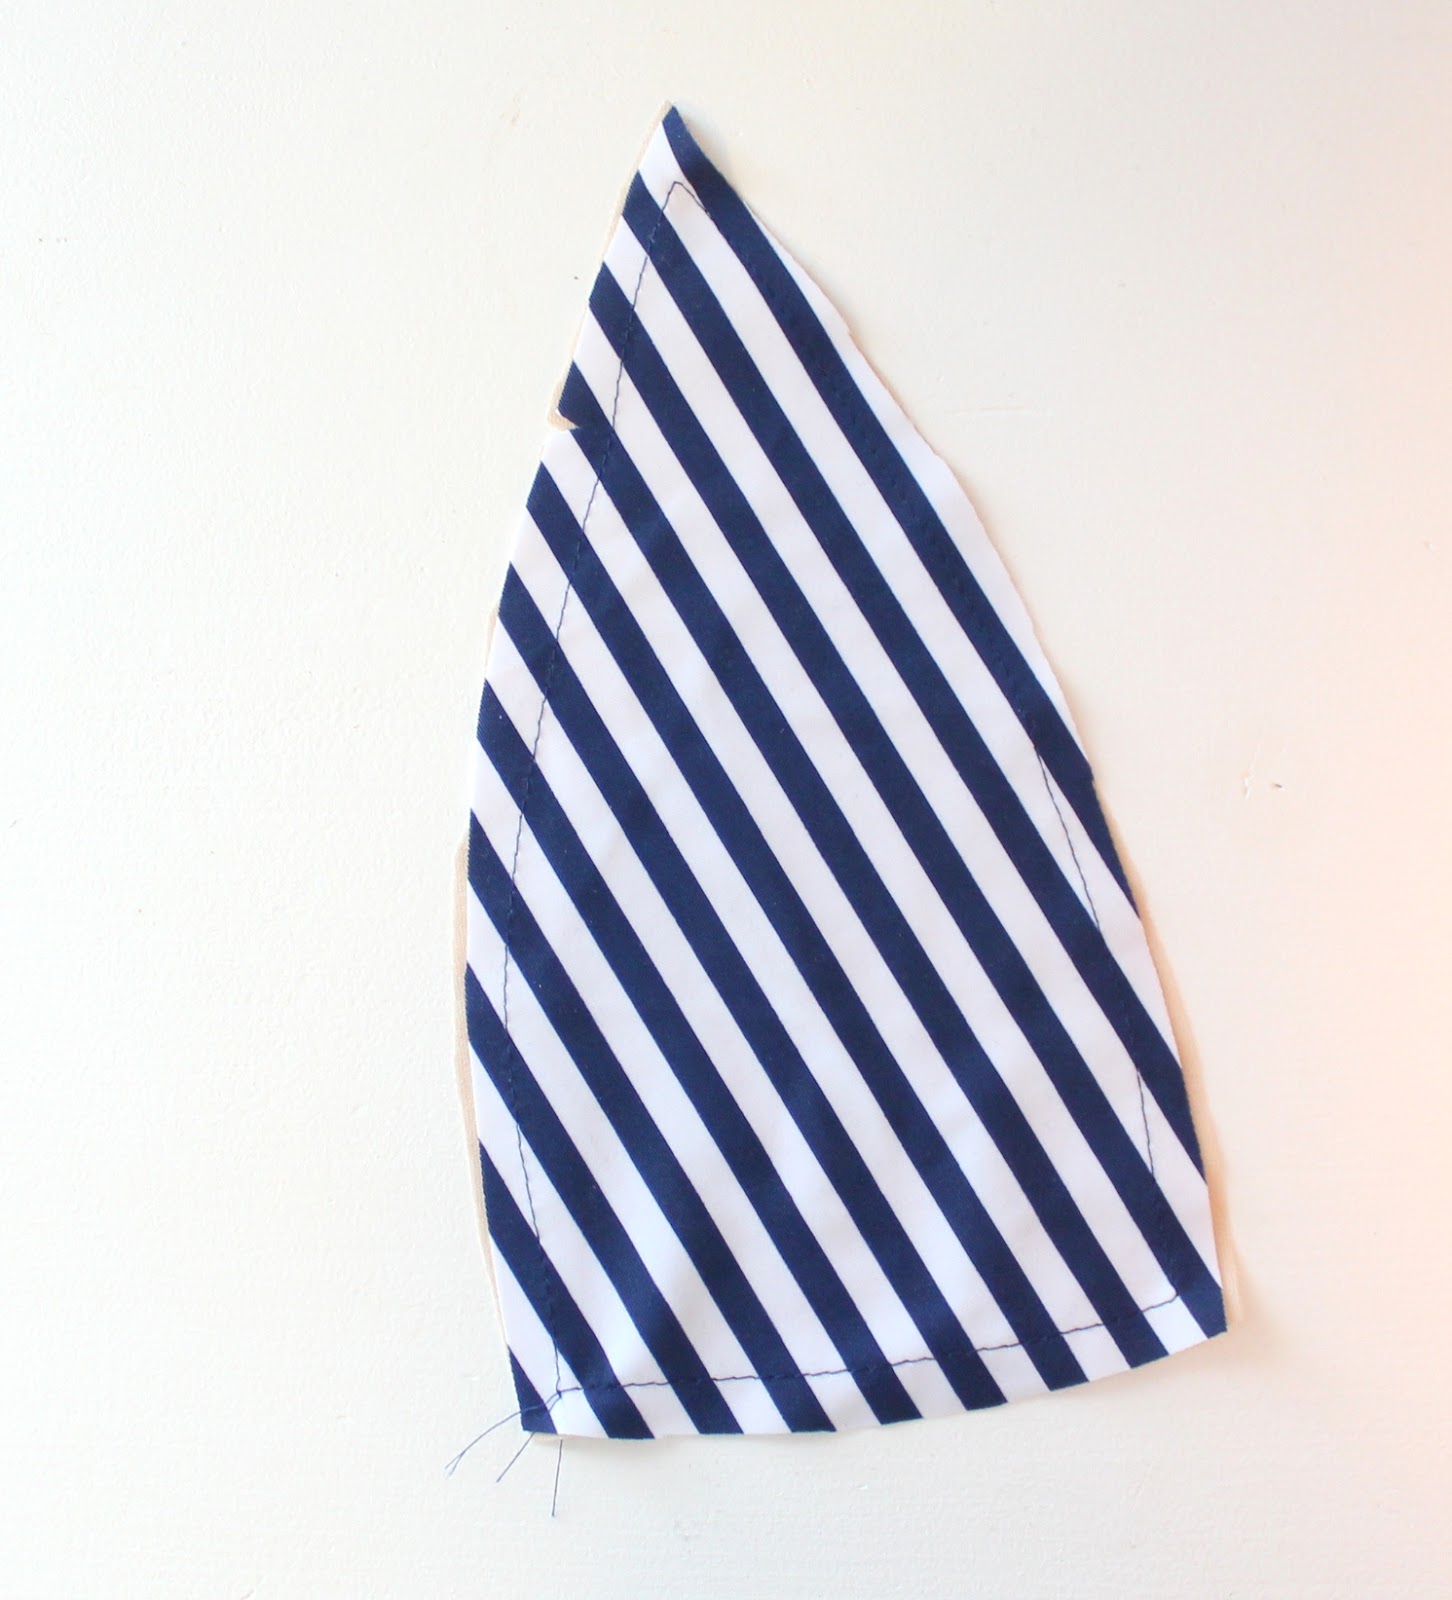
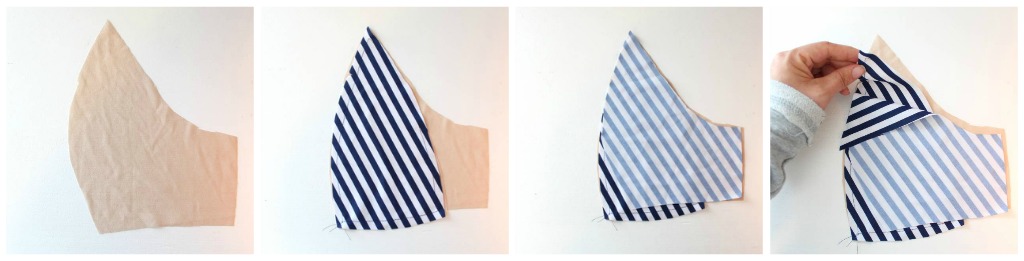
9. Baste lining to Front Cup.
10. We’re going to line and sew our cup seams in one motion so that our seam is encased between the lining and swim fabric. Layer your pieces like so: Side Cup Lining, Basted together Front Cup (lining side down), finished with Side Cup (right side down). Sew your seam (1/2″ Seam Allowance). Why do it like this? This way your lining and exterior fabric won’t shift and you’ll have less seam allowance to worry about between your layers. I’m serging my seams, but you can also just use a zig-zag stitch.
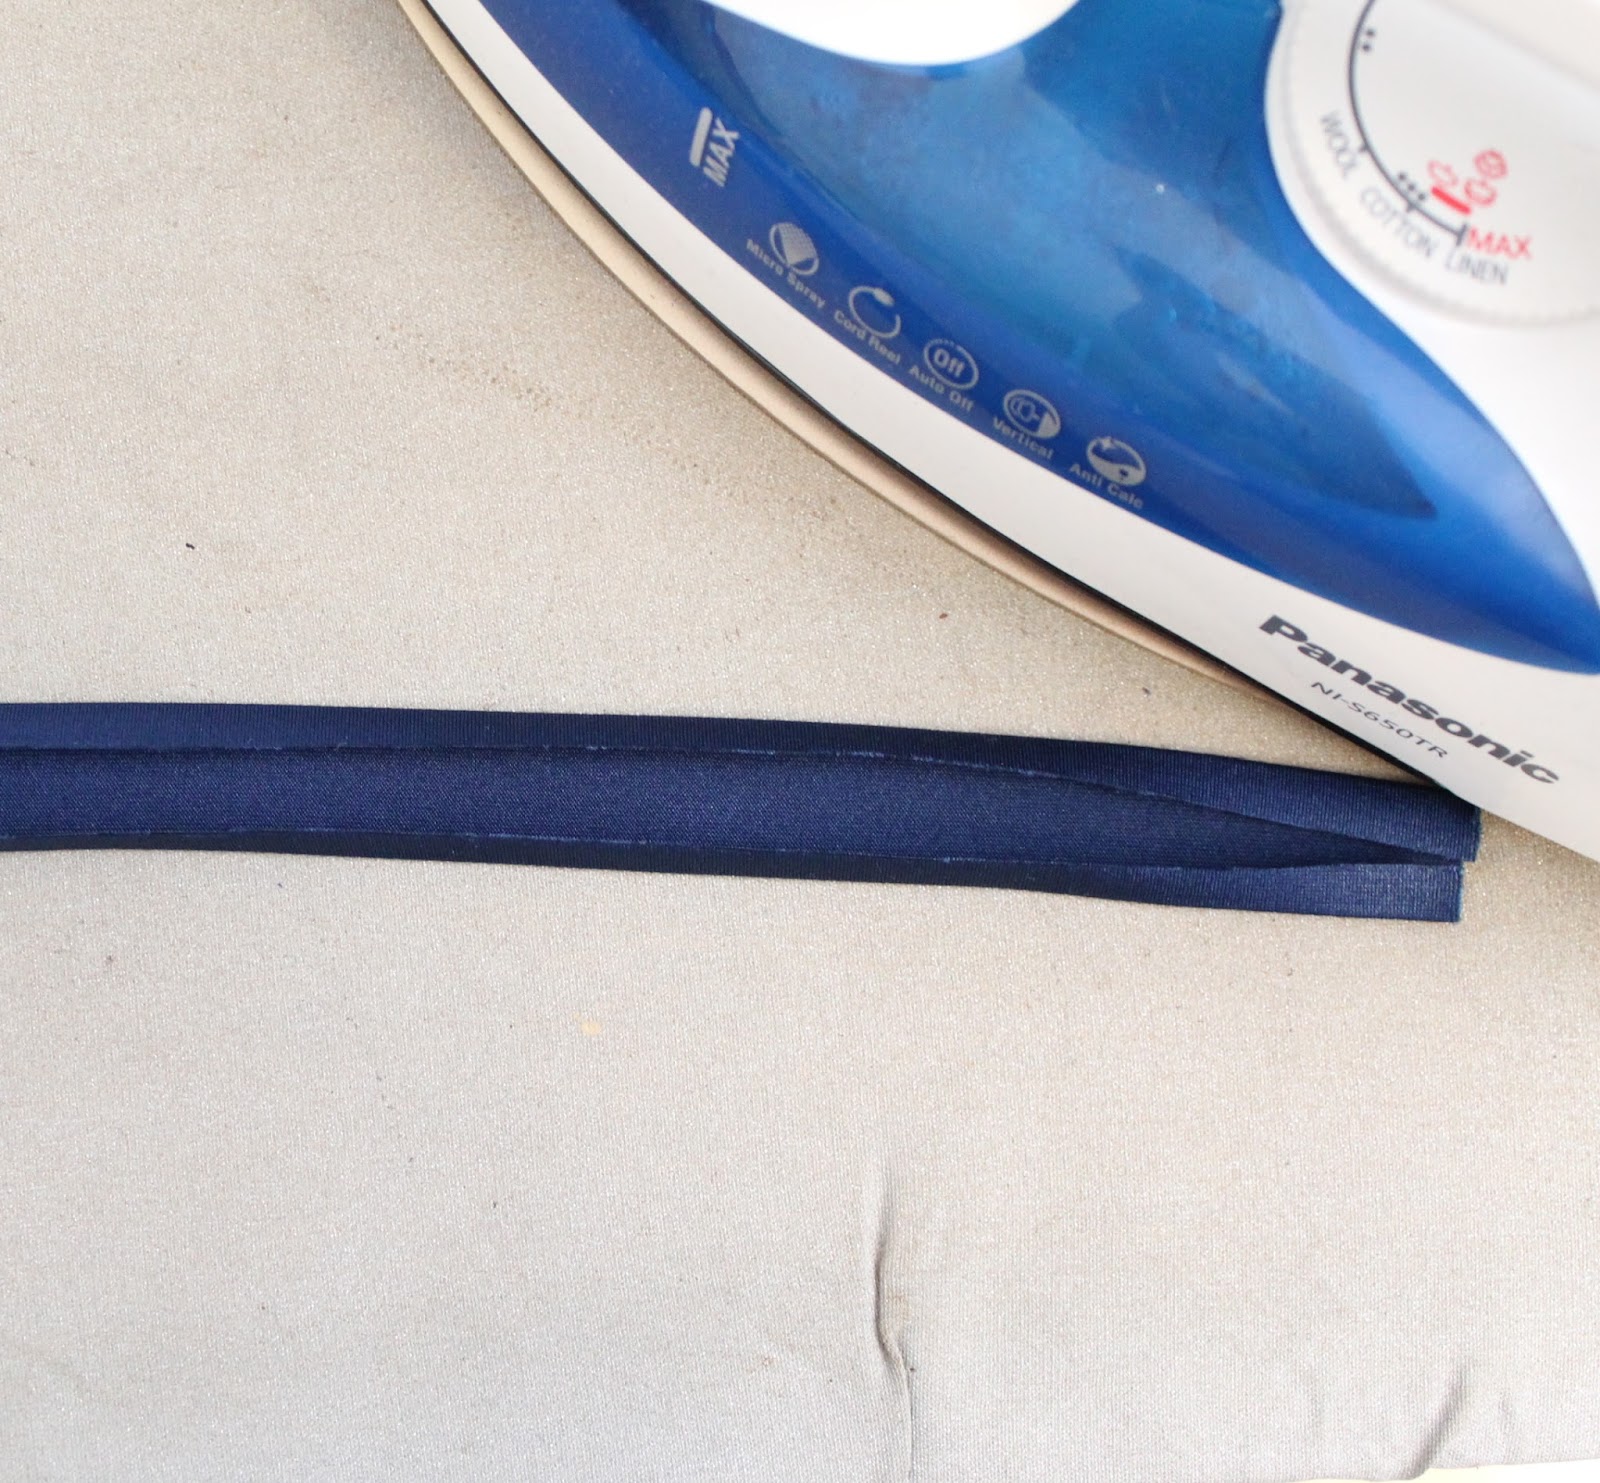
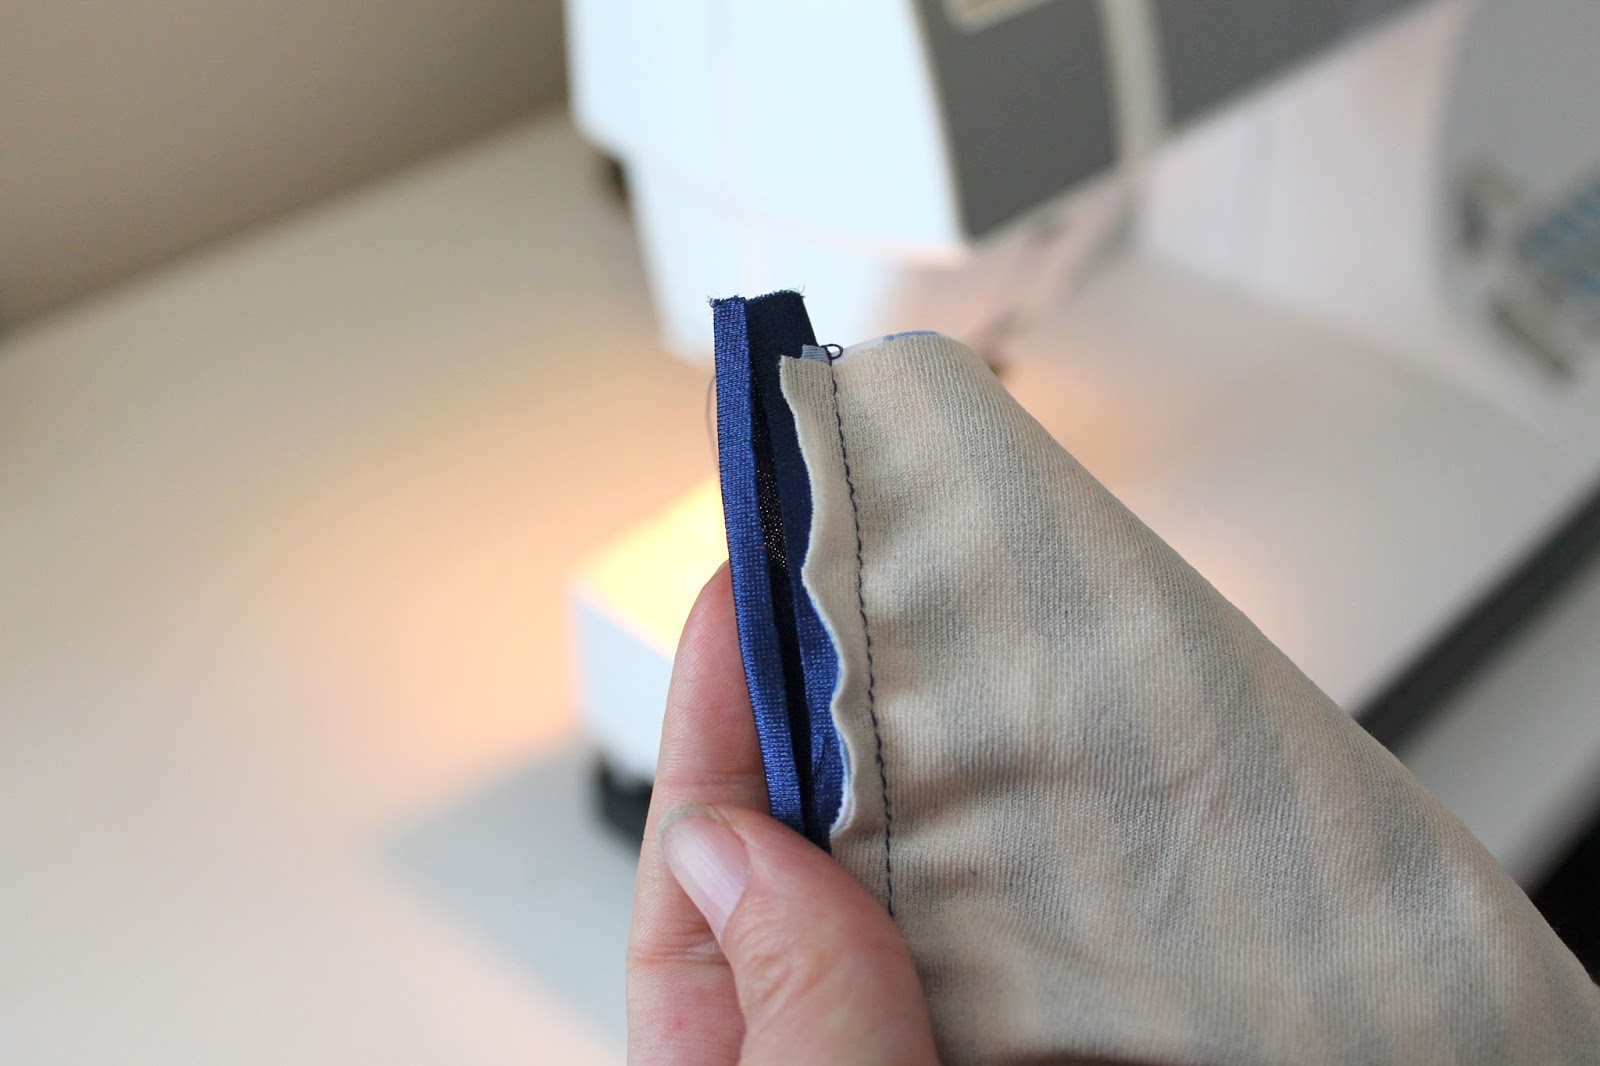
11. Prepare your binding by turning under the raw edges by 1/4″ and pressing with a warm iron. Careful not to melt your farbric!
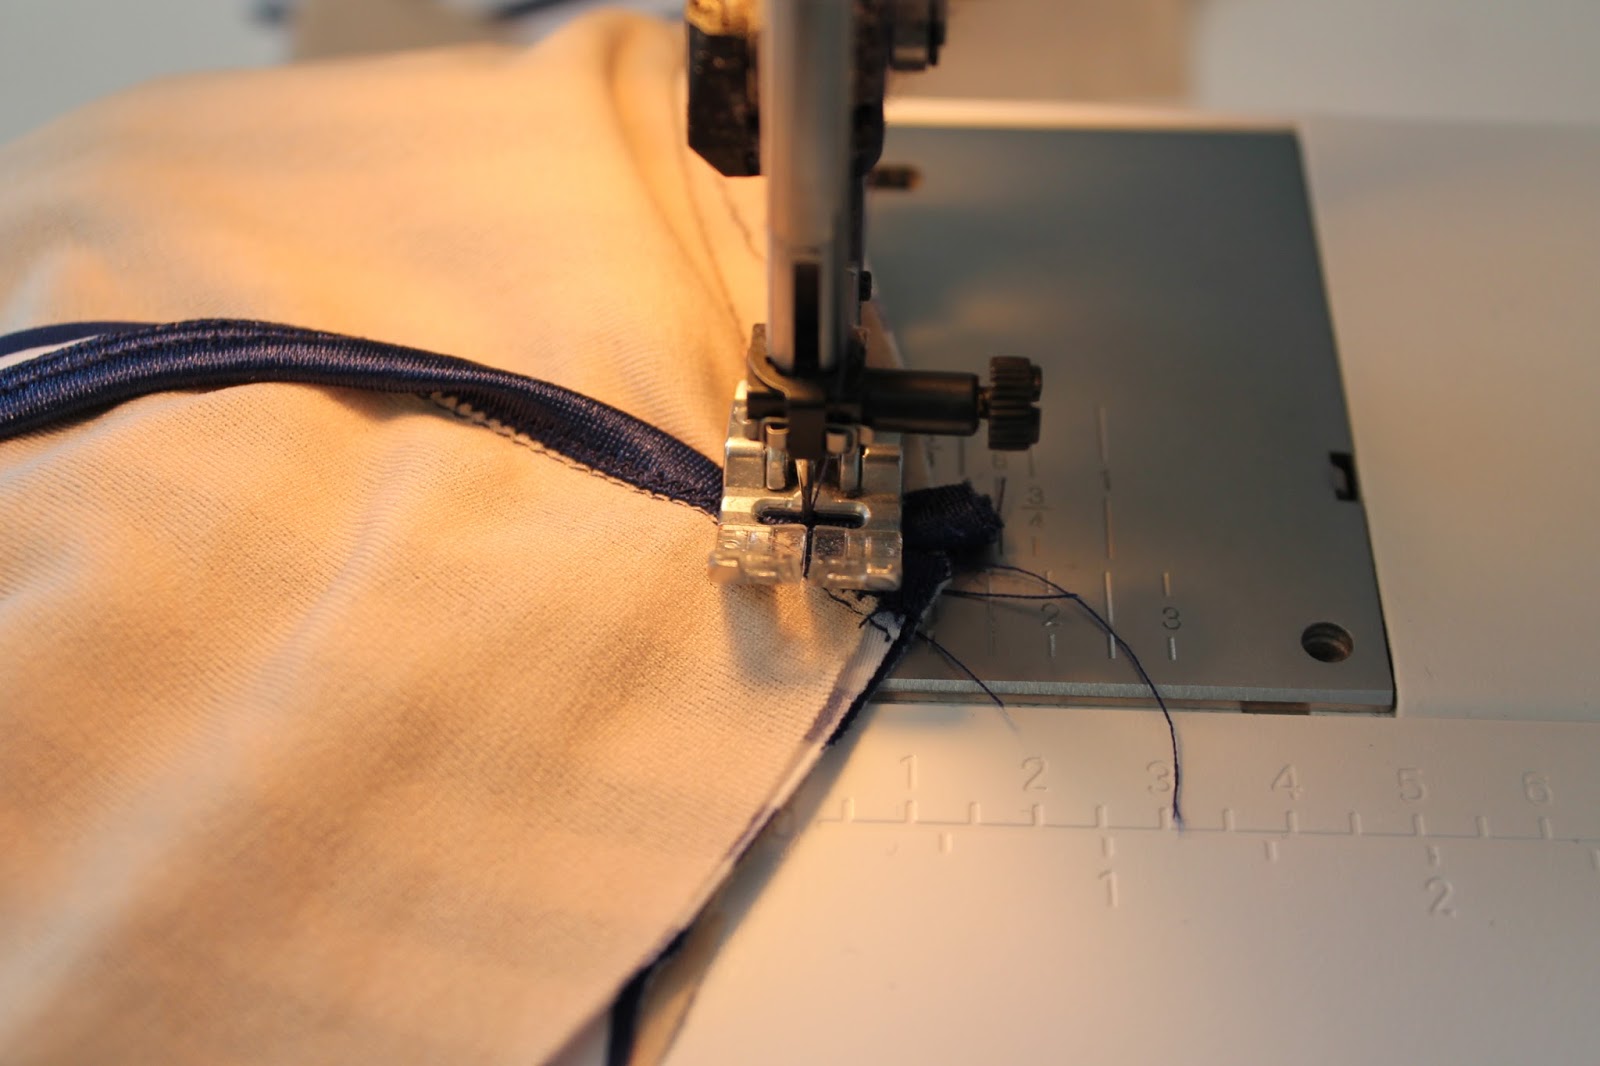
12. Baste Binding along front edge of cup using a narrow zig-zag stitch. Gently pull on the binding as you stitch. You wan the suit to contour along your bustline. When you’re done, turn the binding under and top stitch with a twin needle. If you don’t have a twin needle, you can also zig-zag stitch. The binding gets applied exactly the way you’d apply any binding (though I apply mine to the right-side first). I made a Video! Watch!
Raw edge trimmed back, binding is ready to be turned under and top stitched.
Twin-stitched binding.
13. Baste Lining to Center Front Band.
14. Just like we did with the cups, we’re going to sew our lining and exterior fabric in one motion. Layer your fabric like so: Side Front Band Swim fabric, Center Front Band Basted Piece (Swim Fabric Down), finished with the Side Front Lining. Sew your seam, and now your seam allowance is encased.
15. Stitch cups to Front Band
16. Prepare your back pieces. If you’re doing it like me, you’ll have to sew your Center Back Seams. Then, go ahead and baste your lining to your swim pieces. Stitch your Upper Back to your Lower Back.
17. Sew your side seams then try this baby on! If you’re happy with the fit, finish your seams by serging or zig-zag.
18. Apply Band Elastic on the inside of the garment using a wide Zig Zag stitch, as indicated in the pattern instructions. I have also made a video to show you exactly how to do it.
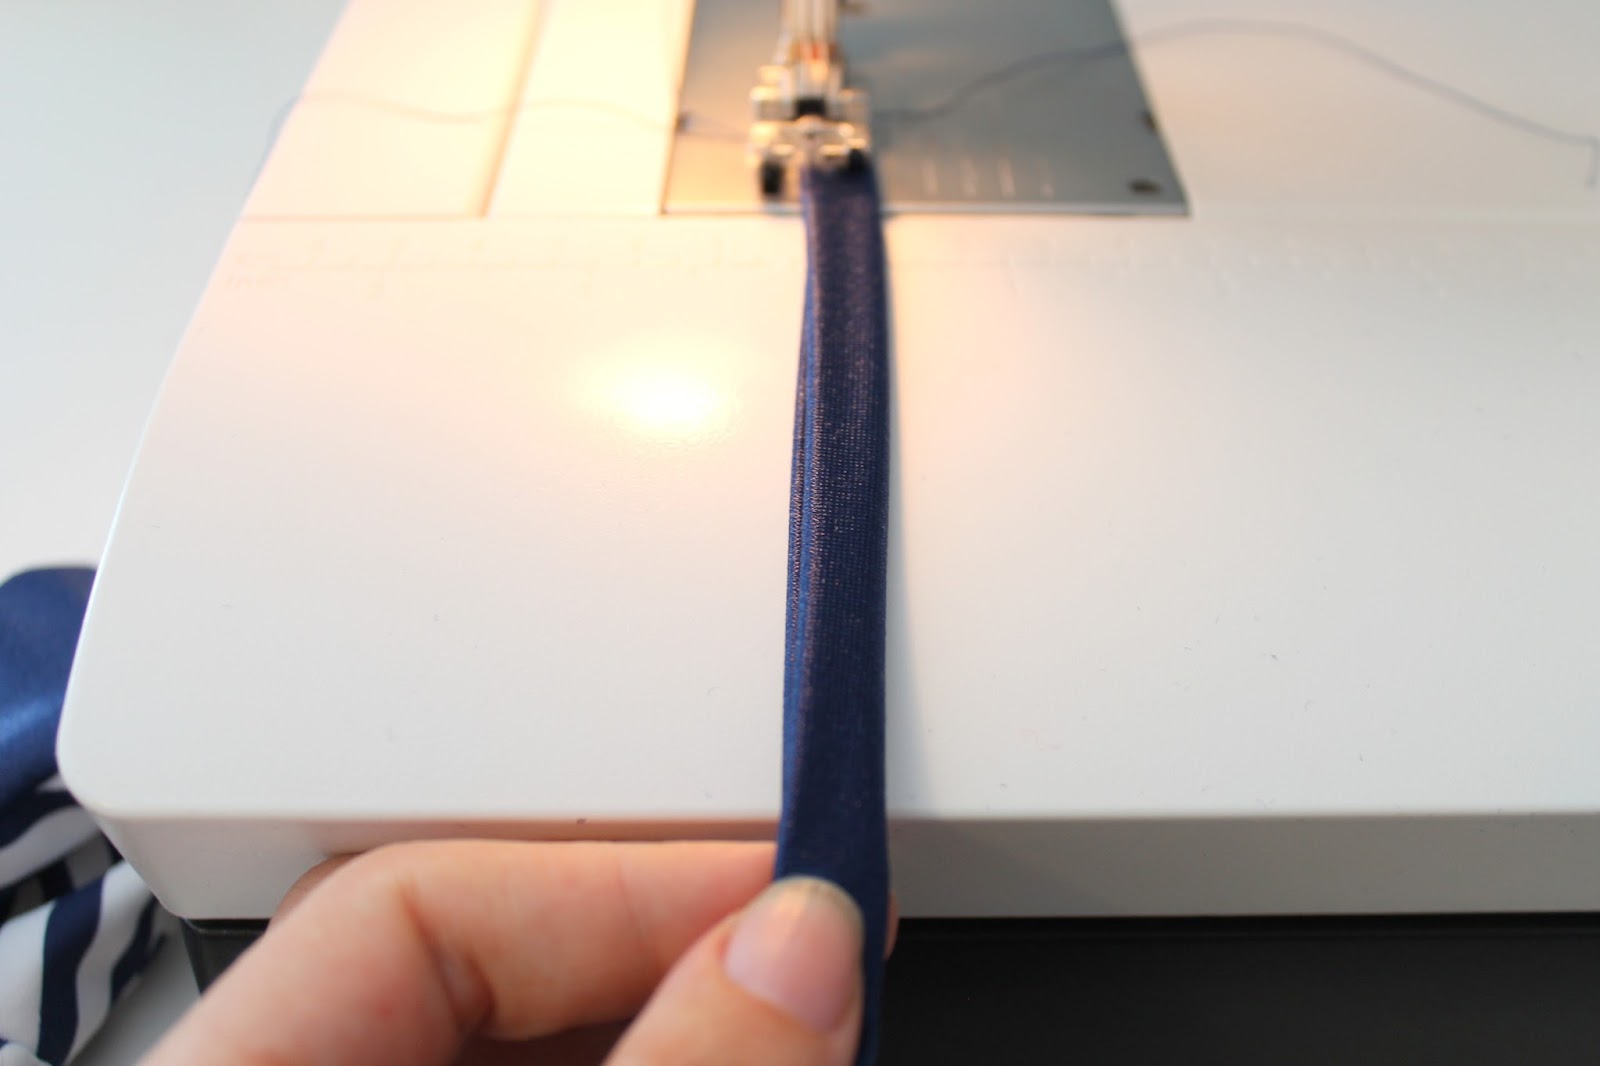
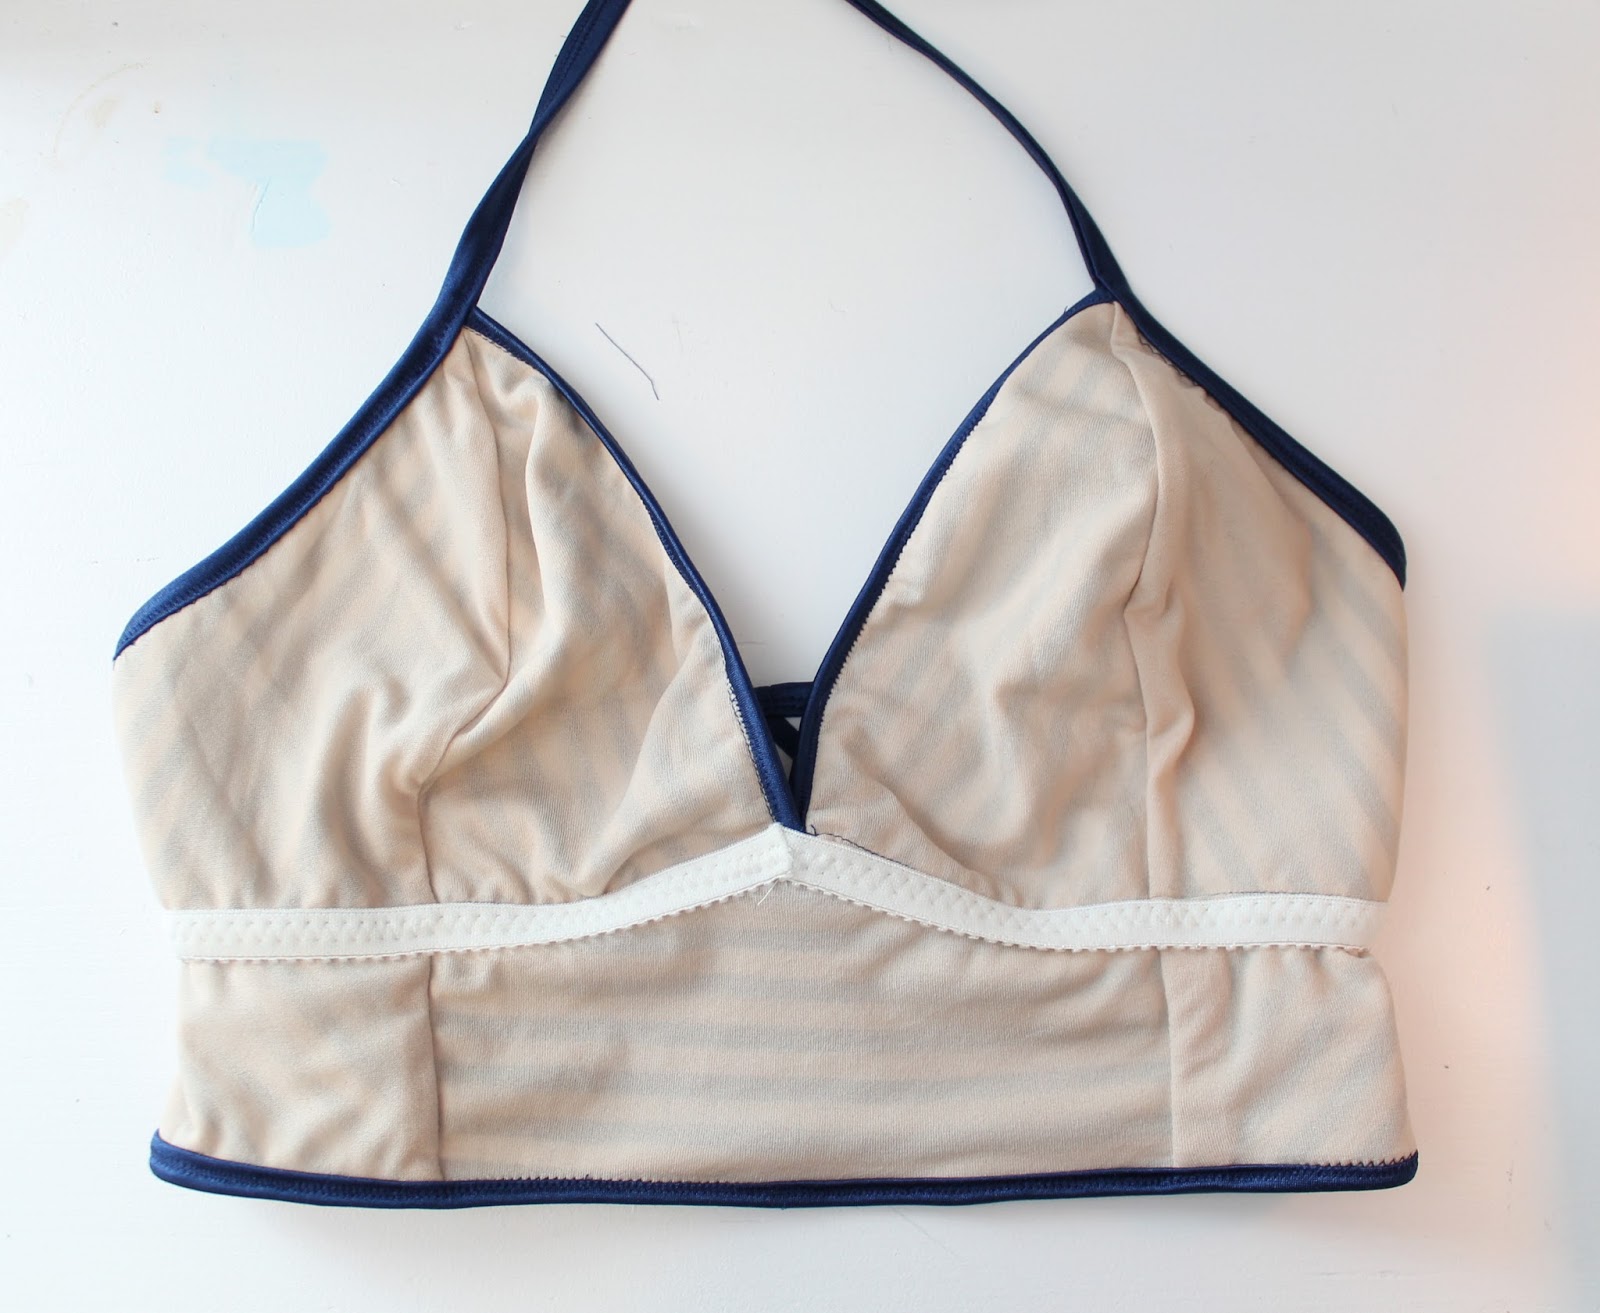
19. Now it’s time to bind the upper edge of our tops. I used a length of binding approximately 80″ long (I had to attach two pieces in order to get this length). I started basting on my binding approximately 31″ down the length of the binding – this extension forms your strap. You will be left with a long extension on the opposite end as well.
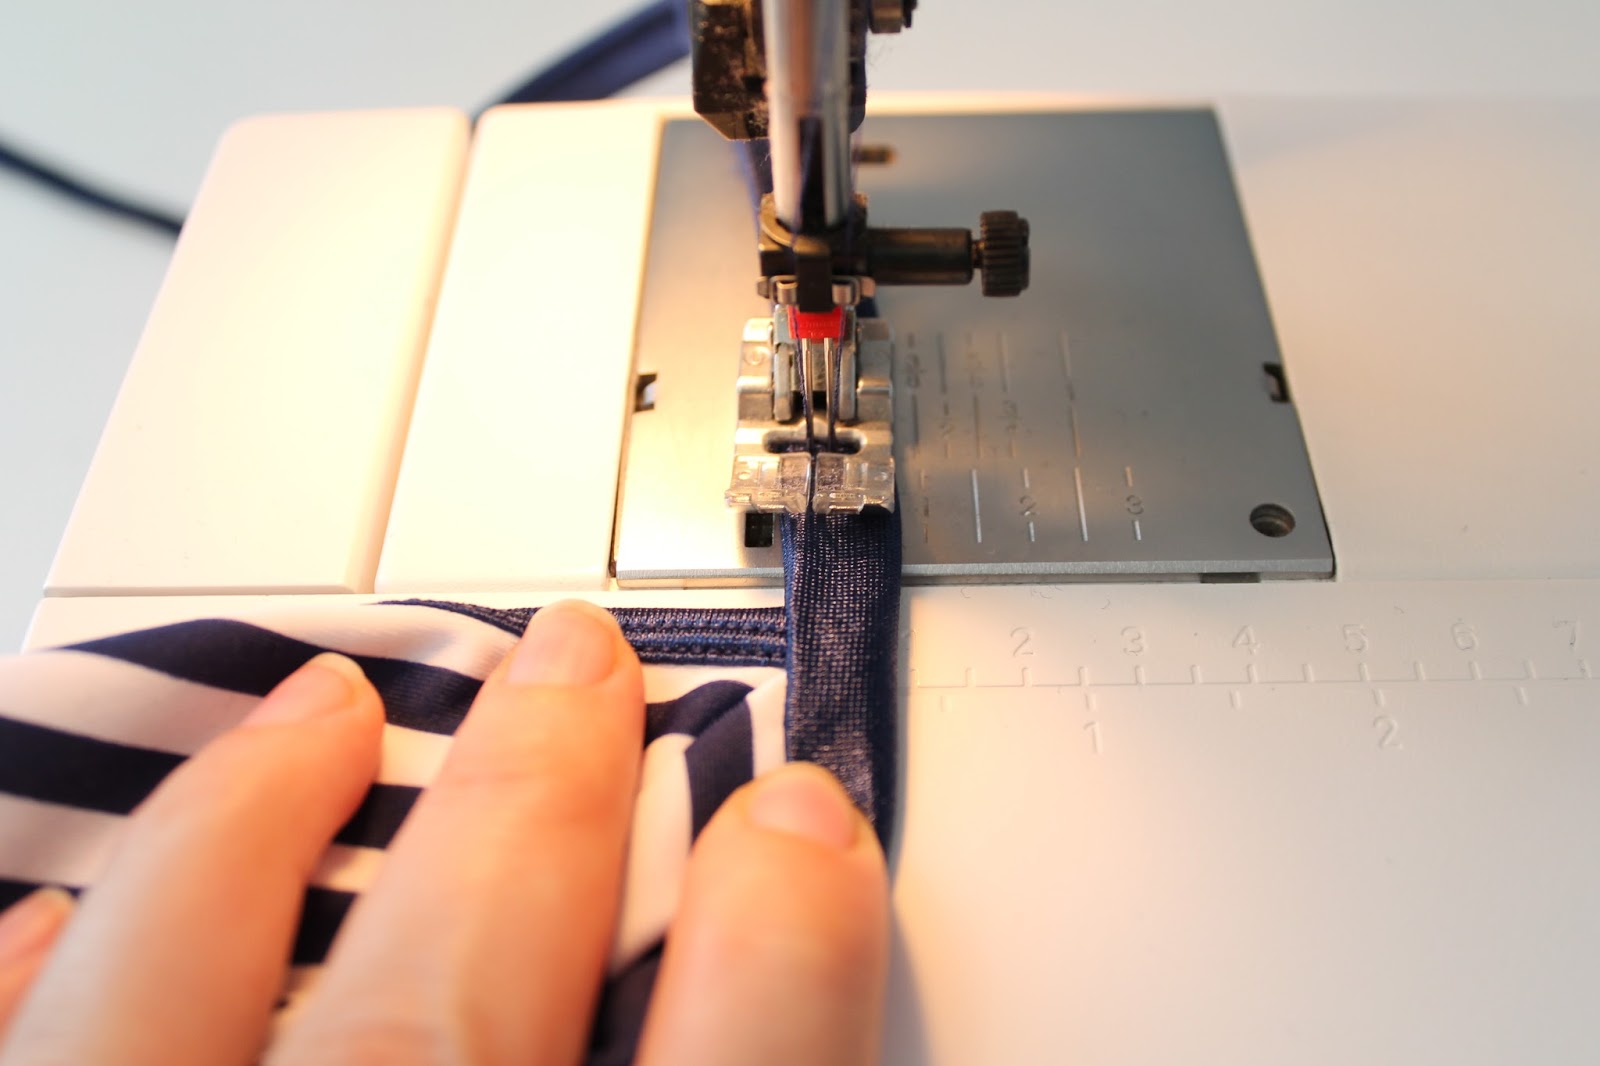
20. Folding your binding in half, and making sure all of the raw edges are turned towards the inside, top stitch with a twin needle.
21. Cut your straps so that they are both an even length and tie the ends into knots.
22. Cut a strip of elastic approximately the same lenth as the bottom of your top. Stitch it into a loop.
23. Pin the binding evenly around the bottom of your swimsuit top and baste on. Finish just like we did all of the other bindings by top stitching with a twin needle.
I’ll post the tutorial for the coordinating bottoms in a separate post!
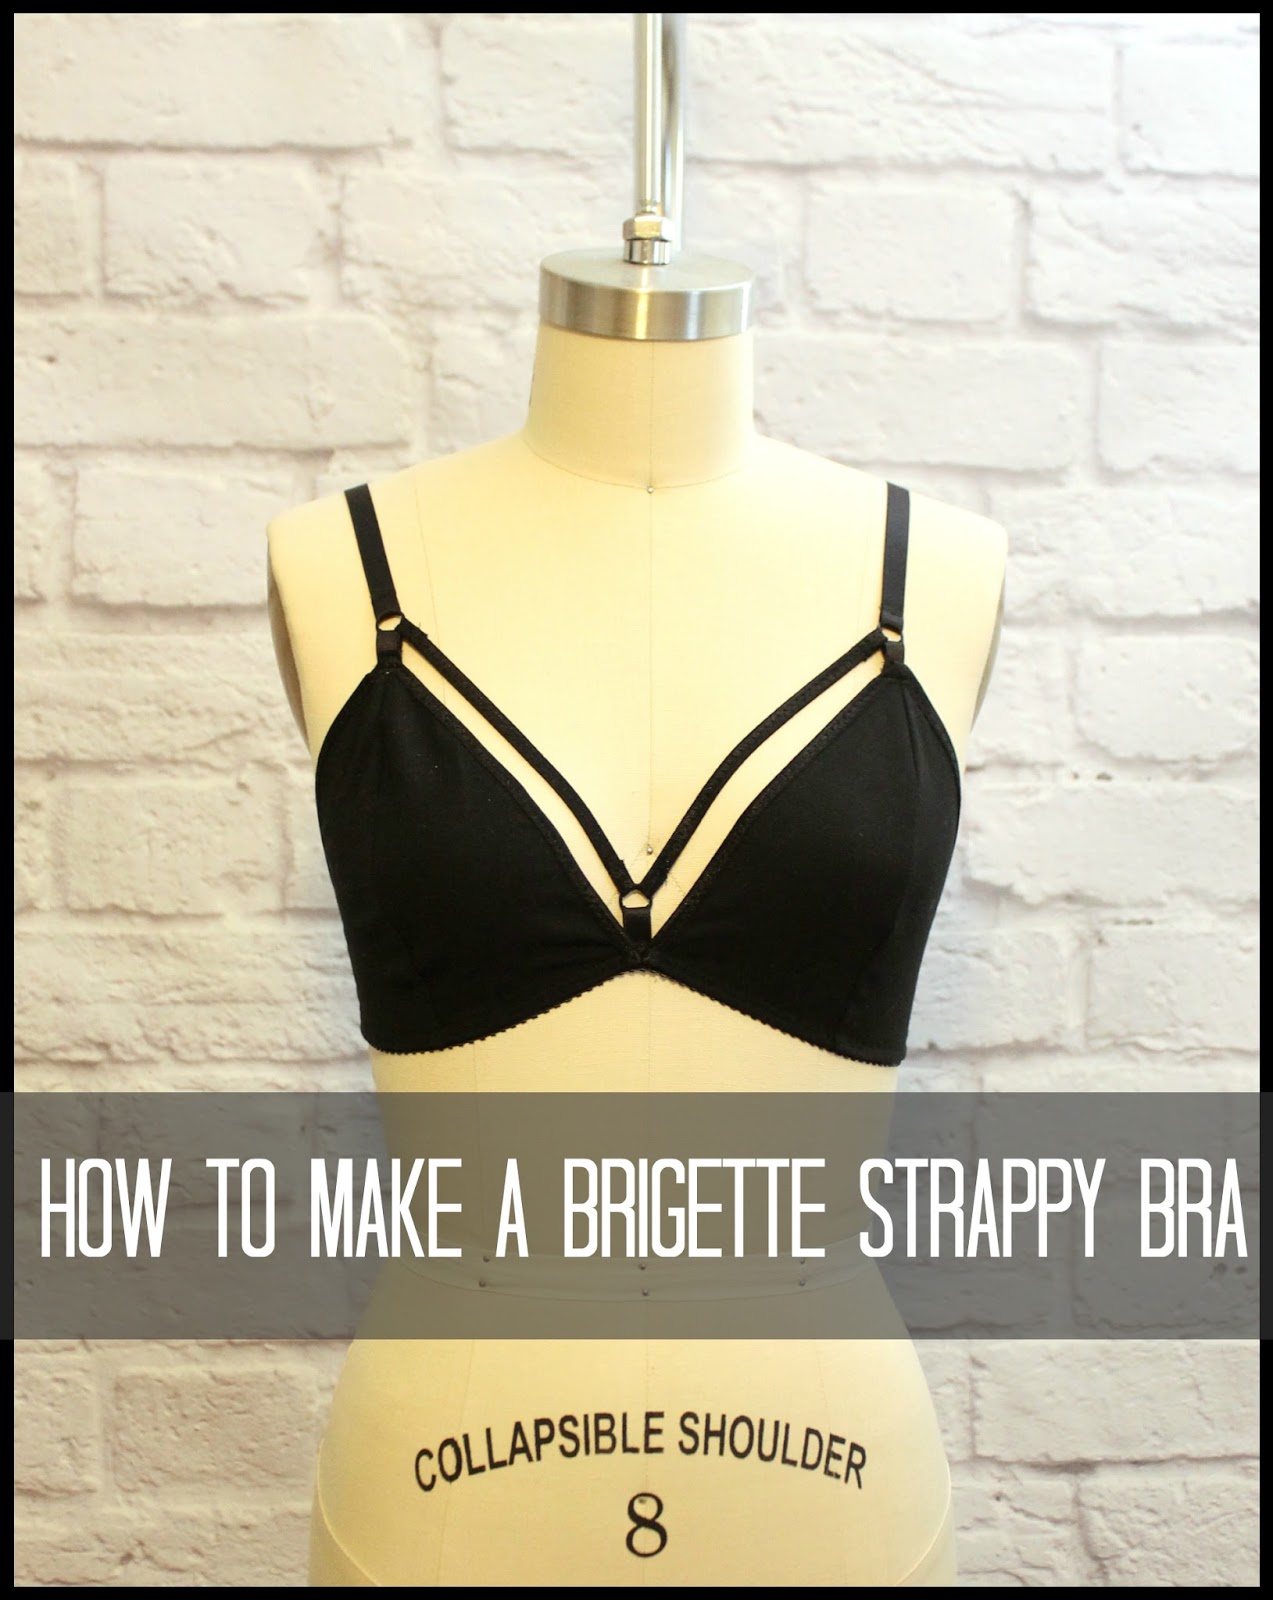
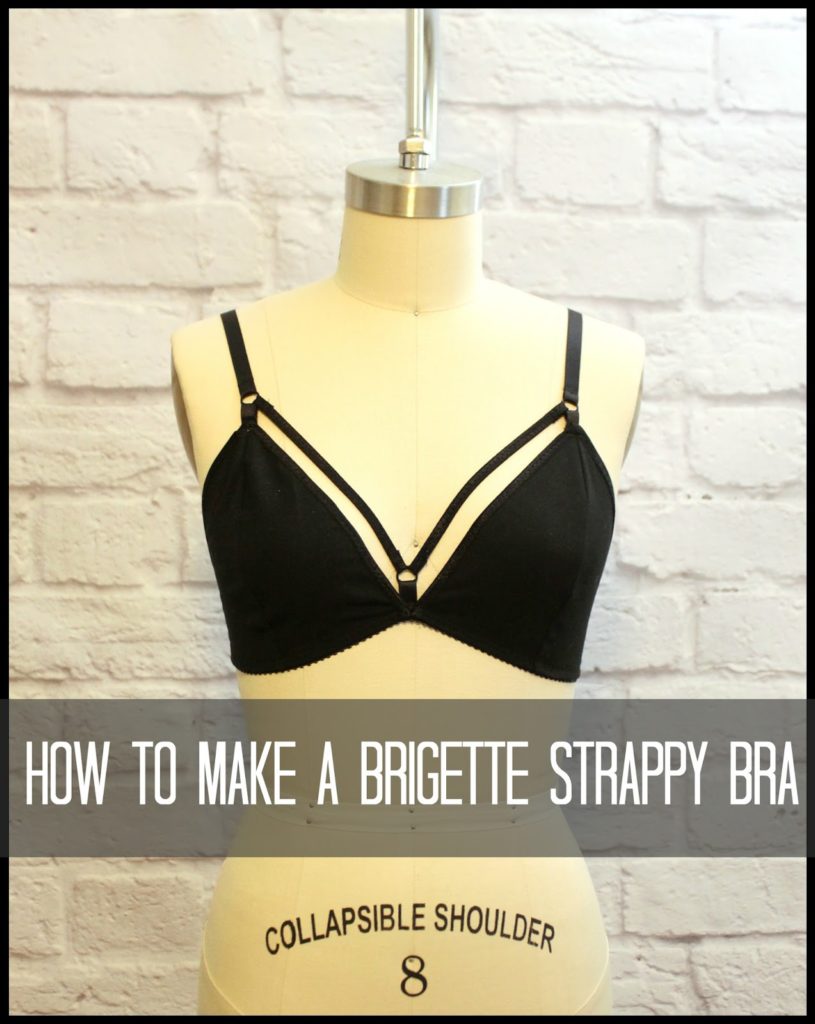
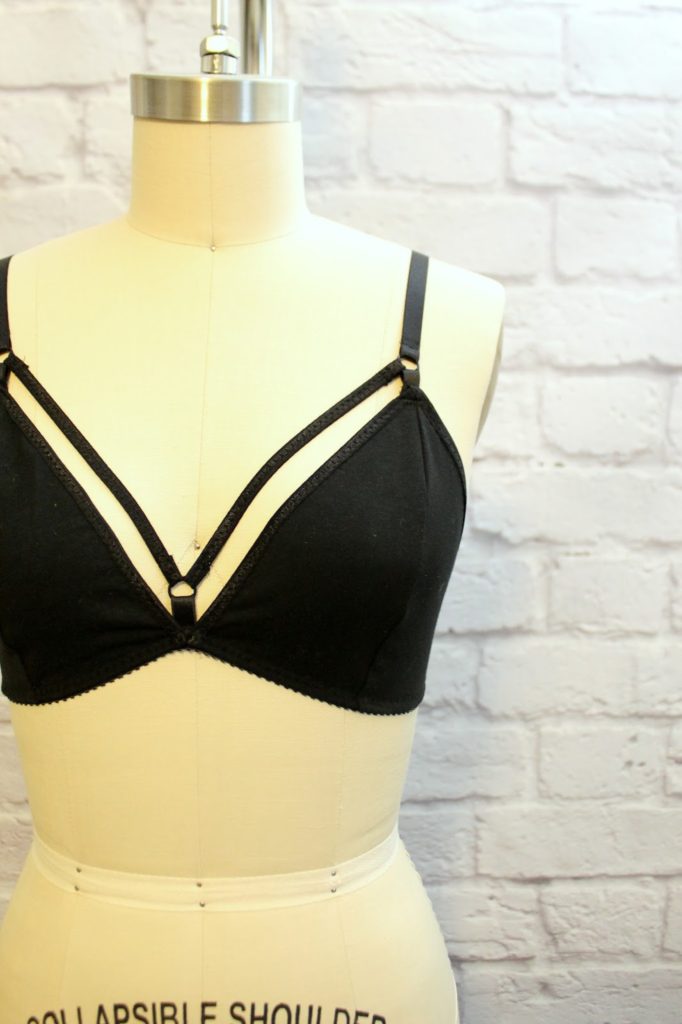
The Brigette Triangle Bra is my favourite bra pattern. While it is still a light-support garment, it can also offer adequate coverage for larger busts, while also being sexy and fitting well under every-day clothes. There are lots of interesting ways to style the Brigette Bra – you can sew it in a solid jersey, sheer lace, add bows or ruffles, or add trendy strap detailing like I’m about to show you here!
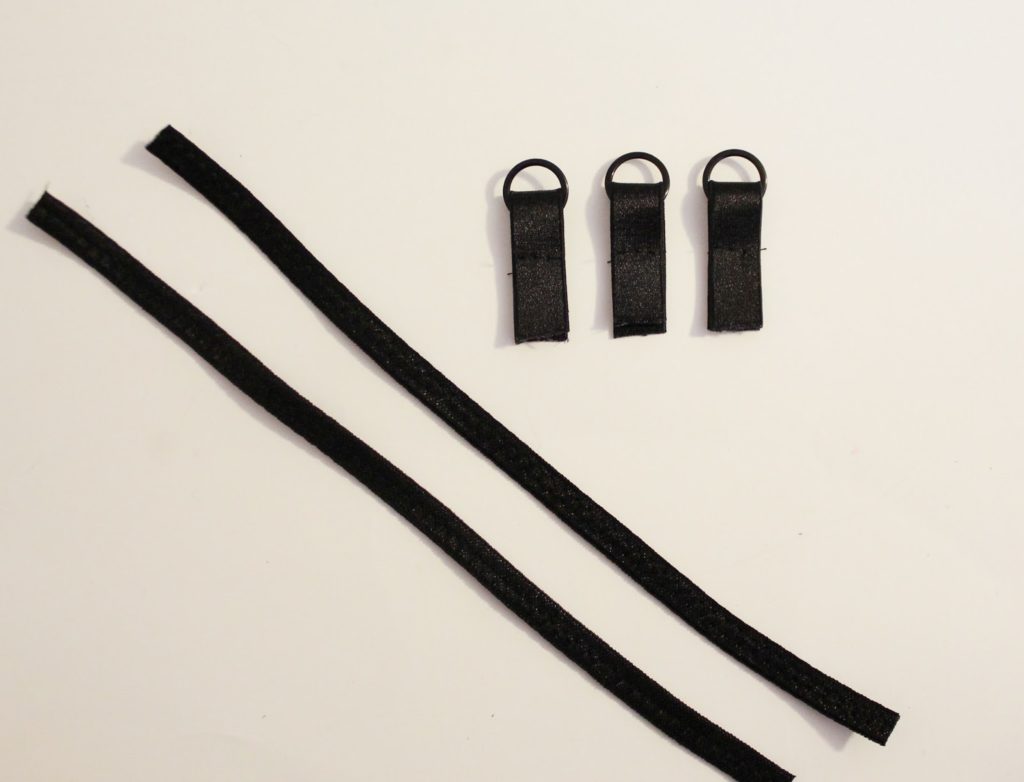
4. Three pieces of 1/2″ strap elastic, approximately 2″ long each.
5. Approximately 1/2-3/4 yard (depending on size of bra you are making) additional fold over elastic
Instructions:
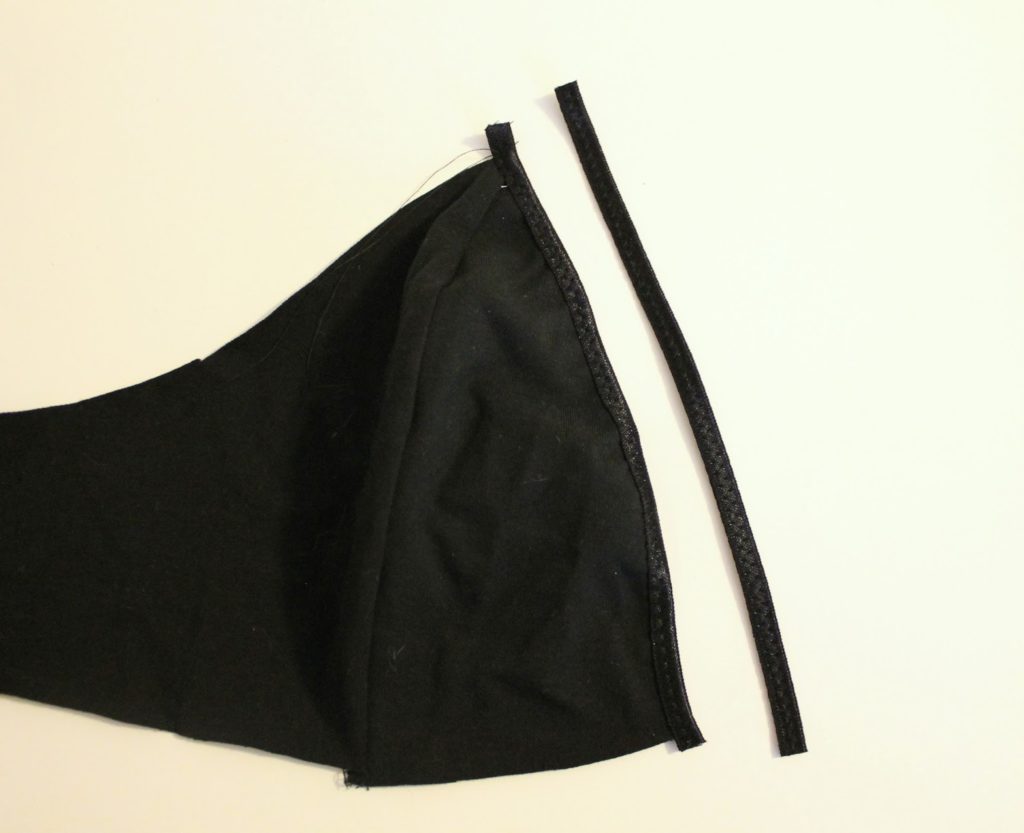
1. Assemble the bra according to the pattern instructions, and apply neckline elastic.
2. Fold additional piece of Fold Over Elastic in half and stitch closed with a zig-zag stitch.
3. Cut the stitched piece of FOE (fold over elastic) in half and trim it back so that it measure approximately 1″ longer than the front neckline edge (see picture below).
4. Wrap 2″ lengths of strap elastic around metal rings and stitch closed.
5. With a zig-zag stitch, apply band elastic to the right side of the garment. Decorative edge of band elastic should be pointing up, towards the top of the garment as it will get folded under in a later step.
6. Baste one metal ring piece onto the the wrong side of the (CF) Center Front of the garment and trim back any excess seam allowance. The piece of strapping should extend approximatley 1/2″ beyond the band elastic.
7. Turn Band Elastic under and top stitch in place with a zig-zag stitch, as directed in the pattern instructions. When you get to the CF, stitch carefully over the piece of strapping.
8. Apply elastic to the remaining upper edge of the bra, leaving a 1″ tail of elastic beyond the “peak” of the cup – follow the pattern instructions for how to apply elastic.
9. Place the Strap & Ring piece over the “Tail” of elastic that extends beyond the cup, and secure in place with a row of stitching.
(sorry for the fuzzy photo!)
10. Turn the excess elastic under and top stitch across with a narrow zig-zag stitch. Make sure to careful back-tack in place as this will become a point of stress on the garment – you’ll want to make sure it’s stitched securely!
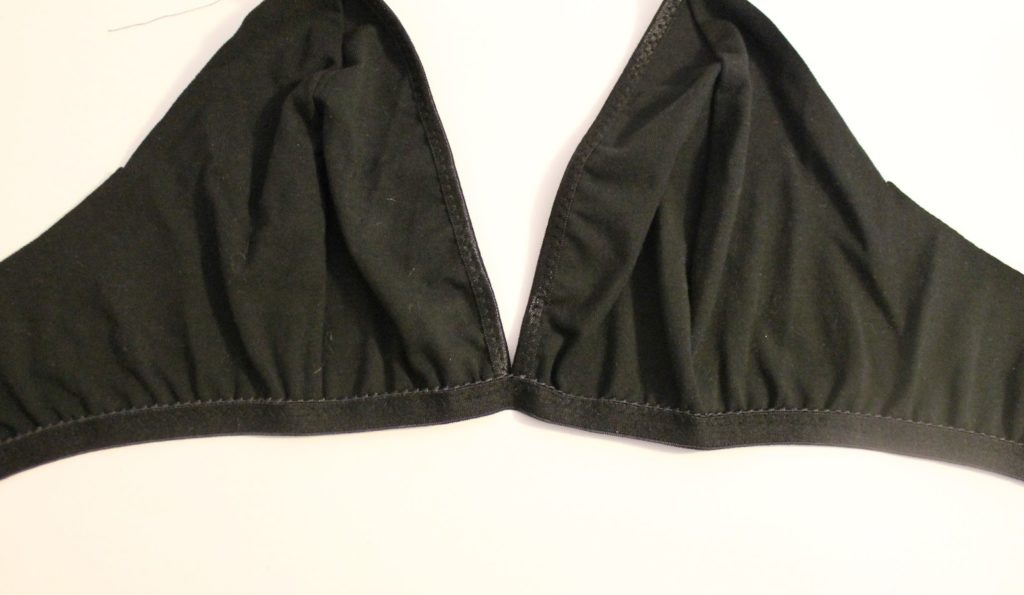
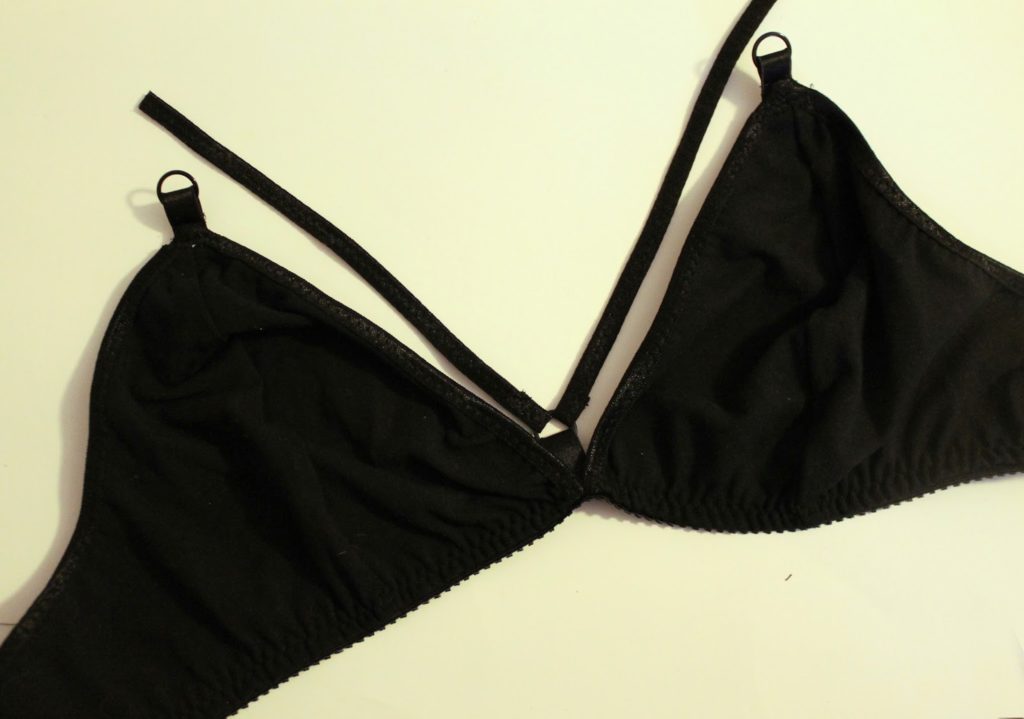
11. We now have rings placed at the CF and peak of each cup!
12. Using the folded pieces of FOE, secure one end of each piece around the CF ring. I use a zig-zag stitch to secure in place. Trim back excess FOE as close to your stitching line as possible.
13. Wrap opposite end through the ring at the peak of the cup. The folded piece of FOE should run parallel with the edge of the Front Neckline.
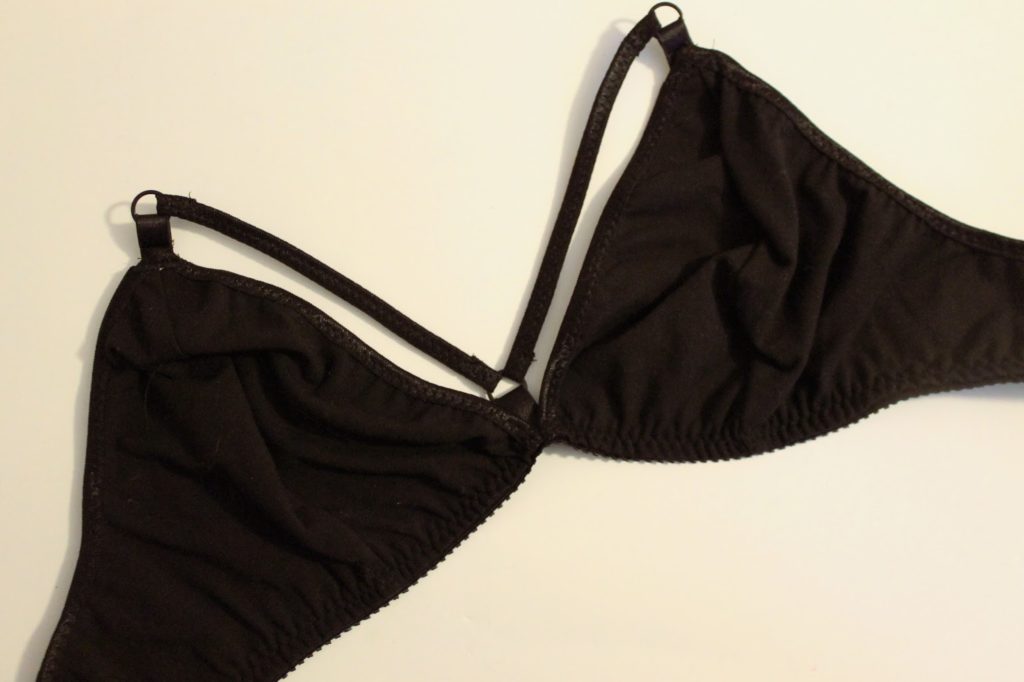
14. Follow the pattern directions to complete the straps and back closure.
And… that’s it! It’s a few more steps and some fiddly details, but this style looks great under loose tanks and sheer tops. You can easily use this same tutorial to add strap detailing to the Sarah Longline Bralette as well!
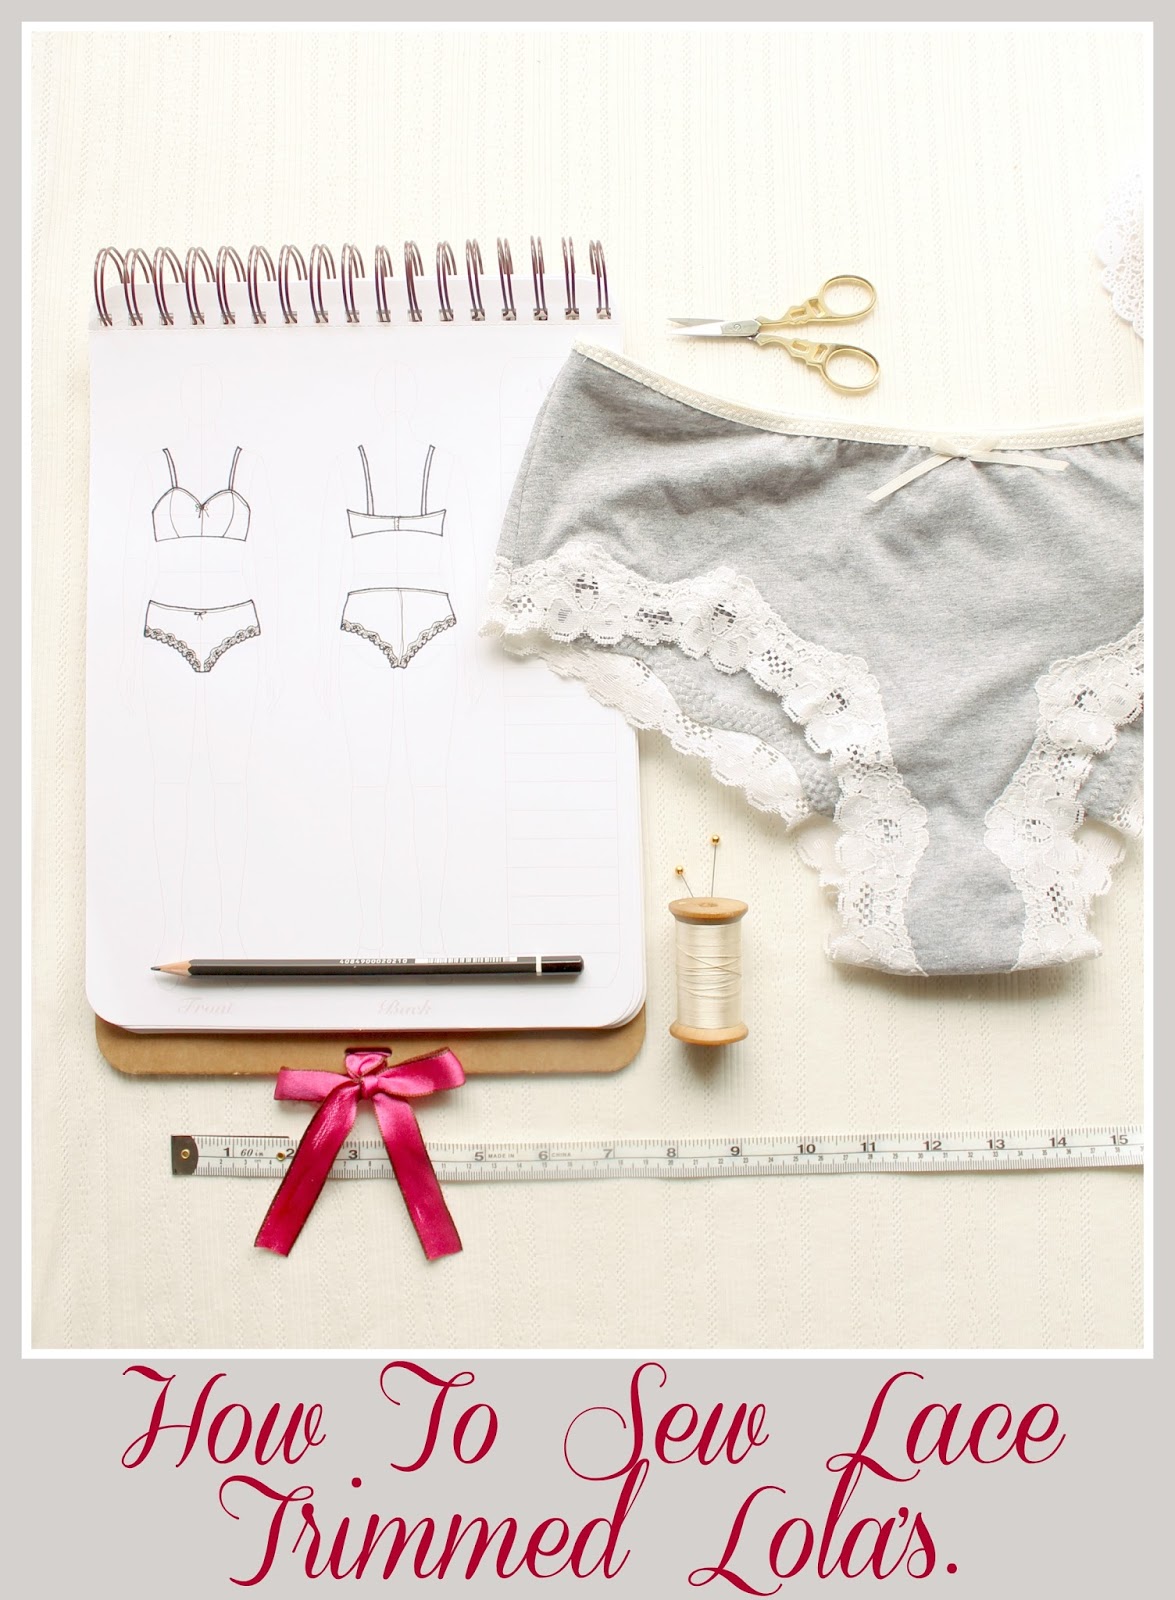
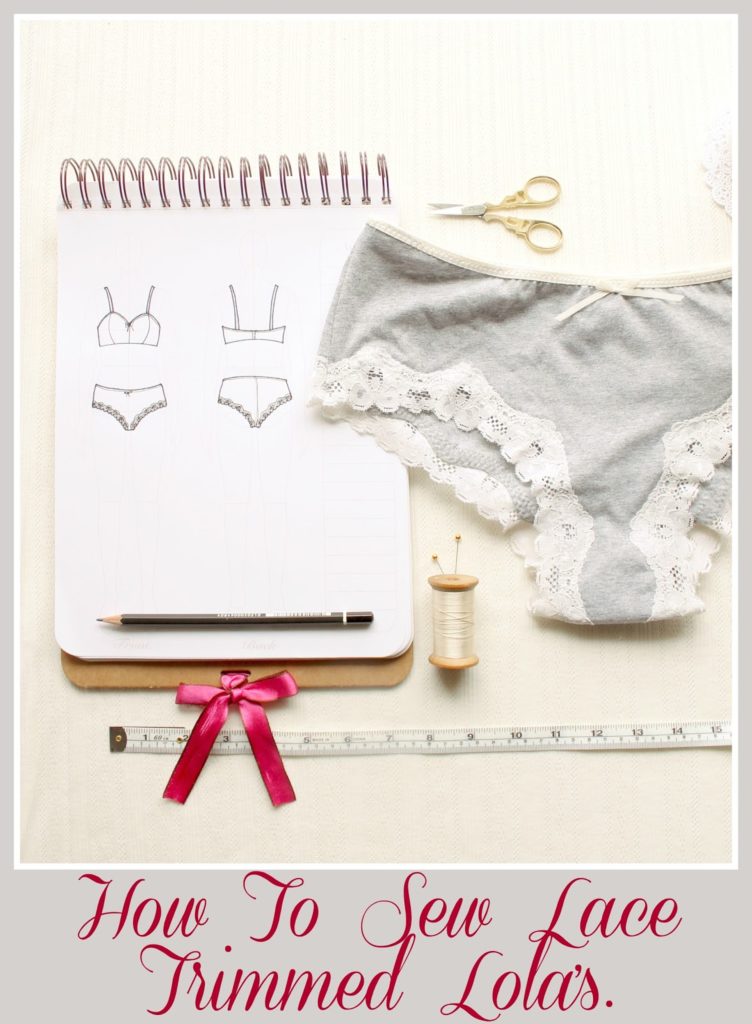
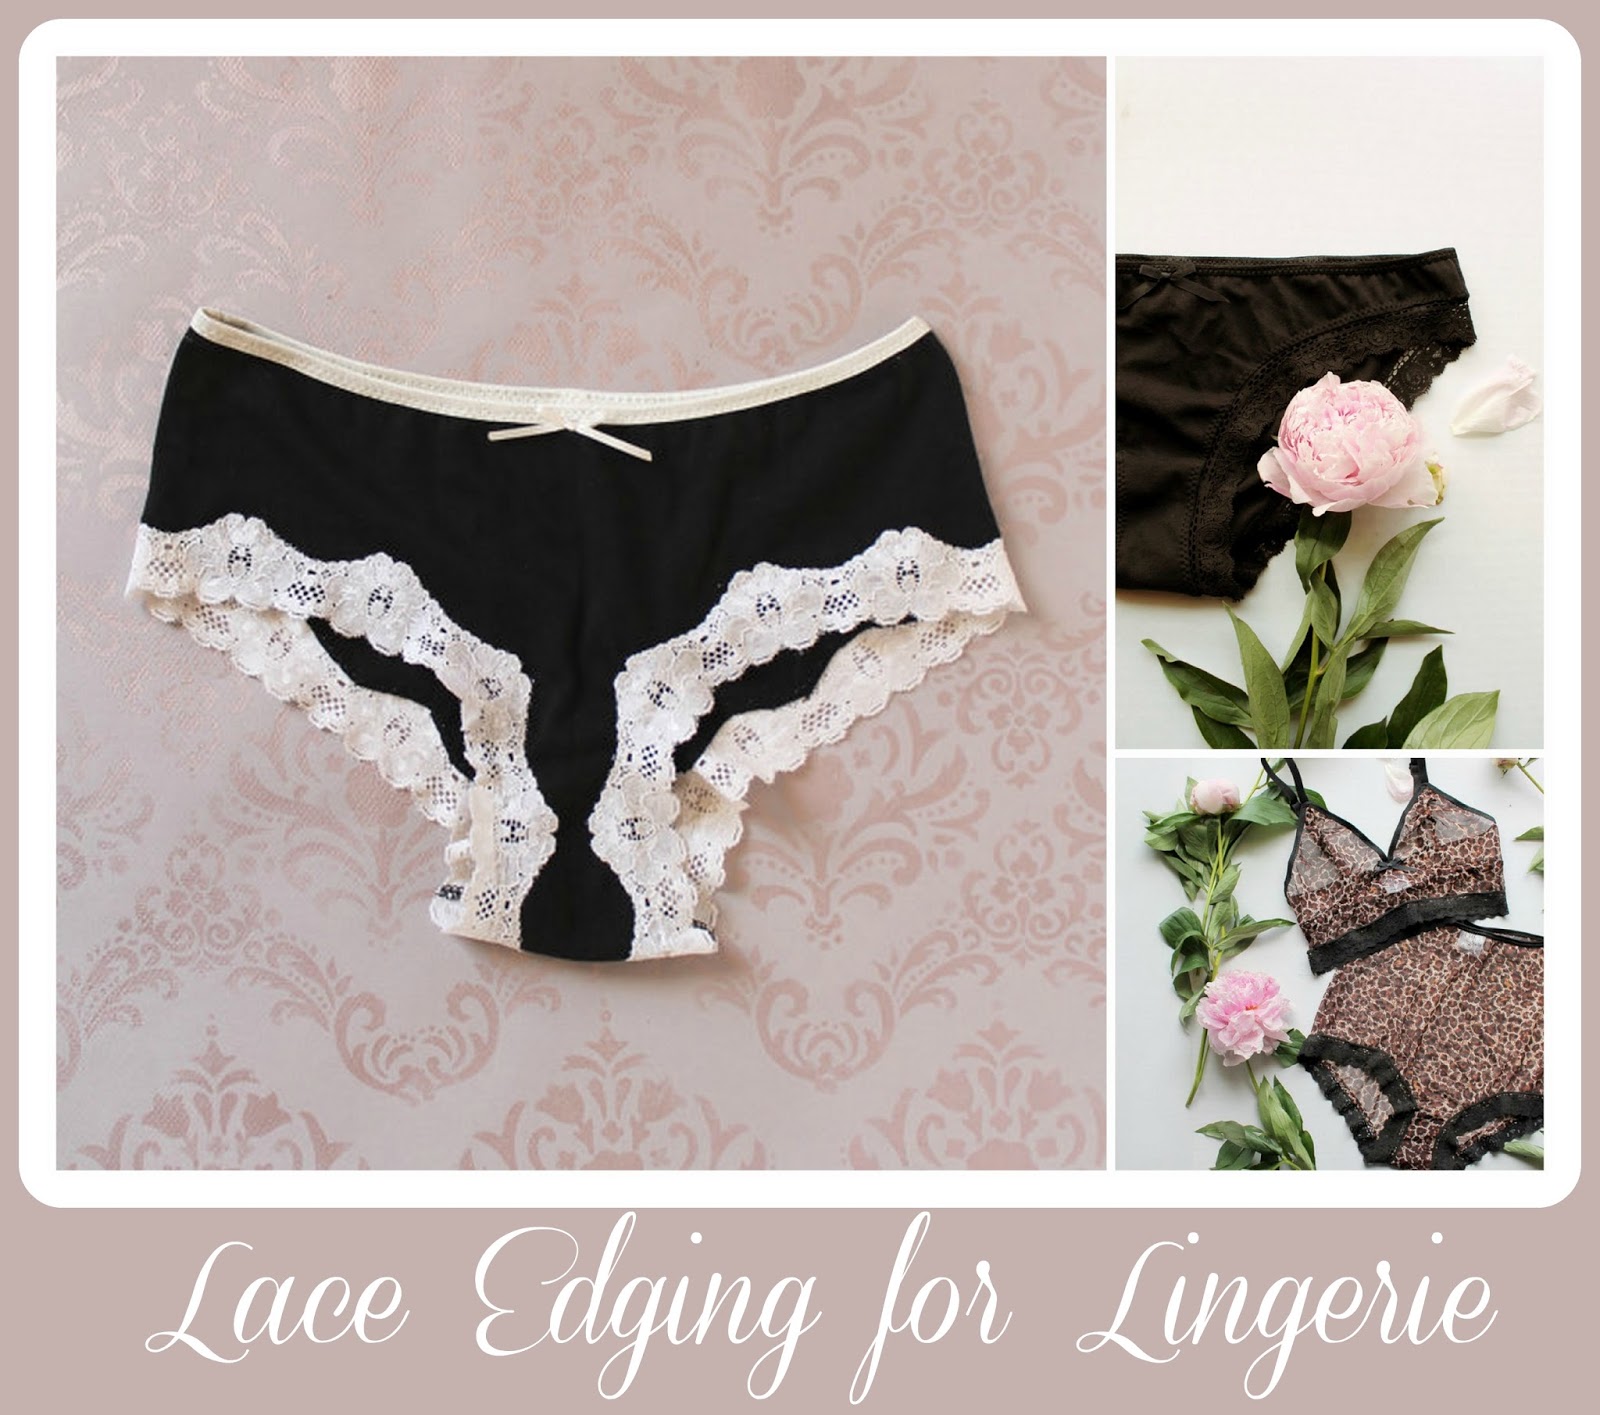
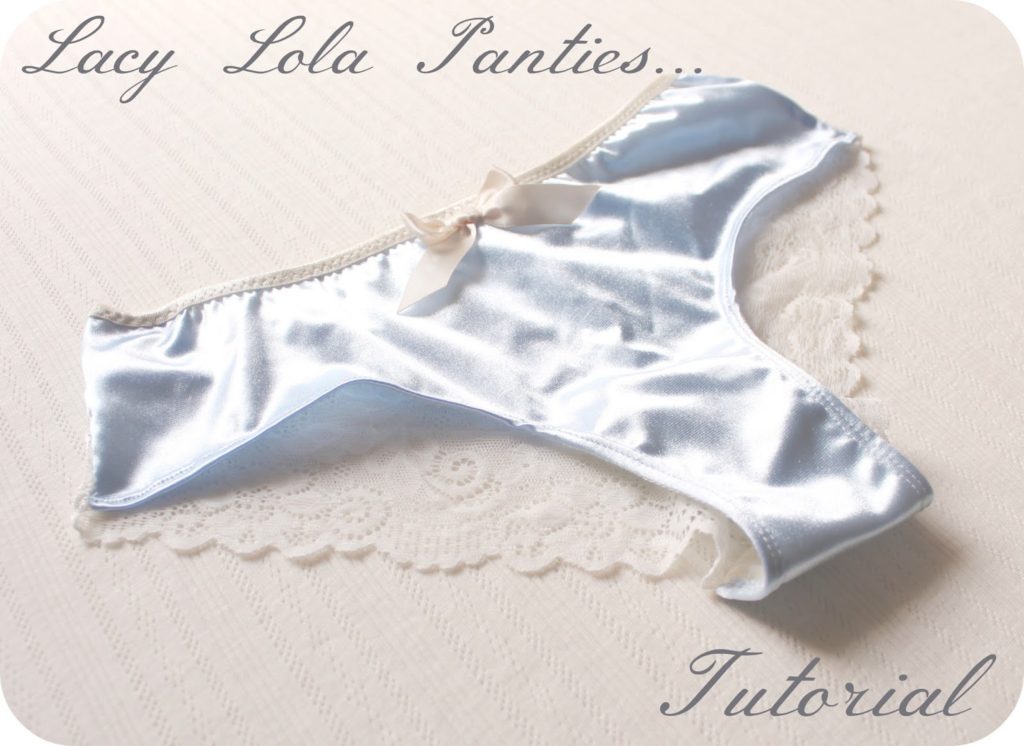
This Pattern Hack is a follow up to my post on Lace Edging for Lingerie. I like to use scalloped lace instead of a twin stitched hem on my Lola’s because it helps to reduce panty lines and is just plain pretty! Here is the way I trim my Lola’s with Lace.
3. Stretch Knit fabric (yardages given in pattern)
4. Elastic for waist
5. Small scrap of cotton jersey for gusset lining
Instructions:
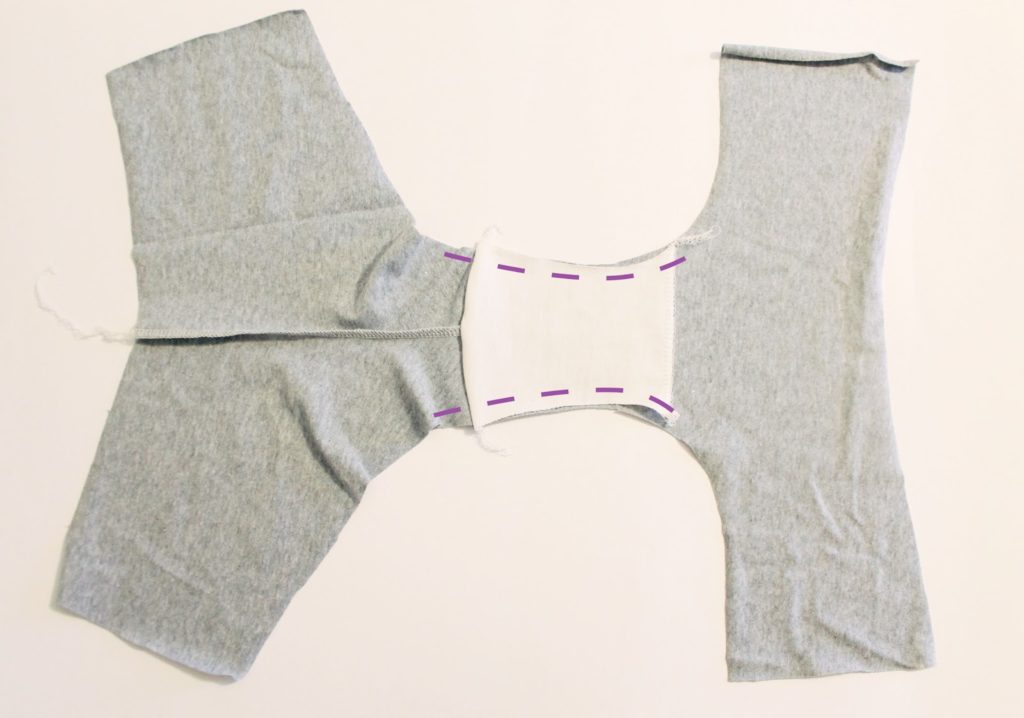
1. Stitch together the panties back and crotch seam as directed in the pattern instructions.
2. Baste gusset lining in place.
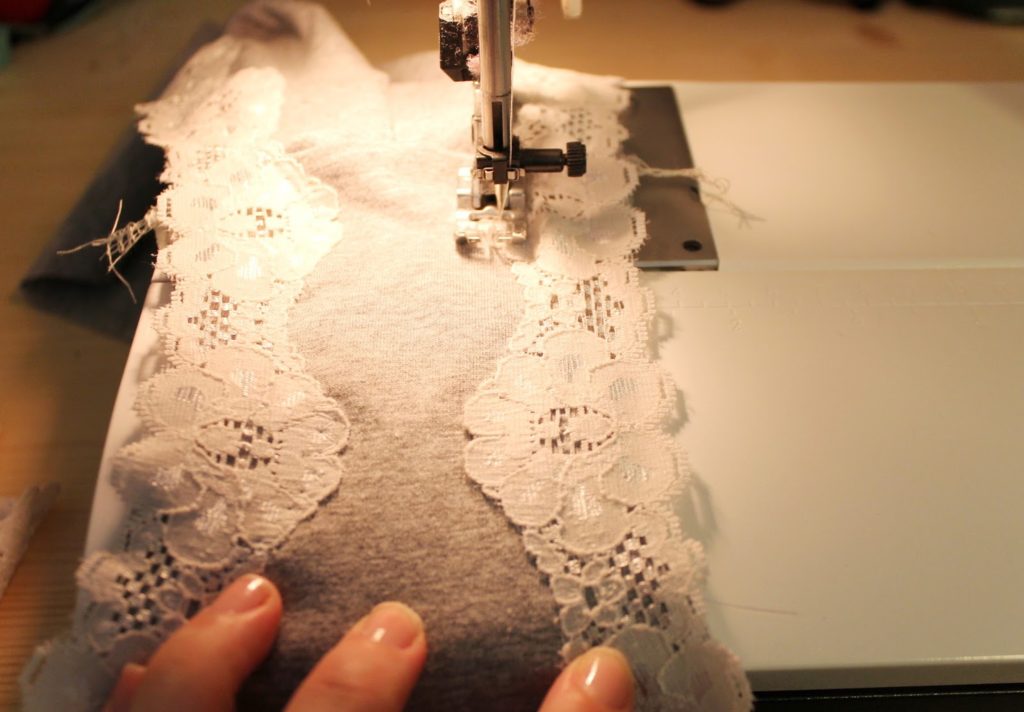
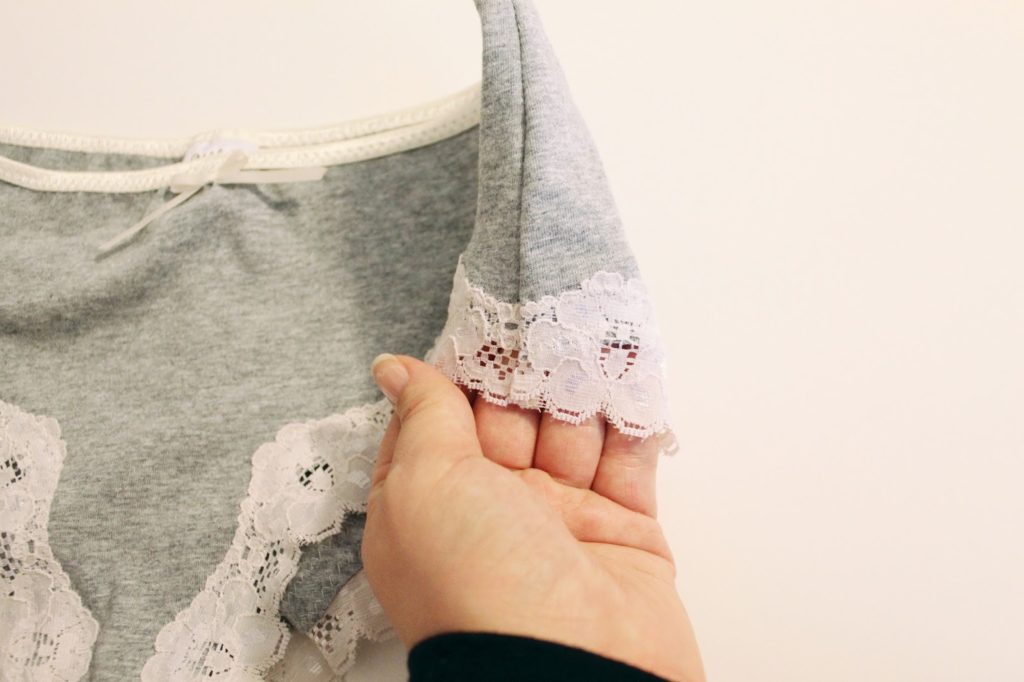
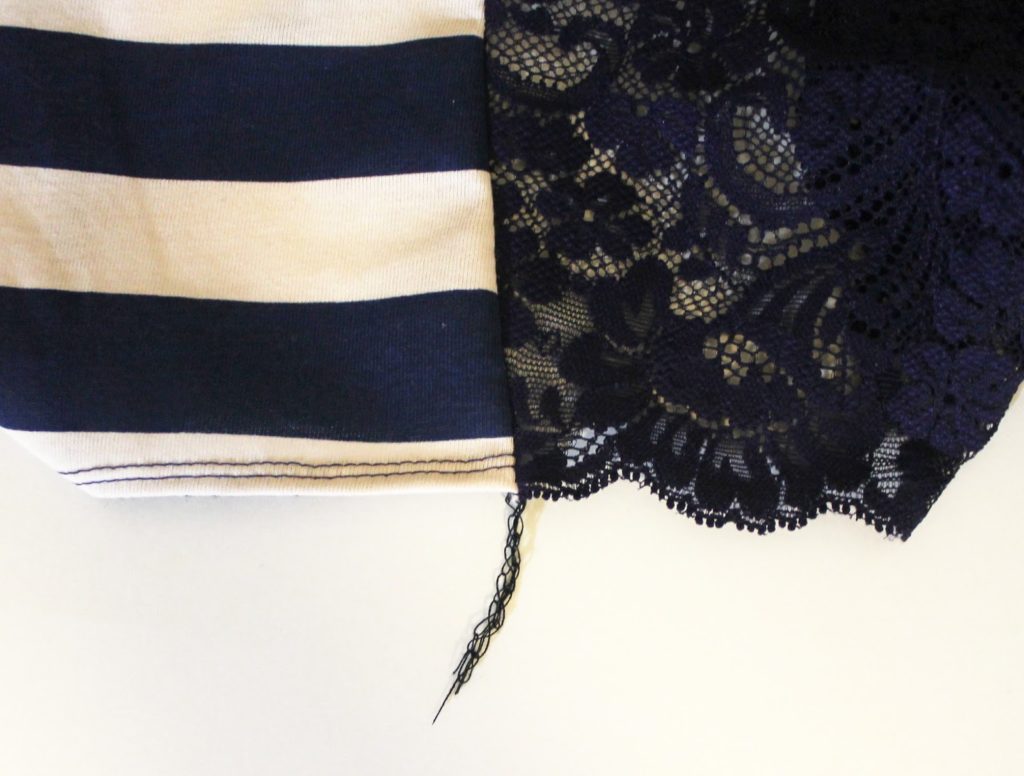
3. Place stretch lace trim on rightside of garment and stitch in place with a zig-zag stitch. Do not apply tension to lace – this pattern does not need contouring around the leg openings. I align the straighter edge of my lace with the raw edge of my leg opening. If you are using an exaggerated scalloped lace like I have, make sure your scallops are even on either side. As I discussed in part two of my post on Lace Edging for Lingerie, I sew two parallel rows of zig-zag stitches to apply the lace.
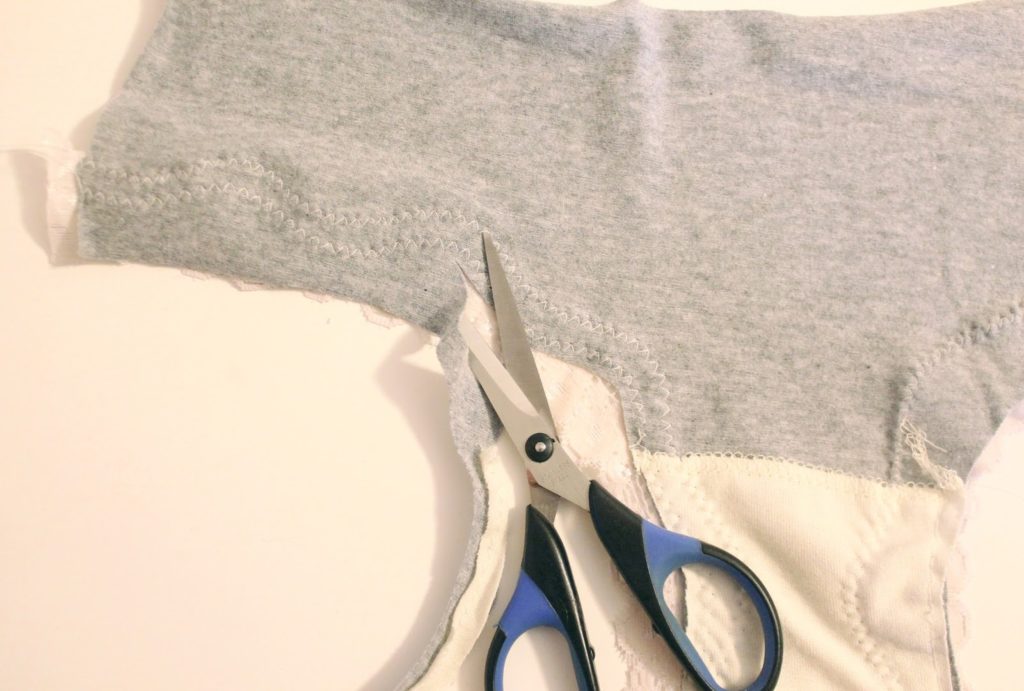
4. Trim back excess hem allowance. Be careful not to clip into any of your stitches!
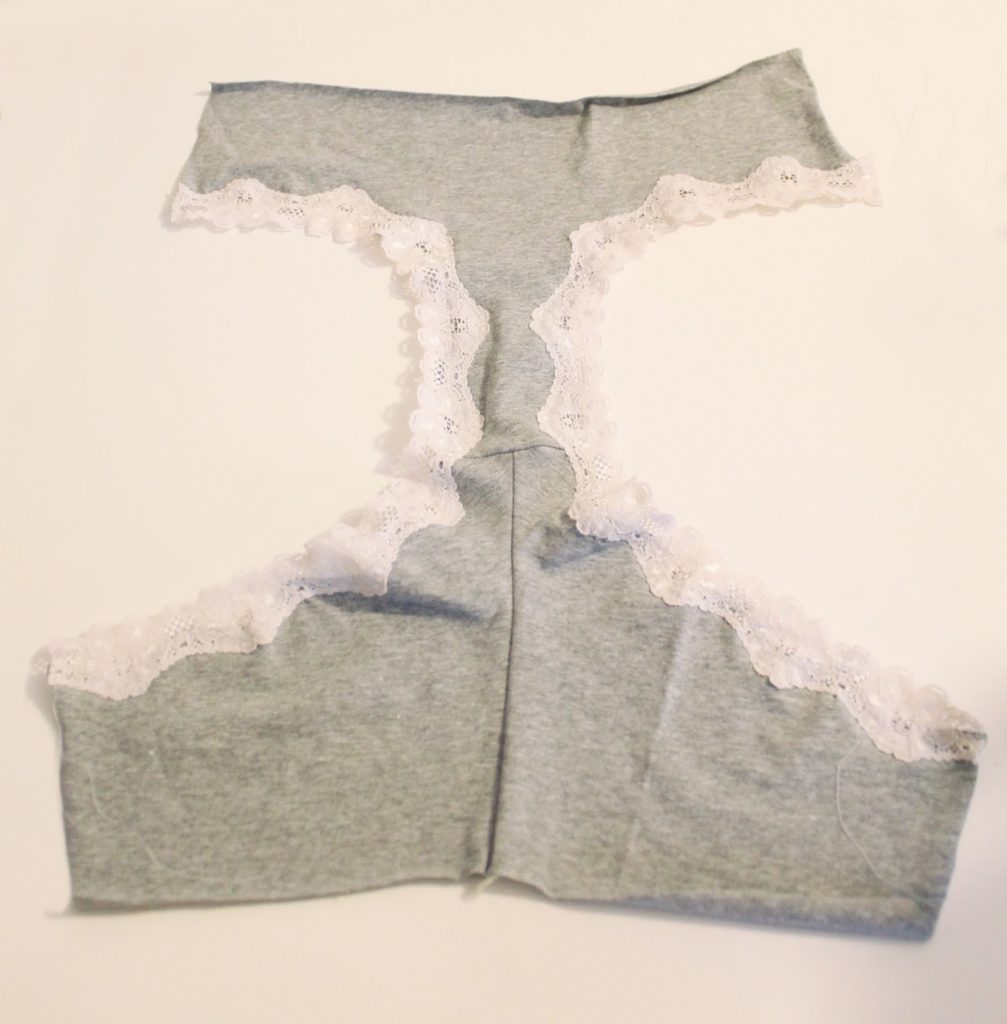
5. Sew your side seams, making sure that the lace hem meets up. Be sure to backtack to secure your seam and knot off your serged seam finish if you are finishing with a serger.
5. Finish waist with elastic and embellishments of your choice!
There you have it! Adding lace to the leg openings of the Lola pattern takes a little extra time, but in my opinion, the results are totally worth it!
In most of my patterns, I demonstrate how to finish lingerie hems with either a twin needle finish, or elastic finish using either picot or fold over elastic. Stretch lace trim is another great option for finishing leg openings. Stretch lace adds a little elastic to leg openings, while reducing the bulk you might get from elastics such as FOE (Fold Over Elastic).
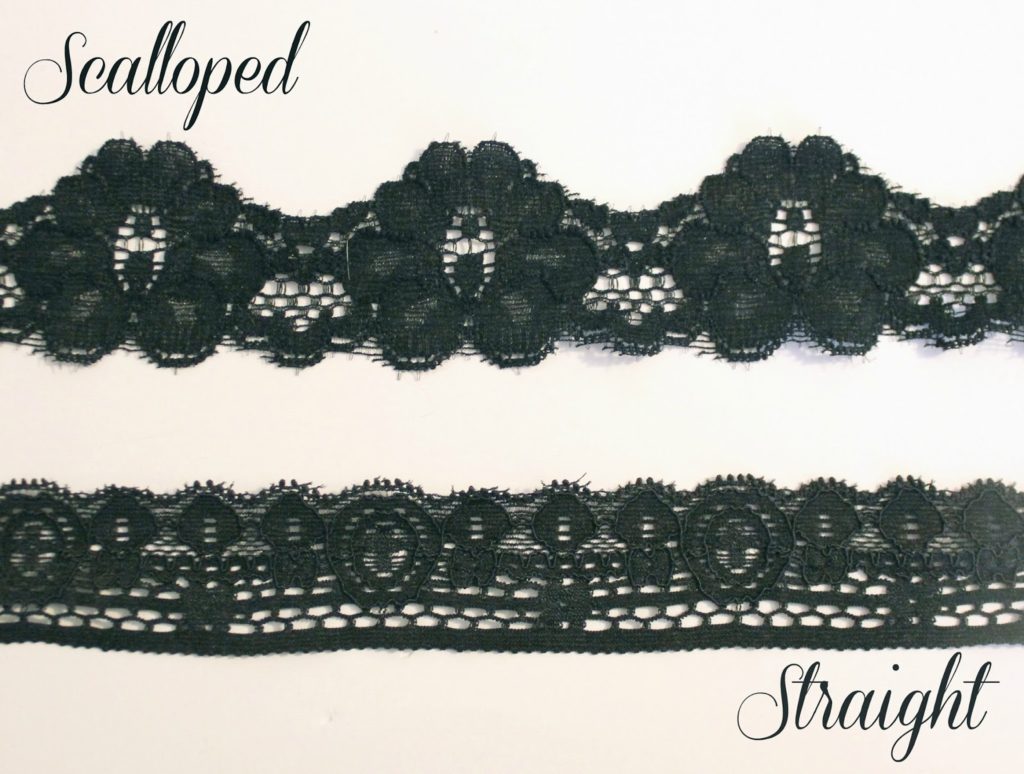
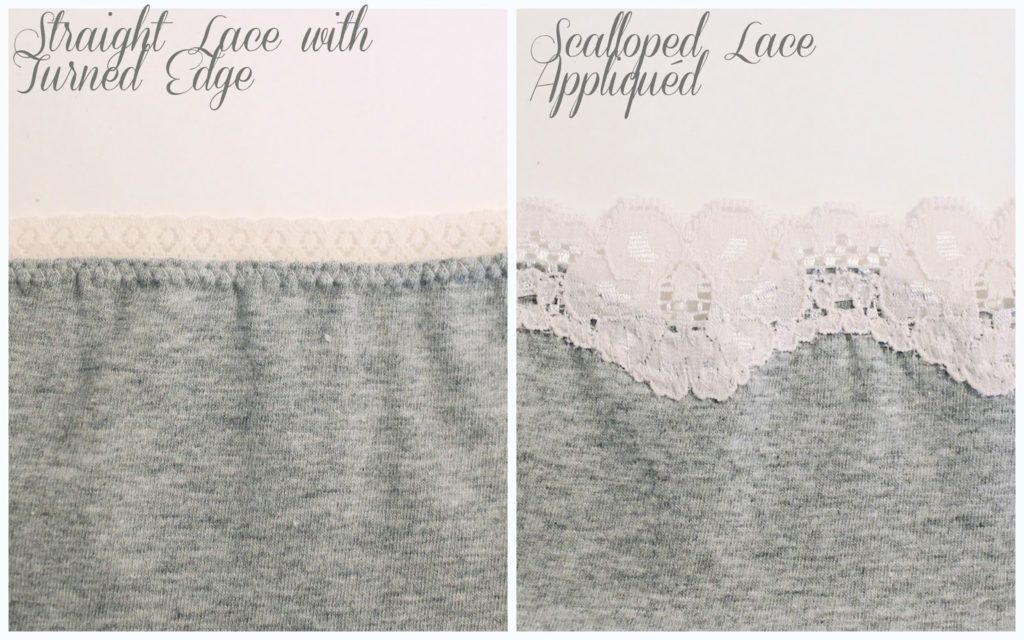
There are a couple types of stretch lace trimming you may find in a fabric store – the first kind has a decorative scalloped edge which gets appliqued to the right side of the garment. The second has a straight elastic edge that can be applied to the garment, turned under and top stitched. Here, I will demonstrate my two favorite ways to apply stretch lace trimming to lingerie.
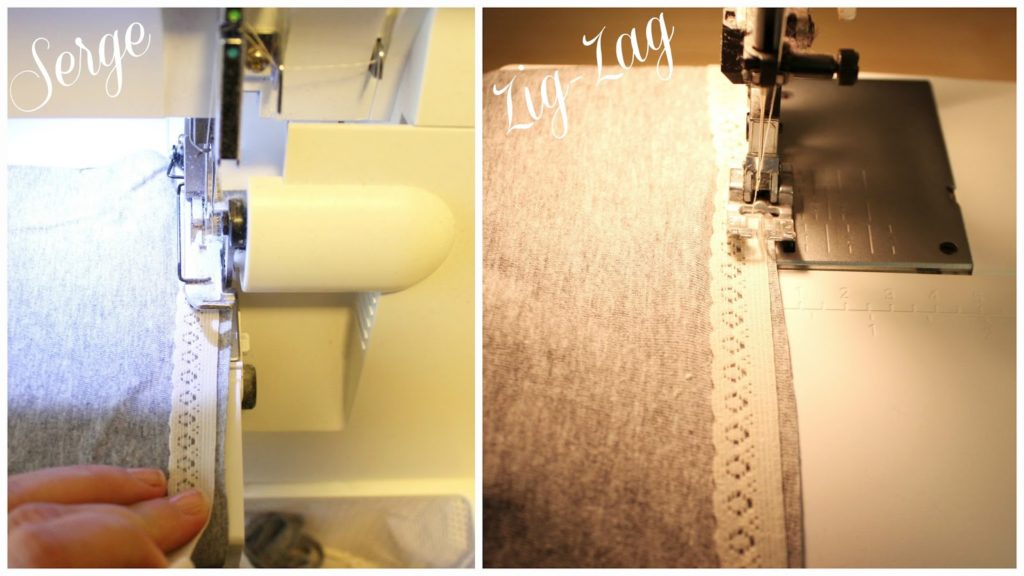
Method #1: Straight Edged Lace, turned under.
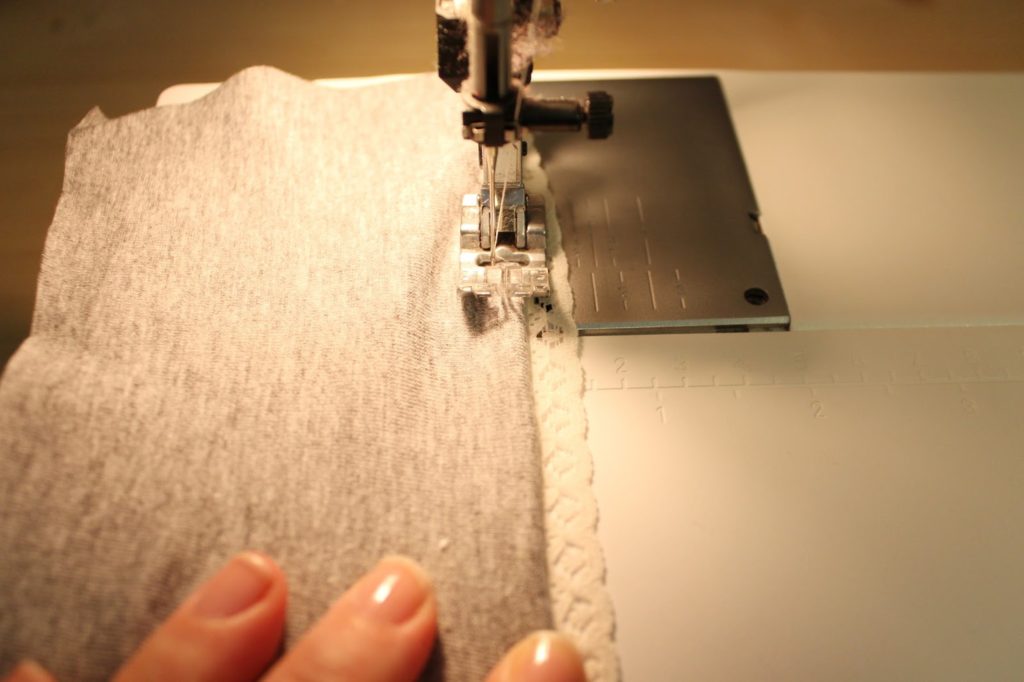
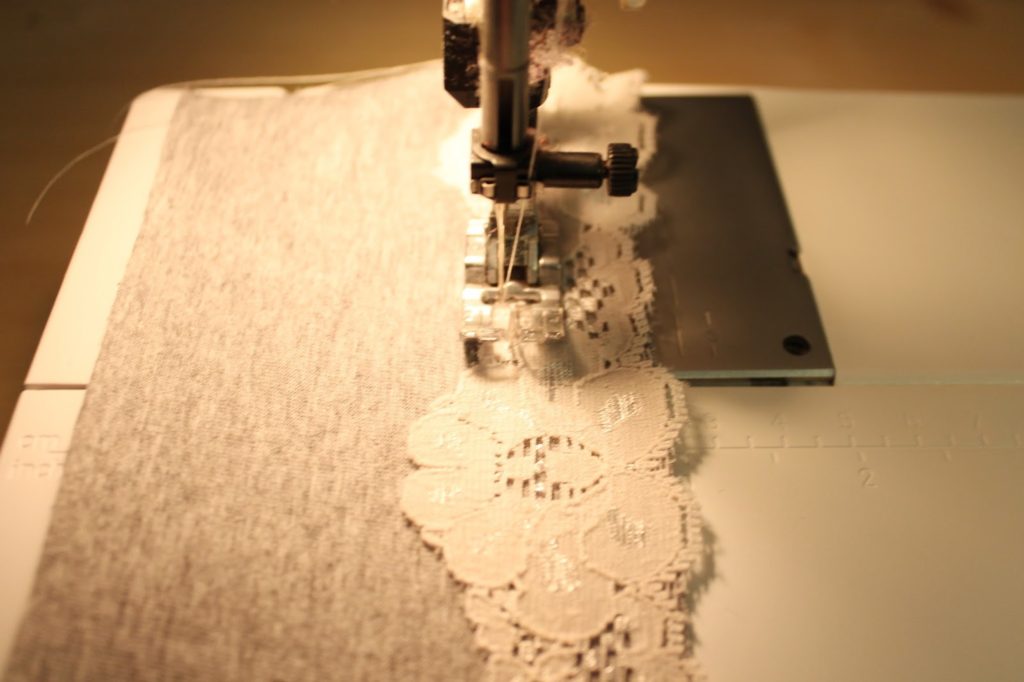
1. With right side of the lace against the right side of the fabric, and straight edge running alongside the hem, serge or zig-zag the lace onto the garment. Depending on the type of garment you are sewing will determine what type of tension you want to apply to the lace. If you are using lace around the edge a garment that normally would just be twin stitched at the hem, do not apply tension to the lace. If you are applying lace to an edge that should be contoured, like along the Zooey Bikini Bottom Pattern, apply a slight amount of tension to the lace as you baste it on. You will also want to slightly offset the lace, as you can see in the photos below.
2. For zig-zag stitched finishes – trim back any excess hem allowance extending beyond the lace. Serged/Overlocked finishes will not require trimming (obviously!).
Trim back excess- for zig-zag stitched finishes only.
Lace applied with serger.
3. Turn seam allowance under towards the wrong side of the garment. With the right side facing you, top stitch with a zig-zag stitch, just like you would if you were applying a picot-edge elastic.
Top stitching hem with a zig-zag stitch.
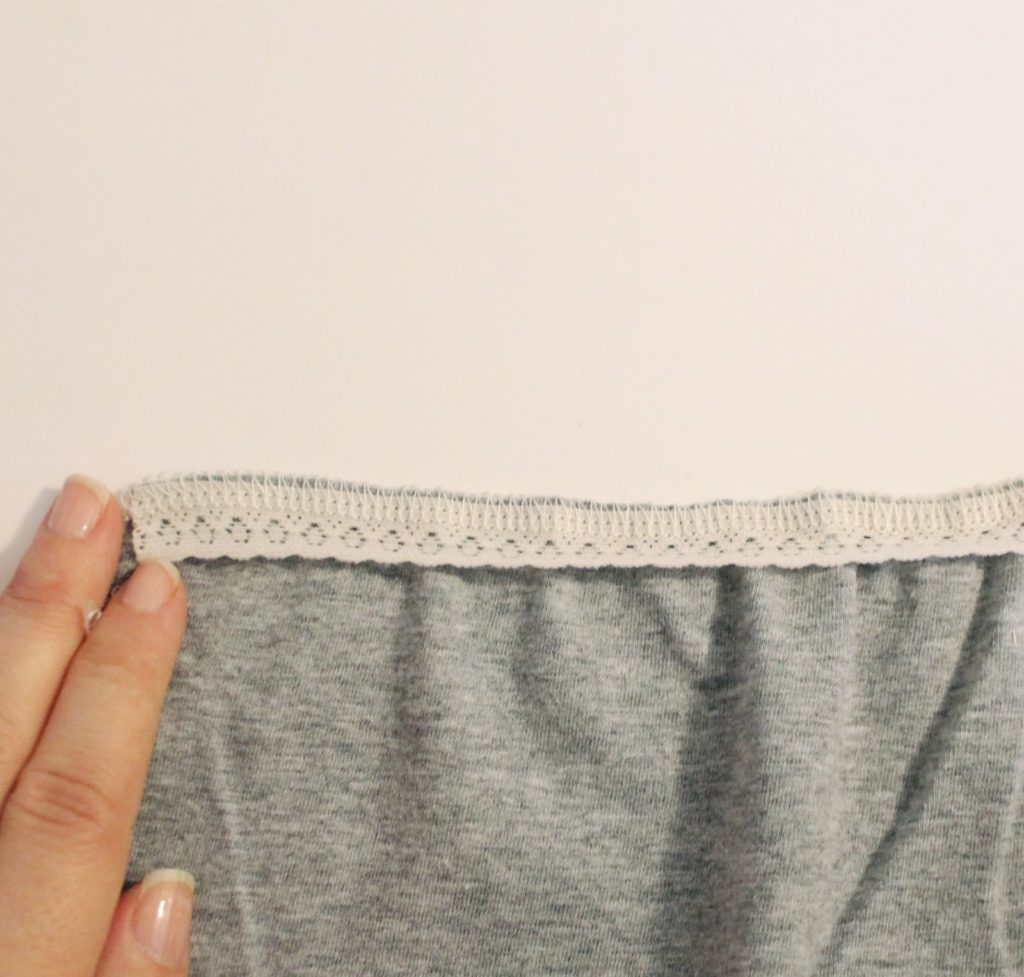
4. Voila! Now you have a lace trimmed edge that is as neat on the inside as it is on the outside.
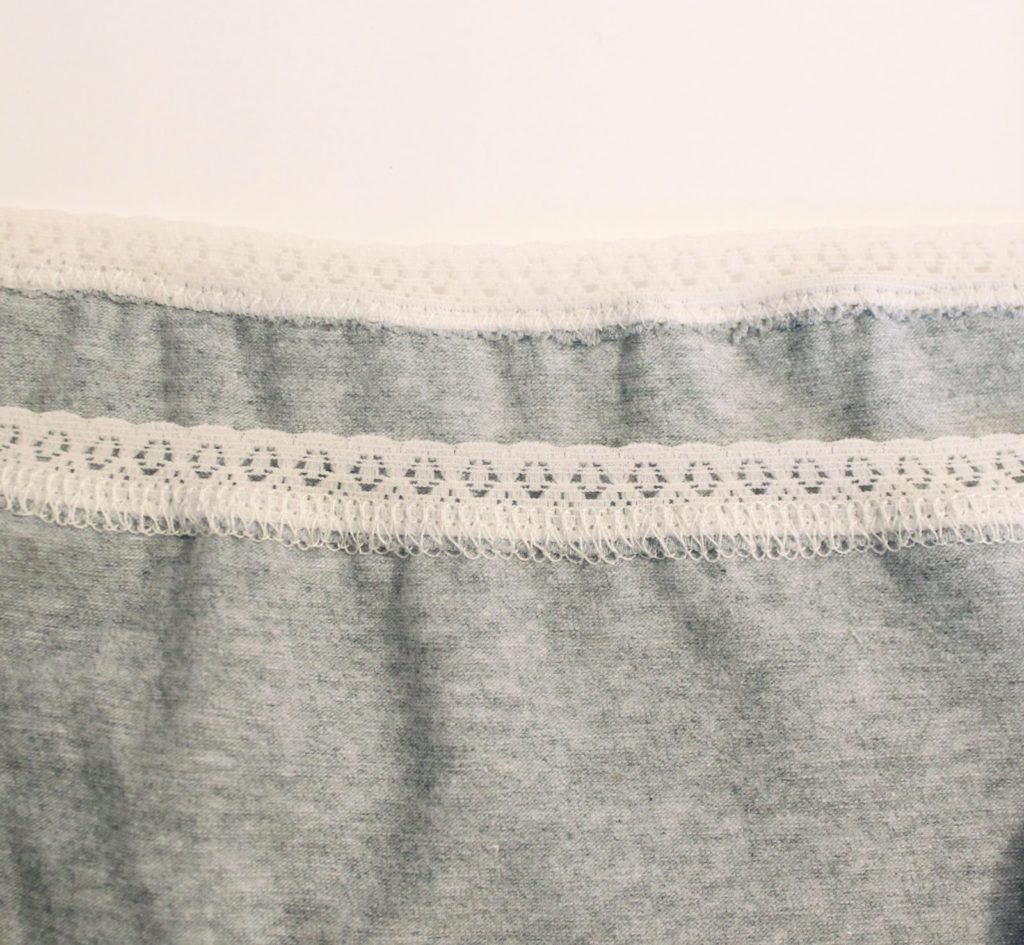
Inside view: Zig-zag & serged lace.
The exterior finish.
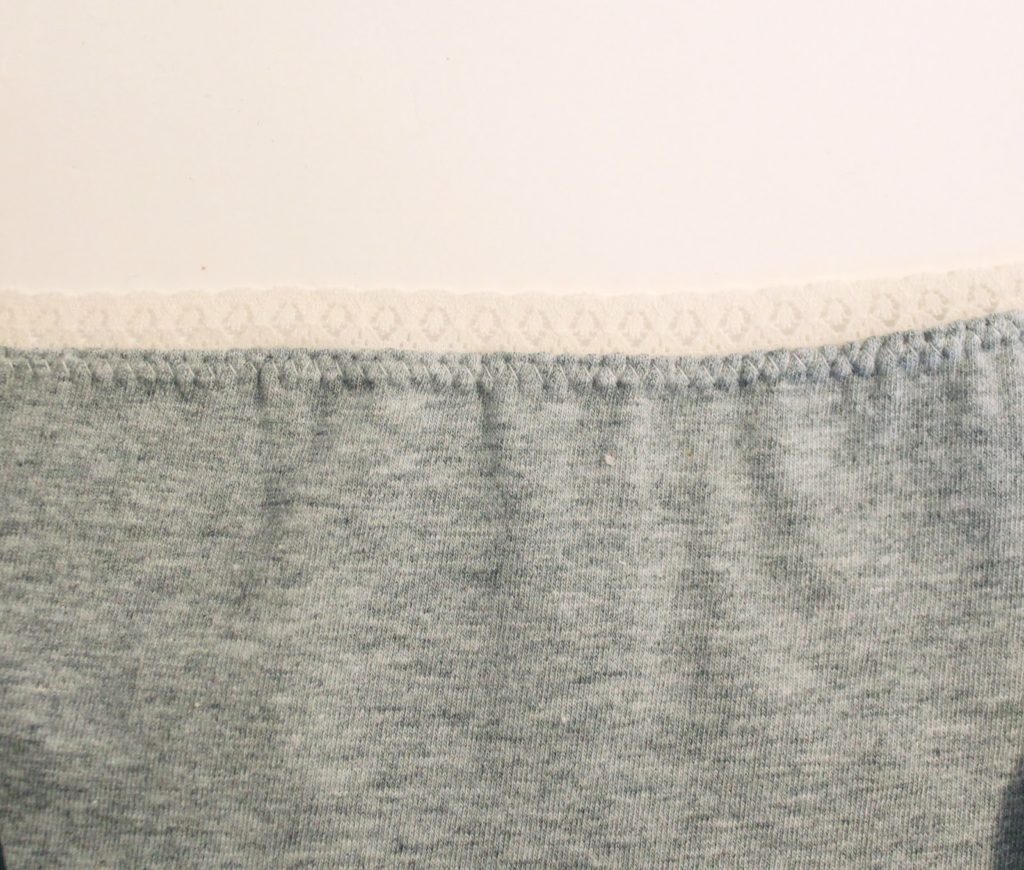
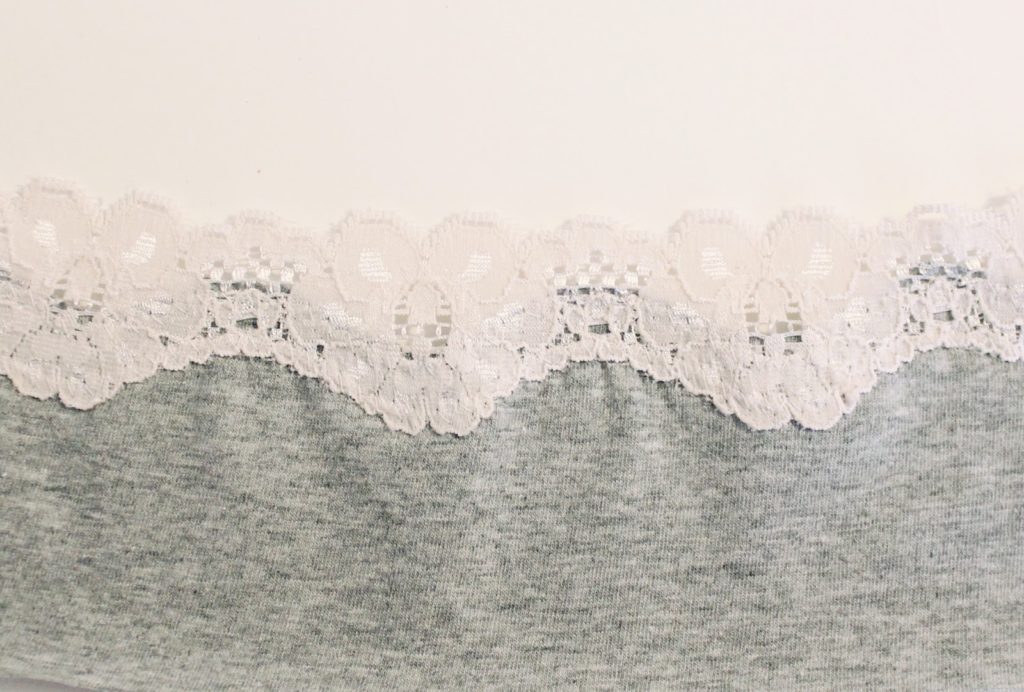
Method #2: Appliqued Scalloped lace.
1. In this method, place the lace directly on to the right side of your garment. The hem edge should run along (or slightly extend beyond) the straighter edge of the lace. Using a zig-zag stitch, stitch the lace along the scalloped edge directly onto the garment.
2. This is something I do for a little extra security: Stitch a second row of zig-zag stitches about 1/4″ down from the first row of stitches. This will ensure that your lace will not come loose from the garment.
Two rows of zig-zag stitches “just in case!”
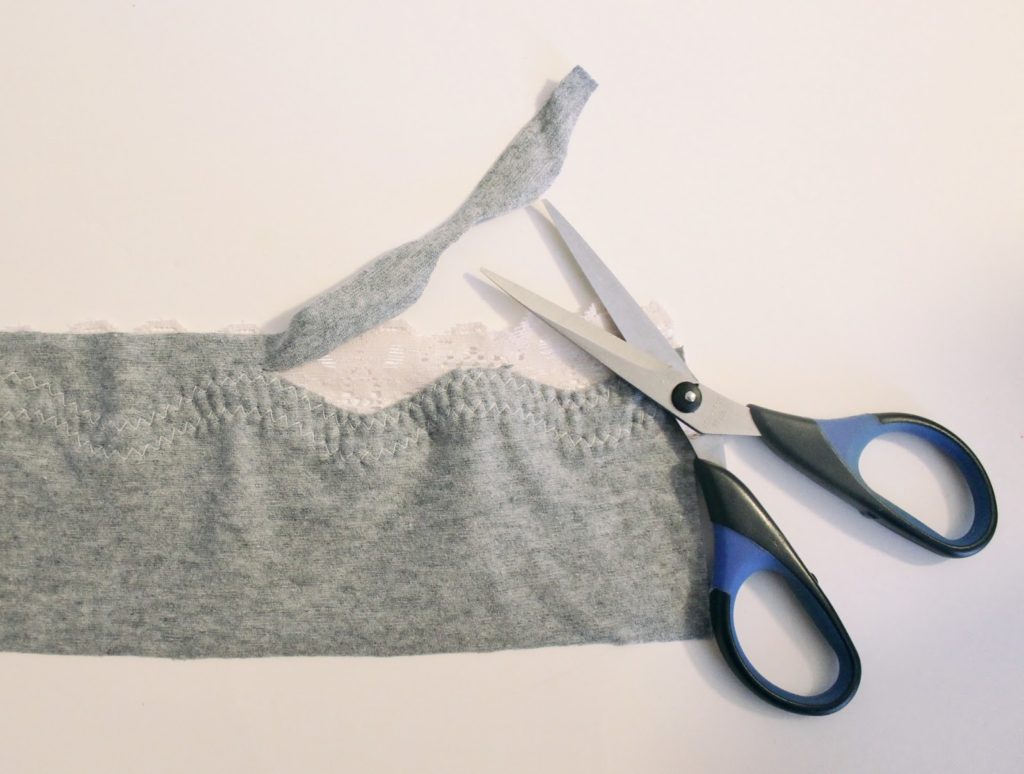
3. Looking at the wrong side of the garment, trim back your excess hem allowance.
Inside view
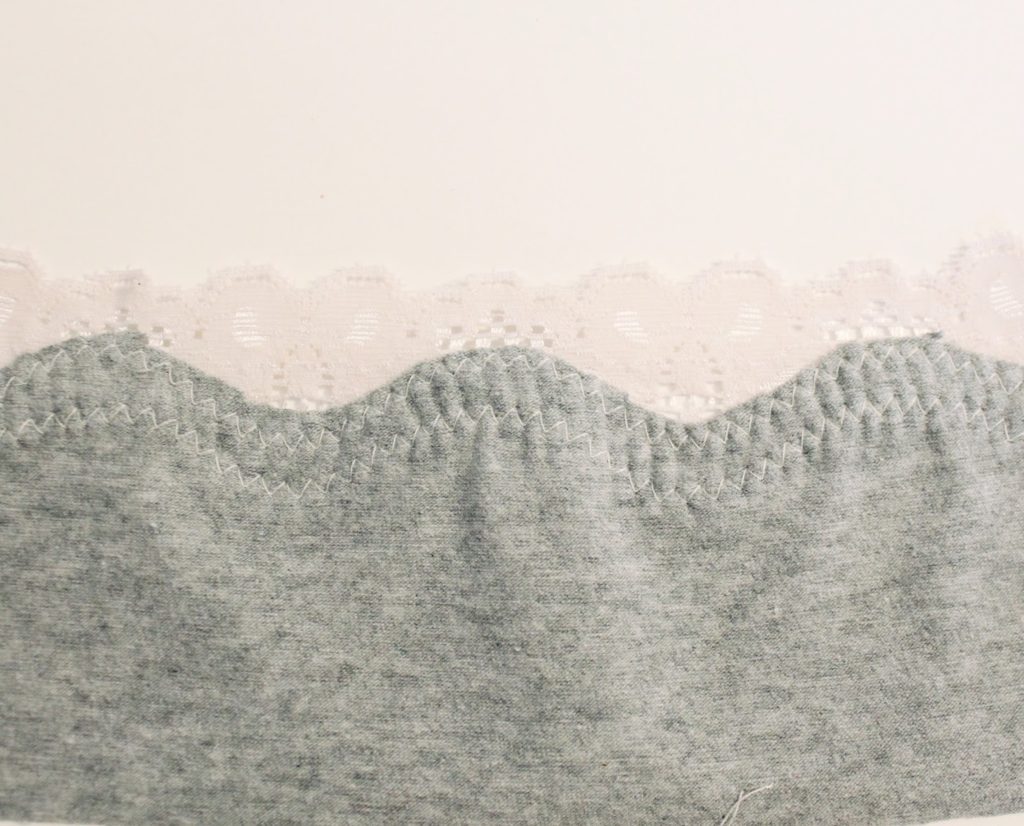
4. That’s it! Applying scalloped lace takes a little more time, but is a beautiful way to finish a garment.
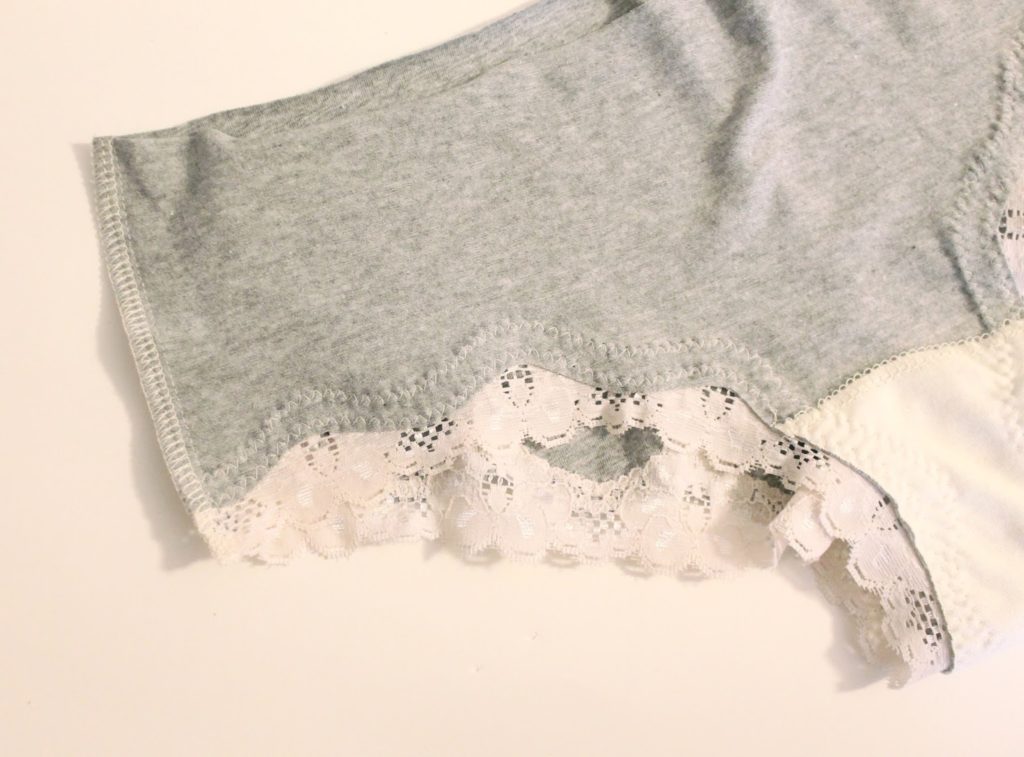
Exterior finish.
For comparison…
Lace edging is one of my personal favourite finishes. It’s pretty and comfortable. The one thing you will want to take note of when using lace is you likely will not want to throw the finished garment in the dryer. The heat from the dryer will quickly degrade the stretch lace. So, remember to hang to dry your lacy-dainties!
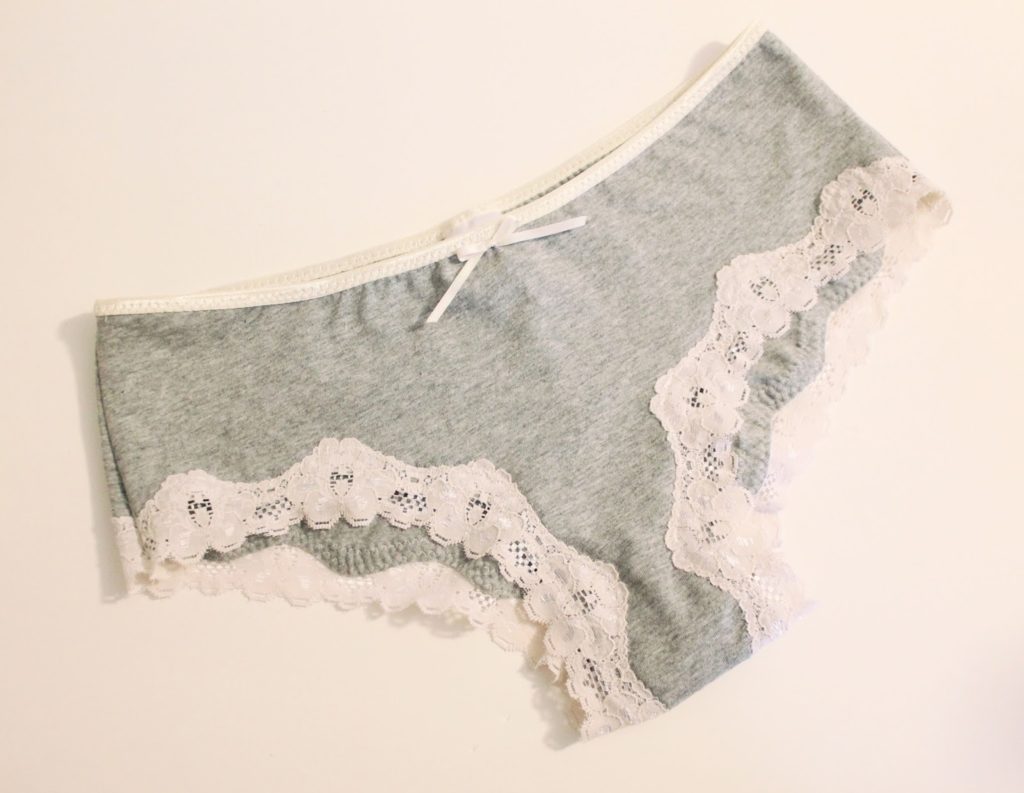
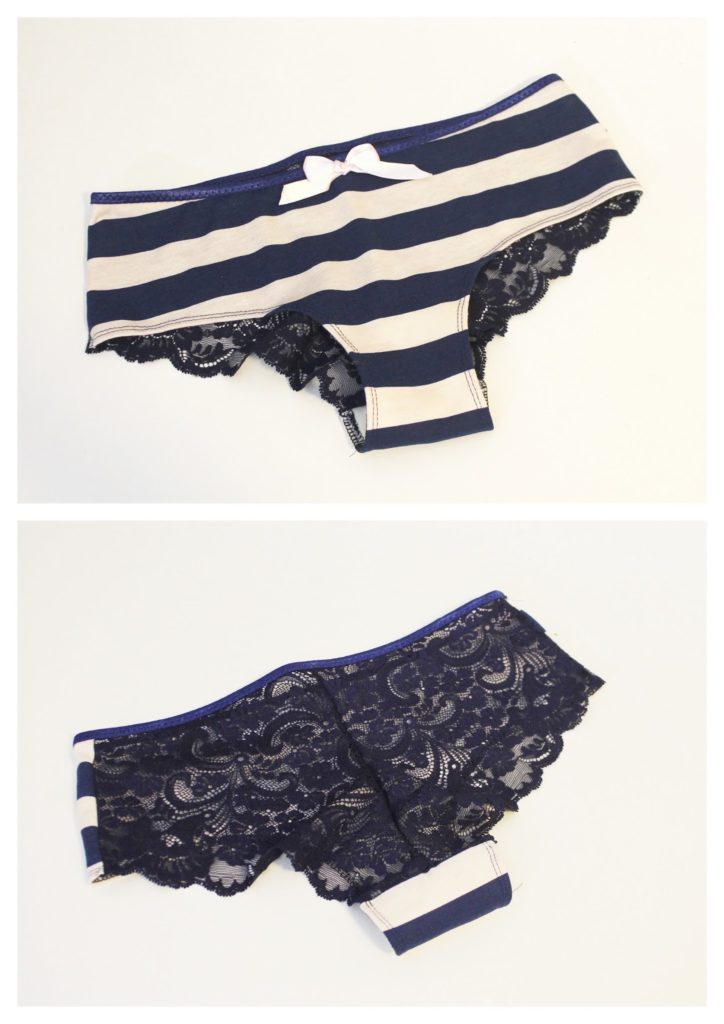
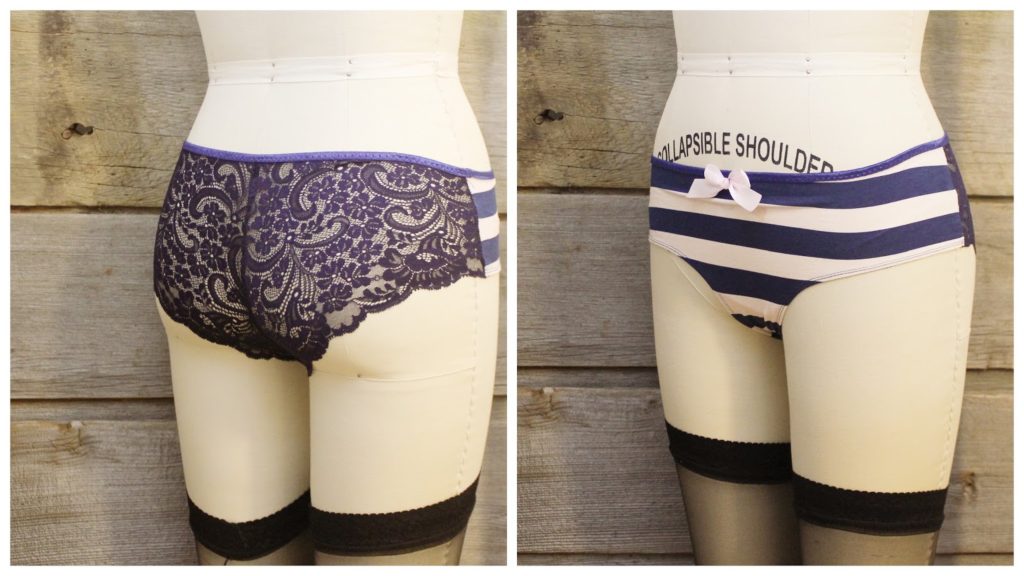
The Lola Pattern is another one of my favourites… they are great for under everyday clothing and I especially love them in lace under tight leggings and clingy pants (I’m a yoga-pants-everyday kind of girl, I even sometimes do yoga in them). Here, I’m going to show you how to use scalloped lace for the back of this pattern. There isn’t a huge change to the way you sew these using scalloped lace, but there are a few tricks to getting a nice finish. You can easily use the method I’ll be demonstrating here on the Grace Panties as well.
2. About 1/4 yard stretch knit fabric (like jersey) for the front.
3. About 1 yard scalloped stretch lace approximatly 7″ wide or more (you can use narrower lace, but will have to be creative with your center back waistline, or alter the rise).
4. Elastic for waist (I use Foldover Elastic)
5. Twin needle
6. Two Spools of thread
Instructions:
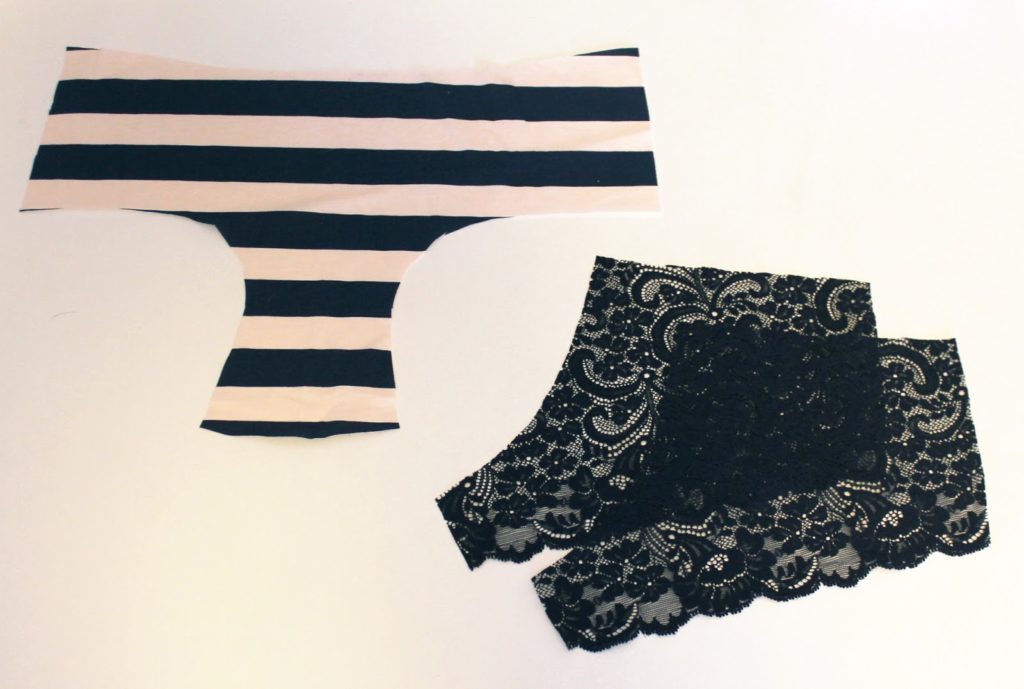
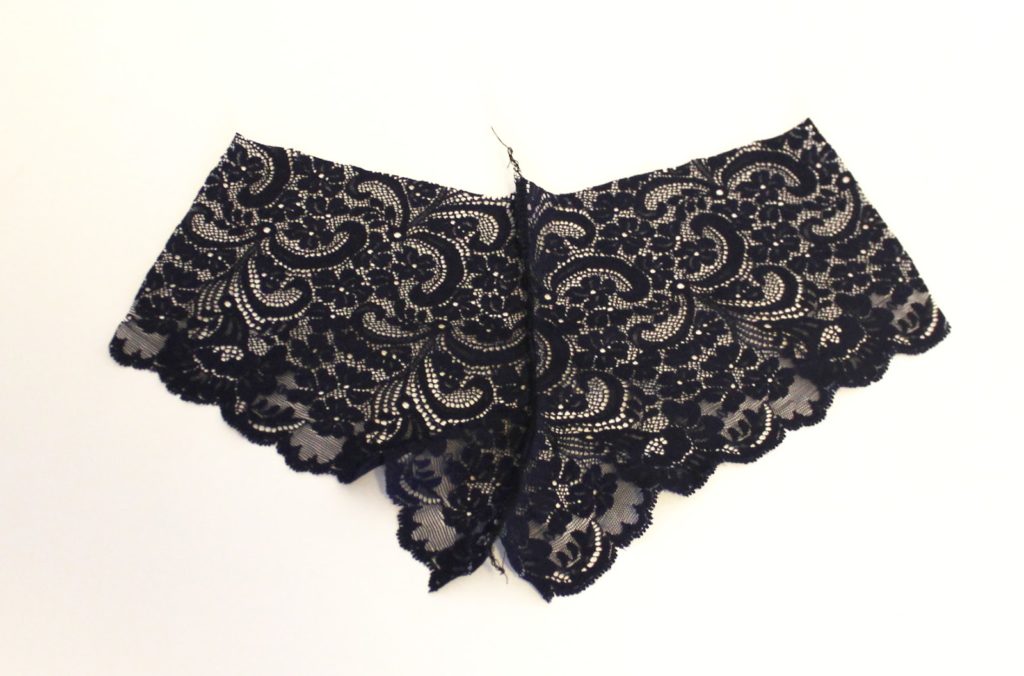
1. Using a pencil and ruler, draw a line along the leg opening of the Panties Back, approximately 1/4″ up from the original hemline. Place the pattern piece with the leg opening along the scalloped edge of the lace, so that the NEW hemline lines up with the scalloped edge. You will notice that the leg opening is slightly curved, so it won’t lay perfectly straight against the edge of the lace.
2. Cut out two pieces of lace in the manner described above, plus the Front Panties and Gusset Lining piece.
3. Using either a seger, or straight stitch and zig-zag, sew your Panties Back along the Center Back Seam.
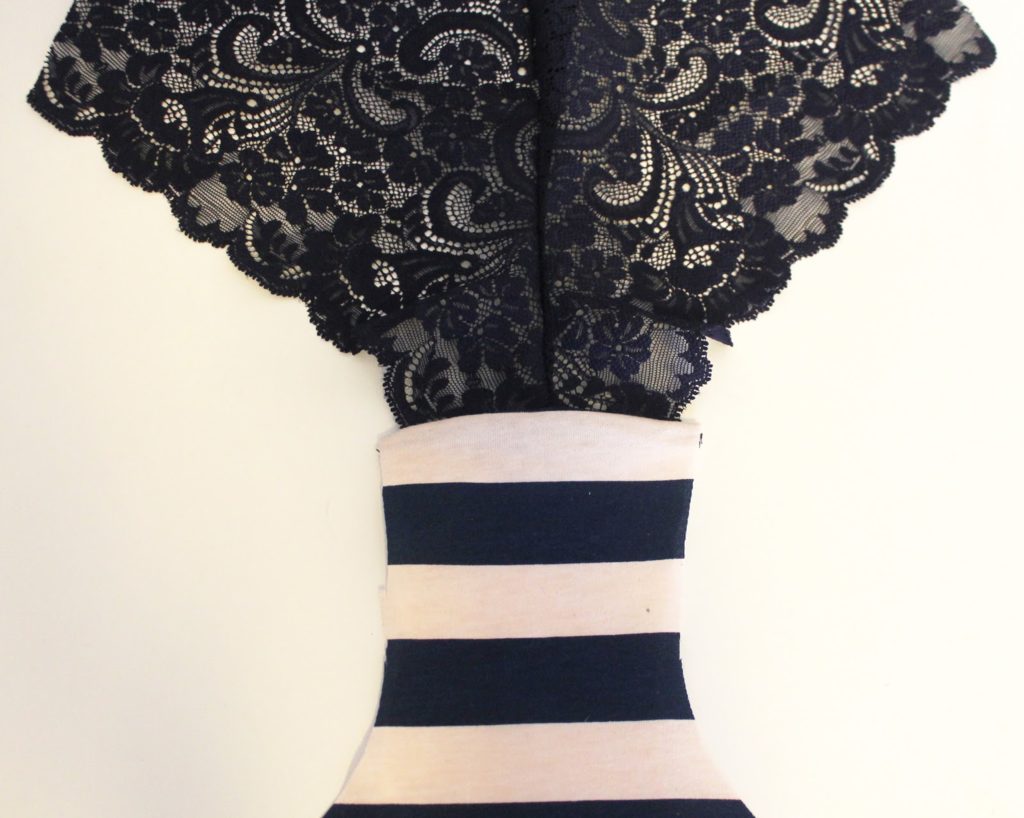
4. Assemble the crotch as indicated in the pattern instructions so that the seam allowance gets encased between the Panties Front and Gusset Lining. Your Panties Front & Gusset Lining Hems should extend beyond the scalloped edge of your lace by about 1/4″ on either side.
Hem Allowance on Panties Front extends beyond the finished edge of the stretch lace.
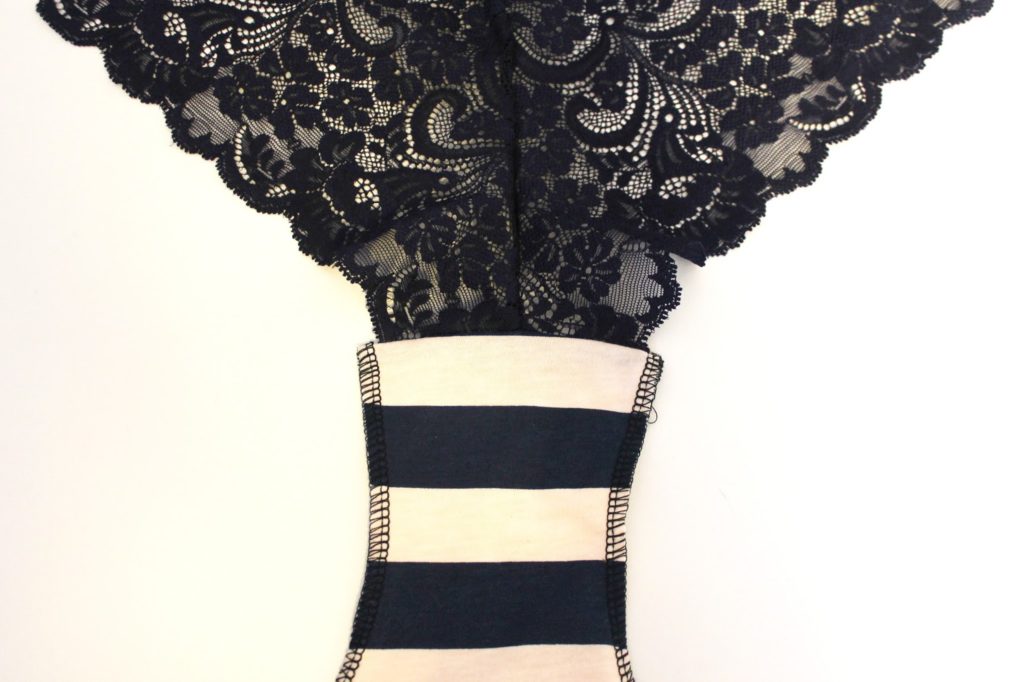
5. Using a serger or zig-zag stitch, finish the raw edges of the Panties front.
6. Turn the hems under by approximately 1/4″ and top stitch down using a twin needle.
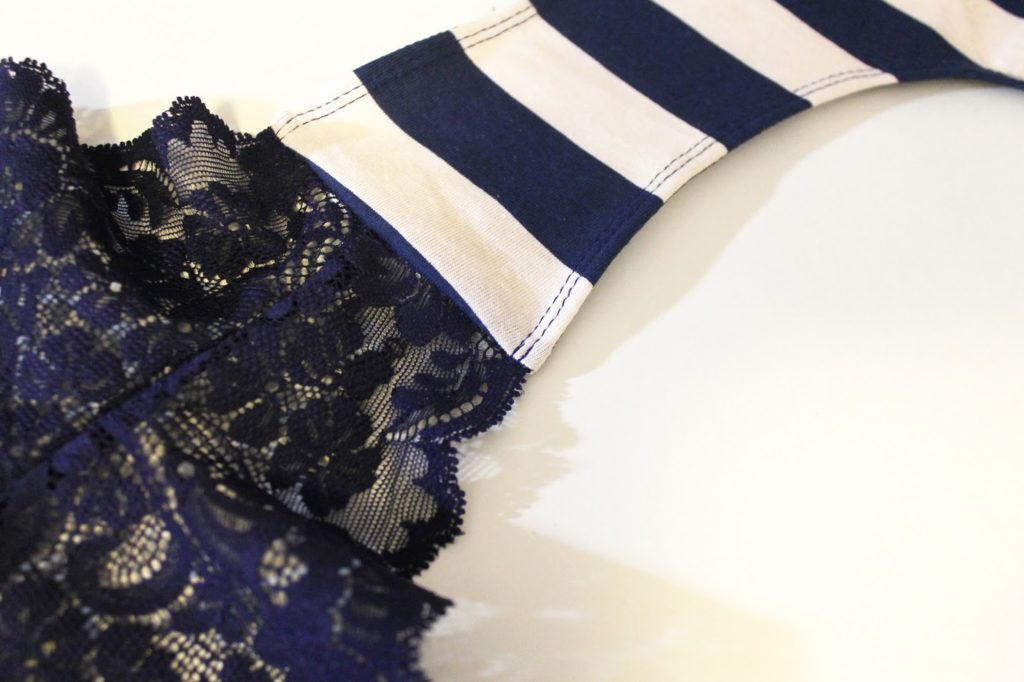
7. With a straight stitch, sew your side seams so that scalloped edge of lace meets up with the finished edge of the panties front. Be sure to backtack at the beginning and end of this seam.
Scalloped Edge of lace meets up evenly with twin-stitched hemline.
8. Tie off any loose threads, and press the seam allowance towards the Center Front of the garment. Sew a small bartack along the hemline, anchoring the seam allowance in place. I do this because it is a potential weak point in the garment, where stitches may be prone to break. By tacking the seam allowance down, you will have a more secure join.
9. Finish with waistline elastic and embellishments as indicated in the pattern.
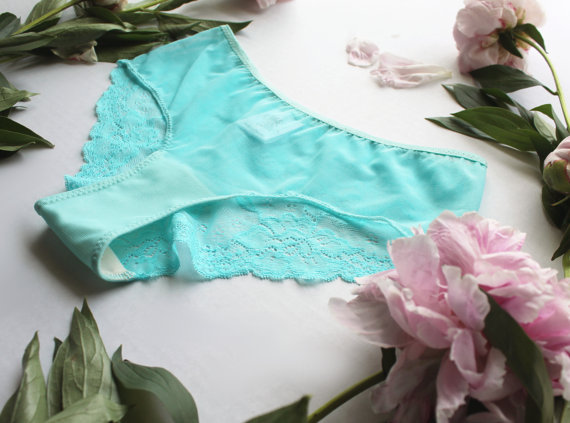
That’s it! It’s pretty easy to substitute with scalloped lace. I’ll leave you with a few pieces of inspiration…!
We use cookies on our website to give you the most relevant experience by remembering your preferences and repeat visits. By clicking “Accept All”, you consent to the use of ALL the cookies. However, you may visit "Cookie Settings" to provide a controlled consent.
This website uses cookies to improve your experience while you navigate through the website. Out of these, the cookies that are categorized as necessary are stored on your browser as they are essential for the working of basic functionalities of the website. We also use third-party cookies that help us analyze and understand how you use this website. These cookies will be stored in your browser only with your consent. You also have the option to opt-out of these cookies. But opting out of some of these cookies may affect your browsing experience.
Necessary cookies are absolutely essential for the website to function properly. These cookies ensure basic functionalities and security features of the website, anonymously.
Cookie
Duration
Description
cookielawinfo-checkbox-analytics
11 months
This cookie is set by GDPR Cookie Consent plugin. The cookie is used to store the user consent for the cookies in the category "Analytics".
cookielawinfo-checkbox-functional
11 months
The cookie is set by GDPR cookie consent to record the user consent for the cookies in the category "Functional".
cookielawinfo-checkbox-necessary
11 months
This cookie is set by GDPR Cookie Consent plugin. The cookies is used to store the user consent for the cookies in the category "Necessary".
cookielawinfo-checkbox-others
11 months
This cookie is set by GDPR Cookie Consent plugin. The cookie is used to store the user consent for the cookies in the category "Other.
cookielawinfo-checkbox-performance
11 months
This cookie is set by GDPR Cookie Consent plugin. The cookie is used to store the user consent for the cookies in the category "Performance".
viewed_cookie_policy
11 months
The cookie is set by the GDPR Cookie Consent plugin and is used to store whether or not user has consented to the use of cookies. It does not store any personal data.
Functional cookies help to perform certain functionalities like sharing the content of the website on social media platforms, collect feedbacks, and other third-party features.
Performance cookies are used to understand and analyze the key performance indexes of the website which helps in delivering a better user experience for the visitors.
Analytical cookies are used to understand how visitors interact with the website. These cookies help provide information on metrics the number of visitors, bounce rate, traffic source, etc.
Advertisement cookies are used to provide visitors with relevant ads and marketing campaigns. These cookies track visitors across websites and collect information to provide customized ads.