Browsing Tag

ooh la la

Ohh La La Pin Up Sew Along Pt 2… Cutting your Fabric

Uncategorized

 Now that you’ve made the necessary adjustments to your pattern, you can cut your fabric! I am using the same pink satin I used for the contrast on my corset.  It has the slightest amount of stretch to it.

 As I mentioned before, I am cutting my cups on the bias.  The reason I am doing this is I find the cup forms better this way.  You can really stretch the fabric around a pressing ham to get a shape you like.

I am using a knit lining in a light beige colour.  I am cutting my lower cup only.  You can line the entire cup if you like.  I am lining only the lower cup, because it adds a bit of support, and will help me create a quilted effect with the decorative stitching I plan on doing.

I am also using a stretch lace for the centre back and side front panels of the corselet. I’ve cut these, and the rest of the corselet pieces on the straight of grain.

What fabric did you choose? Are you planning on lining your garment?

Ohh La La Pin Up Sew Along Pt 2… Sewing Your Muslin

Uncategorized

In order to get the right fit, which is very tricky and specific with bras, it’s really important we sew a muslin.  You can use any scrap fabric of your choosing, so long as it is a similar weight as what your final garment will be sewn in.  If you plan on using any stretch fabric in your finished bra, do the same with your muslin, or you won’t get the same fit. I am using a stretch fabric for the centre back panel.

Cut out your pieces, and assemble as called for in the pattern.  Remember to mark your darts! I always forget to do this…

Sew your bra together, leaving one side open (or open at the back if you plan on using a back closure).  Try it on over a fitted shirt and no bra, or an unpadded bra.  Pin it in place and see how it fits!  I use a pen to mark any alterations that need to be made, directly onto my muslin.

Pin and mark any alterations.  Mine fit pretty good, but needed to be taken in along the upper side seam.  I suspect I added a little too much during my original pattern alteration!

Transfer your markings onto your pattern.  You are now ready to start cutting your fabric! Are you having any trouble with the fit?

If you are finding that the cups are too small, increase the curve of the upper and lower cup.  If you are finding the cups are too large, decrease the curve of the upper and lower cups.  Anna has demonstrated how to size down the cups Here. If you need to size up, do the opposite of what she does.  It’s really that easy.  You can also play with the darts to alter the depth of the cup.

After sewing my muslin I decided to change mine from a side close bra to a back close bra.  I did this by simply removing the “cut on fold” indication and adding 1/2″ seam allowance along the center back seam.  I also decided I would add a panel of stretch to the side front, under the cups.  What changes are you making after sewing your muslin?

Ohh La La Pin Up Sew Along Pt 2… Preparing your Pattern and making adjustments for Long Line Version.

Uncategorized
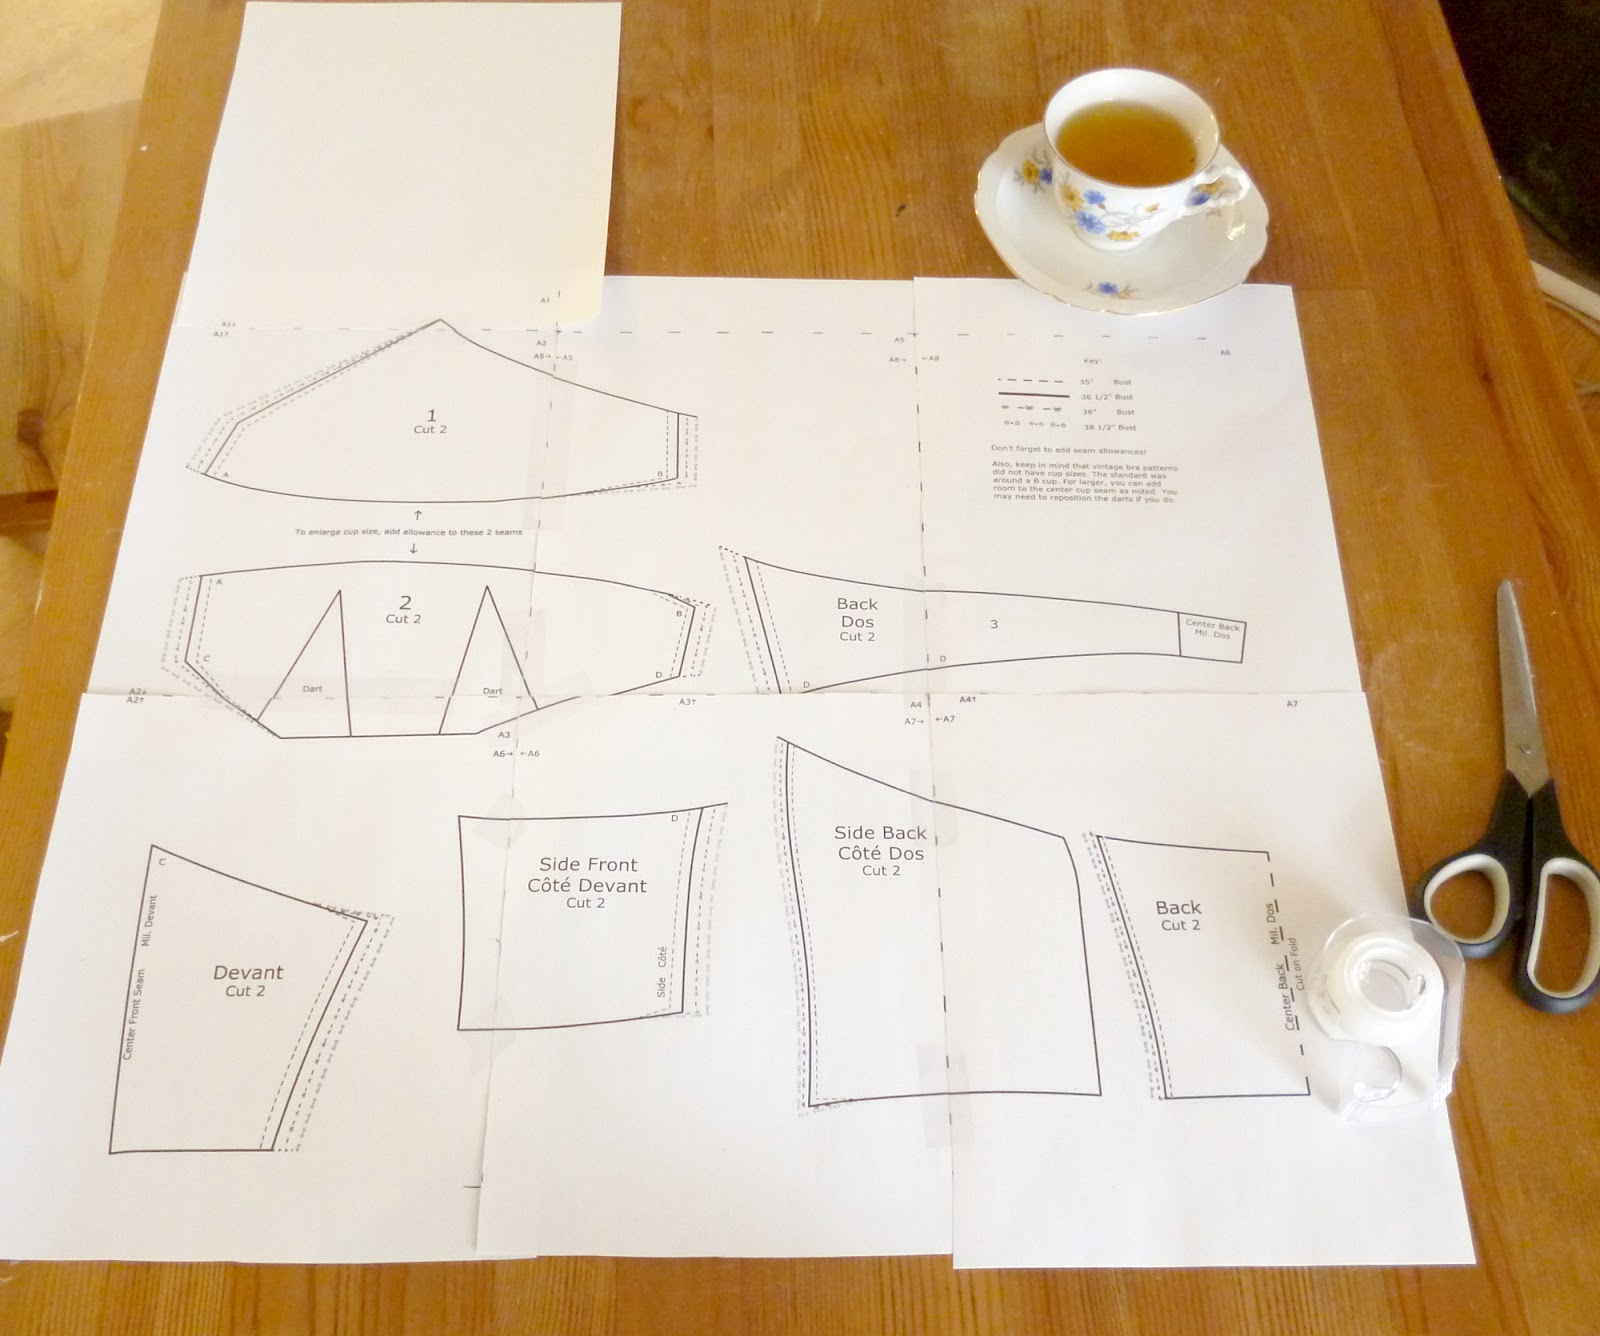
Before we cut and sew our beautiful fabric, we will have to prepare our pattern and make a muslin.  Vintage patterns can be tricky, so it’s important we test our fit.  If you are making the longline bra, you may also want to make some adjustments.

 Start by printing and assembling your PDF pattern.  Not sure how to do this? Follow Anna’s instructions from the corset section of our Sew Along.

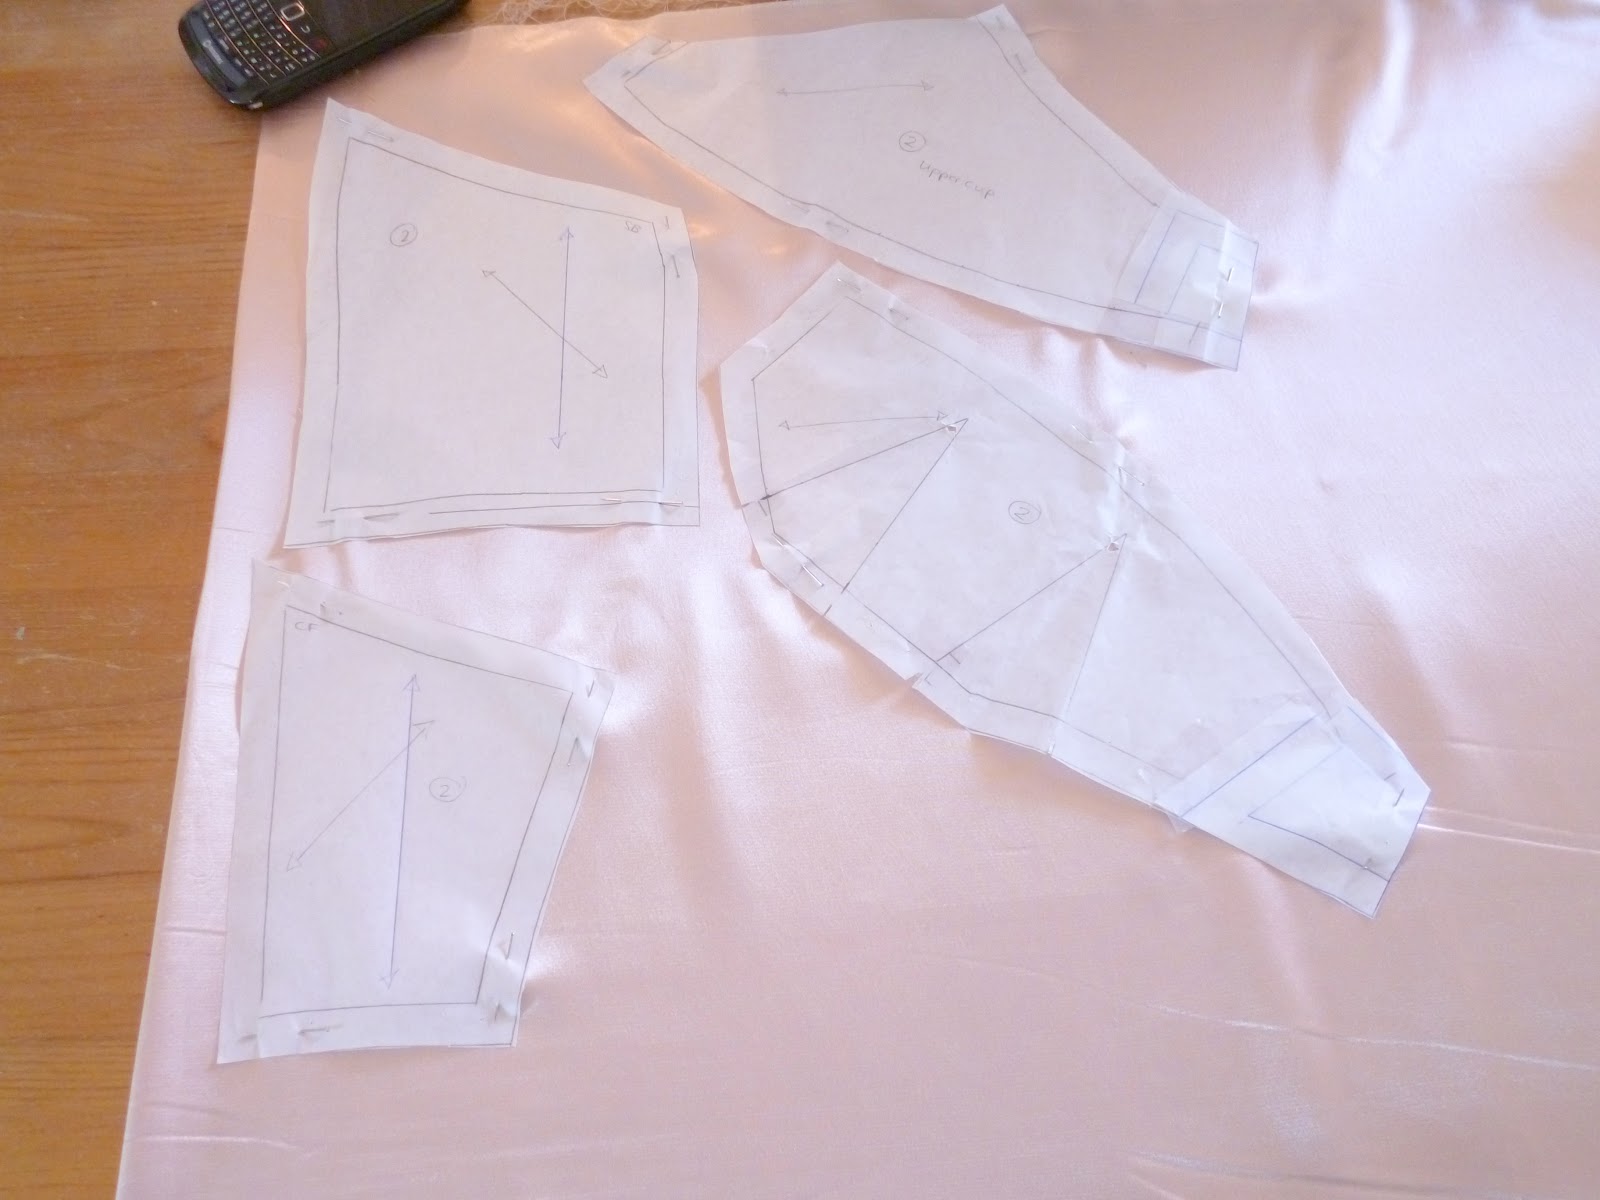
I am making some alterations to my pattern, so I am tracing mine out, but Anna has added enough space between pattern pieces for you to add the Seam Allowance directly to the pattern if you wish to do so!

I am adding 1/2″ Seam Allowance to ALL edges.  I am applying a 1/2″ elastic to the top and bottom edges of my bra, so I am adding 1/2″ to the top and bottom edges of my pattern.  If you are  binding your top and bottom edges, do not add Seam Allowance.  If you are turning your edges under, add the appropriate amount of seam allowance.

For the Long Line Bra, the original Pattern instructions tell us to OMIT the darts for the lower cup. I sewed a couple of test garments, and this just doesn’t seem to work right for me.  So, I sewed a cup with just the FIRST dart, and omitted the second dart.  I also sewed a cup with both darts.  I found, for myself, the cup with both darts contoured much better than the cup with one dart.  If you are larger chested, a D cup or over, you will likely prefer the cup with 2 darts.  This version will require additional pattern manipulation.

I highly recommend you sew the cups both ways to see which one contours around your body best.  You literally just need to sew the cup and hold it over your… ahem… boob.

Follow below if you wish to keep both darts in the long-line version of the bra.

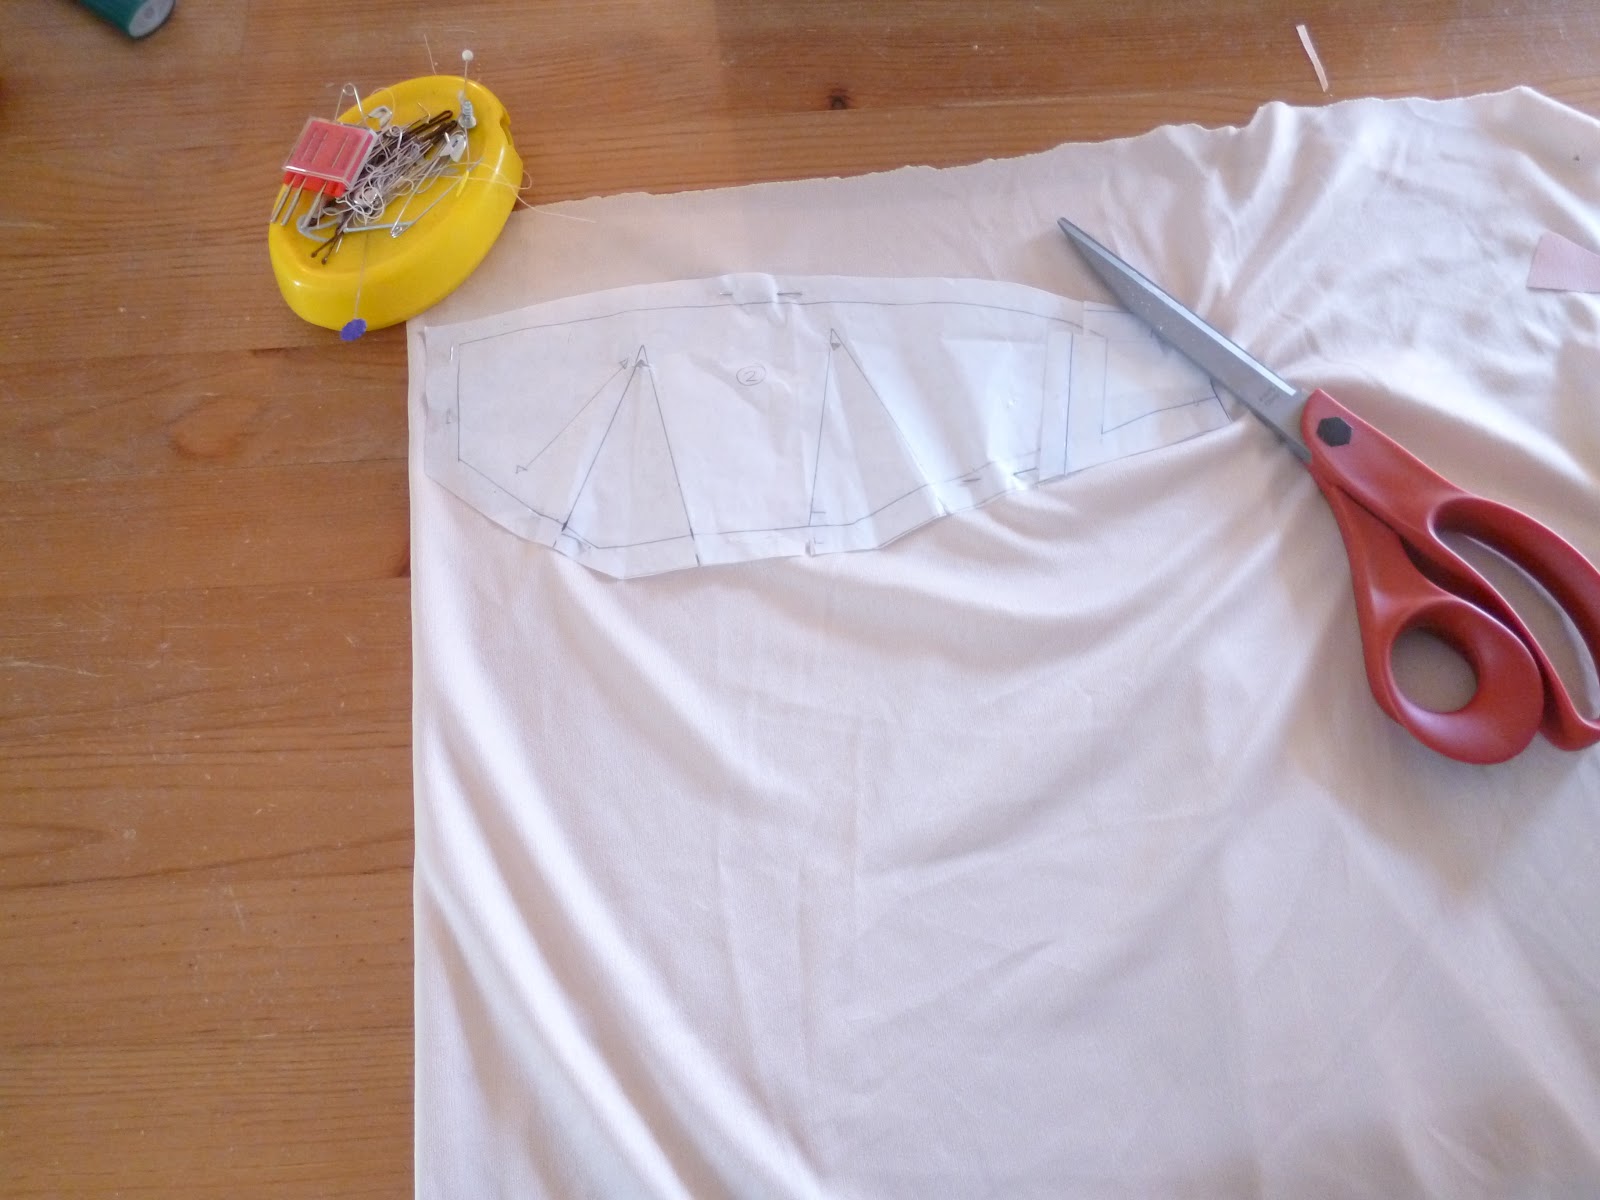
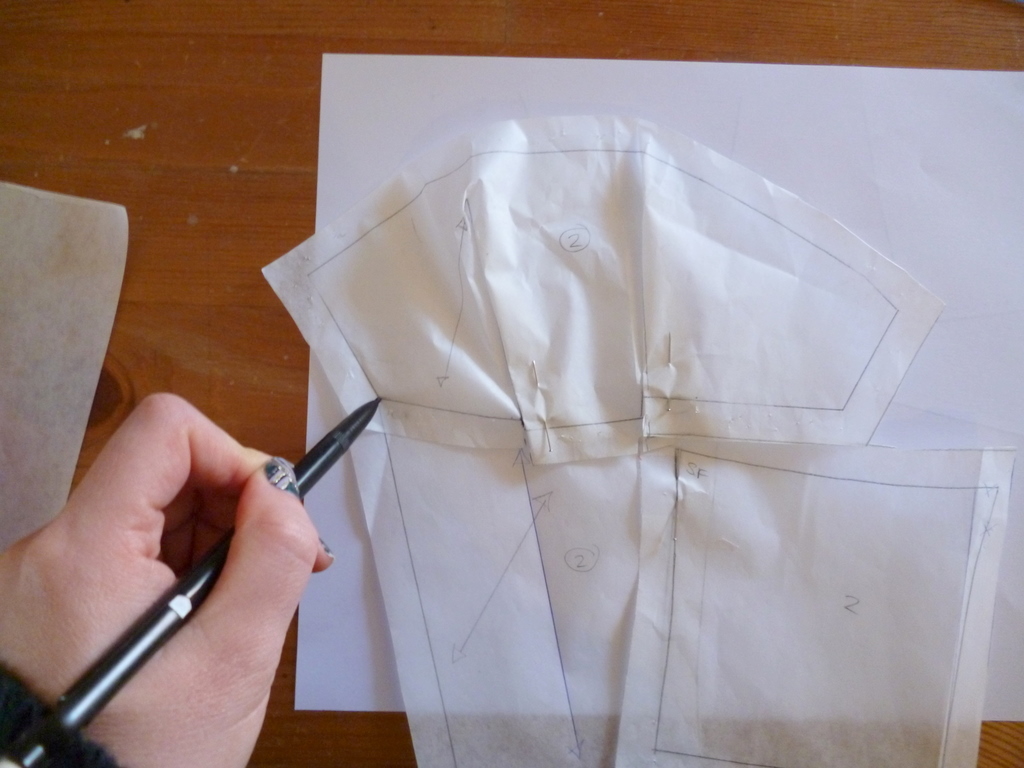
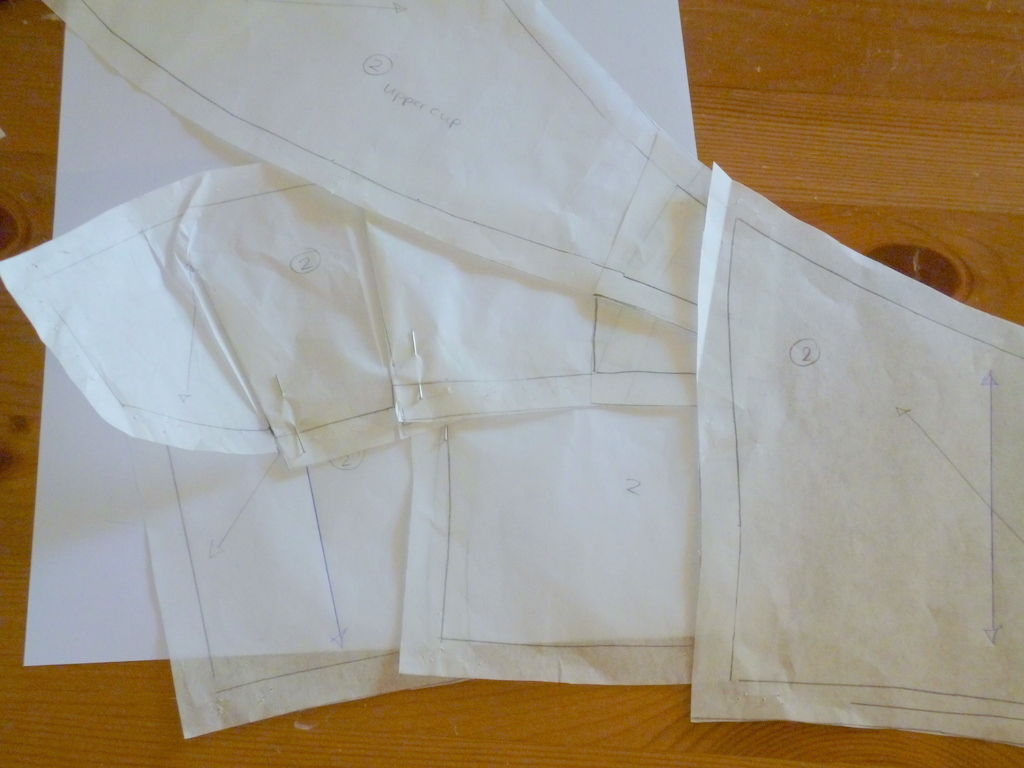
Start by closing your darts – I have just pinned mine closed.  I have also pinned my front corselette pieces together, stitching lines lined up.

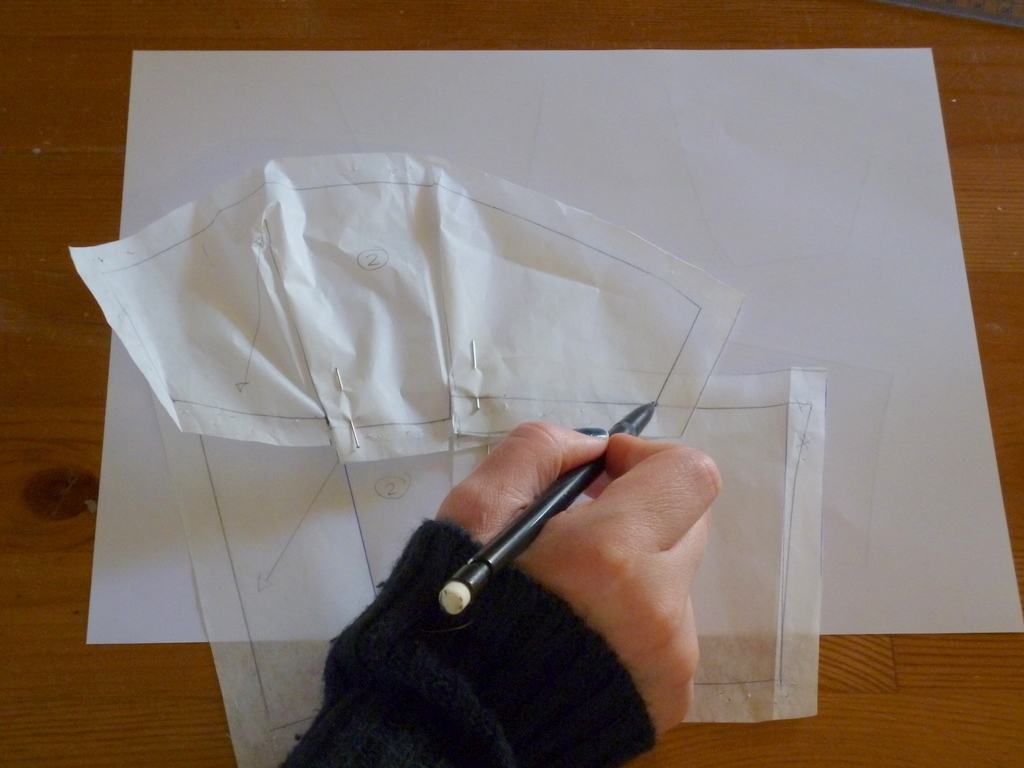
Walk your lower cup along the upper edge of the corselette.

When you get to the end you will notice you are about 1 1/2″ short (or more, if you are cutting a larger size)

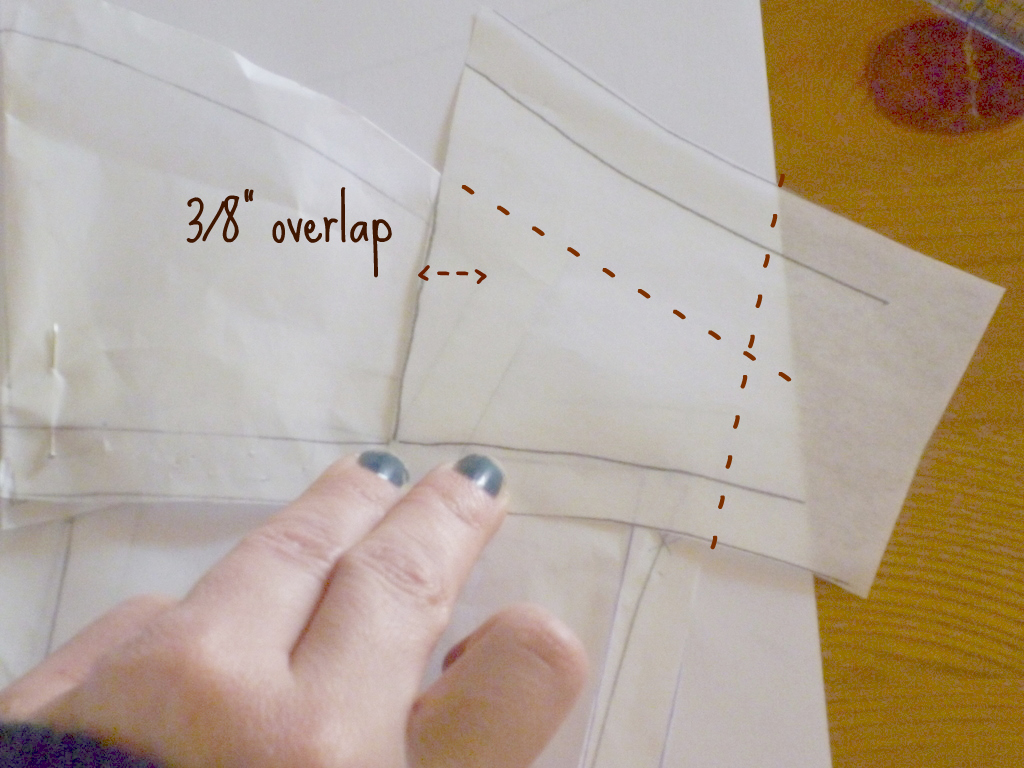
I traced a small portion of the back band to make an “Extension” along our lower cup.  Align the lower line so that it creates a smooth line along the bottom of the lower cup.  The side seam of the band should over lap the side seam of the lower cup in the top corner by about 3/8″.  Extend your cutting lines as shown below.

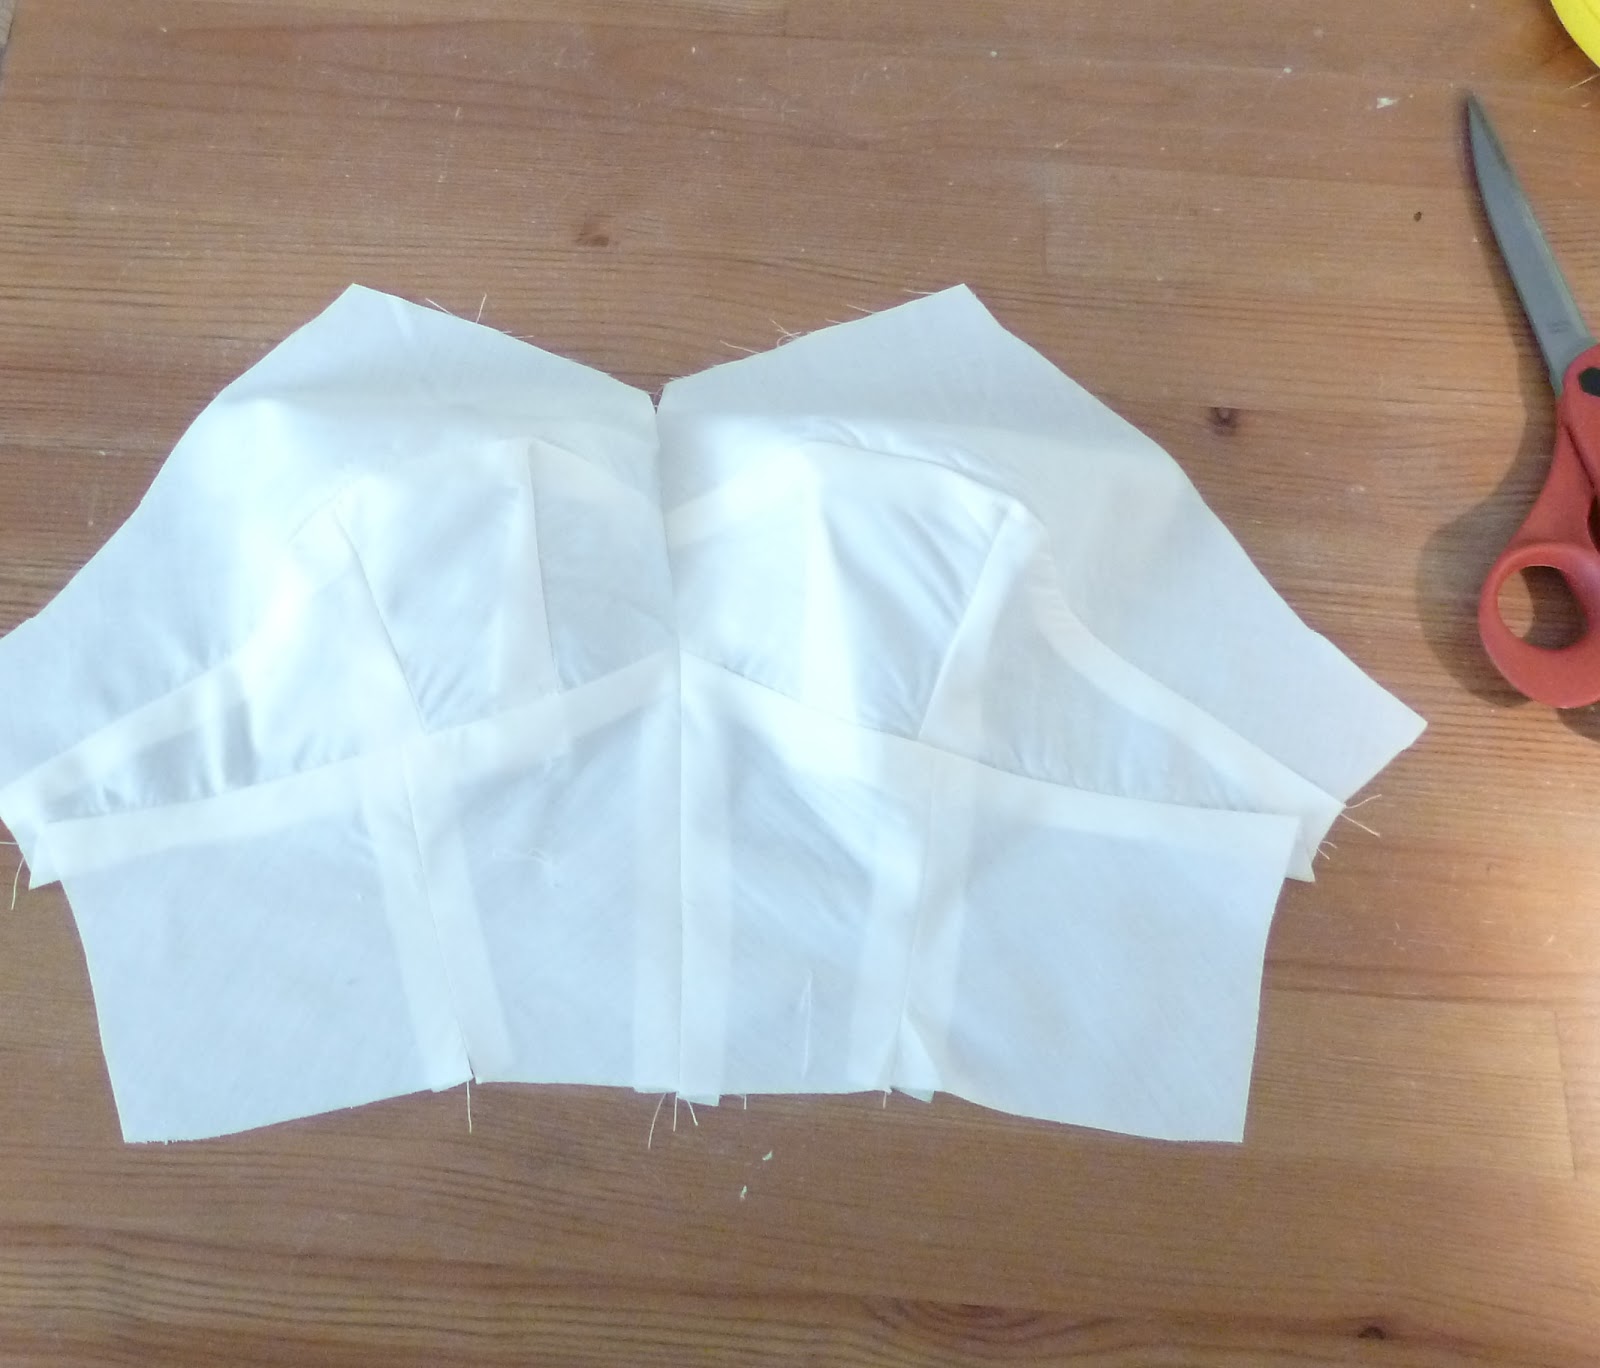
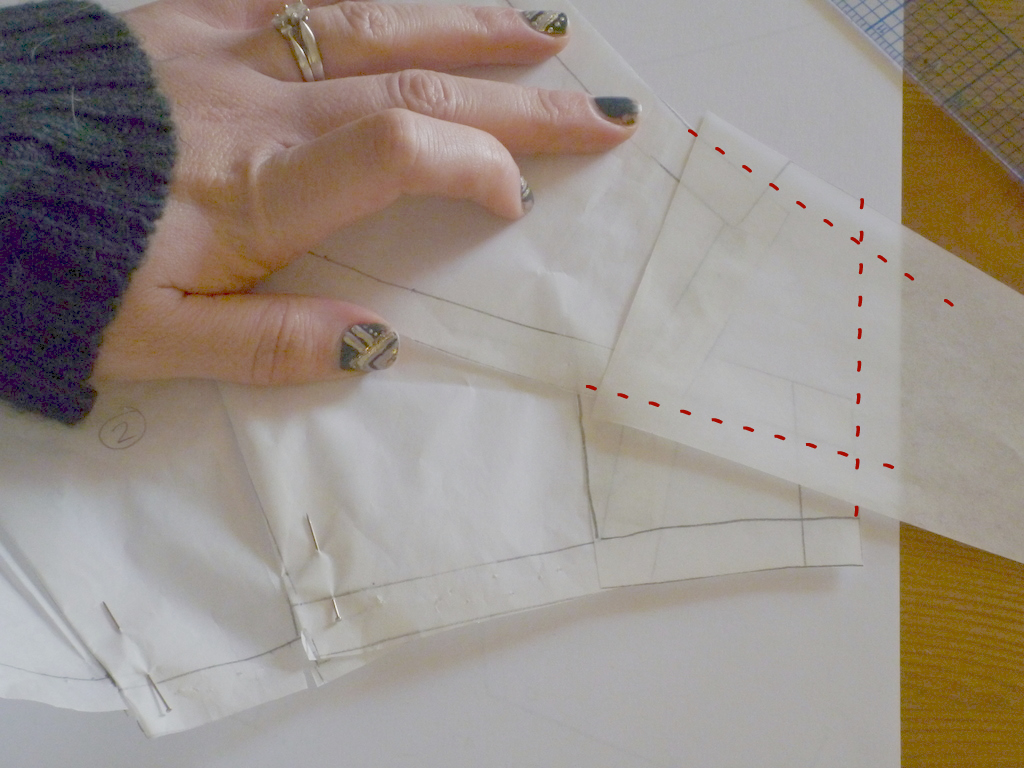
Walk you upper cup along the lower cup.  You’ll notice you are also short here.  Tape a scrap piece of tracing paper along the side seam edge of the upper cup. Extend your cutting lines.  The lower seam of the upper cup should follow the upper seam of the lower cup. Extend a straight line to form the side seam, using the lower cup side seam line as a guide.

 We now have an extension along the side of the upper and lower cup.  Walk your pattern to make sure your lines match.  I found mine was about 1/2″ short, which I then added along the top edge of my upper cup.

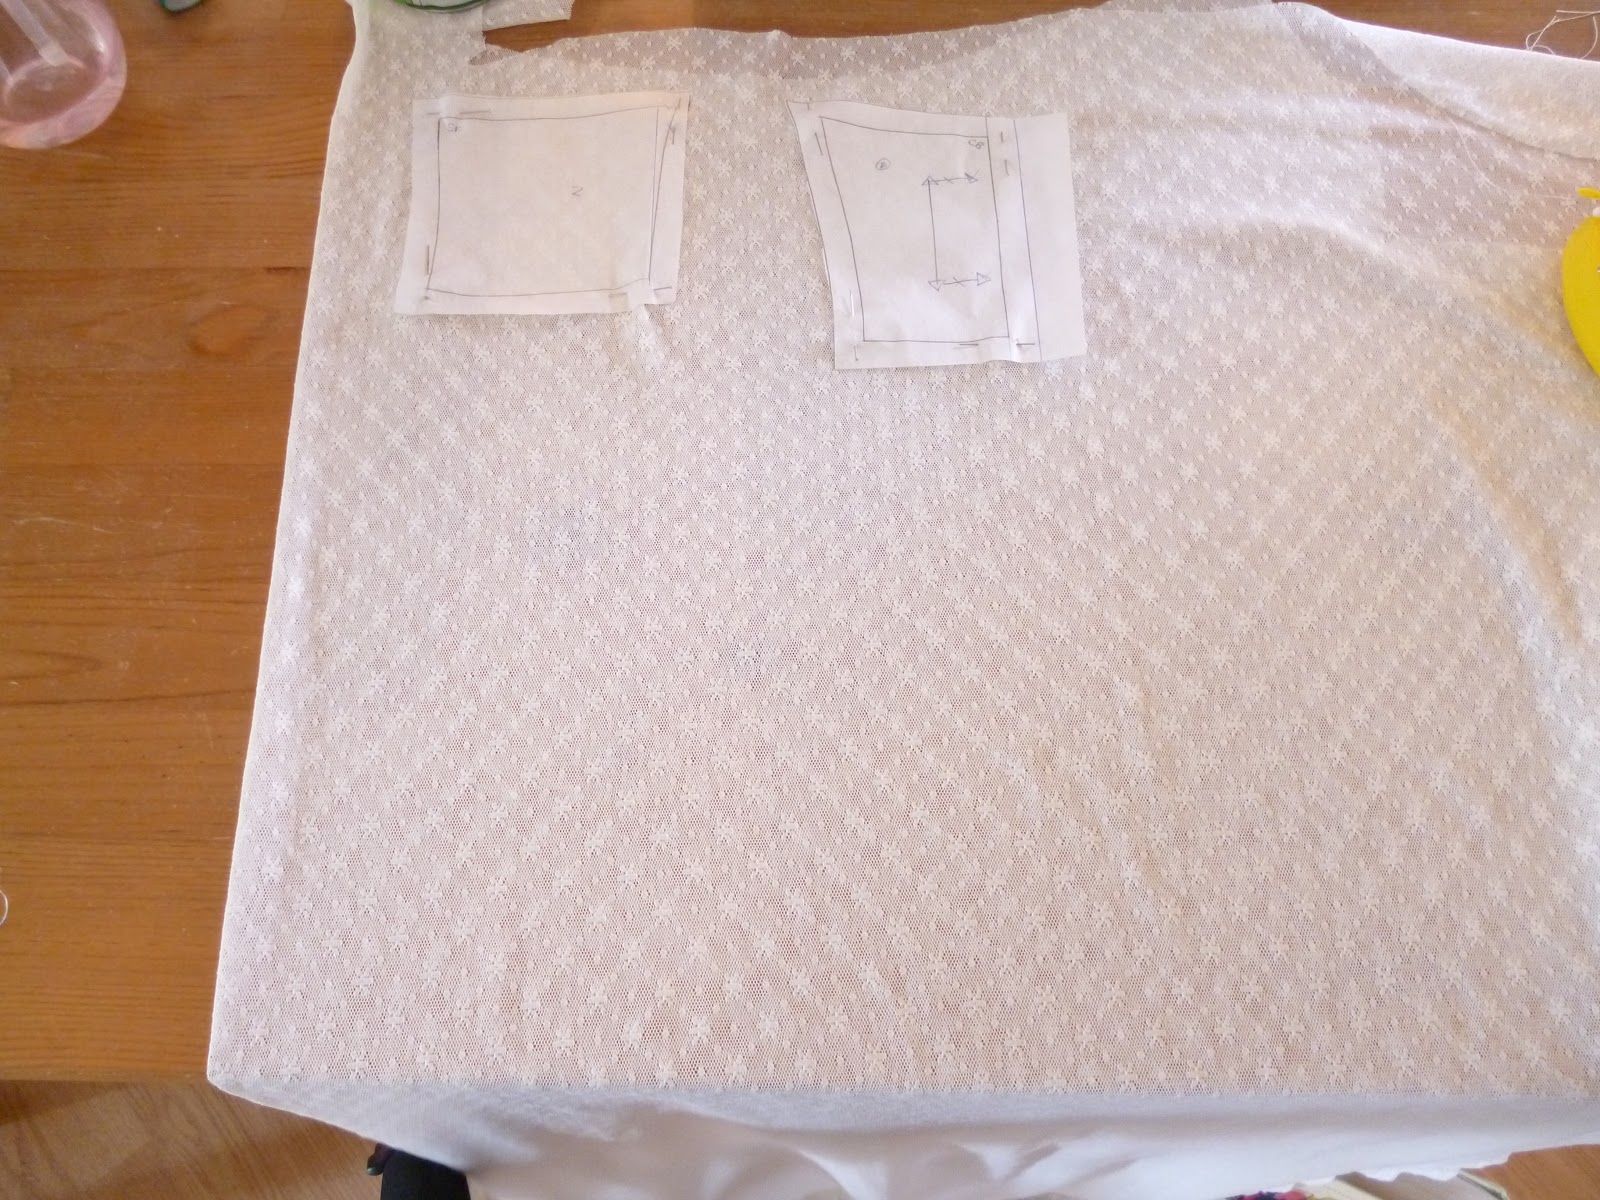
A note about grain lines: I am cutting my cups on the bias.  I am doing this because I want them to mould around my natural shape, but you can cut the cups on the straight grain as well.  I am cutting my corselet pieces on the straight of grain, but will be adding stretch lace for some give.

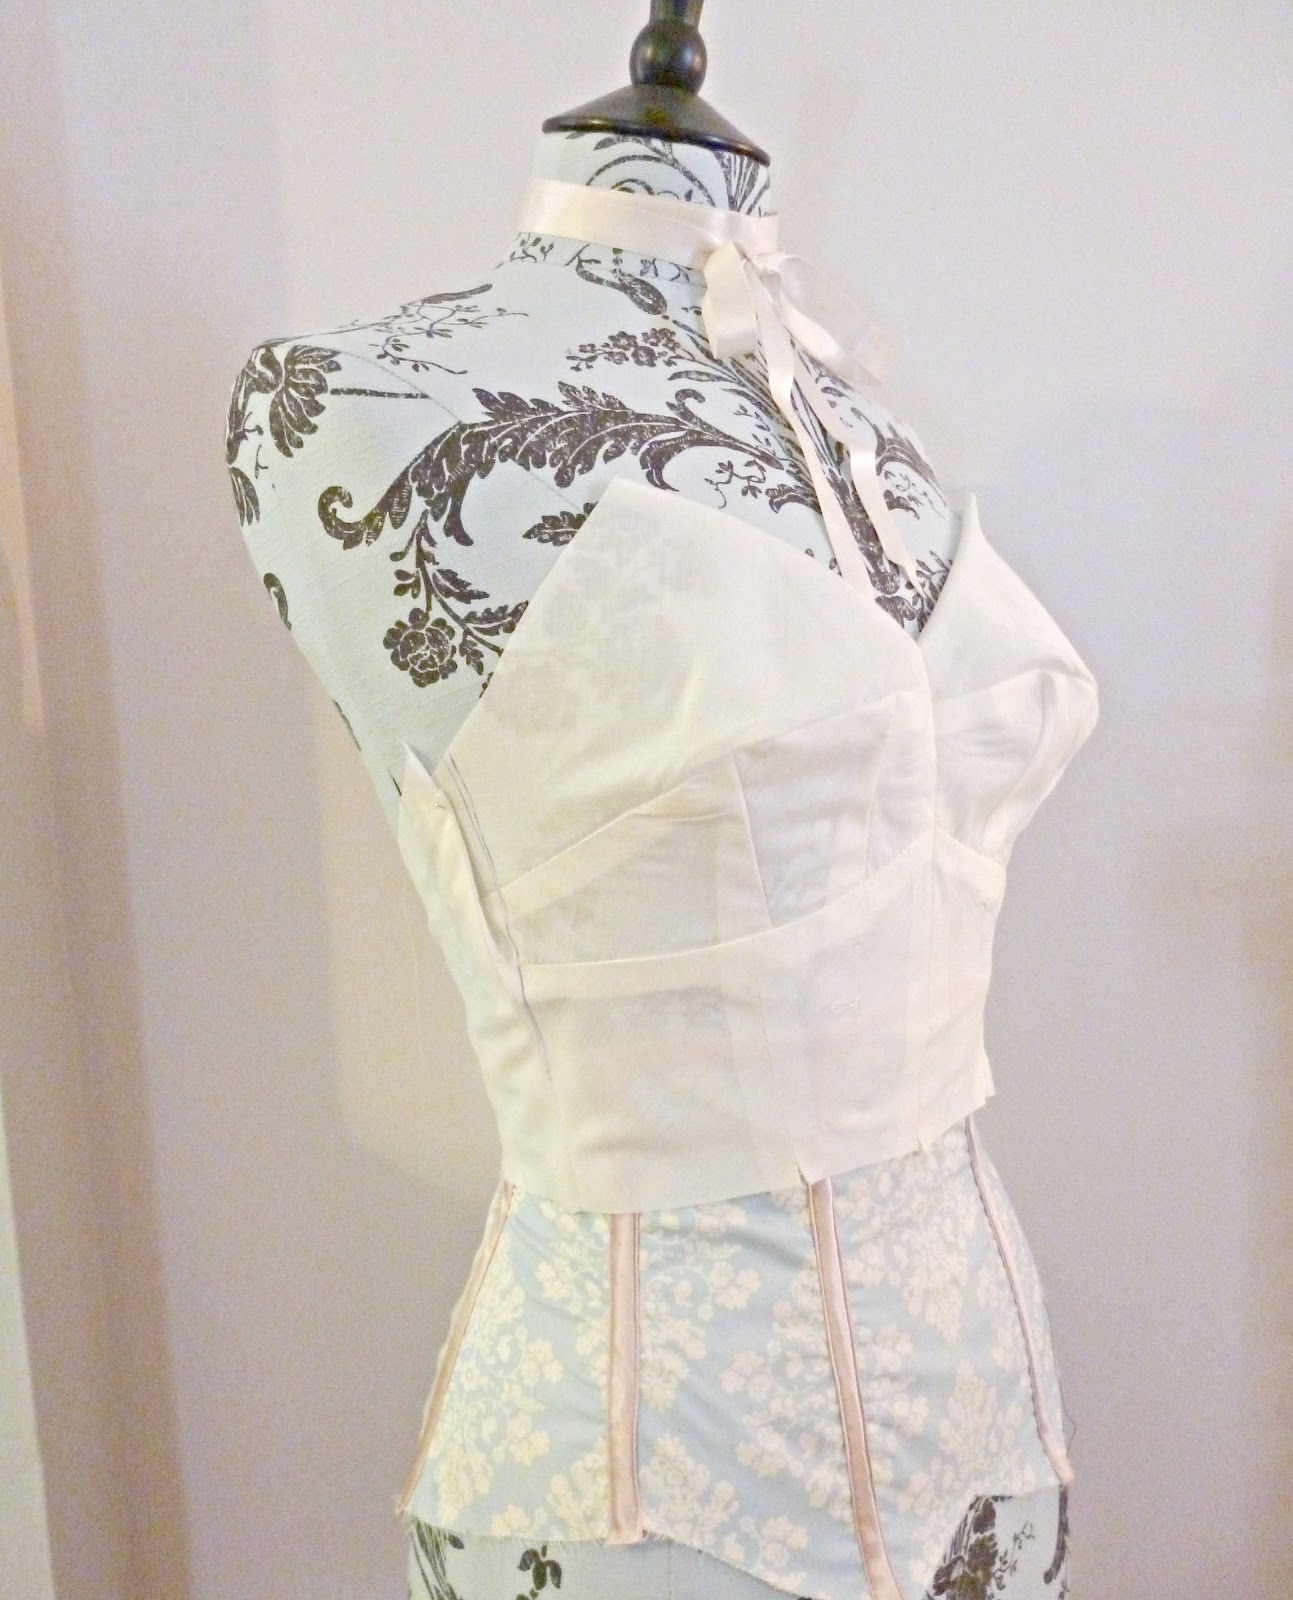
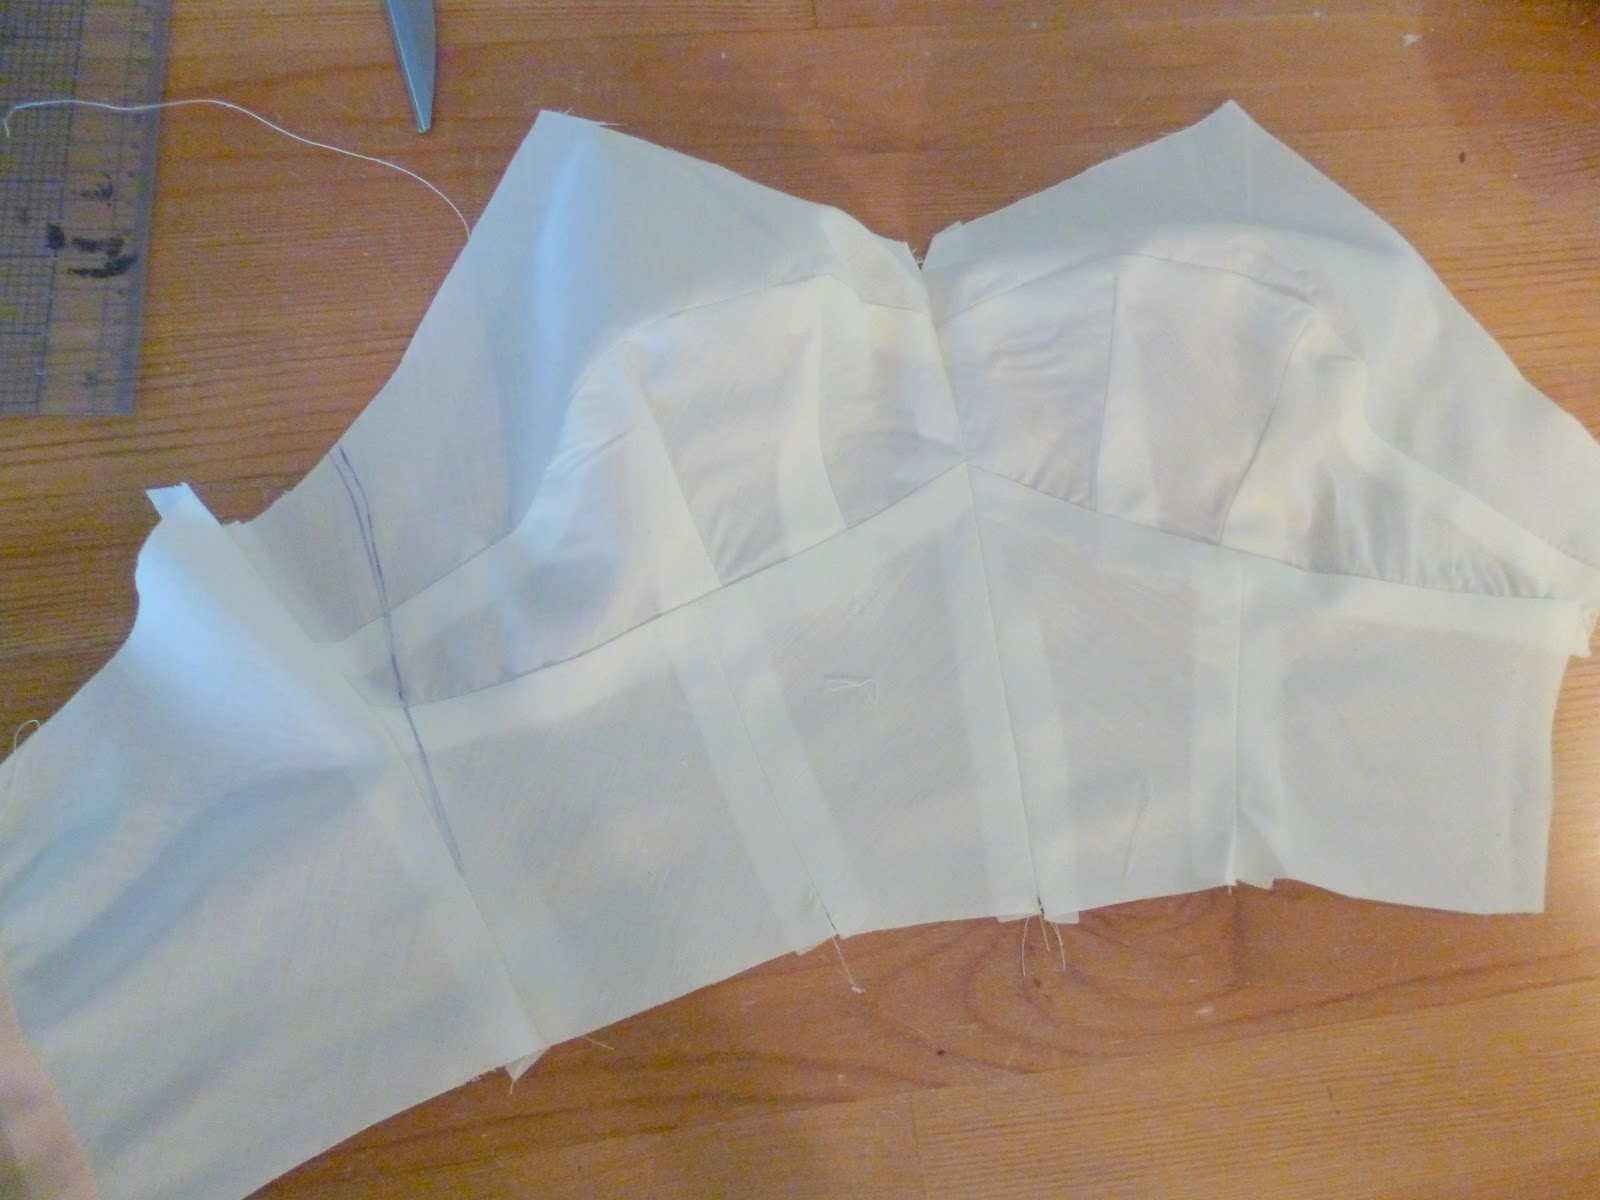
We’re now ready to cut out our muslin and test our fit!

Ooh La La Pin-Up Sew-Along Pt. 2… What you will need for your NEW vintage bra.

Uncategorized
We are on to part 2, and the more challenging part of our sew along: sewing our Pin Up Bra! 
Anna’s pattern comes in two styles, a short bra, and long line bra.  Of the two, the longline bra is the more challenging sew and will require some pattern manipulation which I will walk you through.
But now for the fun stuff, gathering your supplies.  There are so many ways you can finish this garment, so be creative and don’t be afraid to try something new.
I am using the same satin I used as an accent on my corset.  I’ve also gathered up some white stretch lace, which I will use as a contrast, and to give my bra  a little more give, and some nude coloured stretch lining (I chose a knit because I am cutting my cups on the bias).  I am going to edge my bra in cream coloured picot edged lingerie elastic, and I am creating a false band with plush back bra elastic, which I will also use for part of my straps.  I have hook and eye tape for my closure.

If you are sewing the short bra, you will need some kind of bra back closure.  You can use an S-hook, Hook and Eye closure, or a Vintage closure like Anna.  I will be adding adjustable straps to mine, so I’ve set a side some small o-rings and sliders.  I got these adorable heart slides on Etsy .

If you are for more of a reproduction look, skip the elastic and use some bias binding to finish your edges, and ribbon for straps.  You can also add boning to the side of the cups if you feel you need some extra support.

Are you excited? Nervous? Scared? Already finished?  Do you plan on sewing the short version or the long line version? I like this pattern so much, I think I will sew both!

Ooh La La Pin-Up Sew-Along… Recap.

Uncategorized
Well, fellow Sew Alongists, we are done! It’s time to recap what we’ve done with our corsets.
  1. We learned how to print a pdf pattern and add seam allowance.  I traced my pattern and added a facing for the lacing, while Anna added her seam allowance directly to the printed pattern.
  2. Anna demonstrated how to grade your pattern up or down a size.
  3. We sewed our muslin and made alterations.
  4. Anna showed us how to do a lace overlay.
  5. We sewed our Corset with Flat Felled, or stitched down French Seams.
  6. For those of us making a laced-up corset, I showed how to prepare our center back facings.
  7. I also added contrasting bone casings, for a little extra detail.
  8. Anna did a great post on How to Add your Boning.
  9. Then she showed us how to add our hook and eye tape, for those of you using this type of closure.
  10. I demonstrated how to add eyelets to our reinforced back panel.
  11. The top and bottom of the corset were then bound with bias binding.
  12. I made satin covered garter straps, while Anna used vintage clips!
  13. Anna added some adorable handmade rosettes to her corset, while I added some large white bows.  I love bows.

I absolutely love how Anna’s corset turned it.  It looks so vintage! And her ribbon rosettes are adorable.  I may still go back to mine, and add a few along the top one of these days!
Image Courtesy of A Few Threads Loose

 Do you have pictures to share? I’d love to see what you came up with!  Did you like watching the different techniques that Anna and I used along the way?  One of the things I love about sewing are the multitude of ways you can sew a garment.   Are you happy with the end result of your corset? Is there anything you would change? For me, I wish I had interfaced my Self Pieces, and I am very glad I flat lined my corset.

So, Are you excited to start the next part on the Sew along?

Ooh la la Pin Up Sew-Along… Adding Bows.

Uncategorized
We have a saying around my house… “Bows make everything better.” Whenever I finish something that I’m not 100% thrilled with, my husband suggests I “slap some bows on it,” and you know what? It usually works!
I am adding bows to the “points” on my corset above my garter straps.  I’ll show you how to make 2 kinds of bows.
The first kind of bow is a sewn bow.  Cut a large rectangular piece – I cut mine on the bias.
Fold in half length-wise and stitch around the edges, about 1/4″ Seam allowance, leaving a small gap where you will turn the rectangle inside out.  Clip your corners, flip right side out, and pull your corners out with a pin.

Grab a piece of left over bias trim, or make a small strop of fold over bias tape.

Add a row of basting stitches down the center of your rectangle and gather, tying off both ends.

Sew your bias strip around it, forming a loop.  I left a raw edge on the back of mine.  This can then be hand sewn onto your corset.

My favourite bow, the the bow I am using on my corset, is a hand tied ribbon bow.  I took a piece of 1 1/2″ satin ribbon.

And tied a bow.  Cut the ends on an angle, at equal length, and singe with a lighter.  Give your bow a press with a hot iron (but not so hot as to melt the ribbon – always test on a scrap first).

I machine stitched my bows on, but you can also hand stitch.

Here’s my best pin up pose!

Voila! What kind of embellishments will you use on your corset?

Ooh la la Pin Up Sew-Along… Optional Detail – Satin Covered Garter Straps

Uncategorized
Now that your all of the major construction of the corset has been finished, we can add our garter straps.  Has anyone had a hard time finding garter clips? I bought pre-assembled straps, that I’ve taken apart.  I’ll use the sliders and hooks on another project, today all I need are the clips and the elastic.
I decided I wanted ruched, satin garter straps for my corset.  Here is how I did it:
I cut a piece of satin on the bias, 1 1/2″ wide – adjust the width of yours depending on the width of the garter elastic ( I am using 3/8″ elastic). I didn’t use any particular length, I just cut a long strip, and made more as I needed.
Folded in half length-wise, stitch 1/4″ in from the raw edge, forming a long tube.  With a safety pin attached to one end, turn the tube right side out and press, so that the seam falls along one side of the tube.  The seam side is the back side.  Now that you have a nice, pressed strip, carefully stitch 1/8″ in from each edge – can you see my stitching lines in the picture below?

I am using a polyester satin, so I am able to singe the ends with a lighter. This makes life much easier – we are going to have to carefully turn the raw ends in once we have our elastic in place.  I hate dealing with fraying fabric!

Feed your elastic into the satin casing using a safety pin.  Pull and stretch the elastic as you go.  You will start getting a gathered, ruched effect.  Once you have the gathers the way you like it and the elastic has pulled almost all the way to the end, stitch one end so the elastic doesn’t pull back into the tube, and turn the other end in, leaving a “tail” of elastic at the turned end in (about 1/2″ of elastic should be sticking out).  The elastic that is left sticking out the end will attach onto our garter clip.
In the picture above, you can see how I stretch the elastic as I pull it through the satin.  In the lower left, you can see that I leave some elastic sticking out of the casing.

 Fold up your raw edge, at the end where you’ve left some elastic sticking out, feed on your garter clip, fold the loose end of elastic back up into the satin casing, and carefully stitch it closed.

Now, do that four times! Don’t they look pretty?

I attached my straps by hand, first laying the strap upwards and the right side facing out, I basted it to the corset.  

Flip it back down, facing the proper way, and stitch it down.  I then stitched by hand around the entire piece to keep it securely in place.

There! Satin covered garter clips.  I feel like these give my corset a burlesque-ish look.  What do you think? Will you use something like this on your corset?

Ooh la la Pin Up Sew-Along… Binding Your Edges

Uncategorized
Now that you’ve finished off your back with either eyelets or hook and eye tape (with optional decorative edging!), we are ready to bind off the top and bottom edges of our corsets. Make sure you have inserted all of the bones you plan on using, and have tested the fit.
For your binding, you can use purchased bias trim or bias trim made of self or contrasting fabric.  I’m using the same pink satin as I used to cover my bone casings.  I am cutting bias strips 1 1/8″ wide, and pressing my folds prior to stitching.

Baste your bias tape in place, leaving a little overhang on each end as pictured above.

With right sides of the bias tape facing and raw edges on the outside but folded up, stitch the bias tape together, as close to the back edge of your corset as possible.  When we flip this right side out, we will have a nice, clean edge with a sharp corner.  Below is what your stitched bias binding should look like.

Flip your bias binding around to how it will be stitched down, and you’ll see how nice this finishes off the ends of your bias binding.  Do this to both ends before stitching your bias tape down.  You may need to “pull” your corner out with a pin (gently), to get a perfect 90 degree angle!

There are a few options for finishing the back of your binding.  You can stitch by hand – I prefer the look of a slip stitch, but can use a cross stitch, straight stitch, or any stitch you like!

If you want to stitch my machine, like me, you can “stitch in the ditch.” Stitching in the Ditch is when you top stitch over a seam.  Can you see where my needle is going in the picture below? Right back into where I basted my bias trim on.

Stitching in the ditch makes for invisible stitching on the front, and a neat back. Do go slowly and stay within your original stitching line!
On the bottom edge of the corset there are lots of corners and points.  When you come to a point, with your needle down, lift your presser foot and carefully “snip” into the bias binding, so it will easily curve around sharp corners.
There! all of your edges are finished, neat and tidy! Now we are ready for our garter clips and embellishments! 

Ohh La La Pin Up Sew Along… Applying Your Eyelets

Uncategorized
Now that we have sewn our seams, added decorative bone casings, inserted the bones, and finished our centre back panel with self facing and fusing, we are able to apply our eyelets and lace up our corset for the very first time!
If you are using hook and eye tape, head on over to A Few Threads Loose for instructions on how to apply it.

Start by either transferring the lacing markings on the pattern onto your centre back seam OR make small markings, starting 3/4″ of an inch down from the top edge, every 1″ apart.  Eyelets should sit about 5/8″ away from the centre back edge.

Using your markings as a guide, punch small holes where your eyelets will go.  You can use an awl, or grommet pliers to make your hole.

Eyelets can be applied a number of ways – there are two common tools pictured above.
1. Grommet Pliers – these can be found at most hardware store, and will set 2 piece grommets.  Grommets come in many different sizes, so make sure the pliers you buy fit the eyelets you want to set.
2. Tool & Die – These often come with eyelet packages you purchase at the fabric store, and are set with a hammer.

I used grommet pliers to apply my grommets, and used a 2 piece grommet.  Two piece grommets are preferable for a corset that is going to be worn for an extended period of time, or if you plan on wearing it a lot.  Eyelets without washers tend to have rough edges and will work their way through your fabric, if you are applying much strain to the fabric around it.

Remember to insert a bone on either side of your eyelets to keep your lacing laying flat. This is the only spot in your corset where I really, really advise that you use boning.  The rest is up to you!

Now, lace it up and see how it fits! Do you feel like you need to add more boning? Does everything lay flat?

Next we are onto our binding.

Ohh La La Pin Up Sew Along… Adding your boning.

Uncategorized

Yesterday, Anna put together a great post on how to bone the seams of your corset. Like Anna, I am only boning the Side Front, Side Back, and on either side of my eyelets – giving me a total of 8 bones in total. You can add more if you like!
This corset sits fairly low over the hips. Because of this, I am not boning the entire length of my seams. Prior to adding my contrasting bone channels, I made small “tacks” where I want the bone to stop. You can choose to bone the entire length.
Anna and I are both using plastic boning – Anna is using this amazing vintage Featherbone and I am using modern plastic boning. Both come in a casing, that will be removed.
Round off the end of your boning with scissors. Smooth off any rough edges with a file.
Insert your bone into your french seam “Casing”. It’s pretty tight, but you should have just enough room to squeeze the bone through the case.
Next we’re onto binding and eyelets! How is everyone progressing? Have you hit any road blocks?