Browsing Tag

ooh la la

Ooh La La Pin Up Sew Along Pt. 3… Finishing the leg and waist openings with elastic

Uncategorized

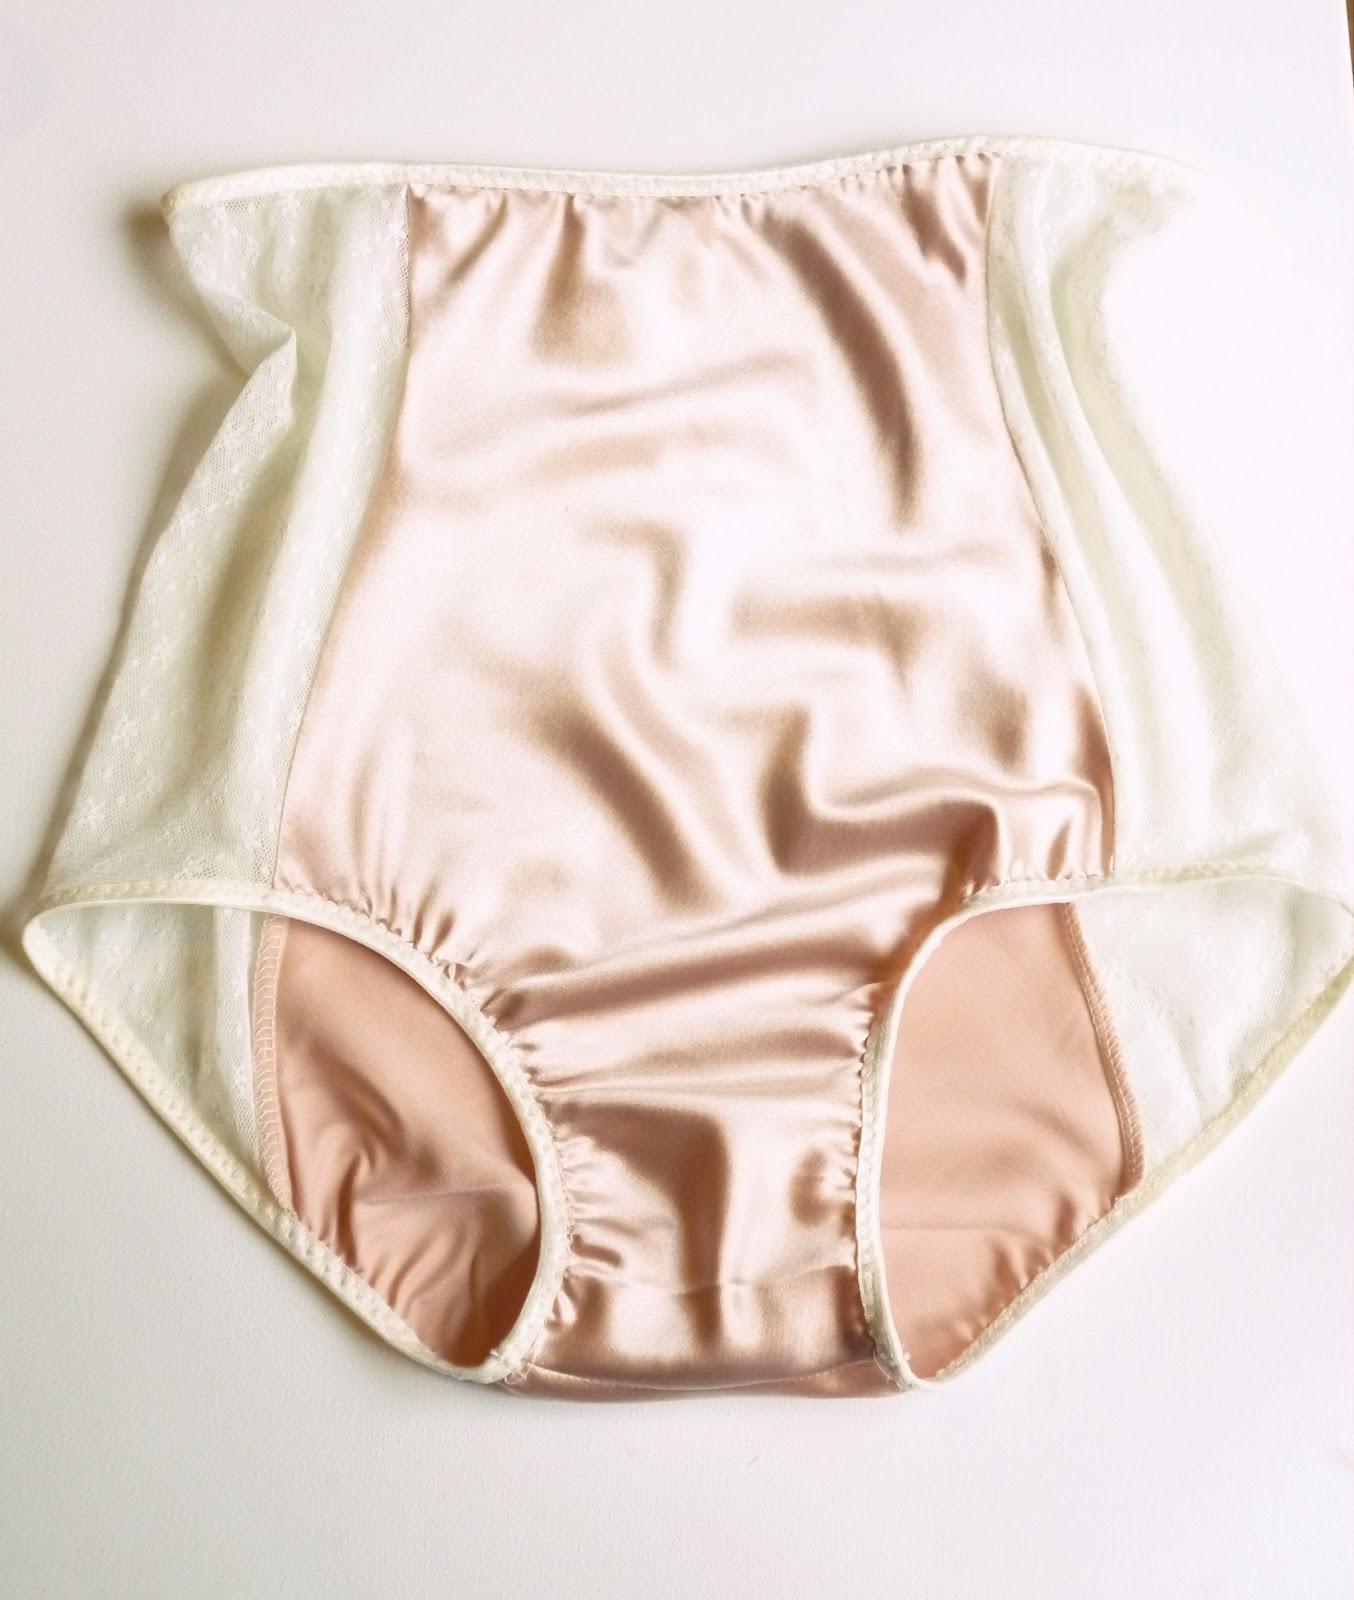
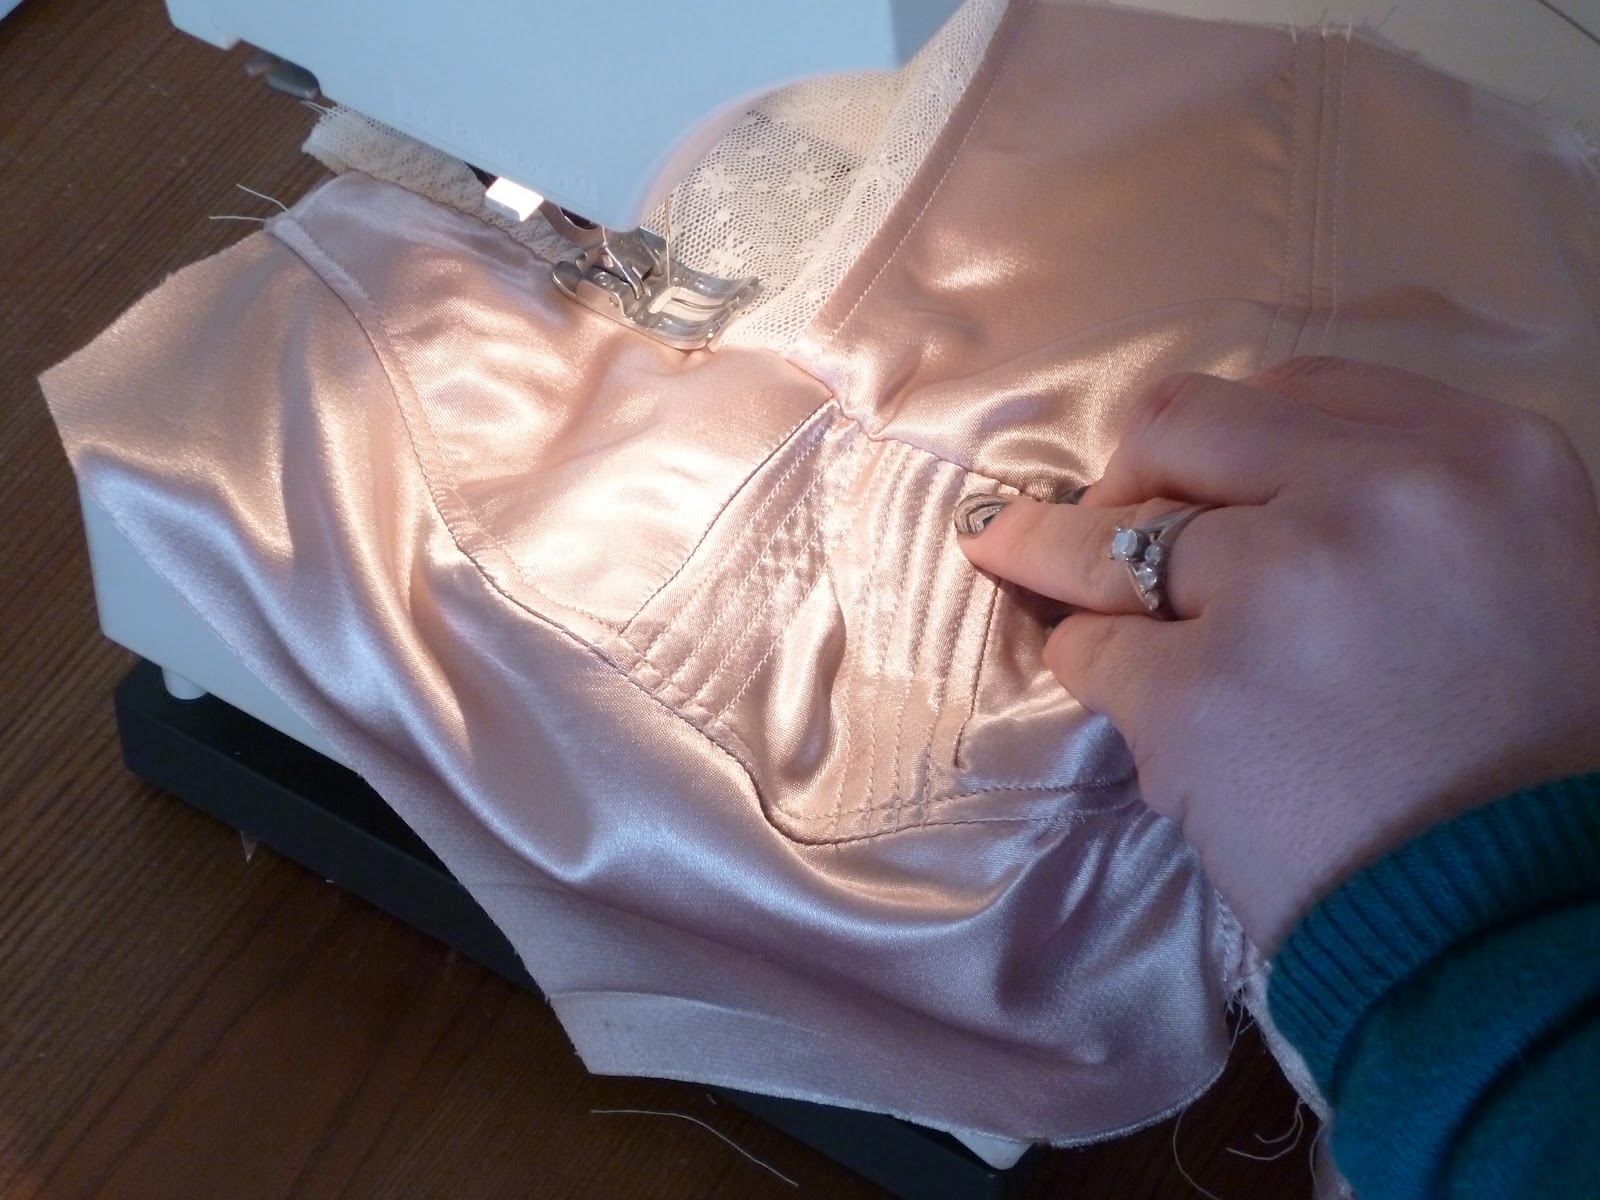
Depending on the type of elastic you are using, you will use different methods to apply the elastic.  However, the basic idea is the same.  Baste your elastic on, pulling gently to ensure a secure fit.  Fold your elastic under, or over, and zig-zag stitch down, pulling flat as you go.  When you finish, you want your elastic to pull your leg and waist opening slightly smaller – about 2″ depending on the resiliency of your elastic.
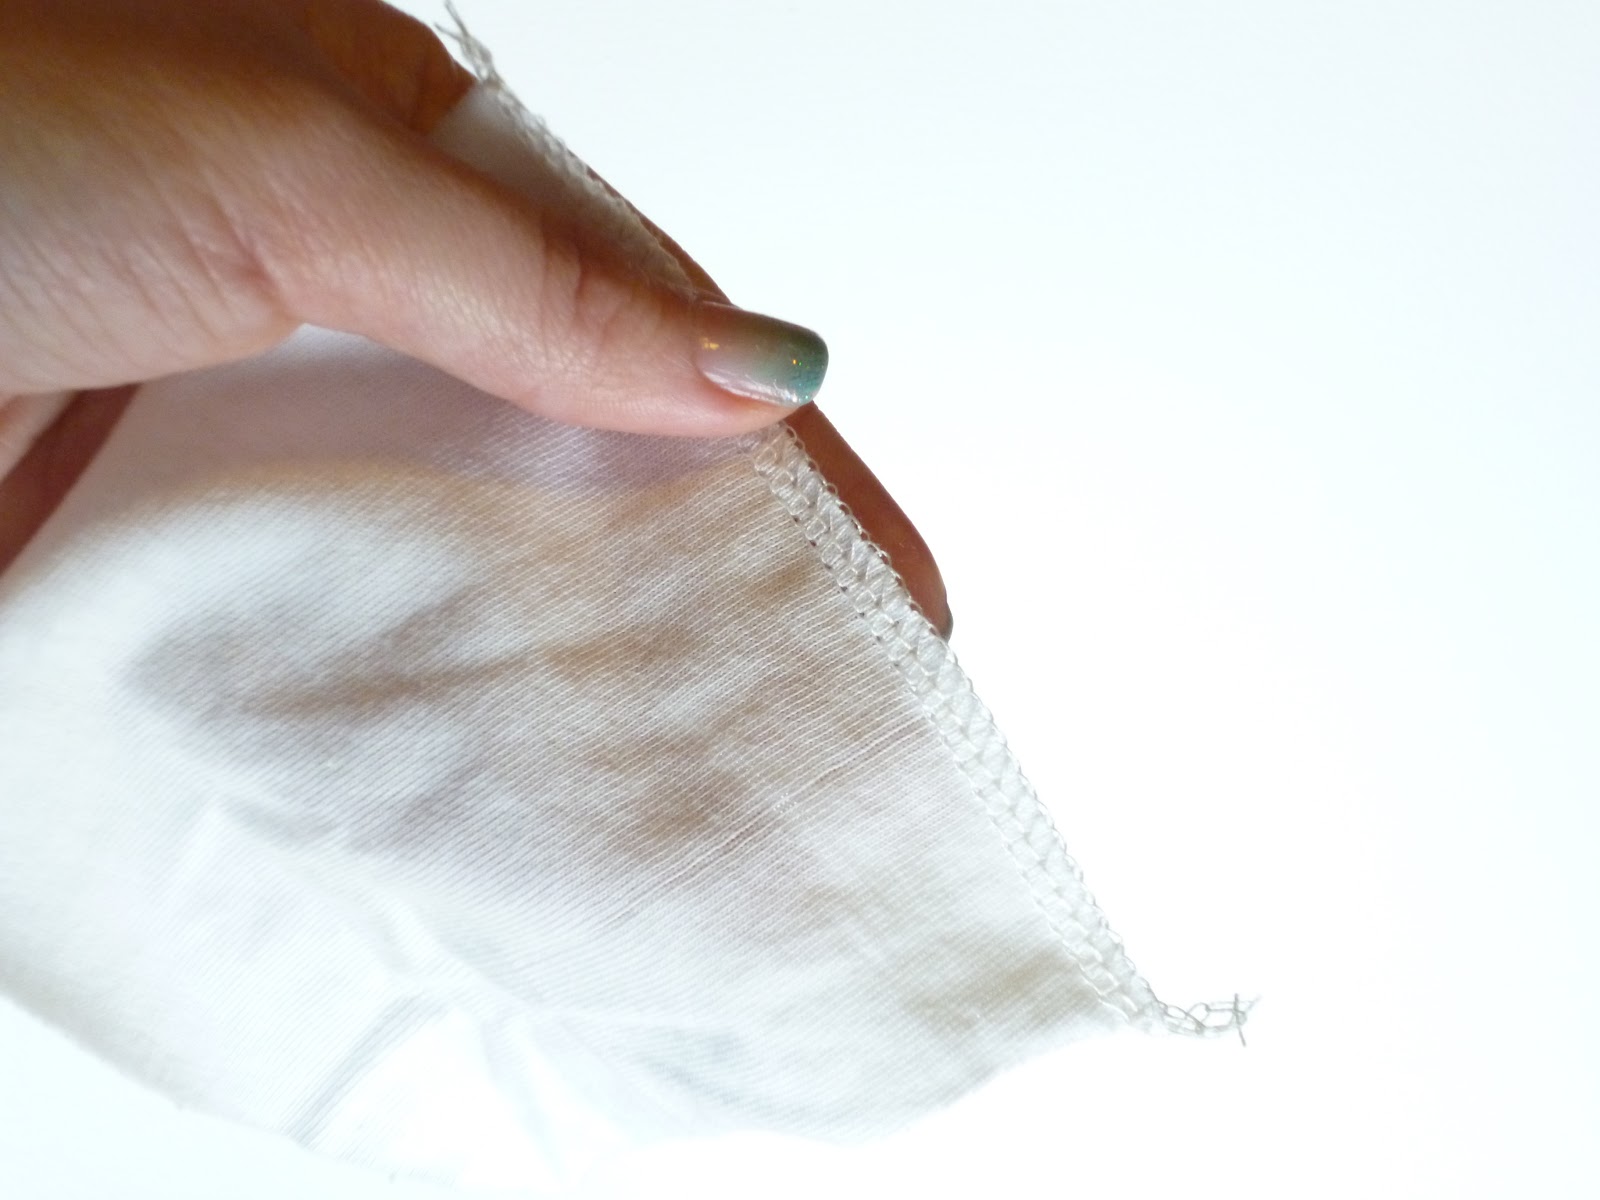
For foldover elastic -baste the elastic to the wrong side, as you would bias tape. Use a long zig-zag stitch.

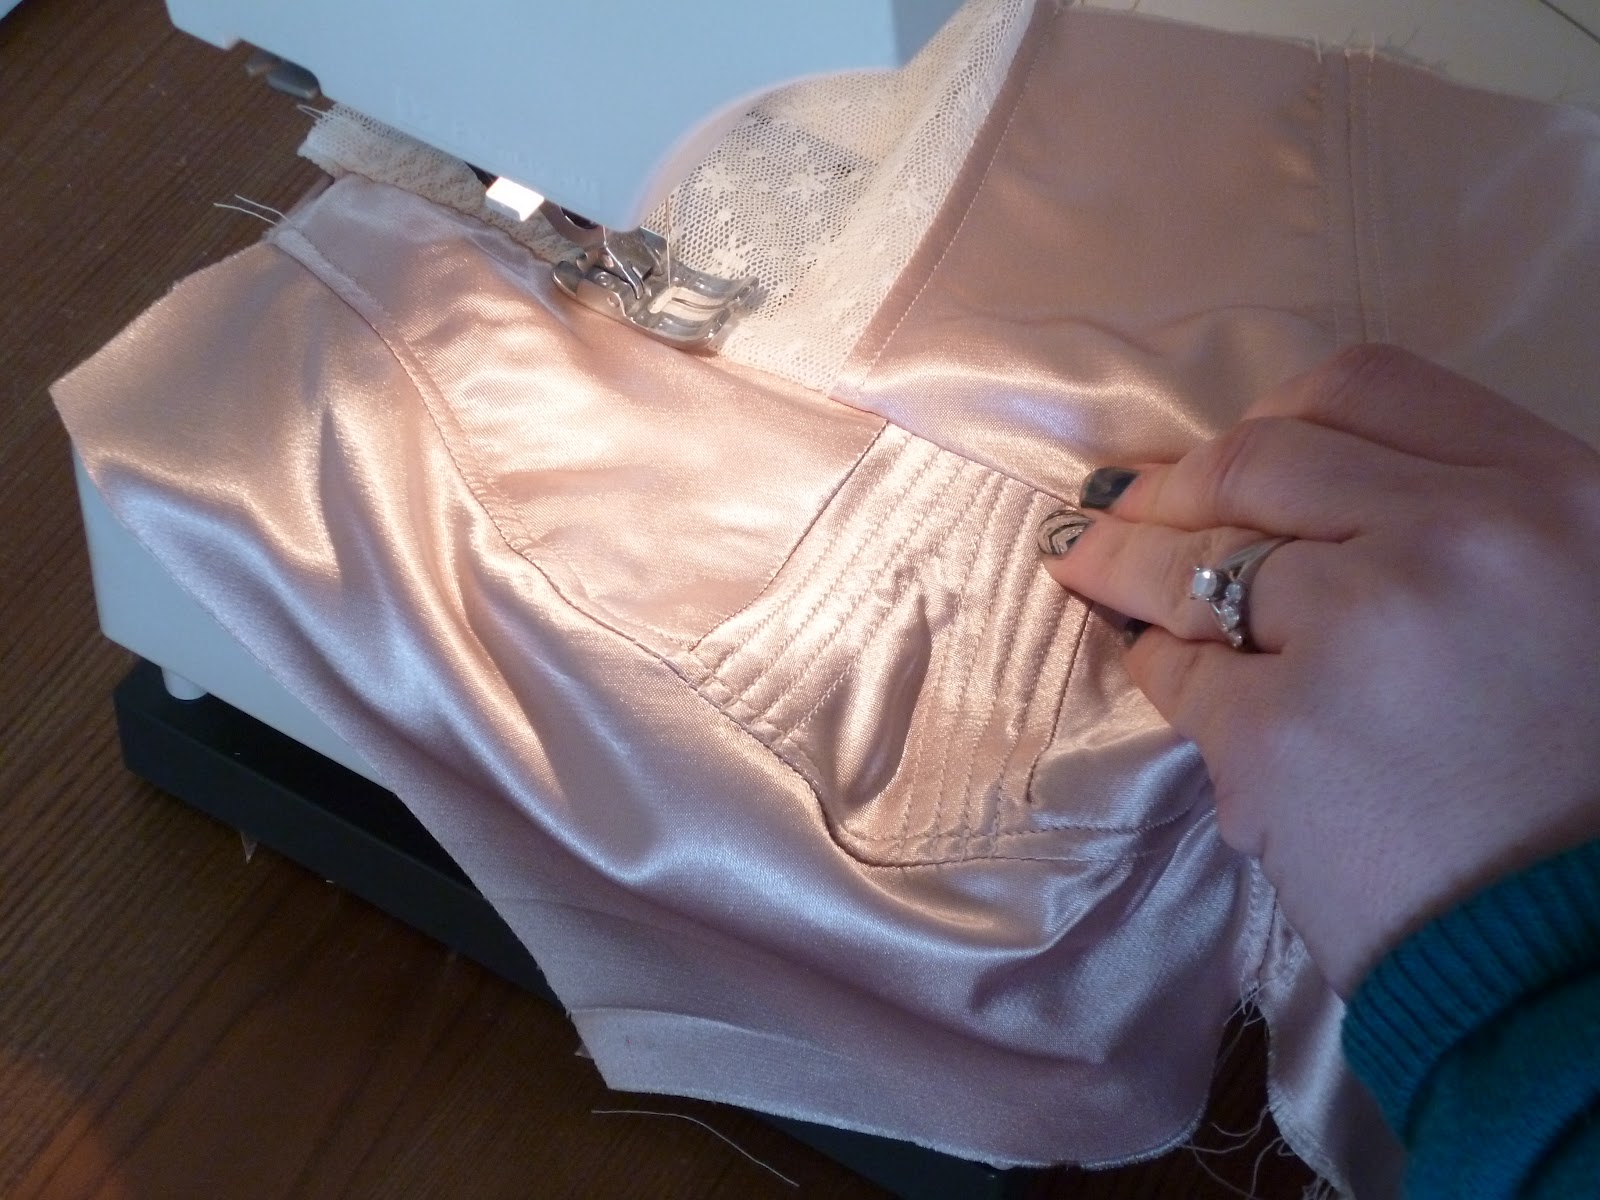
Trim back any excess, fold over towards the right side, and zig-zag stitch down, pulling as you go.

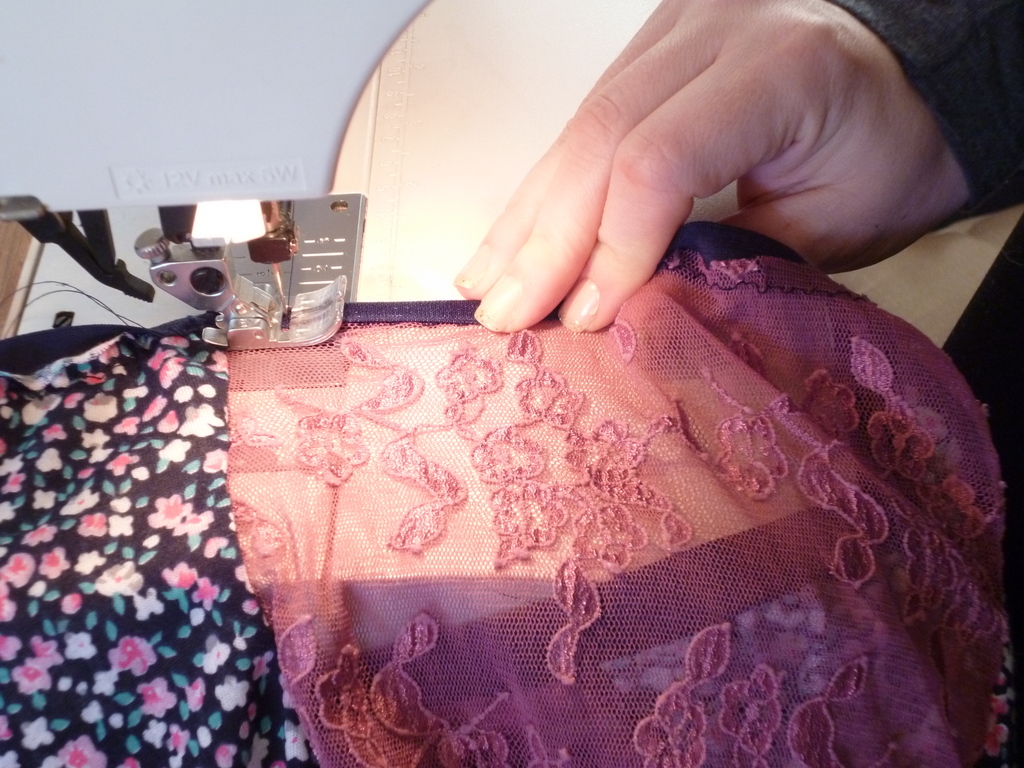
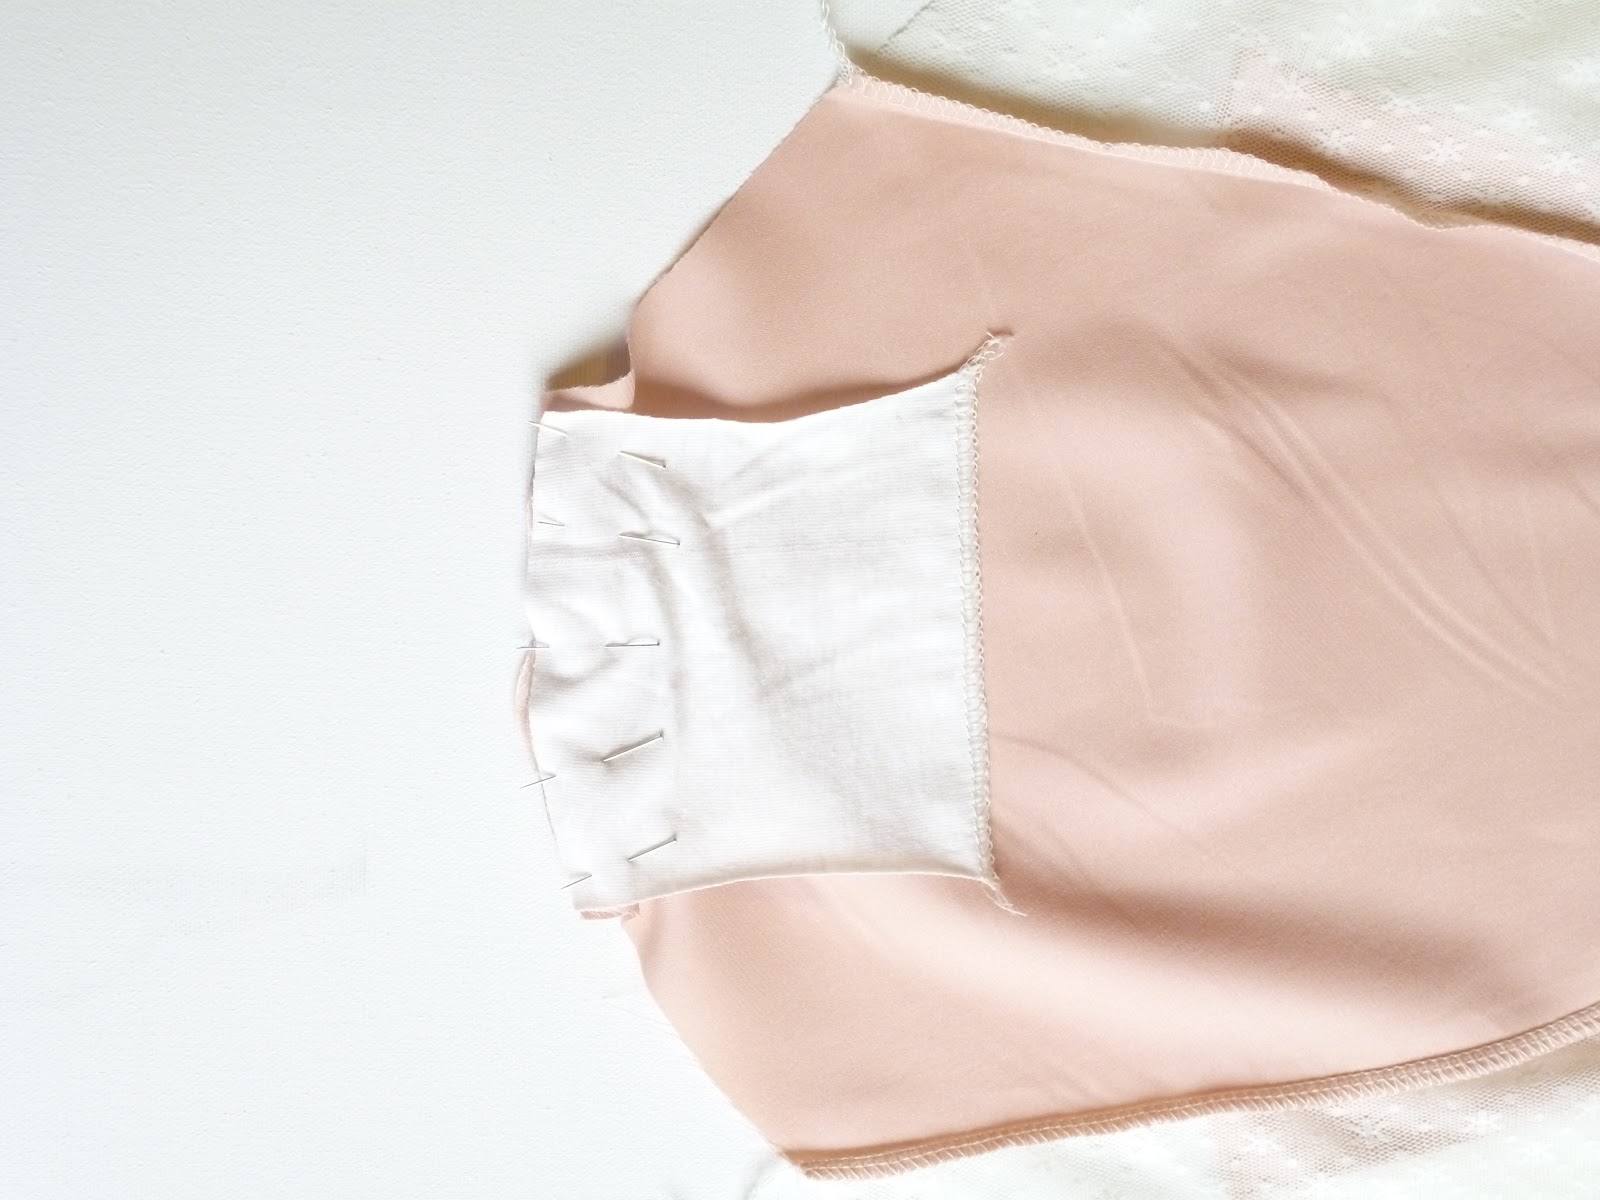
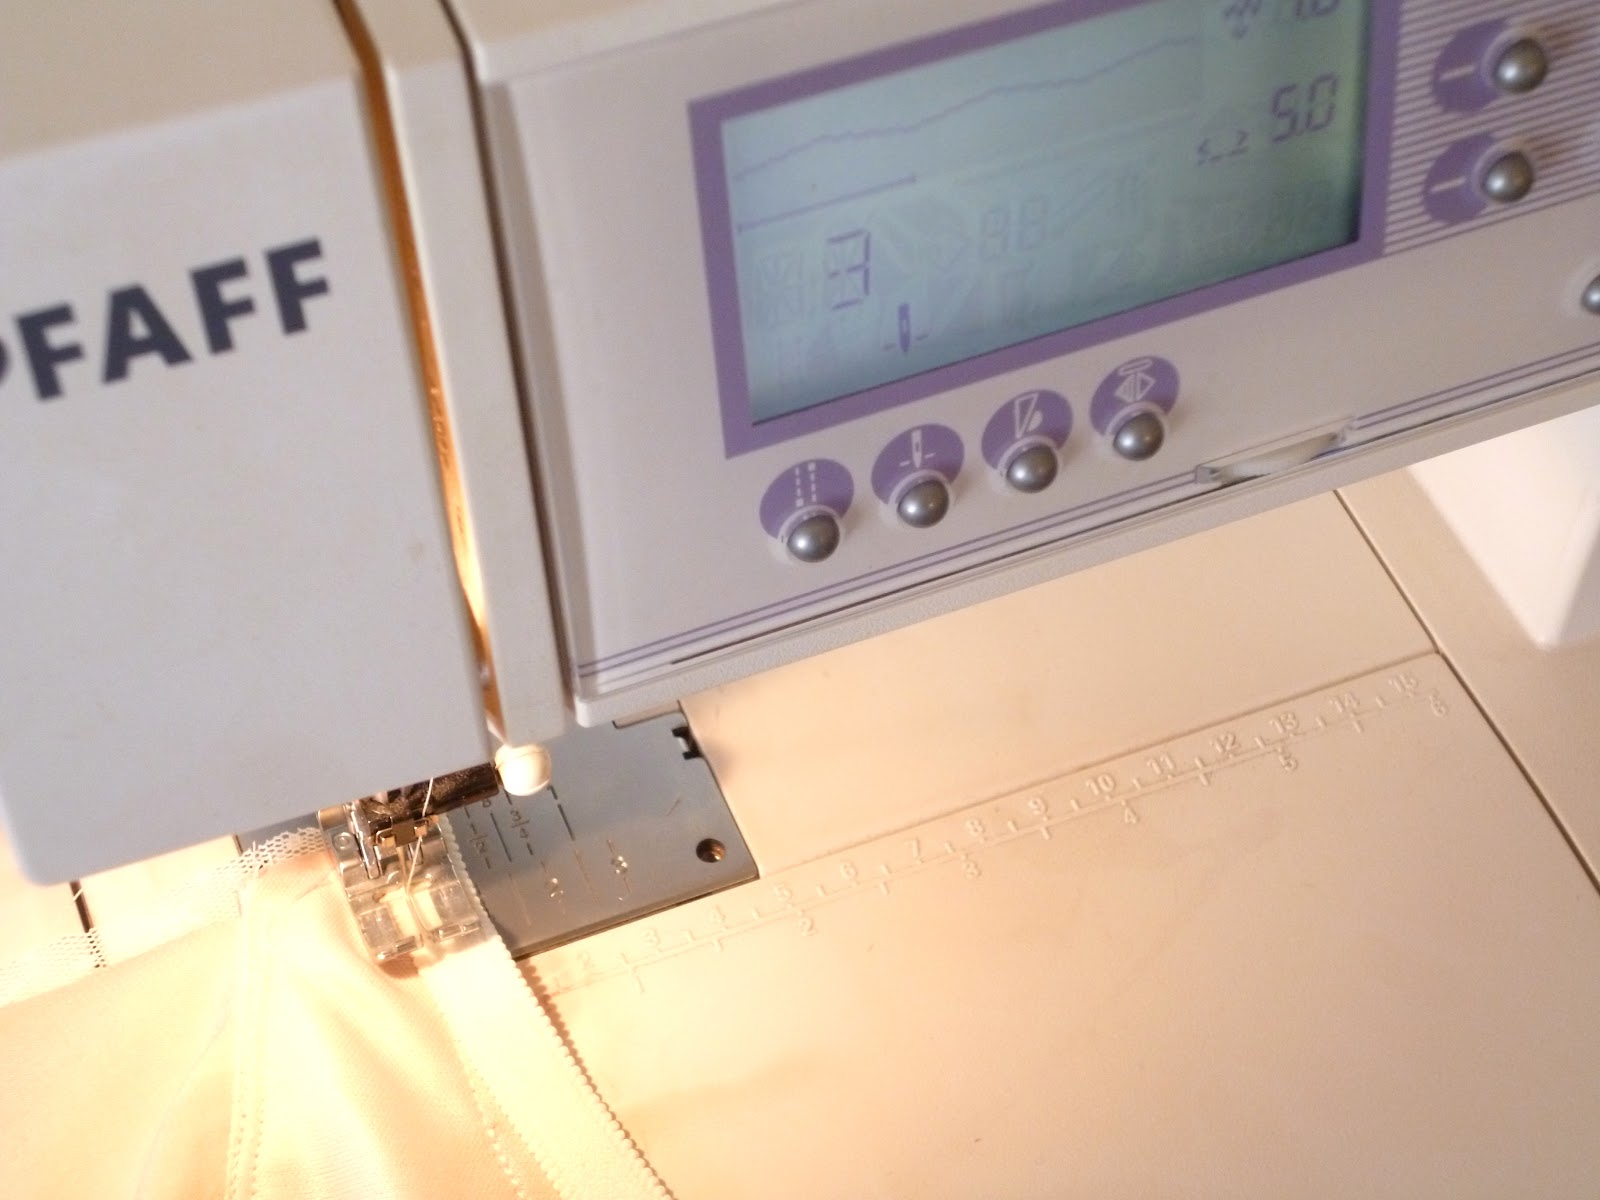
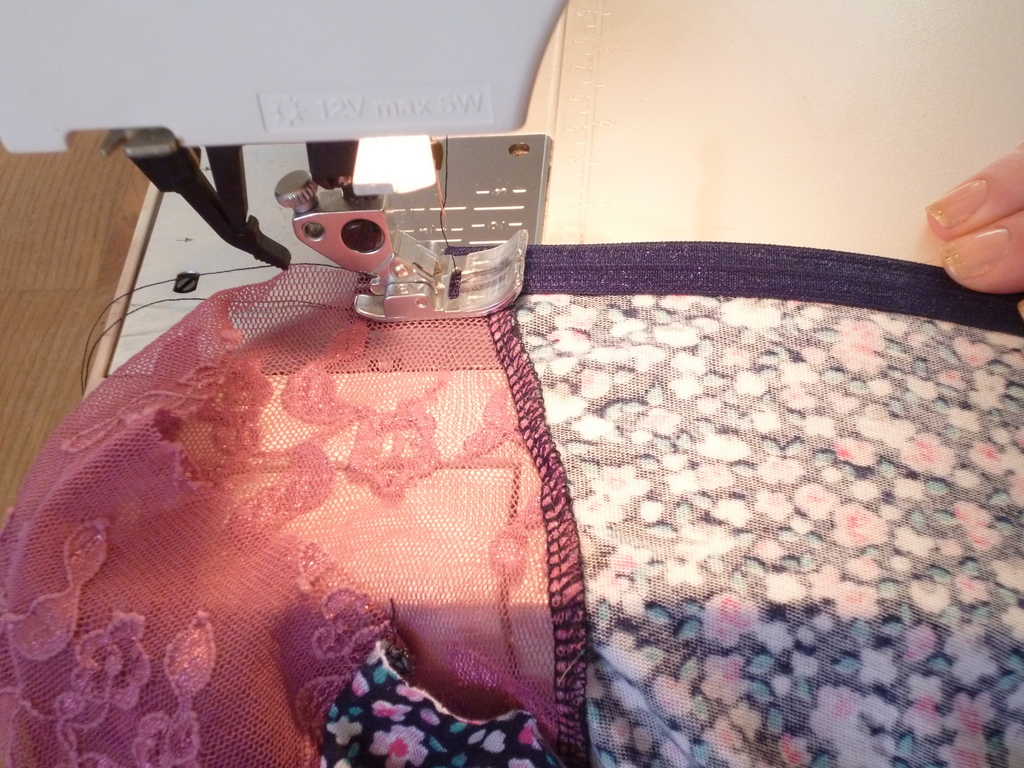
If using a flat lingerie elastic, with or without a picot edge, baste onto the right side of your garment, pulling gently as you go. Stitch about 1/16″ away from the edge of the elastic, furthest from the edge of your garment.  For instance, if you are applying a 1/2″ elastic to the waist band of your panties, baste on 7/16″ away from the seam allowance.  Make sense?

Trim back any excess, fold your elastic under, and top stitch down.

Voila! Two easy ways to finish off your garments… And you’re done!

Ooh La La Pin Up Sew Along Pt. 3… Sewing in the crotch lining

Uncategorized
Something I never anticipated, getting into design, was how comfortable I would become with the word “crotch.” 
Anyway… it’s time to add the crotch lining.  Start by finishing the straight edge of the crotch lining by zig-zag or overlocking.  You want a finish that will not add any bulk to prevent a seam from showing through. With jersey you also have the option of just leaving the raw edge.  It’s not going to unravel on you, but might roll a little.

We are going to sandwich the back crotch seam between the front crotch seam and the  lining crotch seam.

The right side of the crotch lining should be facing the wrong side of the back panel.

The right sides of the front and back panel should be facing.  Pin together, and straight stitch your seam.

Grade your seam allowance, to prevent bulk.  Grading is trimming back one layer of seam allowance at a time, creating a staggered effect.  You might want to add some top stitching here if you find your seam is bulky.  If not, just press your crotch lining forward, and baste into place.
There you have it, you’re almost done.  Just needs elastic now! 

Ooh La La Pin Up Sew Along Pt. 3… Sewing your Muslin

Uncategorized
So, if you’ve got your pattern, you’re ready to start.  This is a really easy project, but requires some experience working with cloth cut on the bias, applying lingerie elastic, and sewing curves.
Because of varying amounts of stretch that your fabric might have, the sizing on this pattern is simply a guide – I’ve found that when using a woven front and back panel, I like to go up a size for myself, but depending on the amount of stretch in the bias, stretch in your side panels, and your body type, you might not find this necessary.  This is why a toile for this garment is really important.
Print and assemble your pattern.  Cut along the dotted lines sand tape together so lines match, just like you would with any pdf pattern.

If you are using a woven fabric for your front and back panel, you need to cut your fabric on the bias.  Here’s my “cheater” way.  Fold your fabric at a 45 degree angle to the selvedge, and cut on fold.  OR, you can trace out a mirrored image of front and back piece and cut it that way.
There is no need to add the crotch lining at this point, so just set the pattern piece aside.
Cut your size panels out of a fabric that has similar stretch to what your final garment will be sewn in.

Sew your front and back seams with a 3/8″ seam allowance, press to once side.  Then, right sides together, sew your curved crotch seam.

Try’em on and adjust.  When using a woven fabric you may find the legs feel a little snug – if so, trim the leg opening to be a little higher.

Ooh La La Pin Up Sew Along Pt 3…. What you will need to sew the High Waist Panties

Uncategorized

The 3rd instalment of our Sew Along is definitely the easiest, and will require just a few things that are pretty easy to source.

You will need a total of 1 yard of stretch knit fabric, like jersey, stretch lace, spandex, etc.  OR you can do a combination of a woven fabric cut on the bias (1/2- 3/4 of a yard will do), and about 1/2 a yard of nice, stretchy fabric for the side panels. When using a wove fabric for the front and back panel, you may find the panties do not sit as high – when fabric is cut on the bias and is stretched horizontally, you will find that it shrinks vertically.

You also need a small scrap of cotton jersey for the crotch lining, and about 2 yards of lingerie elastic.  You can use Fold Over Elastic, Picot Edge Elastic, and even just a plain, soft, flat elastic – about 1/4″ to 1/2″ wide.

Gather up some scrap fabrics of similar weight and stretch to sew a muslin.  I used broad cloth and some old scrap mesh to sew mine. It’s very important that the fabric you choose for your muslin have the SAME stretch as the fabric you plan on sewing your final garment with or your fit will be off.

The last thing you will need is the pattern – I’ll be drawing for a free copy tomorrow.

Ooh La La Pin Up Sew Along Pt. 3… Give Away! CLOSED

Uncategorized
To Kick off the 3rd instalment of our Pin Up Sew Along, I am giving away a copy of my PDF “Betty” High Waist Panties Pattern.  It contains sizes xs-lg (34″ hip to 41″ hip), and is easily grade-able. These knickers have been designed for Stretch Knits, but I will show you how to make them accommodate a woven front and back panel. They use about 1 yard of fabric, but because of the princess seaming, you can mix and match fabrics easily, and use up some scraps from your stash! 
Here’s how to enter:
  1. Leave a comment on this post letting me know how you’ll be sewing your Betty Knickers – stretch satin, lace, jersey? Please also leave me an email address where I can contact you if you are the lucky winner!
  2. Like Ohhh Lulu on Facebook for an additional Entry 
  3. Tweet (@OhhhLulu) or Blog about the Give Away and Sew along for a 3rd entry.
I’ll be accepting Entries from TODAY (Monday, April 9th) and Drawing a name on Friday, April 13th.
Good Luck! And thanks everyone for your input along the way!

THIS GIVE AWAY IS NOW CLOSED! Congratulations Melody – You are the winner!

Ohh La La Pin Up Sew Along Pt 2… Sewing adjustable straps

Uncategorized
I wanted to add straps that are adjustable, but not too utilitarian looking, so I have cut a strip of bias tape approximately 1 1/2″ wide, as well as two lengths of strap elastic.  I also have 2 plastic o-rings and 2 plastic sliders.

I sewed my bias tape into a long tube (1/4″ seam allowance), turned it right side out, and pressed it flat. I then cut it into to strips about 11″ long.

I looped my bias straps around my o-rings, and did the same with my strap elastic and sliders (looping around the middle bar). I tacked them down with a narrow zig-zag stitch.

Next, I fed my strap elastic through my o-ring, and back down, weaving it into my slider.

… making an adjustable strap! Don’t have sliders? Do you have an old beat-up bra laying around? Why not harvest it for parts?  When I was first learning how to make lingerie, I tore apart all my old, unwearable bras,  and used the parts to practice.

I then tacked it into place onto my bra…. And That is it!

To complete the our ensemble, I am working ever-so-hard on a digital pattern of my NEW “Betty” High-Waist Panties… Stay tuned for more info! I am hoping to have it ready to go within the week.

Ohh La La Pin Up Sew Along Pt 2… Adding hook and eye tape

Uncategorized
Can you believe we are almost done sewing our long-line bras? All we have left are the closure and straps.  Anna showed us how to use a very cool vintage-repro closure on her blog.  I am using hook and eye tape – the kind you can buy by the meter at your local fabric store.
I started by cutting a length slightly longer than the back of my bra, so I had extra to turn under.   I basted my hook side onto the right side of my corset, folding the ends under.  

 The eye side, I basted right sides facing, to my bra.

 I folded it back, and stitched it down with two rows of stitching.  I did this to leave a small “flap” to cover the gap between the hooks and eyes.

 Next, I hand stitched my hook side down, just like you would with bias tape. (look – I changed nail polish!)

Voila! It’s that easy!

And it looks neat and tidy on the inside.

Ohh La La Pin Up Sew Along Pt 2… Adding a little extra support

Uncategorized

 I am a curvy petite girl, and I always find that I need a little extra support under the bust, so I am adding some plush-back bra band elastic to the seam allowance between the bra and the corselet.  This will create a shelf bra effect and will prevent… ahem… slippage.

I took a length of 1/2″ wide bra elastic, no specific length… Using a long zig-zag stitch, I basted the elastic onto my seam allowance, carefully stitching about 1/16″ in from my seam line so as to not disrupt the exterior of my bra.  In a nutshell, stitch as close to your original stitching line as possible, without going over.   Gently pull the elastic, creating some tension as you go…

Select a long zig-zag stitch that is short in height.
Gently pull the elastic as you baste it onto the seam allowance.

 When you have finished basting your elastic on, your bra should now “scrunch” in a little bit under the tension of the elastic.  You have created a gently gathered effect by pulling the elastic as you baste it down.  You don’t want to pull too much.  At the end, the elastic should pull the bra only 3/4″ to 1″ shorter in width than it had been previously.

Elastic basted onto the seam allowance of the bra and corselet.

 Now we are going to top stitch the bra elastic down, onto the corselet, using a zig-zag stitch again.  This time, use a wide zig zag stitch. It is very important that you pull your bra flat as you stitch the elastic down.

Elastic pulled Tight – fabric is flat

Elastic not pulled tight – fabric bunches

 Now we have a bra with a band under the bust to prevent a heavier bust from slipping.    Your fabric will gently “wrinkle” or gather under the tension of the elastic when laying flat, but when pulled around the body, will give some support under the bust.

 The elastic also helps us finish off the inside of the front of our bra so there are no ugly seams showing.

I should really trim my threads more carefully!

Here it is pulled tight on my mannequin.  Is this something you will incorporate into your bra?

If you do not wish to do this, you can finish this seam off with binding, by zig zag stitching, serging, or folding under.

Ohh La La Pin Up Sew Along Pt 2… Assembling the corselet and attaching the cups

Uncategorized

We have assembled our lined, half lined, or unlined bra cups and can now star working on the lower half of our long line corset.

Start by stitching the centre front panels together, with a 1/2″ seam allowance.  After I have done that, I have folded my raw edges under, and stitched about 1/4″ in from my seam line.  This creates a clean finish inside, and gives me decorative top-stitching outside.

I attached my side front panels to my centre front panels with a flat felled seam (stitched down french seams).  If you are not sure how to do this, I added a tutorial HERE for our corset section of the sew along. 

 Sew your two bra cups together down the centre line.  I folded under the seam allowance, just like I did for the center front of the lower half, making sure my stitching lines would match when I sewed the two pieces together.

Now you can stitch the front bra and front corselet together.  To keep a sharp corner at the centre where the corselet comes to a point, as you are stitching, leave your needle in the down position at the point, carefully snip the stitches of the centre front seam of the bra, so you can pivot around the corner and get a sharp edge.

 Now is a great time to hold it up to your body or your dress form to make sure nothing weird is going on with the fit!

It’s really starting to look like a long line bra! How is yours coming? Next I am going to show you an optional finish for your bra cups, to add a little support under the bust.

Ohh La La Pin Up Sew Along Pt 2… Assembling your Cups

Uncategorized

Anna wrote a great post yesterday on sewing your darts.  She is also adding a pretty lace overlay to coordinate with the amazing vintage-look corset that she made in Part 1 of our sew along.  Anna is essentially making 2 bras, then sewing them together, to end up with a beautifully lined bra.

I am lining only the lower cup of my bra to reduce bulk in the upper cup, add support underneath the bust, and reduce bulk around the long-line band.  There is no right or wrong way to sew a garment, so do what you think looks best and works best for you!

I started with 2 lower cups cut in Self Fabric, and 2 lower cups cut in Knit lining.  I transferred my dart markings, and sewed my darts.  Anna is using a sheer-ish fabric, so she cut her darts.  I pressed mine towards the side seam.

Now that we’ve sewn the darts, we can start assembling our cups.

 We are essentially making a bra cup “sandwich.” First layer is the lower cup, second layer is the upper cup (right sides together), third layer is the lining (wrong side out).

Pin your delicious “Bra cup sandwich” together, and stitch 1/2″ in from the raw edge.

 Now clip your curved edge to prevent bulk when we turn it inside out.  Always clip seams that curve out, and slash seams that curve in.

 Now that we’ve stitched our cup together (easy!), we turn our cup right side out and give it a good press.

 Here’s what the inside looks like, cleanly finished!

 I understitched the seam allowance to the lower cup lining to help the lining lay flat in place.  To under stitch, stitch 1/16″ to 1/8″ in from the seam line, sewing the seam allowance only to the lining fabric.

 After I understitched my bra cup, I added some decorative stitching to create a quilted effect.  Following the line of the darts, I sewed 4 stitching lines, parallel to each dart line.

Now, do it again to your second bra cup!

You can also line your entire bra cup by simply sewing 2 cups, and sandwiching them together.  You will either bias bind or add elastic around the upper edges, so the top edge can remain raw.

How is the assembly going? Are you having any problems with your bra? This is definitely the trickier part of the sew along!