Browsing Tag

sew along

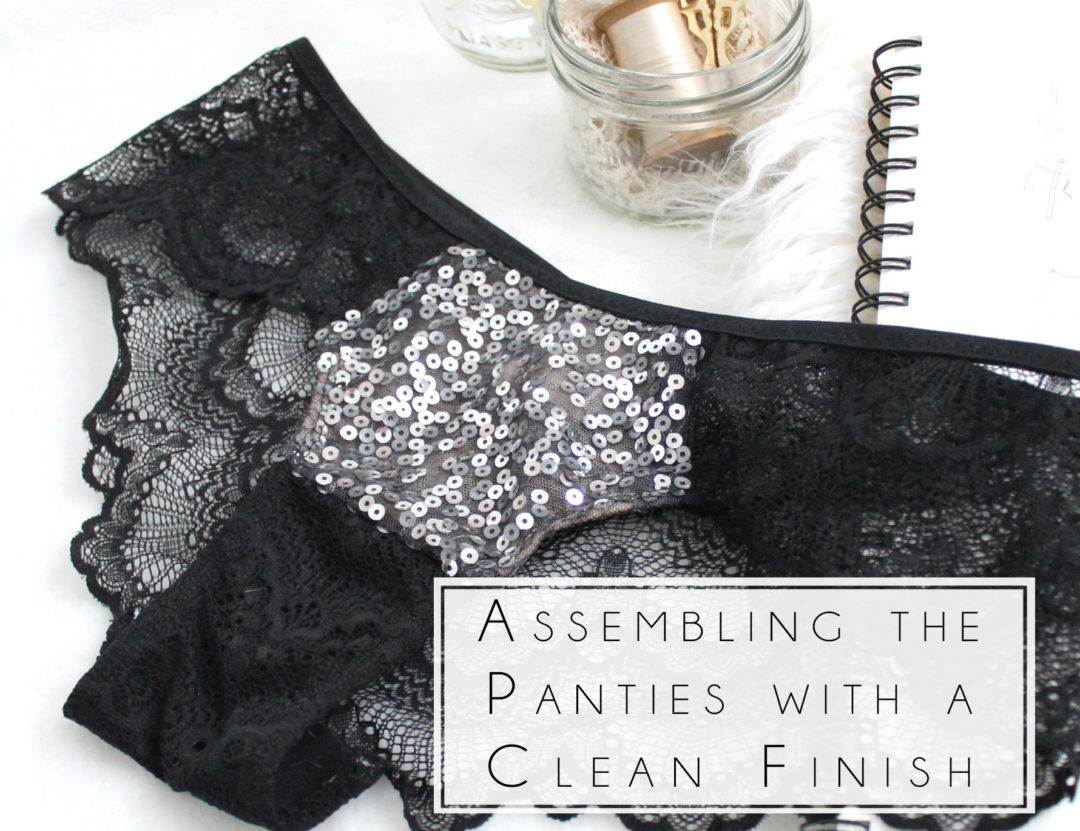
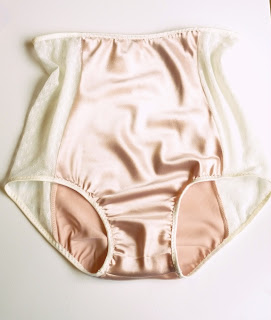
Valentine’s Sew Along: Assembling the Panties

Tutorial, Valentine's Day Sew Along

Ok, I’m going to admit, this part can get a little confusing, which is why I’m doing it first.

Sequin fabric can be really scratchy, so my goal is to sew these with as clean a finish as possible. This means hiding as much of the seam allowance between the lining and sequin fabric as possible.

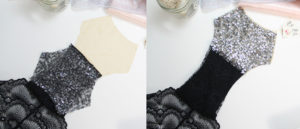
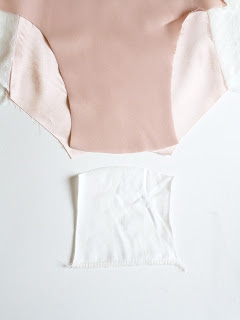
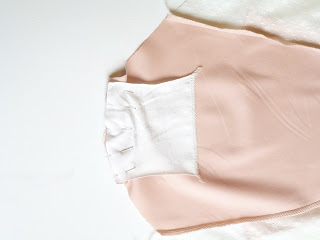
We’re going to start by sewing the gusset pretty much the same as in the pattern instructions. With the Panties Back sandwiched between the Lace Gusset Piece and Gusset Lining, stitch in place using a 1/2″ seam allowance. The Gusset should overhang the edge of the scalloped lace by about 1/4″.

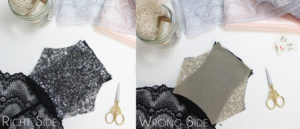
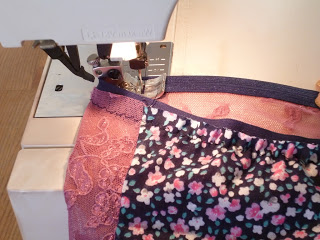
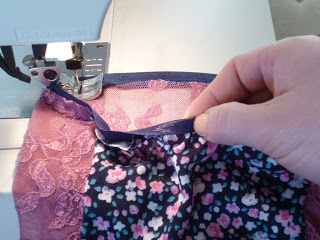
Folding the gusset forward, so that the seam allowance is encased between the lining and lace layers, pin the sequin fabric along the straight edge of the gusset, going through both the lace and lining layers of the gusset. The right side of the sequin fabric should be facing the right side of your gusset. You can baste this here, or just flip it over, and pin the lining along that same seam. Stitch using your sewing machine or serger.

That part was do-able, right?

Here’s the tricky to explain part:

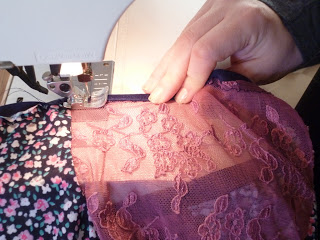
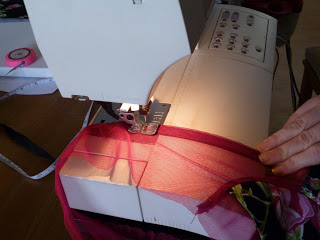
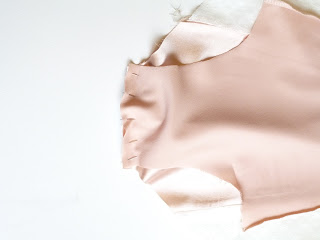
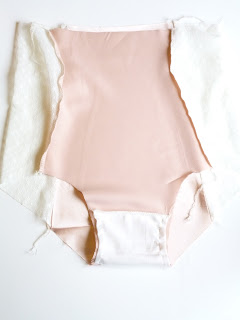
With the right sides together, baste the Sequin Panties Front to the Panties Back down the “side seam” (I put that in quotes because it’s not technically at the side, but this phrase will do). The mesh lining is left loose at this point! Make sure your sequin fabric overhangs the scalloped edge of the Panties Back by 1/4″. This is important for the next installment.

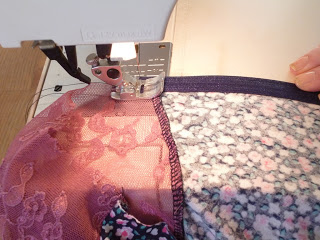
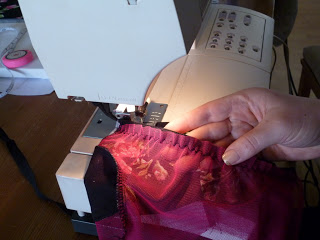
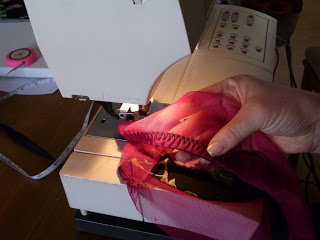
Now that the seam is basted together, working from the inside of the garment, take your mesh lining and twist it so that the right side of the fabric is facing the wrong side of the lace, and pin in place down that newly basted seam. Stitch using a 1/2″ seam allowance.

Are you thoroughly confused?

I made a video to walk you through the process:

I would consider this an advanced technique, but in my opinion it’s a must-do for this style of panty. The video will show you how to sew the gusset, as well as both side seams so that the seam allowance is completely hidden between the lining and sequin fabric.

If you are really struggling with this method, just sew a regular seam. Treat the sequin fabric and lining as one, and pin it down the side seams so that the sequin fabric overhangs the scalloped edge by 1/4″, and finish with a zig-zag or serger.

In my opinion, this is the hardest part of the sew along, so once we’re done this, we’re in the clear!

Next up I’m going to show you how to finish the leg line with some elastic for stability, and how to finish the waist with fold over elastic.

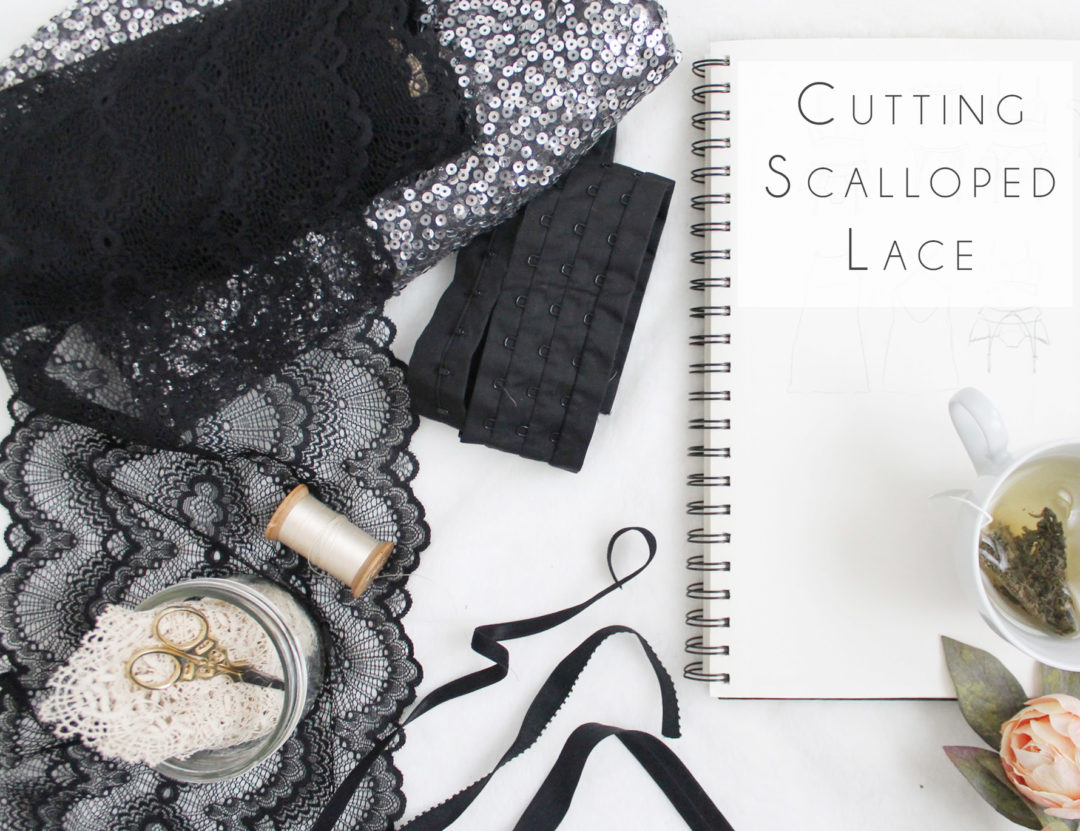
Valentine’s Sew Along: Cutting Your Fabric

Tutorial, Valentine's Day Sew Along

Now that we’ve gathered supplies, and prepared our patterns we can go ahead and cut into all of that pretty lace and sequin fabric.

Cut the sequin fabric is exactly the same as you would cut any other fabric. Fold it in half, and place your new upper front piece on the fold and cut 1. Be sure to use sharp scissors and be prepared to have sequins everywhere. You may not want to use your best fabric scissors to cut the sequin fabric, as the sequins can dull your scissors, but you still want to use a good, sharp pair. Remember to also cut your new upper front piece out of stretch mesh.

The ‘new’ lower-front piece gets cut out of the same lace you are using on the back of the panties. I folded my lace in half lengthways and cut 1 that way. Don’t forget to also use your Gusset Lining pattern piece with the additional 1/2″ seam allowance added to the upper edge to cut your lining – any cotton jersey will do.

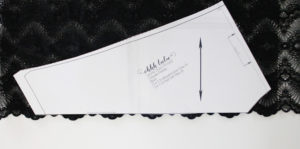
The Claudia Panties Back get cut out exactly as indicated in in the pattern instructions, so that the straight lower edge is running along the scalloped edge.

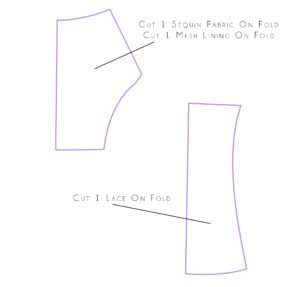
In total, for the panties you should have the following pieces:

  1. Upper Front – Sequins
  2. Upper Front – Mesh
  3. Lower Front – Lace
  4. Gusset Lining – Cotton Jersey
  5. Panties Back – Lace

I’ve made a video showing you exactly how I cut out my stretch lace, so if you need a little more info, this is for you!

The Jasmine Bra gets cut the same as in the pattern instructions. We’ll be adding the longline band in a later step, so don’t worry about that part quite yet.

Here is a “how-to” video on how to place your Jasmine Pattern on scalloped lace.

Don’t forget to also cut the Jasmine Front and Side Front out of stretch mesh for lining.

The most important thing to remember when using scalloped lace is to make sure the motif is mirrored on either side. Take some extra time to make sure that when you fold your lace in order to cut 2 of each piece, that the scallops and motif of the lace all line up.

If you find that your lace is a little too short for the Panties Back, I’ve got some tips on how to make-do in a separate post, Tips & Tricks for Sewing Scalloped Lace.

Now it’s on to the fun stuff!

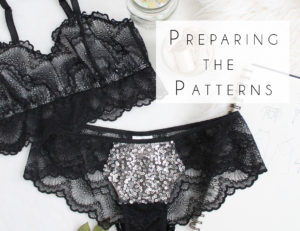
Valentine’s Sew Along: Preparing the Patterns

Tutorial, Valentine's Day Sew Along

If you’ve ordered your supplies online and have to wait for them to arrive, now is a good time to print & assemble your patterns.

As a reminder, you’ll need the following patterns if you want to make a similar set:

  1. The Jasmine Bra
  2. The Claudia Panties
  3. Either the Mina or Cora Garter Belt Pattern (just a reminder that I have a FREE version of the Cora Tutorial in my shop right now).

You can buy these patterns individually, or as a complete Bundle. Just a reminder, they are also available on Etsy, if you prefer to shop there.

Print your patterns making sure that you have selected “no scaling” in your printer options. Measure the 1″x1″ square to make sure it has printed correctly.

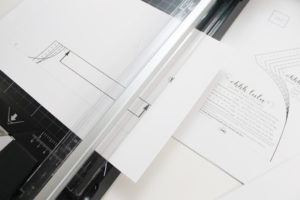
I think I picked this tip up from Marie at A Stitching Odyssey, but a quick and easy way to trim the margins is to use a paper cutter. I can’t believe I didn’t think of this sooner… it has saved me so much time, and you can cut multiple pieces at once! My patterns come with a little scissor indicator showing you which margins to trim.

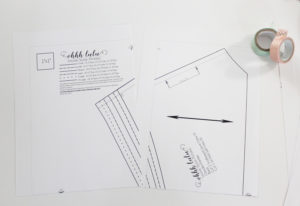
Once the appropriate margins are cut, you can tape your pages together, using the alpha-numeric indicators as a guide.

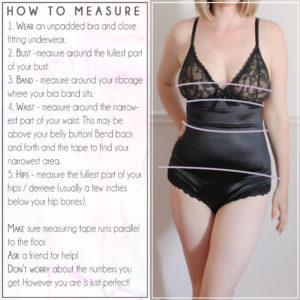
Cut out your pattern pieces in the size that closest corresponds to your body measurements. If you’re not sure how to measure, this infographic might help you out.

I highly, highly, highly recommend you sew your patterns up using some inexpensive test fabric first. You can even just use regular old knitted elastic on your mock-up, and jersey in place of the lace on the back of the panties. You’ll just want to see how the patterns fit your body.

The Jasmine Bra

If you are larger than a D-DD cup, you’re likely going to want to make some minor pattern alterations. My bust size has varied a lot over the last 3 years. I’ve had two pregnancies, one baby, gained 30 lbs, lost 40 lbs, started running, and started weight training. I’ve gone from a 30FF to a 30G during my pregnancy, and now I have no idea what my actual cup size is, but I know it’s somewhere below an F because none of my RTW bras fit anymore.

I’m going to show you what I do for my measurements.

I currently have a 36″ bust, and a 29″ band measurement. I cut out a size small. I draw in a slash line at the appropriate apex of the bust extending to the side seam, and the centre front seam. The apex is the “highest” point of the bust.

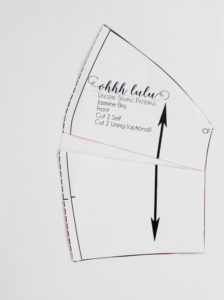
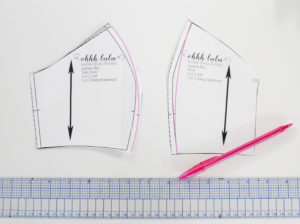
I cut along that line towards the Centre Front and Side seams.

From there, I open up the slash by about 1/2″, and retrace my pattern piece. I find this is all I need to get a great fit. You may want to add more or less. You may also want to add some depth to the curve if your bust projects a lot. This is why it’s really important to test out a bra pattern first. Breasts come in so many shapes and sizes, and they change constantly with the changes in our life, so what worked for you last year, might not work today.

Alternately, if you generally wear closer to an AA-A cup, you might need to straighten out the curved seams of the cup. This is super easy to do. You may want to also shorten the cup just a tad.

All of that being said, please don’t let this scare you off. This pattern is so forgiving. I recommend it for anyone who is just starting to get into lingerie making because the fit is generally quite easy to get!

The Claudia Panties

The front of the Claudia Panties is all one piece. I really love this pattern because it is so flattering and comfortable. But, I wanted to be able to add some sequin fabric to it, without the sequins scratching! I didn’t want the sequins to run as far as the gusset, because sequins between the legs doesn’t sound like a good time to me… so, I’m adding a horizontal seam to the Panties Front.

Here’s how I did that:

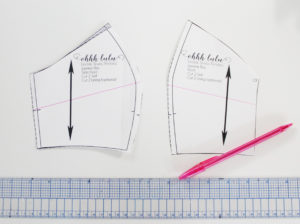
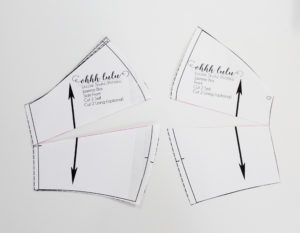
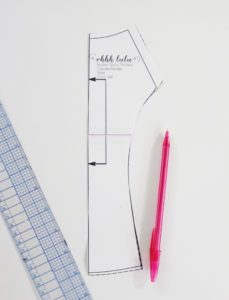
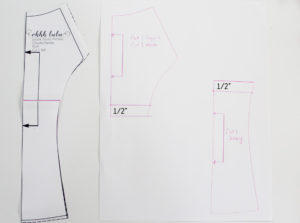
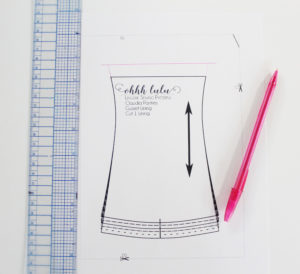
1.Place your Gusset Lining pattern piece overtop of the Panties Front and draw a line where the straight edge of the Gusset Lining falls on the Panties Front.

2. Cut the pattern along that line and trace them onto a separate piece of paper. Add 1/2″ seam allowance on either side of your cut line.

3. Add 1/2″ seam allowance along the straight edge of the Gusset Lining. I’m going to show you how to sew these so that all of the seam allowances are fully encased, so there are no scratchy bits!

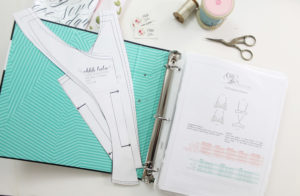
Now that we’ve made the pattern alterations, store your pattern pieces away until your fabric arrives! I store my patterns in plastic sleeves in a binder.

If you’re fabric is already here (lucky), You can go ahead and cut out your pieces for your Jasmine Bra as indicated in the pattern instructions. I’ll show you how to cut the band in a later post.

Valentine’s Sew Along: Gathering Supplies

Lingerie, Sewing Patterns, Tutorial, Valentine's Day Sew Along

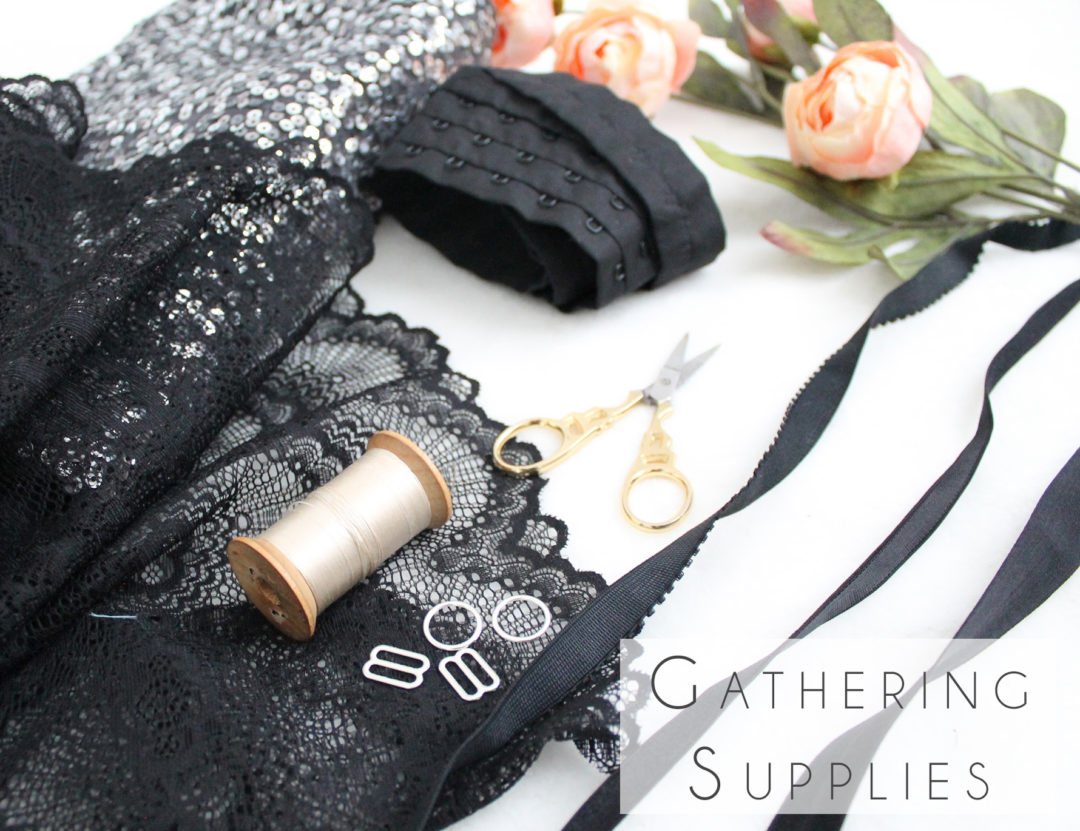
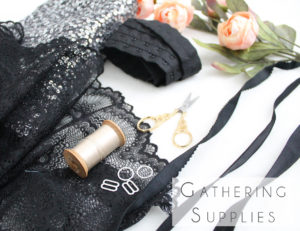
Lingerie-making requires some specialty supplies. If you’ve ever wondered why lingerie is so expensive to buy, it’s because there are a lot of bits and pieces that go into a single piece of lingerie! All of those pieces, as well as the labour involved add up!

Because I also sell made-to-order lingerie, I generally don’t give out the exact names of my suppliers. I like to keep some things a little private. However, I’ve purchased from nearly every big supplier online! So I’m happy to share some of my favourites with you.

As I mentioned earlier, this sew along is going to move along quite quickly. I know that many of you will need to order supplies, which can take some time. I’m hoping that you’ll be able to catch up once you receive everything you need.
Fabric

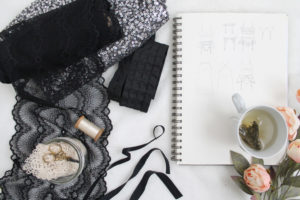
You’ll need to select a stretch scalloped lace fabric. I’m recommend looking for something at least 18cm (7″) wide. Buy the required amount as indicated in the patterns, plus an extra yard or so for the elongated band.

You will also need some sort of lining for your bra and or the front sequin panel of your panties. I like to use a simple stretch mesh. You can purchase it in a skin-tone shade for a nude look, a contrast shade to help your lace pop, or go tone on tone.

We’ll be adding a sequin panel to the front of the panties, so you’ll need to pick up some sequin fabric (or specialty fabric of your choice). This doesn’t necessarily have to be a stretch fabric. As long as it’s not too heavy, almost any specialty fabric will do.  My local Fabricland and Lens Mills stores both cary sequin fabrics, but if you need to source online, fabric.com is a great resource. If you’re looking to source locally, try browsing second-hand and vintage shops for old formal dresses.

The last bit of fabric we will need is a small piece of cotton jersey to line the gusset. Any cotton jersey will do, even an old t-shirt!
Elastics

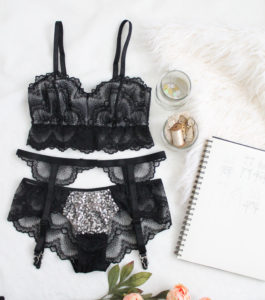
We’re going to need a variety of elastics to complete this set.

Strap Elastic – this is the elastic we will use to make our bra straps and the Cora version of the garter belt. I used 1/2″ elastic for my straps and 5/8″ for my garter belt. I actually also used 1/2″ strap elastic on the waistband of the Mina version of my garter belt. Which ever size you choose is up to you and your personal preference.

Neckline Elastic – this elastic will run along the inside of the bra, so pick something soft. I just use a regular 3/8″ wide knit elastic.  I like to make sure this elastic feel soft and is not scratchy, since it will lay against the skin.

Band Elastic – this elastic will go along the underbust seam of the bra, and can be also used on the waist edge of the Mina garter belt. Band elastic comes with one plush side – this is the side that lays against the skin. It also usually has a decorative edge running along one side. I’m going to be adding a 3/4″ band elastic to my bra, but 1/2″ tends to be the standard.

Waistline Elastic – I’m using fold over elastic. It works best with the sequin fabric we will be using, since it will bind that potentially scratchy edge.
Other Findings

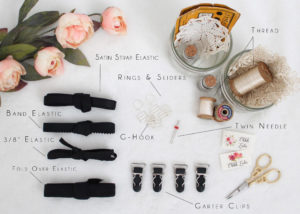
We’re going to need some basic hardware to complete our set.

First, we’ll need bra strap sliders and rings. I’ve used two rings, and a total of 7 sliders between my bra and garter belt. Buy rings and sliders in the same width that you purchased your strap elastic.

Because we are adding longline band, we’re going to have to use hook and eye tape instead of a traditional hook and eye closure. You can get hook and eye tape with a single, or triple column of hooks. I’d recommend going with the triple column.

The Cora version of the garter belt closes with a simple G-hook, while the Mina Version closes with a hook and eye closure.

We also are going to need 4 garter clips. Buy these in the same size that you purchase your strap elastic.
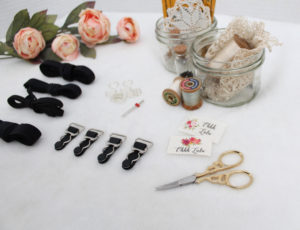
Misc. Supplies

Make sure you have ball-point needles on hand for your sewing machine. These are ideal for sewing stretch fabrics.  We will also be using a twin needle. Of course, buy some thread to match and make sure you have a pair of good, sharp scissors.

Of course, we are also going to need patterns. I’m using the Jasmine Bra, Claudia Panties, and I’m making two garter belts: the Cora and the Mina. I’ve created pattern bundles which you can purchase directly here, or through my Etsy Shop. Remember to use coupon code BeMine to receive 15% off until January 16, 2016.

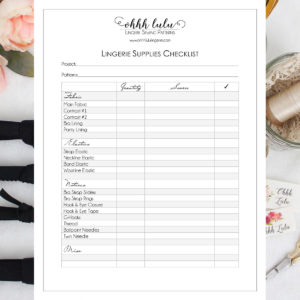
I think that just about covers everything! I know that this is a lot of stuff, so I’ve made a printable checklist for you. I’ve made it as generic as possible so hopefully you can use it for other lingerie-sewing projects in the future!

Download the list here:

Lingerie Supplies Checklist
Where to Buy Lingerie Making Supplies

Now you’ve got your list, you need to actually find the stuff. Here are a list of shops I recommend.

Tailor Made Shop  (USA)

Blackbird Fabrics (Canada)

Bra Makers Supply (Canada)

Sew Sassy (USA)

Lace Heaven (USA)

Sewing Chest (UK)

Vena Cava (UK)


I hope you find this to be a helpful resource! I’m really excited to get started but will wait a few days for everyone to organize their supplies. If you have any questions, I will do my best to answer them here. If you want to share your makes and progress on social media, use the hashtag #ValentinesSewAlong and/or #SewingWithOhhhLulu .
 

Valentine’s Day Sew Along: It’s on!

Valentine's Day Sew Along

OK!!! I’ve wanted to do this for a long time and I’m finally getting around to it; A Valentine’s Day Sew Along!

This sew along will go over three pieces, with some basic pattern alterations.
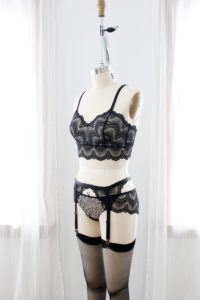
First we’re going to sew a Jasmine Bra. I’m sewing a scalloped lace version, and I’ll show you how to add a longline band.

Secondly, we’re going to sew a pair of Claudia Panties, with one pattern adjustment: adding a lined sequin panel on the front, with fully encased seams. This is a little tricky and does require some pattern-hacking, but I’m confident we can all rock our way through this!

Last, we’re going to sew one of two garter belts: The Mina Garterbelt (which, if you ask me, is the perfect garter belt), or my new FREE! Cora Garter Belt.

Version 1

I’ve created two different pattern bundles. Version 1 contains the Jasmine Bra, Claudia Panties, and Mina Garter Belt Pattern. These are basically all of my favourite patterns. You can purchase this bundle Here, or through my Etsy Shop.

Version 2

Version 2 contains the Jasmine Bra, Claudia Panties, and the FREE Cora Tutorial. You can purchase this bundle directly here, or through my Etsy shop.

I’ll be posting soon about the supplies we will need. I know some of you will need to order supplies on line, which will lead to some delay, but I’m going to start posting as soon as possible, since we have a lot to cover before Valentine’s day!

In the meantime, you can take 15% off all of my sewing patterns Here or through my Etsy Shop by using the coupon code BeMine. Offer expires January 16, 2017, so you have 1 week to purchase your patterns!

Ginger Sew Along: Cutting your fabric and lining

Uncategorized

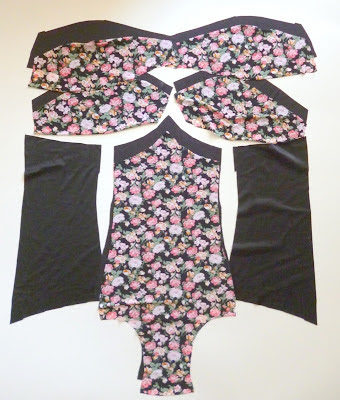
Now that you have transferred your alterations to your pattern you can cut your fabric. Cutting your fabric and lining is easy. 
  1. Cut 2 of the Upper Cup in Self and in Lining
  2. Cut 2 of the Lower Cup in Self and in Lining
  3. Cut 1 on fold of the Centre Front in Self and in Lining
  4. Cut 1 on fold of the Centre Back in Self and in Lining
  5. Cut 2 Side front in Self – optional to cut lining too. I am using a heavy spandex so I didn’t feel I needed a lining.  If you are using a light coloured fabric, or an unstable knit, line it!
  6. Cut 2 Side back in Self – lining here is optional too

Why line a swimsuit if your fabric is opaque?  Lining does a couple of things.  It gives your fabric stability – especially if you are not using a spandex swimsuit fabric.   Fabric clings when they are wet, proudly displaying every nook and cranny that you may not necessarily want on display at the local beach.  Lining gives you that extra layer. Lighter fabrics, as many of us know, lose their opacity when wet. Lining will prevent an unwanted “Surprise” when you emerge from the water.  So, the moral of the story is, it’s very important to line a swimsuit.

Pins are your friend when cutting knits.  When sewing for myself, I am sometimes so excited to get a project underway, that I am skimpy on the pinning.  Properly pinning your fabric will prevent it from sliding, so you’re sure to get exact cuts each time.

**If you are sewing a 2 piece version, you follow these directions exactly, except that you cut along the waist lines** I’ve included a crotch lining gusset piece for people who may want to sew the bottoms as panties, but don’t want a fully lined garment.  You will find that the crotch seam on this garment sits pretty close to the middle of the legs, which slightly off-sets the crotch lining, providing more coverage up front than towards the back.

Ginger Sew Along: Planning

Uncategorized

Swimsuit fabric can be expensive and hard to find, but there are lots of sources online that have a good selection for a decent price.

I often scour Ebay for fabric-finds.  A simple search for “Swimsuit fabric” will bring up a few pages of goodies. Fabric.com has a good selection of Swimwear fabrics, as well as polyester ITY knits, that when lined, will work well for this swimsuit. Etsy as well is a great source for supplies. Sew Sassy has really reasonably priced lining, and solids.

Swimwear fabrics often make me cringe.  Neon, gigantic hibiscus florals, cheesy designs… I find that using prints sparingly tends to make a more… sophisticated suit.

Sew in swimsuit cups can be found at most fabric stores and most online retailers.  They usually come in a range of sizes, A-B, B-C, etc.  They come lightly padded or push up, so decide which you prefer.  We will be stitching these directly to our lining. Sew Sassy is a great resource for these kinds of findings. The added cups are 100% optional and do not need to be added.

Swimwear elastic is often quite rubbery – or the clear type.  I hate that clear elastic, it’s sticky and makes me mad.  I am using a chlorine-friendly elastic that looks just like any elastic you would buy at the fabric store.  It is up to you what kind of elastic you use.  You will need a resilient elastic, no wider than 3/8″ for your leg and neck openings, and a 1/2″ elastic (optional) for under the bust.  I am using bra strapping for this.

Clear elastic can be used to stabilize your seams, depending on how structured your fabric is.  I am not going to be doing this.

I’ve kept construction of this suit as easy as possible. I’m a sewist who loves to sew, I’m not a sewist who obsesses over the “rules” (I am a “whatever works” seamstress).  My goal is always to enjoy what I do, and end up with a garment that I feel great wearing!

This pattern was designed as a lingerie piece, but looks pretty darn cute as a swimsuit if I say so myself.  I am by no means a swimsuit expert so I really look forward to learning some trick and tips from all of you along the way!

The Ginger Swimsuit Sew Along + GIVE AWAY! CLOSED!

Uncategorized

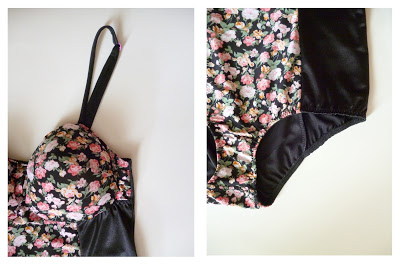
Oh my goodness… I sewed like a mad woman over the last few days, testing my new pattern… and, I think it’s ready to go! So, I am happy to announce that I will be also hosting a sew along for the 1 piece swim suit version of the Ginger Pattern.

Here’s a sneak peek:

The instructions in the digital pattern do not go over things like adding elastic under the bust, or how to sew in the padded cups, so I will be going over all of these things here.  I’ll also be showing how to sew on the elastic and how to make adjustable straps.

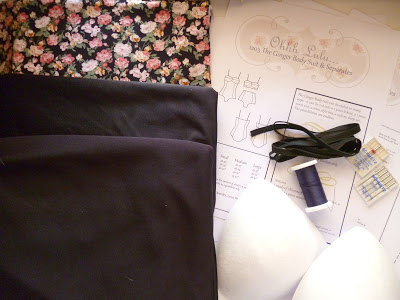
You are going to need a few things that might be hard to source if you are from a small town like me.  First, you will need swimsuit fabric.  While Spandex is the best, it is expensive and not always easy to find.  I am using a combination of black Spandex with a polyester knit that I will line.  If you cannot find Spandex, 100% polyester knits are good because they dry quickly.

 This swimsuit will be lined, so you also need swimsuit lining.  Swimsuit lining is often made of nylon or polyester, and is very stretchy.  It is important that all of the fabrics that you use are 4-way stretch fabrics, or you will need to make some major fit adjustments.

Spandex World has a great selection of Swimwear fabrics. Spandex House is also great.

The most important things about the fabric that you choose are: 1) they will be chlorine and water friendly.  Synthetics tend to dry quicker, and fabrics like polyester tend to have good chlorine resistance. 2) They are 4-way stretch knits.

You will need to buy enough fabric to do a mock up and your actual garment.  I recommend buying 1 yard of inexpensive stretchy knit fabric to test the pattern, and 1 yard of “good” fabric for your actual swimsuit. Don’t forget to buy a coordinating swimsuit lining in either white, beige or black!  I can’t stress enough how important the muslin is for 1 piece swimsuits.  In my experience, finding the right length for the swimsuit on your first go is very, very tricky!

You will also need 2 yards of chlorine-friendly 1/4″ – 3/8″ wide elastic to match your fabric, 1/2 yard of soft elastic for a band under the bust, and sew in swimsuit cups.  Optional are bra strap sliders and clear elastic.

Of course, you will also need a pattern.

To Kick off the Sew Along, I’ll be giving away a free copy of the PDF pattern to TWO Lucky winners! Here’s now to enter:

1. Comment here letting me know what kind of embellishments, fabrics, etc, you’ll be using for your swimsuit.
BONUS ENTRIES!
2. “Like” Ohhh Lulu on Facebook.
3. Tweet about the Sew Along on Twitter


I’ll be choosing two winners on August 1st, and will post my first sew along post on Friday August 3rd!

Ooh La La Pin Up Sew Along Pt. 3… Finishing the leg and waist openings with elastic

Uncategorized

Depending on the type of elastic you are using, you will use different methods to apply the elastic.  However, the basic idea is the same.  Baste your elastic on, pulling gently to ensure a secure fit.  Fold your elastic under, or over, and zig-zag stitch down, pulling flat as you go.  When you finish, you want your elastic to pull your leg and waist opening slightly smaller – about 2″ depending on the resiliency of your elastic.
For foldover elastic -baste the elastic to the wrong side, as you would bias tape. Use a long zig-zag stitch.

Trim back any excess, fold over towards the right side, and zig-zag stitch down, pulling as you go.

If using a flat lingerie elastic, with or without a picot edge, baste onto the right side of your garment, pulling gently as you go. Stitch about 1/16″ away from the edge of the elastic, furthest from the edge of your garment.  For instance, if you are applying a 1/2″ elastic to the waist band of your panties, baste on 7/16″ away from the seam allowance.  Make sense?

Trim back any excess, fold your elastic under, and top stitch down.

Voila! Two easy ways to finish off your garments… And you’re done!

Ooh La La Pin Up Sew Along Pt. 3… Sewing in the crotch lining

Uncategorized
Something I never anticipated, getting into design, was how comfortable I would become with the word “crotch.” 
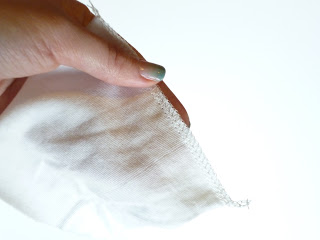
Anyway… it’s time to add the crotch lining.  Start by finishing the straight edge of the crotch lining by zig-zag or overlocking.  You want a finish that will not add any bulk to prevent a seam from showing through. With jersey you also have the option of just leaving the raw edge.  It’s not going to unravel on you, but might roll a little.

We are going to sandwich the back crotch seam between the front crotch seam and the  lining crotch seam.

The right side of the crotch lining should be facing the wrong side of the back panel.

The right sides of the front and back panel should be facing.  Pin together, and straight stitch your seam.

Grade your seam allowance, to prevent bulk.  Grading is trimming back one layer of seam allowance at a time, creating a staggered effect.  You might want to add some top stitching here if you find your seam is bulky.  If not, just press your crotch lining forward, and baste into place.
There you have it, you’re almost done.  Just needs elastic now!